UNIT 3:Objects production
1. Look at the picture below.
2. What is happening in the picture?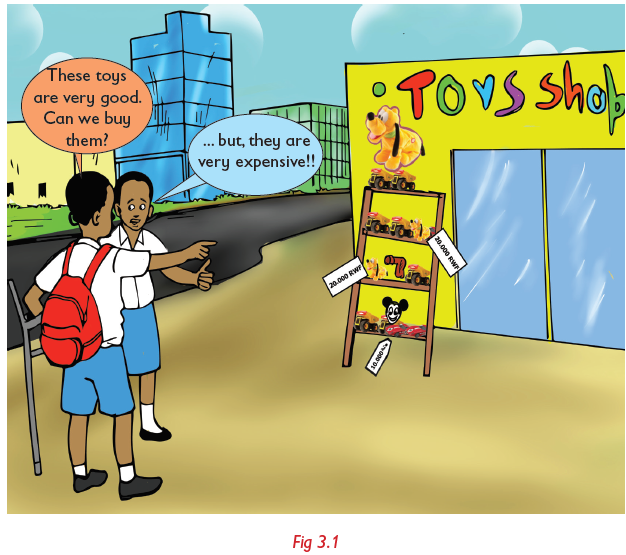
3. What can you advise the pupils to do?
3.1 Making toys using clay
Find out
1. How you can make a doll using clay.2. How you can make a toy motorcycle using wires.
Activity 3.1 Modelling a doll using clay
What you need
• Clay • Water in a container • Model of the doll
What to do
1. Collect clay and water.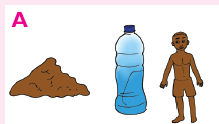
2. Mix the clay with water and knead it to obtain dough for modelling.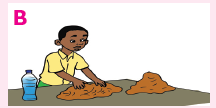
3. Model the trunk of the doll.
4. Model the head with ears, eyes, nose and mouth.
5. Model the limbs and join the trunks.
6. Make the final touches and compare your doll to show/drawn on the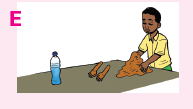
chalkboard. Allow you a model to dry under shade.
Remember!
We should not dry our toys under direct sunlight as this will makethem crack!
Activity 3.2 Modelling animals using clay
What you need
• Clay • Water in a container • Model of the doll
What to do
1. Collect materials needed.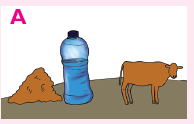
2. Mix the clay with water and knead it to obtain dough for of modelling.

3. Model the trunk of the cow.

4. Model the head with ears, eyes, nose,mouth.

5. Model the limbs and join the trunks.
6. Model the tail and join it the trunk.
7. Fix the head onto the trunk. Make the final touches and compare yourmodel drawn on the chalkboard.

8. Allow you a model to dry under shade.
Remember!
Our environment is our life. When collecting clay, avoid destroying avegetation and polluting the water
Work to do
Use the steps above to make a model of a sheep or a dog. Smooth enyour model and make it as attractive as possible.
3.2 Making toys using wires
Activity 3.3 Making a motorcycle using wires
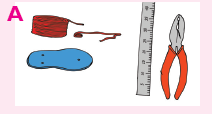
What you need
• Wires • Pliers • Ruler • Rubber bands
• Old slippers( for making a wheel) • Pencils • Drawing paper
What to do1. Collect materials you need.
2. Make a sketch of toy motorcycle.
3. Prepare appropriate pieces of wires with the right measurements.
4. Bend the wires according to the motorcycle shape to be made. The
frame of main parts are: body of motorcycle, handlebars, footrestor foot peg.
5. Connect the different frames with rubber bands.
6. Fix two wheels on the frame made of body and handlebars.7. Display the complete the motor cycle.
Remember!
When making toys from wires, care should be taken. Wires are sharpobjects that can pierce and harm the skin.
3.3 Making utility objects in threads
Find out
How you can make utility objects ( socks, scarfs, hats) using threads.
Activity 3.4 Making socks
What you need
• Threads • Sewing needle
• Pair of scissors • Razor blade or lance let
What to do1. Collect the materials needed.

2. Choose your favorite yarn

3. Cast-on-loop using the left hand needle.
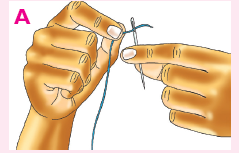
4. Use two needles to begin knitting the socks as shown below.
5. Knit the socks until you reach full sock as shown below.
6. Wrap the end of socks using a piece of cloth to make them strong.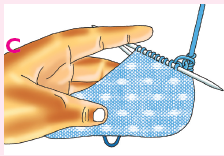
This is called hemming.

7. Repeat steps 1-4 to make another sock.
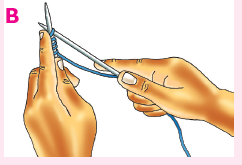
Activity 3.5 Making scarf
What you need
• Threads or yarn • Sewing needles
• Hand cream • Pair of scissors
• Razor blades
What to do1. Collect materials required.
2. Choose your favorite yarn

3. Cast on as shown below.
4. How to knit cast on 24 stitches.
• Hold the needle with the 24 cast on stitches in your left hand.
• Insert the point of the right needle into the first stitch from front to
back under your left needle.
• With your index finger bring the loose yarn under and over the
point of the right needle.
• Draw the yarn through the stitch with your right needle point.
• Skip the first loop on he left needle off , so you now have the newstitch on the right needle.

5. Knit until the scarf is complete.

6 . Wrap the scarf on your neck .
Watch video using internet link http://www.youtube.com/
watc?v=IwRwJUgt_Tg on how to knit a scarf.
3.4 Making learning materials using a paper
Find out
How to make learning aids from paper.
Can you name some learning aids you made in Primary 4 and 5? How
did you make them? In this class, you will make:
• Regular polygons, for example a pentagon and hexagon.• Various solids, for example cuboid and cylinder
3.5 Making regular polygons
Find out
How to make regular polygons from manila paper. Which tools andmaterials are used when making polygons from a paper.
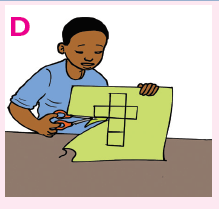
Activity 3.6 Making regular polygons from manila paper
What you need
• Manila paper • Pencil
• Pair of scissors
What to do
1. Collect the materials required.
2 . Draw a hexagon using a pencil,compass on the manila paper.
3. Cut the paper along the lines as shown below.
Remember!
To make a regular polygon, you first draw the polygon on a manila
paper. Cut the manila paper into the polygon using a pair of scissors.
3.6 Making solids
Activity 3.7 Making solids from papers
What you need
• Pencil • Ruler • A pair of compass
• Manila paper • Lancelet, razor blade or pair of scissors
What to do1. Collect materials needed.

2. Draw a hexagon using a pencil on the manila paper.

3. Cut the paper along the lines as shown below.
4. Fold the shape into the cube or solid as shown below
3.7 Maintenance of utility and learning objects
Find out
How to maintain utility and learning objects.
Activity 3.8 Maintaining utility and learning
objects1. Look the picture below.
2. Discuss how to maintain utility and learning objects.
Ways of maintaining utility and learning objects include:
• Storing utility objects in a clean and dry place.They should be
covered to avoid dust.• The learning materials should be placed on the wall of the classroom.
Remember!Our utility objects require maintenance otherwise they will be spoilt.
UNIT TEST 3
1. Name two materials that can be used to make toys.
2. How can you make a toy made of clay strong?
3. Apart from toys, name other utility objects found at home that
are made of clay.
4. Describe how you can make a motorcycle from wires. How can
you make it look beautiful?
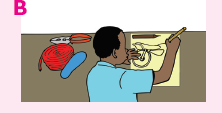
5. Look at the picture below.
a) What is the girl doing?
b) What materials is she using?
c) How can she make the mat more durable?
6. a) Give the importance of knitting in our society.
b) Apart from knitting, which other methods can be used to
make utility objects?
7. Describe how we can maintain our utility and learning materials.
8. Below is a boy playing with a toy.
a) What is the toy made of?
b) How should the boy maintainthe toy?
9. Make a cylinder using a Manila
paper. Which tools did you use?
What method did you use?
10. Hitayezu does not like modelling
using clay. He says it makes him
dirty and that when he goes home,
his parents quarrel him. What advice can you give Hitayezu andhis parents?
Table of contents
- click here for a video lesson on: COMPONENTS OF HUMAN BLOOD
- SET P6
- click here for a video lesson on: The process of human blood circulation
- click here for a teaching audio on this unit EP3
- Click here for a video about this unit EP4
- click here for a video lesson on PLANTS REPRODUCTION
- click here for a video lesson on Process of sexual reproduction in flowering plants
- click here for a video lesson on: Asexual reproduction method in plants
- click here for a video lesson on: classification of wastes
- click here for a video lesson on: Wastes management Techniques
- click here for a video lesson on:Circulatory System
- click here for a video lesson on: Circulatory System|Revision
- click here for a video lesson on: circulatory system exercises
- click here for a video lesson on:The human respiratory system and its function
- CLICK HERE FOR A VIDEO LESSON ON: Mechanism of respiration
- MODEL QUESTIONS