General
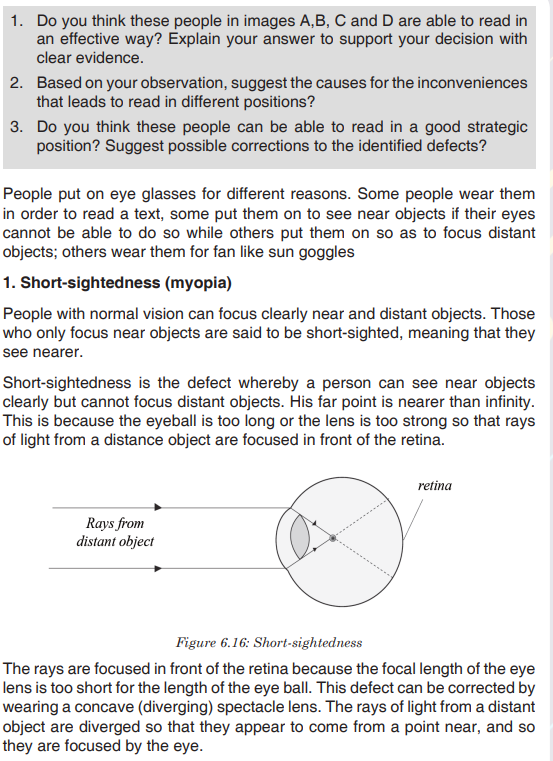
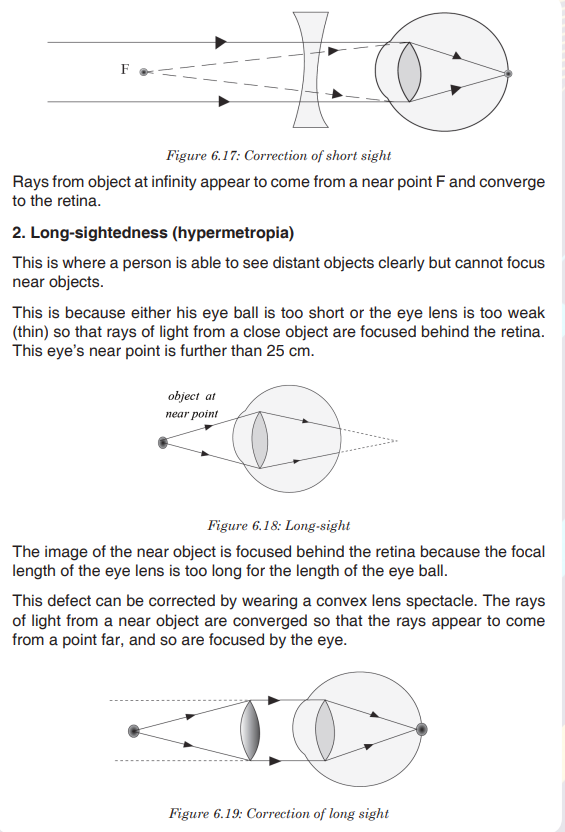
- Y1: Integrated Science SME File Uploaded 17/08/22, 09:33
- Y1: Integrated Science SME TG File Uploaded 17/08/22, 09:35
UNIT 6:SIMPLE AND COMPOUND OPTICAL INSTRUMENTS
Key unit competence: Describe and use effectively simple and
compound optical instrumentsIntroductory Activity 6
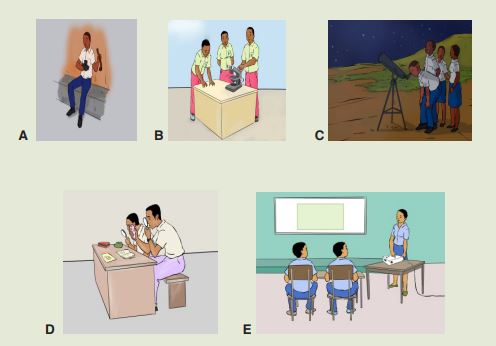
1. After observing the above images, suggest the names of the available
optical instruments.
2. Compared to the above images, provide other optical instrument
you know.
3. Where do you think these instruments are used in our daily life
activities?
4. As a student teacher, what those instruments will help you in teaching
and learning process?6.1. Introduction to optical instruments and their image formation
Activity 6.1
Task 1
i. What objects (things) do you see in the classroom?
ii. Move outside class and observe the kind of objects there, and write
down at least five of them.
iii. Look at the distant objects. Are you able to examine the objects in a
more detailed manner? Do you think you can be able to see these
objects at night?
iv. When they are an eclipse, it’s recommended to use some devices to
observe it.
a). What are devices can you use to observe clearly that eclipse
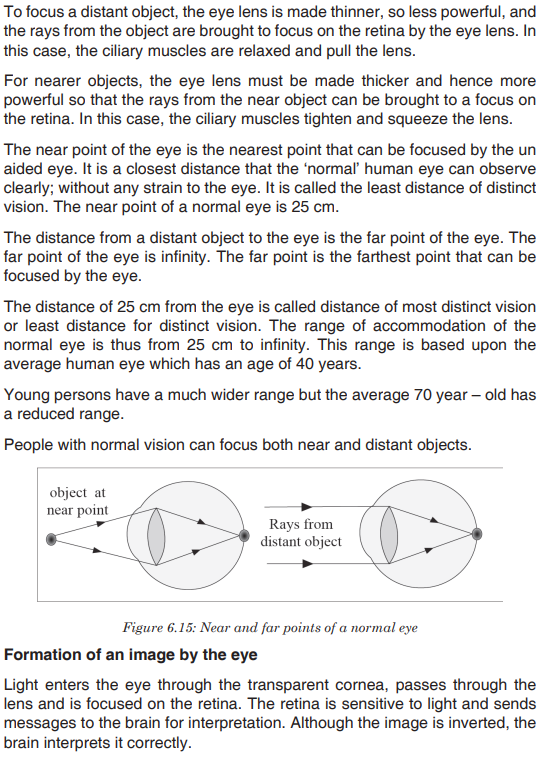
when it happened?
b). How can you take a photo of that eclipse?TASK 2
i. Hold a hand lens at above the word Rwanda at a distance of about
4cm from the word.
ii. Move the lens farther away slowly from the word while observing the
word through the lens.
iii. What changes do you notice after observing?
iv. write your observation in your notebook.
v. Compare the size of the word and the image of that word Rwanda.Task 3
i. Have you ever heard or seen an instrument called a compound
microscope? What is it used for?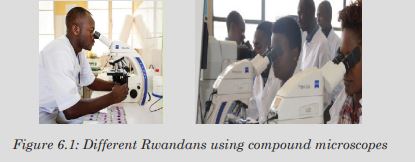
ii. Observe the above pictures carefully and discuss places where
a compound microscope is used in daily life.
iii. You are provided with two lenses of focal lengths 5cm and 10cm
together with a half meter ruler and some plasticine.
a). Arrange the lenses as shown in the figure below.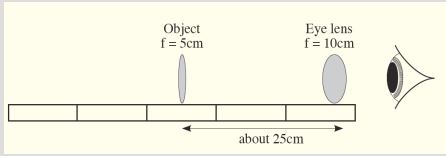
b). Move the object until it appears in focus. What do you notice about the image? Is it distorted? Is it coloured differently in any way?`
We use our eyes to see and view different objects. The eye cannot be used to view clearly these objects at night, and some distant objects or hidden objects. Objects which cannot be viewed by the eye can be focused using other instruments. All the instruments used to aid vision are called Optical instruments.
When the lenses or mirrors or both are arranged in a way, the arrangement can be used to observe objects in a more detailed manner. The arrangement makes what we call a compound optical instrument. The compound instruments include a compound microscope, telescopes, prism binoculars etc.
6.1.1. Image formation by a camera, simple and compound microscope
1. Lens camera
The image is upside down. The pin hole helps you to see the image of the object. This device is called a pin hole camera.
We have already seen that when an object is beyond 2F of a thin converging lens, the image formed is smaller than the object.
A camera consists of a light- tight box with a convex (converging) lens at one end and the film at the other end. It uses the convex lens to form a small, inverted, real image on the film at the back.

The lens focuses light from the object onto a light sensitive film. It is moved to and fro so that a sharp image is formed on the film. In many cameras, this happens automatically. In cheaper cameras, the lens is fixed and the photographer moves forwards and backwards to focus the object.
The diaphragm is a set of sliding plates between the lens and the film. It
controls the aperture (diameter) of a hole through which light passes.In bright light, a small aperture is used to cut down the amount of light reaching the film and in dim light, a large hole is needed. Very large apertures give blurred images because of aberrations
So the aperture has to be reduced to obtain clear images.
In many cameras, the amount of light passing through the lens can be
altered by an aperture control or stop of variable width. This size of the hole is marked in f – numbers i.e 1.4, 2, 2.8, 4,5.6, 8, 11, 16, 22, 32. Defined as
Where is the focal length of the lens and D is the diameter of the lens
opening.
The smaller the f-number, the larger the aperture. An f-number of 4 means the diameter d of the aperture is ¼ the focal length, f of the lens. To widen the aperture, the f number should therefore be decreased.The aperture also controls the depth of field of the lens camera. The depth of field is a range of distances in which the camera can focus objects simultaneously. This depth of field is increased by reducing the aperture.
This large depth of field ensures a large depth of focus. The depth of focus is the tiny distance the film plane can be moved to or from the lens without defocusing the image. A large depth of focus means that both near and far objects appear to be in focus at the same time which is obtained by a small hole in the diaphragm.The shutter controls the exposure time of the film. It opens and closes quickly to let a small amount of light into the camera.
The exposure time affects the sharpness of the image. When the exposure time is short, the image is clear (sharp) but when it is long the image becomes blurred.
The film: This is where the image is formed. It is kept in darkness until
the shutter is opened. It is coated with light sensitive chemicals which are changed by the different shades and colours in the image. When the film is processed, these changes are fixed and the developed film is used to print the photograph.Note that a diminished image is always formed on the film and that the image of distant object is formed on a film at distance f from the lens. For near objects, the lens is moved further away from the film (closer to the object) to obtain a clear image. In this case, the film is at a distance greater than f of the lens.
2. Simple Microscope (Magnifying Glass)
The word Rwanda becomes larger and larger and finally disappears. This
word gets larger because of the lens. We say that it is being magnified by
the lens.Notice that the hair (fur) and other small holes on the skin are seen clearly.
These parts of the skin are made bigger by the glass lens and this enables one to see them clearly. This lens which magnifies images is called a magnifying glass or a simple microscope.
A magnifying glass consists of a thin converging lens and it is used to view very small organisms or parts of organisms which cannot be easily seen by the naked eye.
It has to be held at the right distance between the eye and the object for the object to be in focus.A magnifying glass, the convex lens bends the parallel rays so that they converge and create a virtual image on your eyes’ retinas.
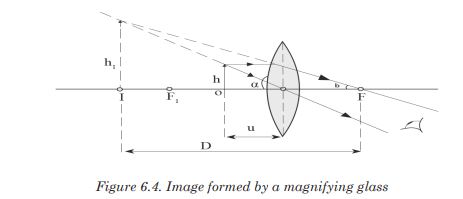
Formation of images by a magnifying glass
We have already seen that when an object is between the lens and its
principal focus, the image formed is magnified and upright. So, a magnifying glass forms a virtual, upright, magnified image of an object placed between the lens and its principal focus.The image is at the least distance of vision since the eyes are not strained
and the magnifying glass is said to be in normal adjustment.A microscope is in normal adjustment if the final image is formed at the near point, and it is not in normal adjustment if the final image is at infinity.
3. The compound microscope and its images formation
The compound microscope is used to detect small objects; is probably
the most well-known and well-used research tool in biology. In daily life,
microscopes are used in hospitals, in biology laboratoriesBy arranging the lenses as above, you have actually made a compound
microscope.We have already seen how a single lens (magnifying glass) can be used to
magnify objects.However, to give a higher magnifying power, two lenses are needed. This
arrangement of lenses makes a compound microscope. It produces a
magnified inverted image of an object.A compound microscope is used to view very small organisms that cannot be seen using our naked eyes for example micro organisms.

A compound microscope consists of two convex lenses of short focal lengths referred to as the objective and the eye piece. The objective is nearest to the object and the eye piece is nearest to the eye of the observer.
The object to be viewed is placed just outside the focal point (at a distance just greater than the focal length) of the objective lens. This objective lens forms a real, magnified, inverted image at a point inside the principal focus of the eye piece.
This image acts as an object for the eye piece and it produces a magnified virtual image. So the viewer, looking through the eye piece sees a magnified virtual image of a picture formed by the objective i.e of the real image.
Image formation in a compound microscope

Application activity 6.1
1. In groups, discuss the differences and similarities between the lens
camera and the human eye.2. (i) Make a paper box and carefully use a pin to make a tiny hole in the
centre of the bottom of the paper box.
(ii) Place a piece of wax paper on the open end of the box. Hold the
paper in place with the rubber band.
(iii) Turn off the room lights. Point the end of the box with a hole in a
bright window.
(iv) Look at the image formed on the wax paper. Which kind of image
have you seen? Is it upside down or right side up. Is it smaller or
larger than the actual object? What type of image is it?3. (i) Carefully place a magnifying glass above some prints on a piece
of paper and adjust it until they are seen clearly.
(ii) Make sure that you don’t feel any strain in the eye while you are
observing.
(iii) What do you think is the position of the image from the eye?
Explain your reason
(iv) Explain when the microscope can be in normal adjustment4. Research on other types of optical instrument and the formation of
their images6.2. Magnifying power of optical instruments and its Calculation
Activity 6.2
1. What do you understand by the term magnification of an optical
instrument?
2. Research how to make a magnification of camera, projector,
microscope and telescope.6.2.1. Magnifying power of a simple microscope
We have already seen that the size of the image depends on the angle
subtended by the object on the eye called the visual angle. Thus, the
magnifying power depends on the visual angle.It is defined as the ratio of the angle subtended by the image to the lens to the angle subtended by the object at the near point N of the eye.

We can write M in terms of the focal length by noting that θ = h N ( fig. 6.7
(a)) and (Fig. 6.7 (b)), where h is the height of the object and we assume the angles are small so θ' and θ equal their sines and tangents. If the eye is relaxed (for least eye strain), the image will be at infinity and the object will be at infinity and the object will be precisely at the focal point.
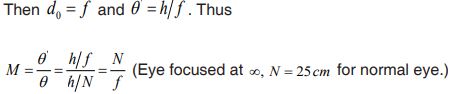
We see that the shorter the focal length of the lens, the greater the
magnification.
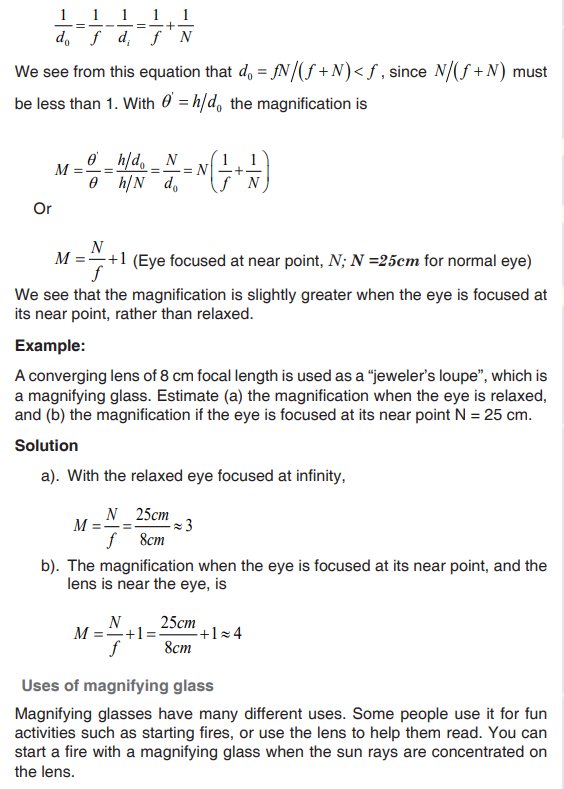
The magnification of a given lens can be increased a bit by moving the lens and adjusting your eye so that it focuses on the image at the eye’s near point. In this case,
 if your eye is very near the magnifier. Then the object distance
  is given by: