Topic outline
General
- Home Science S2 SB File Uploaded 24/01/22, 15:21
Unit 1: Home care
Key Unit Competency
To be able to identify and safely use cleaning materials, tools and cleaning products.Learning objectives
After studying this topic, I should be able to:• Explain the different types of soil.• Handle different types of soil.• Identify appropriate cleaning materials, tools and cleaning products.• Use cleaning materials, tools and cleaning products safely.Introduction
Look at pictures A and B below. What is happening in picture B? After the Activity in this picture, in which classroom would you prefer staying in? Why? Write down some disadvantages of staying in classroom A.
The facts
A house, a shelter or a home is a basic necessity for all human beings. It is therefore important to keep them clean and tidy. The cleanliness and orderliness of a house or a home should therefore be ensured by all inhabitants of that particular house or home. Living in dirty and unpleasant places is a major health hazard. For proper comfort, good health and safety, we should keep our surroundings free from dirt and germs.1.1 Types of soils
You probably have heard people talking of ‘soiled clothes. What do they mean?
The facts
Soil is any substance that stains. They make things unpresentable. There are various types of soils around us. They include:• Dust • Stain• Fixed dirt • TarnishLet us look at these types of soils in more details.(a) Dust
Activity 1.1: Research activityFind out from the library or the internet the various methods used to remove dust. Write them in your notebook and share with your friends.Dust is made up of loose particles that may either be organic or inorganic in nature. The substances found in dust are normally light. They can therefore easily be carried around by air to settle on various surfaces. These surfaces include clothes windows, walls, shoes among others. Germs will always thrive where dust settles. It is therefore important to keep all surfaces in the home free from dust.
The facts
Methods of removing dustThe various methods used to remove dust include:• Sweeping• Dusting• Use of a vacuum cleaner(a) Sweeping
 • It is done by use of a broom.• The broom should be long enough to make the user comfortable.• One should use low and long strokes when sweeping to avoid dispersing dirt.• Sweeping must be done from the furthest corner towards the door.• All the dirt is collected by use of a dust pan brush into the dust bin.• It should be wrapped in swape paper and thrown into the dust bin.• The broom and equipment used for sweeping should be dusted away from the house and stored appropriately.Practice sweeping using a long broom as shown in Fig. 1.4.
(b) Dusting
 • This is removal of loose dirt by use of a duster.• The duster should be made from a fl offy and absorbent material.• The duster should be folded into a pad and used appropriately for removing loose dirt which has settled on surfaces.• Dusting which is done on levels which the hand can reach is called low-dusting.High dusting is done by use of a feather duster or a soft broom tied on a long stick.• High dusting helps to remove dirt from high walls and the ceiling in the house.Practice dusting as shown in Fig. 1.5.
(c) Use of vacuum cleaners
• This is a method of removing loose dirt through sunction process.• The vacuum cleaner works by creating a vacuum within itself, when it is passed over surfaces, it sucks air into its bag.• The air which is sucked from surfaces moves into the dispose bag together with all the loose dirt hence leaving a clean surface.
Note
• Loose dirt can be removed using pieces of cloth. The clothes used for dusting must be highly absorbent. Clothes made of cotton are encouraged.• Dust should be removed as fast as possible. This helps to prevent it from spreading to other surfaces.• Cleaning should be done systematically; that is, from the top downwards. This helps to prevent dust from settling on already cleaned areas.• In areas such as sick rooms or bays, dusting can be done using a wet piece of cloth. This prevents lifting up of dust.• Dip the piece of cloth into water in a basin, squeeze as shown below then use it to wipe the surface. This act is called wringing. My environment, my life!When dry dusting, do not beat off dust from the piece of cloth. This will cause the dust to fl y around. When the dust is inhaled, it can lead to serious respiratory problems.1. What other things do you know that get dusty?2. What are some of the dangers caused by dust?3. Practice removing dirt from dusty surfaces in your classroom.
b) Fixed dirt
This is dust that is mixed with water or grease. Such dirt is normally fi rmly heldon a surface. Fixed dirt can be removed from a surface using a wet piece of cloth. Greasy dirt will require water and a detergent to remove it.1. Give other examples of fixed dirt found either at your home or at school.2. What can we do to avoid fixed dirt?
Methods of removing fixed dirt
Fixed dirt can be removed by either scrubbing or wiping.(a) Scrubbing
 • This is done by use of scrubbing brush and warm soapy water.• Scrubbing is done after loose dirt has been removed from the surface.• The surface should be scrubbed portion by portion, ensuring each portion is clean until the whole surface is done.• The surface should be dried and buffed to shine.Practice scrubbing a silver pot as shown in Fig. 1.9 above.
(b) Wiping
• This is removal of fixed dirt by rubbing it with a piece of cloth dipped in warm water mixed with detergent.• The surface is then rinsed by wiping with a cloth dipped in clean water. Practice wiping the surfaces of your desks, chairs and tables in your classroom.
Note
• Remove the fixed dirt immediately you see it. Old dirt can be difficult to remove and it may even damage the surface.• Choice of detergent (either soapy or soapless) to be used will depend on the nature of the surface being cleaned and the nature of the dirt as well. Greasy dirt will come out more easily when soapy detergent is used.• Brushes and abrasives (scouring powders and pads) are used alongside detergents and water to remove fixed dirt. Warm water can also be used when the stains are too stubborn.• Grease solvents such as kerosene, benzene and turpentine can also be used to dissolve greasy dirt.• Absorbents such as chalk and blotting paper can be used to absorb greasy dirt as well.Activity 1.2You will clean tables and chairs in your classroom to remove fixed dirt in this activity. Gather all the tools and materials you will need. Use the steps above under scrubbing to remove the dirt. Did you encounter any challenges. How did you overcome them?.(c) Stain
Stains are any discolorations on a surface or a fabric. Examples include blood stains, grease stains, fruit juice stains or food stains. Stains spoil the overall appearance of a garment or surface making it less presentable.Methods of removing stains
• Different stain removers may be used based on the type of surface/fabric or nature and source of the stain. These can range from bleaches to various solvents.• Stains must be removed while still fresh; the longer they stay on a fabric/surface, the more stubborn they become.• Water-based stains are easier to remove because they easily dissolve in water. This becomes easier when the removal of such stains is done immediately. An example of a water-based stain is blood stain.• Oil-based stains may be having either wax, grease or oil. This means they need to be dissolved and cleaned by use of a cleaning agent such as soap. • Stained garments should not be ironed until the stain is completely removed. Ironing may set the stain on the garment permanently.Practicing removing stains from a piece of cloth by washing as shown in Fig. 1.11 above.
Rules for stain removal
• Remove stains as soon as they occur.• Try to remove the stains using plain water, or any other appropriate solvent before washing the article in detergent.• Establish the type of fabric/surface stained (read the labels on garment). This will help you to choose the appropriate stain remover.• Work from the outside (where the stain is) to the inside (where the stain is not as much) so as not to continue spreading the stain.• After removing the stain, rinse the surface or garment thoroughly to remove any stain removing agents.Discussion cornerDo you have any traditional rules that you apply when removing stains? Discuss about some of them with your friend.Principles of stain removal
• Acidic stains are removed using alkaline reagents, for example, ammonia solution is used for removing fruit stains.• Alkaline stains are removed using acidic reagents, for example, oxalic acid can remove iron rust.• Water is used for removing water-based stains, for example, mud.• Alcohol or gin stains should be removed by use of reagents which contain alcohol.• Protein stains such as blood and raw eggs are removed by use of cold water.• Detergents are used to remove greasy stains; grease solvents can also be used.1. What other types of stains do you always come across?2. What do you do to remove these types of stains?3. What can you do to minimize stain accidents?(d) Tarnish
Activity 1.3: Research ActivityFind out from textbooks in the library or the internet what tarnish is and how it can be removed. Write short notes and share with your group members.The facts
Tarnish is a thin layer of corrosion that forms over metals in the presence of air. This happens as their outermost layer undergoes a chemical reaction in the presence of moisture and oxygen. Some metals such as silver tarnish when exposed to hydrogen sulphide. However, oxygen will also cause it to tarnish over time. The tarnished surface will normally have a dull, gray or black film or coating. Unlike rust, tarnish only affects the top few layers of the surface. The layer of tarnish seals and prevents the underlying layers from reacting. Tarnish preserves the underlying metal in outdoor use by forming a layer known as patina. This layer is necessary in application of copper roofing and outdoor copper, bronze and brass statues and fittings.1. Where else have you come across a tarnished surface?2. How do you normally remove tarnish when you find it at home or at school?3. How can you protect surfaces from tarnish?
Methods of removing tarnish
• Tarnish can be removed by using fine steel wool, sandpaper emery paper, or a file to polish the tarnished metal surfaces. • Fine objects (such as silverware) may have the tarnish electrochemically removed. This can be done by lining the objects on a piece of aluminium foil in a pot of boiling water with a small amount of salt or baking soda. It can also be removed using a special polishing compound such as toothpaste and a soft piece of cloth or sponge.Steps to follow1. Choose plain white tooth paste.2. Put the tooth paste on a dampened piece of cloth or sponge.
 3. Gently rub the tarnished silverware in back and forth motion.
 4. Add more tooth paste and continue rubbing until all the tarnish is cleared.5. Rinse the silverware using warm water then dry using soft towel.
 Follow the steps above to clean a tarnished spoon.• Gentle abrasives, like calcium carbonate, are often used by museums to clean tarnished silver. These are preferred because they cannot damage or scratch the silver and will not leave unwanted residues. Follow the same procedure as above.
Note
(a) Applying a thin coat of polish can prevent tarnish from forming over metals.(b) Tarnish does not only affect metallic surfaces, it can also be found on fabrics. The following procedure can be used to remove the discoloration on fabrics.1. Soak a cleaning cloth with mild bleach, such as white vinegar, hydrogen peroxide, lemon juice or paint thinner. 2. Sponge the solution onto the stain. Rotate the cleaning cloth to a clean area as the stain will have transferred to it.3. If needed, scrub the cleaning solution into the stain with a soft-bristled brush such as a nail brush or an old toothbrush.4. Rinse the fabric well; then wash it as usual.5. If the stain is stubborn, use sour milk. You can make sour milk by mixing vinegar and milk in a bowl. Put the stained area of the item in the bowl. Let the stain soak in the sour milk for about 30 minutes, then wash it as usual.
 1. Which types of soil are common in your home and school? Specify where these forms of soil are normally found.2. Explain how you would clean a painted wall that has mud stains stuck on it.3. Why is it important to first remove stains from an article before washing it in detergent?4. Explain why it is advantageous that tarnish is different from rust. (Explain the differences and also why tarnish is easier to deal with than rust).
1.2 Cleaning materials, tools and cleaning products
Which things do you use when cleaning at home? What are they used for?
The facts
Cleaning materials and tools are those equipment used in cleaning and removal of dirt. They include brooms (see Fig. 1.19), mops, brushes and buckets, among others. On the other hand, cleaning products are agents that are used in the process of cleaning. They include detergents, grease absorbents, grease solvents, toilet cleaners and glass cleaners. We will begin looking at cleaning materials and tools.
Cleaning materials and tools
 We use these tools for cleaning:
(a) Brooms
Brooms have a handle and a head. The handle could either be made of wood, metal or plastic. For wood, it could either be plain, painted or varnished. The heads are filled with bristles of fibres. The broom fibres may be made of animal hair, vegetable fibre, grass, straw or synthetic fi laments. Brooms are mostly used for sweeping smooth surfaces and removing cobwebs from our houses and classrooms.(b) Brushes
Brushes are shorter than brooms. They may also have handles or lack them. The bristles of most brushes are short and hard; mostly made of synthetic fi bres.The facts
The following are some common types of brushes we use at home and at school.

Care and maintenance of brooms and brushes
Discussion cornerIn groups, talk about how you can maintain brooms and brushes. Write short notes and share with other class members.The facts
Some ways of caring for brooms and brushes include:1. Wash in warm soapy water.2. Wash the bristles by flicking them in water to remove dirt. (If there are any remaining fluff, bits of hair and dirt, remove them using a wire or smooth stick).3. Rinse in warm water, then rinse again in cold water to freshen the bristles.4. Clean the handle carefully, depending on the material used.5. Flick the broom to remove excess water.6. Dry the brooms outside by either hanging, or placing them sideways to drip.Remember: Wood gets soaked when left wet for long. If this is done repetitively, the handle will quickly rot.
Quality check!
Whenever we are buying brooms and brushes, we must consider the surface we will be cleaning them with. The hardness or softness of the bristles has to be well considered. The handles also have to be comfortable.Note: Ensure you remove fluff, threads and bits of hair trapped during cleaning after using the brooms and brushes.(c) Buckets and basins
Activity 1.6Identify the buckets and basins shown below by giving their names, functions and materials they are made of.
The facts
Buckets are roughly cylindrical open containers with handles. They can be made of either metal or plastic. They are mainly used to hold and carry liquids. The plastic ones are however more popular because of their light weight, non-rust, easy to wash, variety of colors and they are also not as noisy as metallic buckets. Basins on the other hand are wide open containers used for holding liquids. They are available in both metallic, enamel and plastic options. However, the plastic ones are more preferred due to the stated reasons under buckets.Note: Protect the plastic buckets and basins from excess heat, fire and the sun. These cause them to warp. Also, avoid using harsh abrasives; they make the plastics rough.My environment, my life!Care should be taken when disposing plastics. We must avoid burning plastics. Let us protect our environment!c) Mops
Activity 1.7Practice mopping the classrooms in your school. Write down the steps that you followed in your notebook. Compare your steps with those of your friends. Correct the steps and repeat mopping the classroom.The facts
Mops are implements consisting of a bundle of thick loose strings or a sponge attached to a handle. They are used for cleaning floors or other surfaces. A mopping bucket is used to make wringing the mop easier.
Care and maintenance of mops
Discussion cornerDiscuss about the various types of mops you know and how to maintain them.The facts
How to maintain a mop:• Wash in warm soapy water.• Use a little friction to remove fixed dirt. Do this carefully so as not to pull out the spring or mess up the sponge. • Rinse severally in warm water to remove traces of soap and dirt.• Give a final rinse in cold water with disinfectant.• Wring out excess water and dry the mop out in the sun. This helps to remove all moisture and odour.• Store in a clean and dry place.
(d) Dust pans
Dust pans are mostly used for collecting dirt after sweeping. They can be made of either plastic or metal. The front edge of any dust pan should be fl at and smooth. This is to allow easy collecting of dirt. The handle should be well designed to allow for easy grip.A dust pan is used together with a dust pan brush. • Collect the dirt in one place and place the dust pan fl at near the dirt.• Use the dust pan brush to sweep all the dirt into the dust pan.• Wrap the dirt with a wape paper.
 • Clean and store the dust pan and the brush.Note: Remember to always clean the dust pan and the brush after use.
e) Cleaning clothes
These are pieces of cloth that are used for dusting and wiping various surfaces. Cleaning clothes should be highly absorbent. The material should be soft but of good quality (with strong fibres). Cleaning clothes should be washed after use. They should also be dried and stored away from dust.
(f) Dustbins
Discussion cornerWhat kinds of dustbins do you use at school? Discuss this with your friend.Generally, we throw dirt into dustbins before it is collectively disposed of. Dustbins are containers, which may either be metallic or plastic, where we throw in all kinds of dirt after clean-up. There are various kinds of dustbins as shown below. My environment, my life!Let us always be responsible enough to throw all rubbish into a dustbin. We must avoid disposing of trash carelessly!
g) Vacuum cleaner
A vacuum cleaner removes dirt by sucking dirt particles into a special bag. The bag is later emptied and cleaned for subsequent use or thrown away. It is very useful especially for cleaning carpeted floors. It is an electrical appliance i.e it uses electricity.
Cleaning products
Activity 1.81.What products do you use when doing the following?a) Washing clothesb) Cleaning the housec) Washing utensils2. Practice doing the above activities at home with your brother or sister. List the cleaning products that you used.The facts
Apart from the tools, there are other products we use that help us in the cleaning process. These are also called cleaning agents. Examples include water, soap and detergents.(a) Water
Most cleaning processes require water. It is the main solvent used when cleaning various surfaces and articles at home or at school. There are two types of water: hard water and soft water. Hard water contains an appreciable quantity of dissolved minerals like calcium and magnesium. Soft water is treated water and the only ion present is sodium. When hard water combines with soap, a precipitate of calcium and magnesium compounds form. This precipitate is called scum. Scum interferes with the process of dirt removal from surfaces by redisposing the loosened dirt back onto the cleaned surface. It also makes the fabric being washed dirty.My environment, my life!We should avoid careless disposal of dangerous chemicals in our environment. Such chemicals can seep into the soil and affect the water table.Note: Use water moderately during cleaning of various surfaces. Different surfaces react differently to water. Prolonged wetting may spoil surfaces such as wood that become sodden. It is advisable therefore to clean such surfaces with a damp piece of cloth wrung out of water.(c) Cleaning detergents
Detergents are substances that loosen and emulsify dirt making it easy for them to be removed from surfaces. There are various types of detergents with a wide range of uses. Can you name some detergents that you know? What is the difference between them?Activity 1.9
1. Look at the pictures below with a friend. Do you recognise the things in the pictures? What are they used for? 2. List other cleaning detergents that you know.
The facts
Detergents are substances used together with water for washing and doing general cleaning. They can be soap or soapless detergents. Soap is usually made of a compound of natural oils or fats mixed with sodium hydroxide or any other strong alkali. Most soaps typically have perfume and colouring added. They also come in various shapes and sizes. Their uses also vary, for example, we have soaps for washing dishes, bathing soaps, soaps for doing laundry and those meant for general cleaning. Soaps can also be either in form of bars or in liquid form. On the other hand, most soapless detergents are in powder form.Money matters!
Always store detergents in a cool and dry place to ensure that their effectiveness is preserved. This ensures value for money.The facts
Apart from water and cleaning detergents, there are other cleaning products that we can use during cleaning. They include:• Abrasives – they are commercially available in forms of pastes and powders. They help remove fixed dirt from surfaces by scratching it off.• Grease solvents – these are mostly hydrocarbons that contain hydrogen and carbon. They can be used to dissolve grease and remove stains when cleaning surfaces in the home.• Grease absorbents – these include fi ne powders such as chalk. They are usually spread on surfaces to take in and remove grease from fabrics and other surfaces. Blotting paper can also be used as a grease absorbent.• Acids - mild acids for example, citric acid, vinegar and oxalic acid are commonly used to remove stains when cleaning surfaces and fabrics at home.• Alkalis - they are also known as bases. They are used in diluted form. Their concentrated forms are very corrosive, so we should take care!• Bleaches - these are substances that improve the white color of fabrics; it is mostly used on linen and cotton clothes and articles.• Salt – salt is used in removal of stains especially those of blood, mucus and ink, from textile fabrics. It is also used in polishing tarnished metals.Health check!
Be careful when selecting soaps or detergents for doing laundry and washing clothes. When a soap is irritating to your skin, stop using it immediately!Natural cleaning products
Activity 1.10
Look at the cleaning products given by your teacher. In groups, talk about what they are used for. Group them based on the above descriptions. Come up with a table like the one shown below.
The facts
The table below shows other examples of cleaning products and their uses.


Activity 1.11
Assuming that your teacher requested you to clean your uniforms, describe the cleaning tools, materials and products you would use. Clean the uniform using these things. Match the following cleaning tools, materials and products with their correct uses.
1.3 Associated health and hygiene risks
Activity 1.12
1. Look at the photographs below with a friend. 2. Identify the differences between the two photographs. List them down in your notebooks.3. What caused corrosion in iron sheet A? Do you think this is possible with human beings as they use cleaning detergents?
The facts
Household cleaning products and agents are mostly chemicals. They can therefore have adverse effects both on the user and the surface being cleaned if care is not taken. The following are some of the risks of doing clean-up both at home and at school, and the safety measures to be taken.Table 1.7: Risks and safety measures when using cleaning products


Activity 1.13
Practice dressing up appropriately for clean-up. Go ahead and carry out cleaning of the house at home.Remember the facts!
• Dirt is any substance that stains. Dirt makes things unpresentable.• The following are types of soils:- Dust- Fixed dirt- Stain- Tarnish• To keep the house clean, various materials, tools and cleaning products must be used to help get rid of the various kinds of soil.• Cleaning materials and tools are those equipment used in cleaning and removal of dirt.• Cleaning products are agents that are used in the process of cleaning.• Examples of cleaning materials and tools are:- Brooms- Brushes- Buckets- Basins- Mops- Dust pans- Dustbins- Cleaning clothes- Vacuum cleaners• Cleaning products include:- Water- Soap- Soapless detergents- Bleaches- Abrasives- Alkalis• It is important to take necessary precautions when doing clean up.Test your competence 1
1. Mention the factors that would determine choice of a stain remover to be used.2. What precautions should you take when using grease solvents?3. a) What is dust?b) Where is it mostly found?c) How can dust be minimized?4. Practice doing the following at home:a) Dusting tables and chairsb) Sweepingc) Removing fixed dirt from a surfaced) Washing a table cloth to remove stains5. Write True or False.a) Stain and fixed dirt are one and the same thing. _______b) Tarnish is a permanent stain on metals which can be removed. _____c) Grease solvents are made up of acids and bases. ______d) Soap is a grease solvent. _______6. Describe how best you would treat the following stains:a) Blood stain on a chopping board.b) Fresh tea stain on a white table cloth.c) Tarnish on an ornamental trophy.7. Why is it necessary to consider the hardness or softness of bristles when buying a brush?8. Find and circle five artificial cleaning products from the grid below. 9. How can we prevent formation of tarnish on metallic surfaces?10. What would you tell a classmate who does not like mopping?11. Which one of the following is not a use of buckets and basins?A. Collecting waterB. Collecting dustC. Storing waterD. Doing laundry12. What specific types of surfaces can we use bleaches on?13. Why is it important for one to dress up appropriately when doing cleanup?14. What measures has your school taken to ensure that health and hygiene risks are covered?15. Today, we are living in a world with a lot of economic hardships. How would you ensure that you avoid wastage during a cleaning exercise?
Glossary
Abrasive: This is a substance that is able to wear away by friction and is used for smoothening or polishing surfaces.Baking soda/Sodium Bicarbonate: This refers to powder used for removing stains from metallic surfaces. It creates a glossy appearance on surfaces.Bleach: This is a term used to refer to the act of removing a colour from something.Borax/SodiumBorate: Powder used for polishing surfaces. It improves the cleansing power in washing detergents. It also prevents formation of moulds.Bristle: These are the short, stiff and rough hairs used for making brushes.Corrosion: Wearing out of metallic surfaces by the action of air.Dust: This is a collection of finely powdered earth or other matter in the air.Enamel: Iron covered with a plastic resin that is meant to prevent it from rusting.High dusting: This refers to dusting high places beyond the arm-length. It is done by use of a cobweb brush.Mould: Mould is fur-like fungus which grows on organic matter causing it to decay.Scum: This is the layer of whitish precipitate formed when hard water reacts with soap.Sodium carbonate: This is washing soda used to improve the cleansing action of soaps. It is a grease solvent and also acts as a disinfectant.Soil: This refers to any foul or filthy substance such as dirt or stain.Solvent: This is a liquid that dissolves other substances, often called solutes to form a solution.Stain: This refers to any discolouration on a fabric or a surface, which requires special reagents to remove.Patina: This is the layer of material formed when a metal surface such as copper or bronze tarnishes.Tarnish: This is corrosion that forms on the surface of a metal due to their reaction with air.Vacuum cleaner: This is a machine used for removing loose dirt from surfaces. It creates a vacuum in the dust bag and sucks the air together with dust into the bag.Vinegar: This is acetic acid used to remove alkaline grease and mildew stains. It is also used for cleaning glass to give it a glossy appearance.Files: 2Unit 2: Colours in Decoration
Key Unit Competency
To be able to demonstrate the use of colours and basic decoration methods in simple decoration.
Learning objectives
After studying this unit, I should be able to:
• Identify decorative accessories.
• Use decoration accessories in simple decoration.
• Explain the basic decoration methods.
• Apply the decoration arrangement techniques.
Introduction
What are your favourite colours? Why? Do you like how your house at home is painted? What decorations would you have preferred? Now, look at the following pictures.

From the pictures above, which one would you prefer? Why is that the case?From your answers, predict what you are likely to learn in this topic.
2.1 Types of decorative accessories
In order to improve the appearance of anything, ranging from homes, offices and various venues; decoration is necessary. Decorative accessories are decorative items used to add beauty, as well as give personality and individuality to a room or a place. Other than being decorative, some accessories can be functional too. If well-chosen, they contribute to the overall unity and ambience of a given place. Also appropriate use of colour is an essential part of decoration.
Discussion corner
Look at the following pictures. What are they? What is their importance? Discuss with your friend how they are used in decorating a house, home or a venue.
The facts
The following are some commonly used decorative accessories:• Lamps and lamp stands • Pictures and wall hangings• Mirrors • Wall clocks• pins • Papers• Threads • Laces• Flowers • Textiles• Beads 1. (a) Give five functional decorative accessories you know.(b) Explain how they are used.(c) Give ideas on how one can ensure that they are decorative at the same time.2. Why is it not advisable to apply very dull colours in a room?3. Why are mirrors common in restaurants and hotels?In Senior 1, you already learnt about use of threads, pins, paper, marker pens, pencils, paints and paint brushes, ropes, textiles, ribbons, laces and flowers in decoration.
Activity 2.1
1. Look for the materials, tools and accessories above from your locality.2. Brainstorm how you can make use of the materials in decoration.3. Practice using the tools and materials with your group members to decorate a venue.4. Compare your work with that of other group members.The facts
The various decorative materials above can be combined and used in various ways in decoration.2.2 Basic decoration methods
Though reasons for decorating a home may vary with each individual, community or society, decorating and patterning makes rather plain surfaces at home more appealing to the eye and improves the overall view. A wide range of decorative accessories can be used in various shapes and colours to add aesthetic value to a home. This can be done in a variety of ways, as you will discover shortly.Activity 2.2
1. Look at the pictures below with your friends. 2. Discuss what is happening in each picture. What tools or materials are being used? How are they being used?3. Come up with a list of decoration methods based on your discussions.
The facts
Decoration methods to apply depends on a number of things. Some of them include:• The type of decorative accessories available.• Architectural out look of the house or home or venue.• Age, sex and taste of the users of the house or home.• Personal prefferences in terms of colours.• If venue, the nature of event.All in all there is need to carefully think about whatever decorative accessories we have and how to combine them in order to come up with attractive designs which bring about the right aesthetics and desired ambience in the room, house, venue or whatever it is that we are decorating.We will now look at some common decoration methods that we can use to improve the appearance of our houses, homes, venues for various functions or any other item that we use in our daily lives.a) Use of haberdasheries
Haberdasheries comprise of additional decorative trimmings useful in adding décor to the accessories used in the home. They include items such as paper, ribbons, laces, textiles, threads, beads, ropes and flowers.
Activity 2.3: Research activity
Find out with a friend from textbooks in the library or the internet how the above items can be used in decoration. Practice doing the decorations with your friend. Share your work with the rest of the class.The facts
Simple cards for various accassions for example wedding cards can be made using paper, ribbon and lace. Ribbons and lace are useful for putting a dainty touch to household accessories such as a tea cozy or personal accessory storage bags. They too can be used to make fancy cards for various occasions. This is a cost effective way of providing such items at the same time developing a person’s creativity that allows an individual to make unique items.
 Tea cozies can artistically be made from threads, beads and buttons using crocheting method. Floral flowers can be made from textile fabrics and lace as well.Beads also make useful contribution in home decoration. A variety of soft furnishing accessories such as lampshades and cushion covers and wall hangings can be made more appealing to the eye by giving them a touch of beads. See the pictures below.
 Further, cushions can be made more attractive by giving them corded edges as well. Frills of curtains can be improved by giving the edges a contrasting colour of ribbon among many other decorations.
Work to do
In your free time, find out other ways the haberdasheries above and others not included in this list can be used in decoration. Come up with attractive items based on your findings.Example
How to make simple wedding invitation cardFollow these steps:Step 1: Carefully choose the designOnline invitations, magazines and other wedding cards samples can be useful in shaping your ideas on the design to choose keeping in mind the invitation forms the first impression the guests will have about the wedding. You can go for wallets and fl at unfolded cards or the traditional card blanks. Wallets are great for including lots of extra information inserts, RSVP cards as well as the main invitations cards themselves. Step 2: Set your budgetThink along how much it may cost you to make the invitation cards. The estimate can be made basing on the number of people you intend to invite, whether singles or couples and the materials to use. Flat unfolded cards and traditional card blanks are great if you’re on a stringent budget or don’t have huge amounts of information to include.Step 3: Work on the decorationsStart with a neutral colour for the card and carefully add décor through printed inserts and use of ribbons or lace. Vary the texture (tapestry style or pearlescent effect) to create a difference in the overall feel of the card. Use of peel off stickers too provides an interesting finish. However, remember to keep the decoration simple but elegant. Adding a diamanté ribbon buckle makes the invitation card look much more expensive than it actually is, and saves you having to tie neat ribbon bows. Lace too can be used down the spine of the card; decorative papers can be used for panels, strips and wraps to bring in a splash of your accent colour, or add a bit of glitter. Layer decorative panels with the same card as your base invite printed with your names, initials, dates and so on can be included as well.with your names, initials, dates and so on can be included as well.with your names, initials, dates and so on can be included as well.
 Step 4: Print your insertsUse a font that is easy to read; some styles of inserts can be mounted on decorative papers, or contrasting card. Accent colours can be introduced by printing in coloured ink or alternating metallic foil printed inserts can be used.Step 5: Add the insertsThis can be done using adhesive tape pens. Attach inserts to the left hand side of the card near the spine, so the insert will fall open when the card is opened. Ribbons, if used, can be either left loose, or secured with a line of adhesive tape pen.Step 6: Add envelopsThese come in standard sizes. Make sure your invitation card will fi t in one before you get too far. Keep in mind the cost of postage as a letter thicker than 5 mm will cost more to send. Remember too the envelope is the fi rst thing people see when receiving your invitation, so consider making it a little bit special with a pearlescent or textured fi nish to match the invite.
Activity 2.4
You will make a birthday invitation card in this activity. Think about the design of the card then follow the steps above to make the card. Make the card as attractive as you can.My safety, my life!
Be careful when handling sharp and dangerous objects when doing decorations. They could hurt you.b) Use of soft furnishing accessories
These group of accessories may be purely decorative or both decorative and functional. They include wall hangings, wall pictures, wall clocks, lamps, lampshades, mirrors, among others.Activity 2.5: Research activity
Find out from textbooks in the library or the internet how soft furnishings can be used in decoration. Practice doing the decorations with your friend. Share your work with the rest of the class.i) Use of lamps and lampstandsCan you give an example of a case where lamps and lampstands are used in decoration? Why are they important? Lamps are functional decorative accessories. They give light to a room when it is dark. If meant for decoration, the design, colours and shape must be selected with an intention to enhance the appearance of the room. Pendant lighting fi xtures such as the chandeliers and the rise and fall fitments give a decorative finish to a room; especially if chosen in colours that blend well with the existing colour scheme. (ii) Use of pictures and wall hangingsLook at Fig. 2.12 below. Does it look familiar? What role do such things serve in a house? Fig. 2.12 shows a wall hanging. The colours and texture of wall hangings and pictures should be in harmony with those used in the room. Their sizes and shapes should blend well with the wall area onto which they are hang. Well-chosen and properly fixed pictures and wall hangings play a big role in adding to the personality of a room.
 (iii) Use of mirrorsMaybe you have used a mirror before. If so, where and how? Mirrors can also be functional depending on the area where they have been used. When used in the bathroom and bedroom, it becomes functional. Even in their functionality, the design used can render them decorative. Mirrors also help in increasing the apparent spaciousness of an otherwise small room.
 (iv) Use of wall clocksDo you use a wall clock at school? How about home? Do you have a wall clock? Now, look at Fig 2.14 below. Does the thing in the picture look familiar? Wall clocks are also functional decorative accessories. They are available in different colours, shapes, sizes, designs and materials. When appropriately selected, they can add to the personality of a room as well.
Note
Also, things like cushions, lampstands, shells, draperies and carpets can be used as decorative accessories. All the things above if well-chosen, give an impressive decorative finish to a house or a home. All or some of the soft furnishing accessories above can be metivulously combined to bring out an attractive and ambient environment as appears in the picture below.
Activity 2.6
Practice rearranging the above decorative accessories in your house at home to come up with a better and more attractive home. Do this with permission of your parents or guardian.Money matters!
When selecting decorative accessories, it is of more value to consider the quality and authenticity of an item rather than just outward appearance. It is even safer to have an arts expert to help in the selection so that you get value for your money.c) Use of paintings in decoration
Activity 2.7
You will make paintings in this activity for use to decorate your room at home. Think about the design of the painting, come up with the painting and hang it on the walls of your room. Think of other ways in which you can use paintings in decoration. With your parent’s or guardian’s permission, decorate the whole house at home.The facts
When doing paintings as a method of home decoration, a wide range of tools and materials can be used. Relying completely on ready-made materials can be quite expensive therefore it is wise to explore local materials and improvised tools. Carpentry workshops and sawmills are good points where one can find various sized cut off wood blocks that may cost little or nothing.Scrapes of fabrics from tailors can also come in handy in home decoration especially as a stuffing material. Look at the picture below. What is going on in the picture? Home decoration tools and materials widely used include paint and painting brushes, pins, pencils, markers, manila papers, scissors, razor blades, textile threads, newspapers and soft paper.• Paints and brushes -It is better to have one good brush than several cheap ones that have no resilience. A good brush can be flooded with paint to cover a larger surface and yet still twist it to a point for a fine line thus more useful than cheap poor quality brush. No 7 or 8 stable brush are highly recommended for most work that requires painting in the home.
 • Pens and pencils - Fountain pen or drawing ink give good results however this is a matter of personal choice therefore experiment until you find one that suits your work. A soft black pencil (3B or 4B) gives better lines than grey ones; HB pencils are quite useful for riling lines or tracing designs on clothes.• Paper - Sketchbook layout pad is most useful as it comes in varying sizes small enough to carry around easily. It takes up rubbings and can be used for pencil, pen or brush. It can also be used as tracing paper if necessary. Pieces of coloured paper of all kinds can be very handy in home decoration; wallpapers, wrapping paper, corrugated paper and coloured pages from newspapers too can be useful. Dressmaker’s paper and graph paper work well where paper with ruled lines is required; brown paper however can be useful where ruled paper is not essential.• Stanley Knife - It has 3 or 4 blades in the handle making it excellent for cutting cards. In addition, a compass and a set-square are useful for making patterns for patchwork.
 • Metal ruler - this would be more useful for cutting card for mounts than plastic or wooden ruler, which can easily be damaged by a sharp knife.
d) Use of colour harmony and colour schemes in decoration
In senior 1, you learnt about colour scheme.What is colour scheme? How about colour harmony?Activity 2.8
1.Observe the figure below with a friend. 2. Identify the various colours and discuss the various ways some can be combined.
The facts
Proper and successful use of colour may pass unnoticed when pleasing. However, colours can be quite annoying and even depressing when there is poor selection of colour. Balance and harmony can be achieved by the visual contrast that exists between colour combinations and good understanding of colour relationships. A colour wheel helps us to understand these easily. If used imaginatively, colour can create the right mood and ambience. It also enhances the personality of the room, house or venue. Look at the following picture. Comment about the use of colour in the picture.
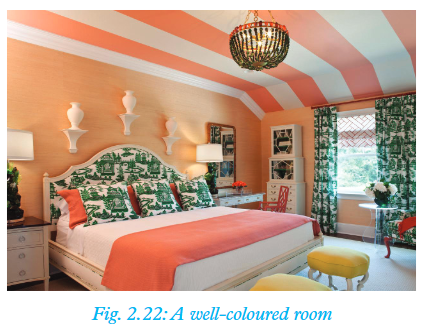
Note:
Colour can only be seen when there is light. Objects exhibit colour depending on the manner in which their surfaces reflect or absorb light. White surfaces reflect light whereas black surfaces absorb it. 1. Have you ever heard of the following types of colours?(a) Primary colours(b) Secondary colours(c) Tertiary colours2. What are they made of? Give examples from Fig. 2.21 above.Different colours can be combined to create a colour scheme for a given room or house as shown in Fig. 2.22 on page 43.
Types of colour schemes
Activity 2.9: Research Activity
1. Find out from the library or the internet the various types of colour schemes.2. Collect paints of different colours. Using manila paper and paint brush, try to replicate those colour schemes in a drawing of your choice.The facts
The following are the four basic types of colour schemes that can be used in decoration:• Monochromatic colour scheme• Analogous colour scheme• Triadic harmony• Complementary colour planWe will now look at these colour schemes in detail.(a) Monochromatic colour scheme
Look at the picture below. What is common in the picture? What colour scheme is it? Monochromatic colour scheme is also known as one colour plan. Here, one colour is used as the key colour. An example is Fig. 2.23 above where orange has been used as the key colour. Monotony is broken using tints and shades of the same colour as shown.
(b) Analogous colour scheme
In this case, one uses a related colour plan. This means that the colours used are next to each other on the colour wheel. An example is yellow, yellow-green and green-blue. Different values and intensities of these colours can be used to create an interesting effect. Look at the following picture. What is common in the picture?
(c) Triadic harmony
This involves use of three colours that are equidistant and form a triangle on the colour wheel. The three primary colours give a good example of triadic harmony. Look at Fig. 2.25 below. What colours can you see? Compare the colours with those in a colour wheel. Can you observe any relationships? Triadic harmony is the most widely used form of colour plan.This is mostly because it provides the basis for many other practical combinations. In fi gure 2.25 green, orange and purple colours have been used.
(d) Complementary colour plan
Here, the used colours are directly opposite each other on the colour wheel. Look at the picture that follows. Which colours can you identify? What is the position of the colours on the colour wheel. Fig. 2.26 above is an example of a complimentary colour plan where colours i.e. red and green are used. A more pleasant effect has been produced by use of tints and shades of the two complementary colours.
Note:
There is also the split complementary colour plan; whereby instead of using colours that are opposite each other on the colour wheel, one can use a hue of one given colour and combine it with the colours on either side of its compliment. This basically means using colours that form a ‘Y’ on the colour wheel. Varying the strengths and intensities of the three colours provides interesting combinations to work with. An example of a split complementary colour plan combination is shown in Figure 2.27 below. The artist of the pot painting used yellow, green and violet colours to create a split complimentary colour scheme.
 What types of colour schemes do you see in the following areas around you?1. Your classroom2. At home3. In the Rwandan flag
Proportion of colours
This refers to the various quantities and concentrations of colours used. Even as we consider the various colour schemes, it is important that we understand the effects of proportion of colours on our decorations.Colour effects
Colour effects can also be used in decoration. Look at the picture below. Comment about the choice of the various items in the picture.
The facts
Walls as decoration and as backgroundWalls make for a crucial part of any house. Walls normally have two portions; the exterior and the interior. We shall however place focus on the interior part of walls; the part that is inside the house.Activity 2.10 : Research Activity
Find out from textbooks in the library or the internet about some of the factors to consider when choosing colours for the interior of walls of a home. List them down and compare your fi ndings with other groups.Look at the walls of the house in the picture below. What colour forms the background in the walls? Was that choice appropriate?
The facts
The following should be considered when choosing colours for the interior of walls in a house:• The intensity of natural light - This in many ways infl uences the choice of colours for house decoration. The colours chosen must blend well with the available natural light. Bright light will make colours like red, yellow and green appear more intense while dull natural lighting will make them appear less intense.• Light colours - These make a room appear larger and warmer while dull colours make it appear small and cold.• Accent in colour is created when a relatively small proportion of a certain colour is applied in a larger area. It is usually meant to offer contrast due to a variation in hue intensity or saturation. For instance, placing small proportions of a light colour on a dark background or small proportions of a dark colour on a light background will create an accent.• Colour intensity - If large areas of a light hue are used, the whole area will appear light. If large areas of dark hues are used, then the whole area appears dark as well. Alternating colour by intensity rather than proportion will also help in changing the perceived visual mix of colour.e) Use of furniture and fixtures in decoration
 1. Describe the furniture and fixtures you have at your home to your friend.2. How can you use the furniture and fixtures to make the house more attractive?Prepare a report and present it in front of your class.
The facts
Styles and colours can be very dynamic. It is therefore important to think ahead when re-modelling a room or designing colour schemes for a new home. Since fi xtures, such as the tub, the toilet, sinks and tiles can be diffi cult and expensive to keep replacing, choose those with a classic look and muted colour. This will ensure that they stand the test of time. White fi xtures are the best choice for bathrooms. However, the appearance of the bathroom can be made more colourful by playing around with more easily changeable items such as towels, pictures, curtains and wall hangings. These help to enhance personality and style in the lavatory. For example, what is your comment about the colour scheme in the picture below? When choosing colour for furniture and fi xtures, the following should be considered:• The desired effect• Purpose of the room• Existing décor• The user’s personal preference (personality and style)For furniture, it is also important to select colours that align with the present colour scheme. It is safe to select plain colours. However, flowery decorations can also be selected with care. They should also be selected with the future in mind.The material and design should also blend with the wall background to enhance unity. A good example of furniture in a room is shown in the figure below.
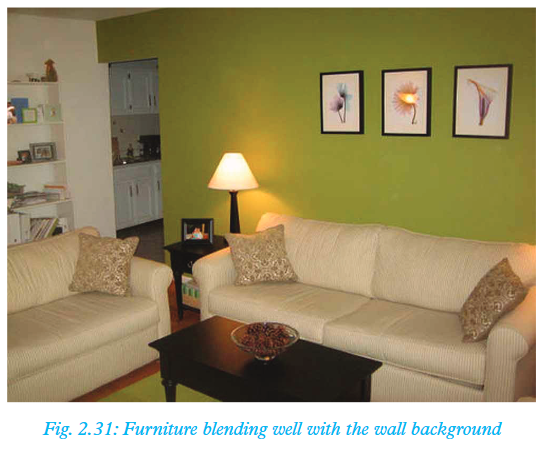
Project work
Form groups of five in your class. Work on a housing project. Collect the materials that you would require. Plan together on how you will construct a small house (Kernnel size) and how you will decorate it so as to look attractive. Implement your plan as a group then present the fi nished work to the teacher for evaluation. 1. Why is knowledge on colour schemes important when doing decoration?2. What colour combination options would you think of in a house with an orange wall?3. Why would it be inappropriate to have very bright colours in an office setting?
Remember the facts!
• In order to improve the appearance of anything ranging from homes, offices and various venues, decoration is necessary.• Appropriate use of colour is an essential part of decoration.• Decorative accessories are decorative items used to add beauty, as well as give personality and individuality to a room.• Examples of decorative accessories are:– Lamps and lampstands– Pictures and wall paintings– Mirrors and wall clocks– Flowers– Cushions– Lampshades– Draperies– Carpets• Balance and harmony can be achieved by the visual contrast that exists between colour combinations and good understanding of colour relationships.• If used imaginatively, colour can create the right mood and enhance the personality of a room.• Objects exhibit colour depending on the manner in which their surfaces reflect or absorb light.• There are three basic characteristics of colour:– Hue– Intensity– Value• Colours can be broadly classifi ed into three categories:– Primary colours (pure colours)– Secondary colours (a combination of two primary colours)– Tertiary or intermediate colours (a combination of a secondary colour and a primary colour).• The four basic types of colour schemes that can be used in decoration are:– Monochromatic colour scheme– Analogous colour scheme– Triadic harmony– Complementary colour plan• Other methods of decoration apart from use of colour schemes and colour harmony are:– Use of haberdasheries– Use of soft furnishings– Use of paintings– Use of furniture and fittingsTest your competence 2
1. Using a colour wheel, show the different colour schemes that can be constructed (use appropriate examples).2. Make a birthday card and use it to invite your friends during your birthday.3. Give examples of decorative accessories you know that are both functional and decorative.4. Which colour schemes have been employed in the pictures below? What advantages do they have? 5. Explain how light can affect choice of colours to be used on a surface.6. With use of appropriate examples, differentiate between tints and shades.7. Decorate your room at home using industrial beads.8. Write True or False.a) Using mirrors in a kitchen makes it look bigger. ____________b) Cushions are examples of decorative acecssories. ____________c) Light colours make a room appear smaller. ____________d) Light has no effect on colour in a room. ____________9. Assume you have just bought a new house. You are trying to furnish it. Why should you be extremely careful when selecting colours for the various fi xtures in the house?10. What colours would be appropriate for a hospital setting and why?11. Describe how you would use the different colours in any specifi c room in the house.12. Make a wall painting of your choice, hang it on the wall of your classroom.13. Why do you think interior design and décor is a thriving career today?14. Match the following characteristics of colour with the correct scheme.
 15. Fill the gaps in the following sentences.(a) Secondary colours are obtained by mixing ______ and ______ colours.(b) Tertiary colours are obtained by mixing ______ and ______ colours.(c) (i) Blue + Yellow = ______(ii) Red + Blue = ______(iii) Yellow + Red = ______(iv) Blue + Green = ______(v) Red + Violet = ______16. Assume your parents have allocated you the village house to decorate. Describe how you will go about doing this task in a responsible manner. Go ahead and carry out the task when you visit the village.
Glossary
Achromatic: A term that refers to lack of hue, for example black, white and grey.Analogous: This refers to colour scheme produced when related colours (appearing side by side on colour wheel) are used together; for example, green, yellow-green and blue-green.Chandeliers: These are branched decorative light fixtures suspended from the ceiling with the capacity to hold several bulbs or candles.Chromatic colours: A term that refers to presence of hue, for example red, green, blue and yellow.Colour Scheme: This refers to a combination of colours aimed at producing a certain effect - mostly applied in interior decoration.Colour wheel: This is a wheel of 12 colours - three primary, three secondary and six tertiary colours arranged in the same way as those of a rainbow.Complentary colours: These are colours which appear opposite each other on the colour wheel and are direct contrasts. Examples are; red and green, blue and orange; violet and yellow.Draperies: This is a term used to refer to long curtains covering a large section of a wall.Furnishings: The term furnishing refers to a piece of equipment necessary for comfort or convenience. Examples are furniture, carpets, curtains and related items.Harmonious colours: These are colours that appear adjacent on the colour wheel such as green, yellow-green and blue-green. Hue: A term used to refer to colour.Intensity: This is the degree of brightness, purity or dullness of a colour.Monochromatic: A term used to refer to something that is having or appearing to have one colour.Pendant: A pendant is a lighting fixture suspended from a point, for example, the ceiling.Secondary colours: These are colours obtained by mixing equal parts of two primary colours. For example, green is a secondary colour composed of blue and yellow.Shade: This is the colour produced when black is mixed with any other colour. For example, maroon is a shade if red.Tertiary colours: Also known as intermediate colours. They are formed when primary colours are mixed with secondary colours or where they overlap in the colour wheel. For example, blue and green gives blue-green colour.Tint: This is the colour produced when white is mixed with any other colour. For example, pink is a tint of red.Tone: Also known as value. It refers to the degree of lightness or darkness of a tint or shade.Triad harmony: This is a type of colour scheme where three primary or three secondary or three tertiary colours are used together.Unit 3: Characteristics of fabrics
Key Unit Competency
To be able to understand and explain the characteristics of different fabrics and conduct appropriate experiments with them.
Learning objectives
After studying this topic, I should be able to:
• Identify different fabrics.
• Classify different fabrics.
• Explain characteristics of fabrics.
• Experiment on fabric textures.
Introduction
Look at the pictures below. What kinds of clothes are they? Are they important or not?

What kind of material do you think each of them is made of? What is the source of that material? Based on your answers above, what do you think you will learn in this unit?
3.1 Classification of fabrics
We wear different types of clothes. The fabrics that make these clothes are made from different types of fibres. The fibres can either be natural or synthetic. The characteristics of the different fabrics are determined by the origin of the fibres it is made from.
Activity 3.1
Put the clothes or pieces of clothes provided by your teacher into different groups. How many groups did you come up with? What factors did you consider when coming up with the groups? Draw a fl ow-chart to show the groups that you came up with. Compare your chart with Fig 3.2 on page 57.
The facts
As we have already seen, the clothes we wear are made from different fabrics. These fabrics have different characteristics. These characteristics define the uses of the fabrics. Some fabrics are heavy as compared to others.Others have a soft feel, while others are warmer than others.
Fabrics are normally classified according to the origin of their fibres. There are those that are obtained from natural materials (natural fibres) and those that are made by human beings (artificial fibres).

Fill in the table below with the correct origin of the fabrics listed (i.e. artificially made, animal or plant).

• Natural fibres – these can be obtained from animal parts, natural proteins, minerals and various plant parts such as cellulose. Cellulose is the substance that forms the cellwalls of plants. Fibres made from cellulose are referred to as cellulosic fibres. The cellulosic fibres include cotton, linen and jute. Examples of fibres obtained from animals are wool and silk. Asbestos is an example of a mineral kind of fibre.
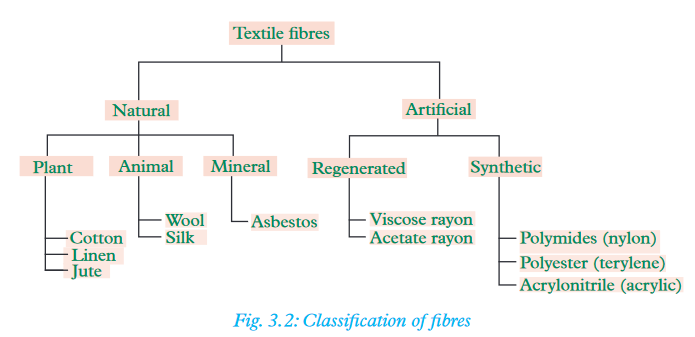
• Artificial fibres – these are manufactured from chemicals and other substances. Examples of artificial fibres are rayon, polyamide, polyester and acrylic. Artificial fibres can be further classified into regenerated fibres and synthetic fibres. Regenerated fibres are made from treating the natural materials with chemicals. They include viscose rayon and acetate rayon. Synthetic fibres are made from chemicals.
Examples are given below.
(i) Polyamides – such as nylon and polyester such as terylene.
(ii) Acrylonitrile – such as acrylic.
(iii) Elastofibres – such as lycra.
Quality check!
When buying clothes, check that it has clear directions on care and handling. This helps in ensuring that clothes last long and remain in good condition.

1. What fabrics are common in your household?
2. Differentiate between natural and artificially made fibres.
3. (a) Which is the best fibre for babies?
(b) Explain your answer in 3(a) above.
3.2 Characteristics of different fabrics
Do you think all fabrics are of the same type? If not, what makes them different?
Activity 3.2
In this activity, you will be required to use the same clothes you had used in Activity 3.1. Try to describe their:
(a) Appearance (how they look, arrangement of fi bres, e.t.c).
(b) Texture (how they feel to touch).
Go to the library or the internet and research from textbooks about the characteristics of fabrics. Write a report and present to the rest of the class.
The facts
Each of the different fabrics we have learnt about have their own unique characteristics. Examples of fabrics whose characteristics you will learn are:
• Cotton • Wool
• Silk • Linen
• Polyester • Rayon
• Nylon
In looking at the characteristics of these fabrics, we shall consider their appearance and texture. We will also find out their care requirements.
(a) Cotton
Cotton fibre is produced from the cotton plant. When the cotton plant grows and matures, it produces cotton balls. The cotton balls are then picked and processed into yarn. The yarn is what is spun into a cotton fabric.

Examples of cotton fabrics are lawn, calico, flannelette, drill, jinja, denim, gingham, muslin, organdie, cambric, hair cord, pique, poplin, khaki, corduroy, terry toweling and voile.
Practical ways of identifying cotton
Activity 3.3
Your teacher will give you a sample of cotton. Do the following1. Touch the cotton between your fingers. How does it feel?2. Burn the sample of cotton. What happens? Is there any smell produced?3. View the sample of cotton using a microscope. Draw what you can see.4. Put the cotton sample in hydrochloric and nitric acids. What happens?i) Appearance and handle– Cotton feels strong (the fibres do not break easily).– It lacks luster.(ii) Burning testWhen burnt, cotton flares up with a yellow flame. It smells like burnt paper leaving behind grey ash-resembling wood ash.(iii) View under the microscopeWhen observed under the microscope, cotton appears like twisted threads. These twists are what make cotton fibre very strong. (iv) Solubility testCotton dissolves in hydrochloric and nitric acids.
Discussion corner
Talk to your friend about the various special characteristics of clothes made of cotton. Discuss also how these clothes can be cared for.Care for cotton fabrics
Characteristics of cotton fabricWhat should we do to ensure cotton fabrics last for long?1. Avoid storing them when wet. This will cause development of mildew stains.2. Avoid exposing cotton to sunlight for too long. This causes it to degrade.3. Since it creases easily, cotton should be ironed when not completely dry.4. Cotton becomes weak when wet, hence it should not be soaked for long.The facts
• It is highly absorbent and soft to touch. Therefore, clothes made from cotton have a very high affinity to water.• It is also because of its highly absorbent nature that it readily takes in dyes. Due to this, it can be available in a wide range of colours.• It is resistant to high temperatures. This is because of its strength. Dirty clothes made out of cotton can be boiled to be sterilised. • Cotton can withstand mild alkalis, washing detergents and all kinds of stain-removing agents. Cotton clothes can hence be very easily laundered.• Cotton makes strong fibres. Hence the fabrics are strong too.• It is resistant to attacks from moths and other destructive insects.• Cotton does not generate and hold static electricity.• It is a good conductor of heat.• It catches dirt very easily.• It is not resistant to mildew. It can therefore easily get damaged if kept under damp conditions.• It lacks natural brightness (luster).• It is easily weakened by strong acids.• Cotton creases easily because of its low ability to spring back after being stretched.• It burns readily when exposed to flames.• It weakens when it is exposed to sunlight for too long.
(b) Wool
Wool is obtained from the fleece of sheep. The common sheep which produces wool is the merino sheep. We can also get wool from special types of goats and rabbits.Wool is a protein fibre.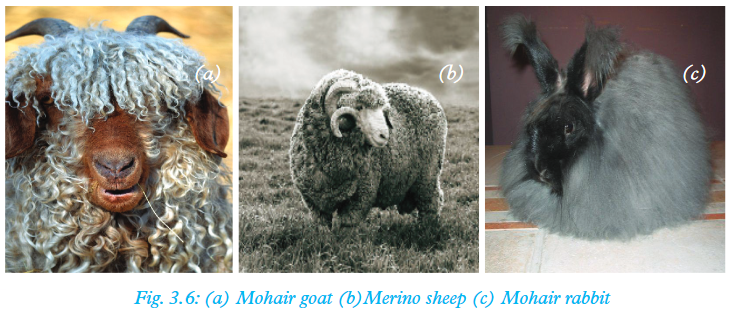 Examples of woolen fabrics are tweed, mohair, gabardine, whipcord, serge, jersey, felt, woolen clothes and worsteds.
Practical ways of identifying wool
Activity 3.4
Your teacher will give you a sample of wool. Do the following.1. Touch the wool between you fi ngers. How does it feel?2. Burn the sample of wool. What happens? Is there any smell produced?3. View the sample of wool using a microscope. Draw what you can see.4. Put the wool in hot caustic soda solution and sodium hypochloride bleach. What happens?The facts
(i) Appearance and handle– Wool feels hairy.– It lacks luster.(ii) Burning testWool does not burn. It smolders with a strong smell of burnt hair or feathers.(iii) View under the microscopeWhen observed under the microscope, wool has a rough and fuzzy surface. (iv) Solubility testWool dissolves in hot caustic solution and sodium hypochloride bleach.
Discussion corner
Do you know about any characteristics of clothes made of wool? How should we care for them? Discuss these with your friend.The facts
Characteristics of wool• It has natural crimp hence warm.• It is highly elastic and resilient making it resistant to wrinkle.• It does not burn easily.• It is highly absorbent.• It can be attacked by moths when stored for long.• Wool easily shrinks.• Wool felts easily.• Long exposure to direct sunlight turns wool yellow.• Wool can easily stretch out of shape.• Wool is easily damaged by alkalis which is found in most laundry soaps. Care for woolWhat should we do to ensure that woolen fabrics last for long?1. Wool stretches out of shape and should not be soaked.2. It is destroyed by alkalis and so mild detergents should be used.3. It is affected by high temperatures hence care should be taken during washing and finishing.4. Should be stored well as it is affected by moths.
(c) Silk
Silk is produced from the secretions of silkworms. The silkworms feed on mulberry trees. The worms secrete the silk thread. The threads are then harvested and put in hot water. The hot water helps to unwind the thread. The threads are then twisted to form yarn.Examples of silk fabrics aretaffeta, chiffon, brocade, velvet, satin, crepe de-Chine, faille, georgette, organza and silk jersey.
Practical ways of identifying silk
Activity 3.5
Your teacher will give you a sample of silk fabric. Do the following:1. Touch the silk between you fi ngers. How does it feel?2. Burn the sample of silk fabric. What happens? Is there any smell produced?3. View the sample of silk fabric using a microscope. Draw what you can see.4. Put the silk fabric in sodium hypochloride bleach, hydrochloric acid, sulphuric acid and in caustic soda. What happens?The facts
(i) Appearance and handleSilk feels smooth and soft.(ii) Burning testWhen burnt, it curls and eventually burns giving off a smell of burnt hair.(ii)View under the microscopeWhen observed under a microscope, silk appears like a smooth rod-like surface with some triangular points on its length. (iv) Solubility testSilk dissolves in sodium hypochloride bleach, hydrochloric acid, sulphuric acid and in caustic soda.
Discussion corner
Do you know about any characteristics of clothes made of silk? How should we care for them? Discuss these with your friend.The facts
Characteristics of silk fabric• Silk has strong fibres.• It is not flammable.• It is very lustrous (shiny and bright).• It is resistant to creasing because it has some degree of elasticity.• It has a good drape.• It has a high affinity for dyestuffs.• It makes warm fabrics.• It is resistant to mildew, fungi and moth attacks.• It is absorbent.• It is damaged by high temperatures.• Long exposure to sunlight weakens the fibre.• It is easily damaged by alkalis and acids.
Care for silk
What should we do to ensure that silk fabrics last for long?1. It should be protected from high temperatures.2. It should not be bleached. Bleaching weakens silk.3. Use mild detergents.
(d) Linen
Linen fibre is obtained from the stem of fl ax plants. It is a cellulosic fbre. It is from the fibres that yarn is made. The yarn is eventually used for making linen fabrics. Examples of linen fabrics are damask, crash, toweling dress and suiting fabrics, linen/polyester canvas, cambric and huckaback.
Practical ways of identifying linen
Activity 3.6
Your teacher will give you a sample of linen fabric. Do the following:1. Touch the linen fabric between you fingers. How does it feel?2. Burn the sample of linen fabric. What happens? Is there any smell produced?3. View the sample of linen fabric using a microscope. Draw what you can see.4. Put the line fabric in concentrated sulphuric acid, hydrochloric acid and nitric acid. What happens?The facts
(i) Appearance and handleLinen feels rough and lustrous.(ii) Burning testLinen like cotton, fl ares up with a yellow fl ame. It smells like burnt paper, leaving behind grey ash resembling wood ash.(iii)View under the microscopeWhen observed under the microscope, linen appears like a smooth lustrous rod with nodes at intervals. (iv) Solubility testLinen dissolves in concentrated sulphuric acid, hydrochloric acid and nitric acid.
Characteristics of linen
Discussion corner
Do you know about any characteristics of clothes made of linen. How do they behave under various circumstances? Discuss these with your friend. Also give ways of caring for linen clothes.The facts
The characteristics of linen are similar to those of cotton. Linen, is however much stronger than cotton. It is more lustrous, it frays more readily has crisp and is very expensive. Linen is also more resistant to damage through long exposure to sunlight.Care for linen1. Linen frays badly therefore it should be finished well.2. It should be well dried before storage to avoid formation of mildew.3. Linen is highly flammable. It should therefore be kept away from fire.(e) Nylon
This is a synthetic fibre from the polyamide family.
Practical ways of identifying nylon
Activity 3.7
Your teacher will give you a sample of nylon fabric. Do the following1. Touch the nylon fabric between you fingers. How does it feel?2. Burn the sample of nylon fabric. What happens? Is there any smell produced?3. View the sample of nylon fabric using a microscope. Draw what you can see.4. Put the nylon fabric in formic acid. What happens?The facts
(i) Appearance and handle- Nylon is very smooth, soft and elastic.- It is lustrous in appearance.(ii) Burning testNylon runs away from flame and melts into a hard, uncrushable bead.(iii) View under the microscopeWhen observed under the microscope, nylon appears like a smooth glass rod. (iv) Solubility TestNylon dissolves in formic acid.
Characteristics of nylon
Discussion corner
Do you know about any characteristics of clothes made of nylon. How do they behave in various circumstances? Discuss these with your friend. State also how such clothes can be cared for.The facts
• It is extremely strong, light and elastic.• It is not absorbent.• It neither shrinks nor stretches.• It is thermoplastic i.e it can be permanently pleated.• It is resistant to moth and mildew attack.• It requires little or no ironing. It is therefore an easy-care fabric.• It is crease-resistant. It can hence be blended with other fibres to improve their quality.• Nylon is a poor conductor of heat.• It is resistant to abrasion. • Pilling is common in fabrics made of spun nylon yarns.• It is versatile. Nylon fabrics can be produced in a variety of textures, thickness and finishes for various uses.• Nylon rots with long exposure to sunlight. It is therefore not suitable for making curtains.
Care for nylon
How can we ensure that our nylon fabrics last for long?1. It should not be exposed to sunlight for a long time. This may cause rotting.2. It should be protected from activities that cause friction to avoid pilling.(f) Polyester
This is a man-made fibre derived from coal, air, water and petroleum. When they are mixed with other chemicals, they form polyester. It resembles nylon fabric.Examples of polyester fabrics are jersey, terylene, lawn, suiting, polyester/woolen blends, polyester/cotton blends and trevira.
Practical way of identifying polyester
Activity 3.8
Your teacher will give you a sample of polyester fabric. Do the following:1. Touch the polyester fabric between you fi ngers. How does it fell?2. Burn the sample of polyester fabric. What happens? Is there any smell produced?3. View the sample of wool using a microscope. Draw what you can see.4. Put the polyester fabric in concentrated sulphuric acid. What happens?The facts
(i) Appearance and handle- Polyester is very smooth and soft. It is elastic to handle. - It is lustrous in appearance.(ii) Burning test– Polyester burns in the flame and produces an aromatic smell. – It leaves behind a hard bead.(iii) View under the microscopeLong smooth continuous fibre (similar to silk). (iv) Solubility testPolyester dissolves in concentrated sulphuric acid.
Characteristics of polyester
Discussion corner
Do you know about any characteristics of clothes made of polyester? How do they behave in various circumstances? Discuss these with your friend. You should also state how clothes made of polyester can be cared for.The facts
• It is a very strong fibre both when dry and also when wet.• It is resistant to bleaches and acids.• It has a high affinity for dyes.• It can be blended with other fabrics and crimped to produce more desirable fabrics.• It is thermoplastic and can therefore be permanently pleated.• It is flame and crease resistant.• It is resistant to attacks by moths, mildew, fungi and bacteria.• It is not destroyed by strong exposure to sunlight hence, it is suitable for making curtains.• It is not absorbent. It therefore does not take up dyes easily.• Polyester is resistant to abrasion.• Stains and dirt are easily removed.• It is resistant to shrinking, creasing and stretching.
Care for polyester
1. Avoid too much heat so that it does not stretch.2. Do not bleach. This weakens the fabrics.g) Rayon
There are two types of rayon; viscose rayon and acetate rayon.(i) Viscose rayonViscose rayon fabric is made from treated wood pulp. The pulp is processed into fi bre which is then spun into yarns. The yarn is then what makes the fabric. Examples of viscose rayon materials include: damask, satin and velvet, flannel, lace, taffeta, gabardine.
Identification of viscose rayon
Activity 3.9
Your teacher will give you a sample of viscose rayon. Do the following1. Touch the viscose rayon between you fingers. How does it fell?2. Burn the sample of viscose rayon. What happens? Is there any smell produced?3. View the sample of viscose rayon using a microscope. Draw what you can see.4. Put the viscose rayon in acetone but it does not dissolve. What happens?i) Appearance and handle– Viscose rayon is smooth and soft.– It is lustrous in appearance.(ii) Burning testViscose rayon burns with a yellow flame leaving behind ash. It also resembles cotton.(iii) View under the microscopeWhen observed under the microscope, viscose rayon appears like wavy lines of glass. (iv) Solubility testViscose rayon dissolves in caustic soda, hot sulphuric acid and hydrochloric acid.
Characteristics of viscose rayon
• It is reasonably strong.• It is absorbent and hence takes up dyes well.• It is fairly crease resistant.• Viscose is moth-proof and fairly resistant to mildew stains compared to cotton.• Yellows and rots when exposed to light for a long time.• It is weaker when wet than when it is dry. It should therefore be handled with care when being laundered.
Care for viscose rayon
• Viscose is a strong fibre. It can therefore be laundered by use of a washing machine or by hand.• It is resistant to alkalis. It is therefore not damaged by detergents.Acetate rayon
Acetate rayon is made by treating cotton linters with chemicals.
Practical ways of identifying acetate rayon
The facts
Activity 3.10
Your teacher will give you a sample of acetate rayon. Do the following1. Touch the acetate rayon fabric between you fingers. How does it feel?2. Burn the sample of acetate rayon fabric . What happens? Is there any smell produced?3. View the sample of acetate rayon fabric using a microscope. Draw what you can see.4. Put the acetate rayon fabric in acetone but it does not dissolve. What happens?(i) Appearance and handle– Acetate is smooth and soft to handle.– It is lustrous in appearance.(ii) Burning testBurns like viscose rayon.(iii) View under the microscopeWhen observed under the microscope, acetate rayon appears like a rounded structure-less fibre. (iv) Solubility testAcetate rayon swells in acetone but it does not dissolve. It dissolves in methylated chloride.
Characteristics of acetate rayon
• It is lustrous and hence it gets to have a rich appearance.• It has a good drape.• It is soft to handle.• It can be treated to become water repellent.• It is weaker when wet than when dry.• It is resistant to moth attack and mildew. This makes its storage easy.• It cannot withstand high heat. It is therefore best for permanent pleating.• It is less absorbent than viscose rayon. It hence dries very easily.• Acetate rayon is resistant to shrinking, creasing and stretching.• It is easily damaged by strong alkalis – they weaken its luster.• It develops and holds static electricity. It hence cannot be used for making under garments.• It is soluble in acetone as it is one of its components.Care for acetate rayon
What should we do to ensure that acetate rayon lasts for long?1. Use mild detergents when washing to avoid weakening it.2. Fabric softeners should be used when rinsing water to control development of static electricity.3. Avoid subjecting it to acetone.Activity 3.11Collect various pieces of fabrics, get a microsope, sulphuric acid, hydrochloric acid, acetone and methylated chloride. Carry out these tests on the pieces of fabric:a) Microscopic testb) Solubility testc) Burning testd) Touch testFrom the tests above, group the fabrics based on the type of material they are made of. Discuss your results with other class members. 1. Discuss the characteristics of natural fibres.2. Explain why wool is not commonly used in making school uniforms.3. Explain why polyester is a popular fibre in the cloth making industry.4. Discuss the properties of polyester which differentiates it from nylon and cotton.5. What are the advantages of blending various fibres together?6. Which fabrics would be most appropriate for making curtains of a house?My environment, my life!Some fabrics, especially the artificial ones, are non-biodegradable. They should therefore be disposed of properly. Let us protect our environment in order to have it tomorrow.Remember the facts!• A fibre is a long thin hair-like substance which is spun into yarns. Yarns are then used for making fabrics.• Textile fibres are classified as either natural or artificial.• Natural fibres are obtained from animal and plant parts. They include silk, wool and cellulosic or plant fibres.• Artificial fibres are mostly synthetic. They are usually regenerated in factories. Examples include viscose rayon and acetate rayon.• Synthetic fibres include polyester and nylon.• Fibres can be identified by burning, using the solubility test, observing under the microscope, by touching and also by observing the appearance.
Test your competence 3
1. Explain the best fabric we should choose for making the following articles. Give reasons for your choice.a) An apron _________________ d) Curtains _____________________b) An offi cial shirt ____________ e) Chair back cover ______________c) Bed sheets ________________ f) Medical theatre clothes _________2. Fill the gaps in the following sentences.a) Cotton, linen, wool and silk are ______ fibres.b) Viscose and acetate rayon are _____ fibres.c) Nylon, polyester and acrylic are ______ fibres.3. Which fabrics are most suitable for making baby clothes?4. Why is a blanket mostly used when extinguishing fire?5. Give the advantages of synthetic fibres over natural fibres.6. Find and circle six types of fabrics from the grid below. 7. Write True or False.a) Silk is smooth and shinny than cotton. _______________b) Viscose rayon is more absorbent than nylon. _______________c) Water forms stains on silk which are diffi cult to remove. _______________d) Wool is warmer than acrylics. _______________e) Polyester is warmer than nylon. _______________f) Acetate rayon dissolves in acetone. _______________8. Your sister wants to do tie and dye. Which materials would you recommend to her for use?9. A Senior 2 student had kept his pair of shorts in the wardrobe for two months without wearing it. When the time came for him to wear it, he found it with strange white markings.a) What were the white markings?b) What fabric was the short made of?10. Match the fabrics with their correct characteristics using a line.
 11. Which fabrics are negatively affected by bleaching?12. Which one of the following fabrics is not easily affected by burning?A. CottonB. LinenC. WoolD. Nylon13. State the effect of each of the following activities on the fabrica) Prolonged exposure of wool to the sun. _______________b) Acetone pouring on acetate rayon. _______________c) Prolonged rubbing of nylon. _______________d) Storing linen when dump. _______________e) Prolonged exposure of viscose rayon to the sun. _______________14. Which one of the following is not a characteristic of silk fibre?A. It is warm.B. It is highly lustrous.C. Easily gets water-mark stains.D. Dissolves in acetone.15. Which one of the following is not a characteristic of nylon?A. Highly absorbent.B. Appears fuzzy on the surface.C. It is strong.D. It shrinks badly.16. Choose the Odd one out.A. Nylon, polyester, acrylic.B. Cotton, wool, silk.C. Viscose rayon, acetate rayon linen.D. Cotton, nylon, wool.17. State the disadvantages of synthetic fibres.18. Collect a vaiety of old pieces of clothes. Perform various tests on them to establish which ones they are. Come up with a table on the various fabrics and their identities. Which tests did you use? How did you make your conclusion?
Glossary
Abrasive: This is a term that refers to a substance that can grind or polish a hard or metallic surface by scrubbing. It is often associated with having a rough surface.Chiffon: This is a fine almost transparent fabric in plain weave of silk, wool or artificial fibres.Crepe: This term refers to light weight fabric in plain weave. It can be silk, viscose acetate, cotton, wool or polyester.Damask: This is a firm-textured fabric with a raised pattern.Denim: This term refers to a twill-woven fabric from cotton or cotton blends mainly used to make jeans.Flannel: This term refers to an all-wollen fabric made from either wooven or twisted yarns.Flannelette: A soft cloth in plain or twill weave usually made from cotton.Gingham: This is a light-weight to medium-weight fabric woven in plain weave. It may be cotton or linen.Jinja: This is plain woven cotton fabric in light-weight and medium-weight. The name originated from Jinja town in Uganda where the fabric was first produced.Lawn: Lawn refers to fine, light and crisp fabric in plain weave usually from cotton or linen. Organza: It is a thin transparent stiff fabric of cotton, viscose or silk.Sateen: This is cotton fabric or spun yarns from artificially produced fabrics with fl oats running on weft.Satin: This is silk or rayon fabric with a smooth glossy finish.Taffeta: This is a crisp, plain woven lustrious fabric of either silk or rayon fabric.Velvet: This is a cotton, silk or nylon fabric with a soft thick pile and a plain under side.Unit 4: Seams
Key unit competency
To be able to explain and make different types of seams.
Learning objectives
After studying this topic, I should be able to:
• Explain types and functions of seams.
• Classify seaming techniques.
• Make and repair clothes using appropriate seaming techniques.
Introduction
In the previous unit, you learnt about the various fabrics that are used in clothes making. Observe the pictures in Fig. 4.1 below.

Can you identify the fabrics? Say what has been done to each fabric? Are they different? How? Why are they important? Answers to the above questions should give you an idea of what you will learn in this topic.
Note: When dealing with seams, some abbreviations are commonly used. They include:
•WS – refers to wrong side of a garment.
•RS – refers to the right side of a garment.
•FL – refers to fitting line.
•LS – refers to left side of a garment.
Money matters!
Manufacture of clothing can be a good source of income. Reasonable investments in the industry can lead to major economic developments in our country.
4.1 Types and functions of seams
The clothes we wear have been made from separate pieces of fabric joined together. The point where these pieces of fabric are joining together at is what makes a seam. In general, a seam is the line where two pieces of fabric are sewn together in a garment or any other article. There are many purposes for different types of seams beyond simply holding two pieces of garment together. For example, seams can be used for fashion and decoration, as well as function and finishing. Some fabrics require special types of seams to help with handling. Some patterns as well require certain sewing seam types for their construction and fit.The method of seaming used determines the appearance of the garment.
Activity 4.1: Research Activity
Go to the library and find out from textbooks the various types of seams. What are their functions? You can as well find out about these from the internet. Write a report and share with the rest of your class members.
The facts
The most common types of seams are:
•Open-neated seam
•French seam
•Overlaid seam
•Machine-fell seam (also knwn as double-stitched seam)
(a) Open seam
This is also known as the basic seam. It is the most commonly used type of seam in sewing.
When a seam is stitched only once and the raw edges are pressed apart, it is called an open seam. This type of seam is mostly used in medium and heavy weight materials where a fl at finish is desired. Examples are the seams of skirts, or the under-arm and shoulder joinings of woolen dresses.

Working an open neatend seam
• Place together the two pieces to be joined with right sides facing each other, match the fitting lines and raw edges.
• Pin and tack along the stitching line.
• Remove the pins and machine along the fitting line.
• Remove tacking and finish off threads.
• Trim the seam allowance to about 1cm and neaten the raw edges using edge stitching.
• Press open.
Note: We can do finishing to open-neated seams in various ways as shown below.

(b) French seams
French seams have the edges doubled in, hence no raw edges show. These types of seams are usually used on lightweight fabrics because they are strong but inconspicuous. They are narrow and completely encase the raw edges of your fabric. On top of this, French seams add a very professional looking touch to your garment. They are mostly used on blouses, infants’ clothes and lingerie.

Working a french seam
• Place together the two pieces with the wrong sides facing each other and the right sides outside.
• Tack matching raw edges and fitting lines 6 mm above the fitting line.
• Machine along the tacking, finish off threads ends and remove tacking.
• Trim turning to 3 mm and press open.
• Turn the work to wrong side and knife-edge.
• With the right sides together, pin and tuck along the fitting lines, enclosing raw edges completely.
• Remove pins and stitch along the tacking.
• Remove tacking and press the seam over towards the back of the garment.

Characteristics of a good French seam
• The width should be even.
• It should be of correct width.
• It should have a knife-edge.
(c) Overlaid seams
This is a decorative seam with the stitching only visible on the right side. Braids, frills and loops may be stitched between the layers of material to give a decorative effect. It is particularly useful on yokes, bands and other garments with difficult shapes.

Working an overlaid seam
• Take two pieces of fabrics and mark the top part as overlay and the other part as underlay
.• Take the overlay and fold it on the stitching line to the wrong side and press.
• Place the overlay on the underlay matching the stitching line, tack in place.
• Machine stitch close to the fold through the three layers of fabric.
• Remove the tacking and press fl at.
• Remove the tacking.
• Turn on the wrong side and trim the edges to reduce bulk.
• Neaten the raw edges by use of lop stitches or overcasting stitches.
• Press the seam flat.

(d) Machine-fell seams (double-stitched seam)
Machine-fell seams are commonly referred to as fl at-felled seams. These usually appear on the outside of a garment. It usually appears as a pair of stitch lines on the right side of the garment, while on the wrong side, it looks clean and tidy without raw seam edges. Such seams are commonly used on jeans (denim wear) and men’s dress shirts.

Working a machine-fell seam
• Place the two pieces of material or fabric together with the W.S facing and fitting lines matching.
• Pin and tack along the fitting line.
• Remove pins and machine stitch along the fitting line.
• Remove tacking and press the seam open.
• Trim the front side to 1.5 cm and the back seam allowance to 0.5 cm.
• Make a small turning on the front seam allowance of about 0.2 cm. Fold it over the back seam allowance.
• Pin, tack and remove the pins in position and machine stitch 0.1 cm from the fold.
• Iron the seam.

Activity 4.2
Try identifying the above seams on the sample of clothes you have in your class. Consult with your teacher or other learners in case you have a problem.
4.2 Techniques of seams
Activity 4.3
1. Visit a nearby tailoring shop or a clothing Export Processing zone. Find out:
• The equipment being used for making the different types of garments.
• The types of seams being used for the different types of garments.
• How the seams are being made.
2. You can practice making the seams with guidance of the tailor.
The facts
Seams are made using the sewing machine. Look at the diagram below. Can you recall what it is?

Name the various parts of the machine. Come up with a table on the parts and their uses.
Though seams can basically be classified as conspicuous/exposed (for example, double stitched (machine fell) and overlaid) or non-conspicuous/enclosed (French and open) various seaming techniques can be used to make the seams. They include:
• Straight seaming - they are worked on a straight line as commonly used in side seam or underarm seams.
• Corner seaming - some shaped pieces or household articles take the shape of a right angle necessitating the working of corner seams.
• Curved seaming - they are worked on curved edges such as the neckline or other shaped pieces with convex on concave edges.
• Princess seaming - these are variations of darts useful for seaming fitted garment made of shaped pieces.
(a) Straight seams
A straight seam is seam that is in straight line. Steps to follow when making straight seams include:
Step 1
• Lay two pieces of fabric to be joined with the right sides together. Align the edges you would like to sew. Push out all the wrinkles and smooth the fabric fl a t .
• Starting at one end of the seam, match the corners and pin them together.

Step 2
Work your way down the edge to be sewn pining the two pieces of fabric together.
Note: The closer the pins are, the more stable the fabric will be. However, you will have to stop to remove each pin as you sew. If you’re just getting started, use a pin every inch or two of fabric.

Step 3
• Make sure the settings on your sewing machine are set to sew a straight stitch.
• Slide the corner of your fabric into the sewing machine, directly under the hole in the presser foot.
• Align the edge of your fabric with the edge of the presser foot.
Note: This will act as a guide while you sew. It will help you keep your seam straight. In this case, it will leave a quarter-inch seam allowance. You can use a different guide if you would like to.
.• Lower the presser foot using the presser foot lever.
Step 4
• Engage your backstitch function.
Note:Backstitch functions vary widely between machines and can come in the form of buttons, levers, and knobs. See your sewing machine manual for instructions on your backstitch function.
• Depress the pedal slowly. This will start the sewing machine sewing backwards.
• Sew two or three stitches backwards.
• Release the pedal.
• Release your backstitch function.

Step 5
• Depress the pedal and sew slowly forward, guiding the fabric with your hands as you go.
Note: When guiding the fabric through a sewing machine, you should not be pushing or pulling. The machine will feed the fabric in at the right speed. Your job is merely to guide the fabric so the seam remains straight.
• Keep the fabric aligned to the edge of the presser foot as you sew.
• Stop before you reach each pin. Pull the pins out, being careful not to misalign the fabric.

Step 6
• When you come to the end of your seam, engage the backstitch function.
• Sew two or three stitches backwards.
• Release the backstitch function and sew forward off the fabric.
• Turn the balance wheel until the needle is up.
Step 7
Lift the presser foot up.
Step 8
• Pull the fabric out of the sewing machine.
Note: The threads are still attached to the sewing machine, so be careful not to pull too far or tangle the threads.
• Clip the threads as close to the fabric as possible.
• Turn your seam right side out and admire your work.
Activity 4.4
Practice doing the straight seam as described above using the sewing machine.
(b) Corner seams
This type of seam technique helps to ensure that the corners of garments and various articles are stable, strong and neat. To make a corner seam follow these steps:
Step 1
Have the two pieces of fabric to be joined. Have their right sides facing up.

Step 2
Pin the right sides of the pieces together. The top edges should not meet: You should have about twice the seam allowance length overlapping the corner of the larger piece.

Step 3
Stitch until the apex point (i.e. where the seam allowances meet) using short stitches.

Step 4
Carefully, clip the seam allowance up to the stitching line (snip into just the bottom layer; the one with the angle in).

Step 5
Pin the other sides together. You can see how it looks from both sides. Pivot the angle at the apex point so the edges meet and pin.Stitch the other side until you reach the apex. Make sure not to stitch over the fabric “fold”; the two lines of stitches will meet at the corner.

Step 6
Press the seams to the outside. Here is the right side.

If you see a little plucker here, you can clip carefully a little bit closer to the stitches from the wrong side.
Activity 4.5
Practice doing the corner seams on pieces of clothes that your teacher will provide you.
(c) Curved seams
1. Draw the seam line you intend to seam on your fabric before sewing. Pin the fabric to be seamed together to prevent movement.
2. When sewing, focus on the area directly in front of your needle.
3. Shorten the stitch length. This is especially important when doing sharp curves.
4. When sewing convex curves onto concave ones, reduce the seam allowance before sewing.


Activity 4.6
Practice doing the curved seams as described above using different fabrics.
(d) Princess seams
Princess seams add a touch of elegance to any garment. They create graceful vertical lines that elongate the body. Princess seams are a variation of darts that are manipulated to make a fitted garment using shaped seams. Princess seams can be used in the bodice, skirt or a combination of both. Below is an example of how bodice parts can be made into a princess seam. We shall use a ‘C’ cup for the front part of a bodice.

1. Stay stitch all the seam allowances.
2. Pin your pattern pieces together up to the notches. Be sure to mark or cut your pattern notches – they are absolutely necessary to get the proper ease and shaping on a princess seam. Leave the pattern unpinned between the notches for now.

3. Cut snips in the seam allowance of the center bodice seam just between the notches to allow the fabric to lay fl at around the curve.
Note: Do not cut into your seam line.

4. Finish pinning your pattern pieces together between the notches. This part of the side bodice will now lay fl at because of the snips.

5. Stitch your seams together.
6. Press your seam allowance fl at with an iron.
7. Press your finished bodice open. You can use tailor’s ham to maintain the curved shape.

Activity 4.7
Using the procedures above, practice sewing princess seams on different clothes.
4.3 Choice of seams
Discussion corner
Talk to your friends about what you should consider when choosing seams. Write a report and present to the rest of the class.The facts
The type of seam chosen for a given garment is determined by a number of factors. These factors are discussed below.a) Type of fabricThis refers to whether the fabric is heavy or light. Heavy fabrics tend to be bulky and therefore the seam chosen should not make them more bulky. The suitable seam for such fabrics is the open-neatened seam.b) Use of the garmentDaily wears or clothes which are frequently used are subjected to a lot of washing. These therefore need to be very hard wearing to withstand this constant washing. The seams which are suitable for such fabrics are the French seam and machine-fell seam as they are very strong.c) Position of the seam on the garmentAn overlaid seam is commonly used for fixing yokes in front of garments. They cannot however be used for joining the side seams of such garments. Therefore, some seams are more suitable in some positions than others.d) Style of the garmentIf the garments have yokes, an overlaid seam is best for fixing such yokes.e) The desired effectSome seams are both functional and decorative while others are only functional. The conspicuous seams tend to be decorative on the right side. They are therefore used if they are required to add a feature to the garment, to make them more appealing.Discussion corner
From the knowledge of seams that you have acquired as at now, what do you think are some of the characteristics of a good seam?Characteristics of a good seam
1. It should be of correct size.2. It should have an even width.3. It should be neatly stitched.4. It should be well-pressed and fl at.5. It should be strongly stitched for durability.Remember the facts!
• A seam is a method of joining two pieces of fabrics together.• Seams can either be conspicuous or inconspicuous.• The common types of seams are open-neatened seam, machine-fell seam, overlaid seam and French seam. Others include seams on corners and curved edges.• The factors which determine the choice of a seam include, type of garment, position of the seam, type of fabric, use of the fabric and the style of the garment.• A well-made seam should be fl at, of correct size and, neatly and firmly done.Test your competence 4
1. What is a seam?2. Suggest the type of seam you would use on the following garments:a) A jeans trouser. ___________b) A dress made from a light weight fabric. ___________c) A knitted sweater. ______________d) A simple bag for carrying school books. ___________3. Identify these seams. Where are they best used in a piece of cloth?: 4. Name and describe the types of seams on the clothes you are wearing.5. What is the difference between a French seam and a princess seam?6. Write down the steps you will follow when making a straight seam.7. Why must a seam be well pressed and fl at?8. Which of the following seams is not conspicuous?A. French seamB. Machine-fell seamC. Overlaid seamD. Basic seam9. Write True or False to answer the following:a) Open-neated seam is stronger than French seam. ______b) French seam is the most suitable seam to use on fraying fabrics. ______c) Machine-fell seam is inconspicuous. ______d) Machine-fell seam is the best to use on woolen garment. ______10. Write down what letters w, x, y and z represent in the following diagrams.
 11. Match the following characteristics with the correct seam.
 12. What would you advise a friend who does not want to pursue tailoring because he is a man?13. What would you consider when choosing a seam?14. Plan and execute a dress making project. In your plan you should include:a) What you will require (resources)b) Timelines to do various activitiesc) A budget for the projectd) Precautions to takee) How you plan to minimise wastage
Glossary
Conspicous seams: These are seams that can easily be seen on the right side of the work.Crotcheting: The art of making a piece of needle work by looping thread with a hooked needle.Edge stitch: This is the art of making a narrow turning and machine close to the folded edge when neatening raw edges.Fabric: This term refers to a piece of cloth made from yarn or fibres by weaving, knitting or felling.Fitting line: This is the line where final stitching is done. It is the same as seam-line. It is usually 1.5 cm from the cutting line.Fray: This term refers to exposed threads that come off a cut raw edge of a piece of cloth.Garment: This is any article made of clothing, for example a shirt or skirt.Inconspicous seams: These are seams that cannot be seen on the right side of the work except in the joining line.Neaten: This term refers to finishing or completing the raw edges of seams so that threads do not show at the cut edges.Overlay: An overlay is the part of garment that comes on top when making an overlaid seam.R.S: This is an abbreviation for the right side of work.Raw edges: This refers to the cut edges of a fabric.Seam allowance: This is a term that refers to the area between the cutting line and the fitting line. It is usually about 1.5 cm in diameter.Seam line: It is also known as stitching line. It is the line where the final stitching is done.Seam: This is a term that refers to a method of joining two or more pieces of fabrics together.Stitching: This refers to a way of arranging threads together during knitting, sewing or crotcheting.Trim: To trim is to reduce size of seam allowance by cutting it.Underlay: This is the opposite of overlay. It is the part that lies below the overlay when making an overlaid seam.W.S: This is an abbreviation for the wrong side of the fabric.Unit 5: Food safety techniques
Key Unit Competency
To be able to understand and apply health and safety procedures in the handling and preparation of food in compliance with Hazard Analysis Critical Control Point (HACCP).
Learning objectives
After studying this topic, I should be able to:
• Categorise food safety procedures according to Hazard Analysis Critical Control Point (HACCP).
• Comply with food safety procedures according to Hazard Analysis Critical Control Point (HACCP).
• Embrace the food safety procedures and contribute to the society.
Introduction
In the previous class, you learnt about preservation of Agricultural products. Look at the pictures below with a friend.

What food preservation methods are shown in the pictures? How do they relate to food safety?
5.1 Hazard Analysis and Critical Control Point (HACCP)
All foods contain some amount of moisture and enzymes which if not controlled, can cause the food to get spoilt and become unfit for human consumption. In this topic, you will learn about food safety procedures to HACCP principles.
Activity 5.1: Research activity
Find out from textbooks in the library or the internet what HACCP is and its importance in the society. Write short notes and present your findings to the rest of the class.
The facts
HACCP or Hazard Analysis and Critical Control Point is a management system in which food safety is addressed through the analysis and control of a number of factors. These factors can be biological, chemical or physical hazards that could arise right from the production stage, procurement and handling, manufacturing, distribution and consumption of the fi nished products. The HACCP system is meant to assess and control hazards in the food production process. This helps to provide a preventive and cost-effective approach to food safety. HACCP puts emphasis on the following seven principles.
1. Analysis of hazards - To identify any hazardous biological, chemical or physical property in raw materials and during the processing steps. Likelihood of their occurrence and potential to render food unsafe for consumption are also assessed.
2. Determining the critical control points – This is done in the food manufacturing process to ensure food safety hazards are prevented, eliminated or reduced to an acceptable level.
3. Establishing limits for critical control points – This provides the criterion which separates acceptability from unacceptability. Examples of limits for critical control point are based on time, temperature, humidity, water activity and pH value. These limits should be measurable.
4. Establishing monitoring procedures for critical control points – This is the planned sequence of observations done to assess whether a critical control point is under control or not. Such procedures help to produce an accurate record for future use. Monitoring can provide a warning in case there is a trend towards loss of control. With this, appropriate action can be taken to bring the process back to safety.
5. Establishing corrective actions – These are actions taken when the results of monitoring at the critical control point indicate that the limits have been exceeded.
6. Establishing verification procedures – This involves application of methods, procedures, tests and other evaluations, in addition to monitoring, to determine compliance with the HACCP plan. Examples of verifi cation procedures are the calibration of process monitoring instruments at specifi ed intervals, direct observation of monitoring activities and various corrective actions.
7. Establishing a record system - Accurate and complete HACCP records are very helpful for documentation of an establishment’s compliance with the HACCP plan. A good record system has the following benefits:
• Tracing the history of an ingredient.
• In-process operations of a fi nished product.
• When a problem arose.
• Identifying trends in a particular operation that could result in deviation of the HACCP plan.
• Identifying and narrowing a product recall.

Give a summary of why adherence to the HACCP plan is important to participants in the food processing and manufacturing industry.
5.2 Food safety procedures
These are the things that we should do in order to ensure food safety. They include:
• Cooking food to proper temperatures
• Refrigerating food to below 4° C.
• Paying close attention to ‘use by’ and expiry dates.
• Appropriate handling and disposal of garbage.
(a) Use of food thermometer in ensuring food safety
Examples of food thermometers used in ensuring food safety include:
• Thermocouple • Thermistor
• Oven cord • Thermometer-fork combination
• Liquid-fi lled thermometer • Candy/Jelly/Deep fry thermometer
• Refrigeration/Freezer thermometer
The table below shows these thermometric instruments and how they are used.
Table 5.1: Thermometers, their speed of taking readings, placement levels and usage considerations.


Temperature requirements for proper cooking of various foods
Activity 5.2: Research activity
Find out the correct temperatures of cooking various foods. Come up with a table like this.

Share your findings with other group members. Were your findings the same?
The facts
• Use a thermometer to make sure meat and poultry are cooked to safe temperatures.
• Cook shellfish until the shell opens and the flesh is fully cooked; cook fish until flesh is opaque and flakes easily with a fork.
• Heat hot dogs and lunch meats to steaming hot or 75°C before serving to those who are pregnant, immune compromised, very young or elderly.
• Use a thermometer to make sure leftovers are reheated to 75°C.
• Cook eggs until both the yolk and white are firm.
• Use a thermometer to make sure foods containing eggs are cooked to 70°C.
• For safety and quality, allow meat to rest for at least three minutes before serving or consuming.
Table 5.2: Recommended internal temperatures for cooking various foods

Note: These temperatures are recommended for consumer cooking. They are not intended for processing, institutions or foodservice preparation. Food service professionals should consult their state or local food code.
Activity 5.3
Practice using the various kinds of thermometers you have learnt about when cooking food in the Home Science room.
Care for food thermometers
• Wash carefully by hand in hot soapy water. Most thermometers are not supposed to be immersed in water.
• Use with caution as some models have plastic faces, which can melt if placed too close to heat or dropped in hot liquid.
• Thermometer probes are sharp and should be stored with the probe in the stem sheath.

• Some glass thermometers are sensitive to rough handling and should be stored in their packaging for extra protection or in a location where they will not be jostled.
Calibrating a thermometer
To calibrate an instrument means determining, checking or rectifying its graduations to make it more accurate when measuring. How can we calibrate a thermometer? Calibrating a thermometer is done by use of ice and boiling water.
• Most food thermometers have a calibration nut under the dial that can be adjusted. Check package for instructions.
• To use the ice:
– Fill a large glass with finely crushed ice.
– Add clean tap water to the top of the ice and stir well.
– Immerse the food thermometer stem a minimum of 2 inches into the mixture, touching neither the sides nor the bottom

– Mark the level of the liquid inside the thermometer.
• To use the boiling water:
– Heat the water in a container until it boils.
– Immerse the stem of a food thermometer into boiling water a minimum of 2 inches and wait for at least 30 seconds. Mark the level of the liquid in the thermometer.

– Divide the space between the two markings above into 99 equal parts. This gives the scale of the thermometer.
Activity 5.4
Practice calibrating a liquid-filled thermometer using:
(a) ice
(b) boiling water as described above.
(b) Requirements for food refrigeration
Low temperatures can be used to retard the action of enzymes and stop growth of micro-organisms thus keeping foods fresh for long.

What factors should we consider when refrigerating or freezing foods:
• Deep freezing should be done under very hygienic conditions with no risks of contamination.
• Keep foods at safe temperatures; cold and other perishable foods should be kept at or below 4°C.
• Use appropriate packaging materials (plastic bags, aluminum foil sheets, plastic boxes with lids and clad wrap paper). The packaging materials should be clean as well.
• The packaging should be the size of one meal to avoid re-freezing thawed foods. As soon as food is thawed, enzymes and micro-organisms become more effective than before.
• The foods should be lightly wrapped or packed to keep away the surrounding air. Oxidation alters the colour, flavour, texture and nutritive value of foods.
• Fill food containers up to the top but leave some room for liquid foods as they expand during freezing.
• Vegetables should be cleaned, prepared as for table use then blanched before freezing.

Note: Blanched and cooked foods should be cooled before freezing.
• Food packages should be frozen in the middle part of the freezer at 18°C to 68°F within 12 to 24 hours; low and fast freezing enables the cold to reach the central part in the food package leaving no patches in which micro-organisms and bacteria remain active.
• Do not prepare food too far in advance of serving without plans for proper cooling and reheating.
• Refrigerate food in shallow containers within 2 hours of preparation.
• Use a thermometer to make sure the refrigerator temperature is between 2 °C and 4° C.
• Thaw perishable foods in microwave oven, or under cold running water.
(c) ‘Use-by’ dates and expiry dates
Manufacturers of foods usually provide information on ‘use-by’ dates and expiry dates to ensure that consumers receive their products when they are still of good quality.
Activity 5.5
1. Look at the pictures below with a friend. Have you ever seen such images before? Where did you see them?

2. Try to interpret the information in the pictures. Seek guidance from your teacher where necessary.
The facts
The shelf life of a product refers to how long foods can be good past the coded date. Many canned and boxed products may still be safe to eat after the code date. The shelf life of refrigerated and frozen foods can be extended if they are handled properly. Freezing may keep foods safe, however the quality slowly deteriorates over time.
• Expiration date – This indicates the date when the food expires and this may appear as ‘Expires on 18/5/16’ or ‘Do not use after 18/5/16’. Though yeast and baking powder may still be safe to use after their expiry dates, they may not be as effective.
• Pack date – ‘Packed on 15/2/16’, indicates the date the food was packaged. Some companies may use this such as 001 to mean the food was packaged on 1stJanuary or 365 for 31st December.
• ‘Sell by’ date – This is also called the “pull date”. Shopping outlets should sell their products before code date listed to ensure peak quality, especially of foods such as milk, yoghurt, cheese, eggs, meats and packaged salads.

Note: ‘Sell by’ date does NOT necessarily mean that the food is expired.
• ‘Use by’ or quality date – For example, ‘Use before 5/5/16’ is the manufacturers recommendation on how long the food will be at peak quality. After such dates, the foods begin to slowly deteriorate losing its fl avour, colour and nutritive value.
• Shelf stable foods (condiments, canned foods and dry goods) – these can be stored at room temperature before opening; once opened they deteriorate fast.
• Shelf stable beverages (juices, sodas, water and other drinks) – are stored at room temperature until opening.
Foods purchased frozen or refrigerated should be kept in that form until used. Prepared foods, such as salads, are generally perishable and care should be taken to note how long the best date can be extended safely.
Remember!
Care should be taken not to consume foods or beverages from containers, bottles, cans or boxes that show the following signs:
• Leaking, cracked or stained.
• Swollen or rusty.
• Badly dented, crimped or pinched.
• Foul odour or strange change in colour.
• Broken or missing safety seals.
• Loose or missing lids.

1. Why is it necessary to ensure correct temperatures of foods while they are being cooked?
2. A student bought a packet of milk and found it leaking. What would you advise her to do and why?
3. Which thermometer would be the most convenient for checking the temperature of roasting meat? Give reasons for your answer(s).
4. Give examples of businesses or industries that you think need to consider the HACCP plan in their daily operations.
Quality check!
Whenever you come across packaged foods that look suspicious, you should either return them to the vendor or discard them appropriately.
5.3 Appropriate handling and disposal of garbage
With today’s fast growing population and rapid industrialisation, creation of waste material is a common phenomenon. Proper disposal of such material helps to keep the environment green and free from any disease-causing pathogens.The method of disposal depends on the type of waste.
Discussion corner
In groups, talk about the various methods of disposing different kinds of wastes. Why is that method used and not the others?The facts
The two forms of waste are:• Organic wastes • Inorganic wastesOrganic waste is derived from living matter. It therefore has the ability to decay. It normally results in unpleasant smell and is unsightly too. Inorganic waste is of mineral origin and does not decay. Open dumping of any kind of waste causes foul smell, breeds diseases such as diarrhoea, dysentery, skin and eye irritations, and spoils the public image of that place. Waste disposal is therefore a serious concern and as such, we need to be aware of the proper ways of waste management. Examples are given below.(i) Recycling/ Reuse
Recycling is a very popular method of managing inorganic wastes. The waste materials are treated and made into other usable items thus saving money as well as reducing pollution. Papers, glass, aluminum and plastics can be recycled to reduce the volume of waste material. Dirty water, or sewage, can also be purified and treated then channelled back into the water system. On the other hand, some materials such as plastic bottles and polythene bags can be re-used. Always remember the 3Rs-Reduce, Recyle, Reuse.
(ii) Composting
This is a natural process that is completely free of any hazardous by-products. It involves breaking down of organic waste materials into organic compounds that can be used as manure. This can easily be carried out in our own backyards. Leaves, grass, twigs, vegetables, fruit peels and kitchen wastes can be decomposed into manure. Manure is rich in nutrients and is used to improve soil fertility. Note: The pit should be dug away from the main house to control flies that are usually attracted by rotting material. A shade can be placed over the pit. This will help to prevent loss of nutrients through evaporation.
(iii) Sanitary landfills
These are engineered facilities designed with protective measures to save the environment from pollution. Waste management through the use of landfills involves burying wastes on large scale in a large area. The place is dug open and filled with the waste. The area is then later covered up with soil. Landfills are not safe because they give off gases like methane, which are highly hazardous. You should not carry out waste management through landfills if you cannot ensure proper safety measures. The landfill should be properly lined and the waste should not come into contact with the adjoining areas. It is a common practice for disposing inorganic refuse such as broken bottles, glasses and cups. The waste should be buried deep enough.
Qualities of a good landfill
Discussion corner
1. Find out about qualities of a good landfill.2. Why should it have those qualities?3. Write down your report and present to your classmates.The facts
A proper landfill must have the following features:• It must have a liner at the base and sides to prevent spread of toxic liquids (leachate) or landfill gas into the environment.• Have a leachate collection and treatment facility to restrict contamination of soil and water.• Have a landfill gas collection facility to avoid explosions. The gas produced can also be used for energy generation.• Have a fenced buffer zone and green belt around the facility to reduce odour and serve as a visual barrier.• A final cover system at the top at closure of landfill to prevent infiltration of water.• Safety provisions and basic amenities such as roads, lighting, water supply, protective gear, toilets and so on.(iv) Burning the waste material
In cases where it is not possible to recycle or no proper places for setting up landfills,the waste can be managed by burning. Controlled burning of waste at high temperatures to produce steam and ash is called incineration. It is done in an incinerator (Fig. 5.12). Combustion reduces the volume of waste to be disposed significantly. Moreover, solid waste can provide for a continuously available and alternative source for generating energy through combustion. This energy can be channelled into useful purposes.My environment, my life!Burning of wastes causes air pollution. Therefore use of this method to dispose wastes should not be encouraged!
 1. Name the two types of garbage or wastes. What is the difference between them?2. Distinguish between:(a) Recycling and re-use.(b) A landfill and a compost.3. What factors should you consider when disposing garbage?4. A good landfill should _______ (Give five points).Remember the facts!•Hazard Analysis and Critical Control Point (HACCP) is a management system in which food safety is addressed through the analysis and control of a number of factors.•The factors that HACCP aims to control are biological, chemical and physical hazards that could arise right from the production stage, procurement and handling, to manufacturing, distribution and consumption of the finished product.•HACCP puts emphasis on the following seven principles:- Analysis of hazards.- Determining the critical control points.- Establishing monitoring procedures for critical control points.- Establishing limits for critical control points.- Establishing corrective actions.- Establishing verification procedures.- Establishing a record system.•There are many types of food thermometers used to ensure food safety. They include:- Thermocouple- Thermistor- Oven cord thermometer- Thermometer fork combination- Liquid-filled thermometer- Candy/ Jelly/Deep fry thermometer- Refrigerator/ freezer thermometer•It is necessary to ensure correct food temperatures so that any pathogens that may be present in the food are killed.• Low temperatures can be used to retard the action of enzymes and stop growth of micro-organisms thus keeping foods from deterioration.• Manufacturers of foods usually provide information on use-by dates and expiry dates to ensure that consumers receive their products when they are still of good quality.• There are two forms of wastes:- Organic wastes- Inorganic wastes•When recycling, waste materials are treated and made into other usable items thus saving money as well as reducing pollution.•Re-using means using something again for a different purpose.•Composting involves breaking down of organic waste materials into organic compounds that can be used as manure.•Sanitary landfills are engineered facilities designed with protective measures to save the environment from pollution.•Large-scale burning of refuse can be safely done in incinerators.
Test your competence 5
1. Why is food safety important in Rwanda?2. Describe four methods used to dispose of waste.3. Explain the term “Doneness” as used in food preparation.4. For each HACCP principle below, write what it entails. 5. Practice calibrating a liquid-filled thermometer.6. Explain the reasons behind the following practices when freezing foods:a) Blanching vegetables before freezing.b) Filling solid foods to the top but leaving some room for liquid foods during freezing.7. Take some food of your choice and store it safely in the refrigerator for one week. Monitor the food during this period to ensure it is safe.8. Describe three different thermometers that are commonly used in food industry.9. Which one of the following food thermometers cannot be used on very thin foods?A. Thermistor C. ThermocoupleB. Liquid-fi lled thermome D. Thermometer fork combination10. Practise taking good care of a kitchen thermometer at home.11. Why is it important to keep a good record system for the HACCP procedures and results?12. Interpret the information given in the labels below.
 13. Assuming you are the CEO of a food processing firm. Explain how you will ensure the food products from your company are safe for human consumption.
Glossary
Calibration: To calibrate is to set or check the graduation of an instrument for example a thermometer.Expiry date: This is a date on the food packets that indicates when the food expires.Food thermometer: Thermometer used to measure the internal temperature of food in the kitchen.Garbage: This term refers to any matter that is no longer wanted or needed. It is another name for waste or refuse.Incinerator: This refers to an enclosed chamber where heat is used to burn harmful types of waste.Landfill: This is a site where solid wastes are disposed of or buried. It is also known as dampsite.HACCP: Abbreviation for Hazard Analysis and Critical Control Point.Hazard: The word hazard refers to risk or danger or a chance of getting harmed.Pack date: This is a date on the food packets that indicates when the food was packaged.Pull date: These are dates when shopping outlets should sell their goods especially the ones that go bad easily.Quality date: This refers to the period when food is in good quality.Recycling: This is the technique of converting waste materials into usable items.Re-use: When we re-use something, we use it for a different purpose.Refrigeration/freezer thermometer: Thermometer used to test the temperature of refrigerators and freezers.Candy/Jelly/Deep fry thermometer: Thermometer used to measure temperatures when cooking food in an oven.Shelf stable foods: These are foods which are stored at room temperatures but will remain fresh as long as they are not opened. Once opened, they deteroriate very fast, for example, canned foods.Thermistor: This is a type of food thermometer used as a resistor to measure temperature. It can test tempratures upto ½ inches and takes about 10 seconds.Thermocouple: Thermometer used to test the temperature in liquids or beverages during food preparation without cutting into the surface of food.Thermometer fork combination: This is a type of food thermometer that combines both fork and thermometer. It is used to measure temperature of solid foods.Unit 6: Food nutrients utility and meal plans
Key Unit Competency
To be able to select and prepare foods that best suit different life stages based upon nutritive value.
Learning objectives
After studying this topic, I should be able to:
• Categorise the food nutrients utility according to life stages.
• Balance food nutrients’ utility according to life stages.
• Explain meal plan principles.
• Apply meal plan principles on basic menu format and construction.
Introduction
What foods do you see in the picture below? Suggest meals that can be prepared from the raw foods shown. At what time should each of the meals be served?

The meals should be served to people of different age groups. Why? What does this tell you about what you will learn in this unit?
6.1 Food nutrients utility and life stages
The foods that we eat should best suit different people at varied life stages and with particular health issues. This should be guided by the nutrient value. Various nutrients play different roles in the development of our bodies. It is therefore important that we carefully plan our meals putting into consideration all these factors.
Discussion corner
1. If you happened to have a sick person in your house:
a) What kinds of food would you give them and why?
b) Which ones would you avoid giving them and why?
2. Why is it important to plan family meals?
We should plan the family meals for the following reasons: To
• ensure the meals meet nutritional needs of all family members.
• ensure the amounts are adequate for the family members.
• make sure that meals are within the family budget.
• help provide variety in the diet.
• ensure that meals are served attractively and in good time.
The facts
Though everyone needs a balanced diet, the quality and quantity of food may vary considerably when catering for special groups. The special groups of people include:
• expectant/lactating mothers • infants
• the elderly • invalids
• convalescents • adolescents
Meals for different people at home
Though everyone needs a balanced diet, the quality and quantity of food may vary considerably when catering for special groups.
Activity 6.1
Your teacher will invite a nutritionist to talk to you about meals for different categories of people. Write down short notes and seek answers to questions such as why they need that kind of food and not any other. Share your work with other class members.
(a) Meals for infants
Activity 6.2
Use the food pyramid in figure 6.3 to come up with a list of foods for:
(a) breakfast (b) lunch (c) supper for infants
The facts
The following should be considered when preparing meals for infants:
• Breast milk remains the best food for infants. This milk is complete with all the nutrients apart from iron. It also contains colostrum which boosts the baby’s immunity.
• After 4 months, the baby is usually weaned (gradual introduction of solid foods into the baby’s diet). The foods should be rich in body-buildings (for the rapid growth spurt) and protective foods. The foods should be soft and served in small quantities.

• By 2 years, when the teeth have developed, change the baby’s diet from milk to a diet similar to that of adults but slightly softer. In addition, provide crispy foods like carrots or toast to promote good development of the teeth.
• Serve well balanced, attractive meals at regular intervals through the day.
• Avoid threatening, forcing or bribing the child to eat. It may lead to psychological problems and dislike for food.

• Serve children when they are neither too tired nor too hungry. This is to prevent babies from having poor feeding habits.
(b) Meals for young children
Activity 6.3
Use the food pyramid in Fig. 6.5 to come up with a list of foods for:
(a) breakfast (b) lunch (c) supper for young children
The following factors should be considered when preparing meals for kids:
• The meals must be balanced: They should provide sufficient proteins (for rapid growth), enough energy-giving foods (to take care of their active stage of development), calcium and phosphorus (for healthy growth of bones and teeth), iron (to guard against anaemia), sufficient fruits, vegetables and water (to provide roughage and guard against constipation and also to act as a source of vitamins.
• Provide for variety: The food should be varied in terms of colour, texture and flavour. Make a good blend between crispy (carrots, salads, fruits) and hard foods to exercise the jaws and keep the teeth strong. If not varied, the monotony tires the child making them lose interest in food.

• Individual requirements - Consider the child’s body size, activity, health status, likes and dislikes.
• Soft and easy to digest - Children will enjoy their meals if what is served does not give them difficulty in chewing or digesting (e.g. use of minced beef/fi sh/mashed potatoes etc).
• Plan fornutritious drinks and juices - These will help to replace the body water lost during exercise as children tend to be very active.

Guiding rules when preparing and serving meals to children include:
1.Seasoning, flavouring and sweetening should be carefully done as children may not enjoy the food if it is excessively seasoned.
2. Present food as attractively as possible - Proper use of shape (star cutting or wheels for pastry) and colour (colouring milk puddings) makes the food more palatable for the child. This can be artistically done by: use of candles made from ½ bananas set upright in jelly, small cakes iced as parcels, traffic lights on biscuits among others.

3. Serve foods in small quantities as this will be found more appealing than large portions of food. Too much food served discourages the child from eating.
4. Serve meals punctually and regularly. Set and maintain the child’s meal times and avoid snacks in between to allow satisfactory digestion of one meal before another is given. Use fresh fruit or milk if a snack is to be given in between the meals. Don’t keep the child waiting for the meal, they soon get bored and disinterested in the food.
5. The foods should be in portions of manageable sizes. Foods such as meat should be mouthful-sized or better still minced, serve fish fillet instead of fish with bones, etc.
c) Meals for teenagers
Activity 6.4
Use the food pyramid in figure 6.8 below to come up with a list of foods for
a) breakfast (b) lunch (c) supper for teenagers.
The facts
This is a stage characterized by rapid growth spurt and very active body. There is therefore need for foods to meet the requirements of the body. In addition to rapid growth and high energy demand, teenagers undergo many physical changes that relate to body development. The following points are essential when planning meals for teenagers:

• Meals should be balanced - Provide sufficient proteins, vitamins and minerals such as iron. Girls require additional iron to replace haemoglobin lost during menstruation. Proteins and calcium are highly recommended for body building. There is also high energy demand on the body because teenagers are very active.
• Satiety value - The meals must be adequate. Adolescents have fairly big appetites. Provide sufficient amounts of food as per the body’s requirements.
• Provide plenty of fresh fruit drinks, soups and beverages to replace body water lost during sports and other physical exercises.
• Though there is need for increased energy foods, fats and oils must be controlled to guard against obesity and other skin complications (acne, blackheads, pimples) caused by excess oil.


1. Which are your favorite meals?
2. Describe how you like them served.
(d) Meals for expectant and lactating (nursing) mothers
Activity 6.5
Use the food pyramid in figure 6.10 below to come up with a list of foods for:
(a) breakfast (b) lunch (c) supper for (i) expectant and (ii) lactating mothers

The meals of expectant/lactating mothers must be balanced to include:
• Sufficient proteins to cater for increased maternal tissue and growth of the foetus- use foods of high biological value (meat, milk, eggs, cheese and other animal products).
• Calcium and phosphorus and vitamin D are essential for the development of the skeletal framework of the foetus and to ensure healthy bones and teeth of the mother.
• Provide iron in adequate amounts for the child to store their own iron stores to last them for the first six months of life and to guard against anaemia during delivery. Include foods such as red meat, liver, egg yolk; fruits, juices and salads to provide vitamin C which promotes absorption of iron; avoid excessive intake of strong tea as it interferes with the absorption of iron. Where necessary, iron supplements can be prescribed by the doctor.
• Provide iodine for proper functioning of the thyroid gland and guard against goiter; use of iodized salt is also recommended.
• Provide protective foods (vitamins and minerals) to nourish the foetus, ensure good health status for the mother and boost milk production for lactating mothers.
• Give plenty of fruits and vegetables to provide roughage and guard against constipation which may be common during pregnancy. Lactating mothers require proper intake of fluids - at least 2 litres daily to increase volume of breast milk.

(e) Meals for elderly (60 years and above)
Activity 6.6
Use the food pyramid in figure 6.12 below to come up with a list of foods for:
(a) breakfast (b) lunch (c) supper for elderly people.
At this stage, the body has undergone physiological changes which may affect the intake of nutrients. The most notable changes include:
(i) Decreased acidity of the gastric juices - this may impair digestion therefore need for easy-to-digest foods.
(ii) Low metabolic rate - this necessitates intake of less energy-giving foods.
(ii) Decreased absorption rate and a less active digestive system - this calls for light foods.
(iv) Loss of teeth - the foods planned for must therefore be soft and easy to chew.
(v) General body weakness - for example, the bones become weaker, the tissues generally wear out; hence there is need to increase the levels of proteins, calcium and phosphorus.
(vi) Poor sense of taste - consider their likes and dislikes.
Based on the above; the following must be considered when preparing meals for the elderly:
•Meals must be balanced with all nutrients in right proportions.
•Serve soft foods that can be easily digested. Soups with a vegetable base and mildly flavoured stews are cheap and quick to prepare. Fruit juices and whole fruit such as pawpaw and bananas would make a good choice.
•Meat should be minced or shredded into finer pieces. Tender cuts of meat well-cooked make a good source of protein foods.

Other sources of proteins include legumes which can be served as sauces (groundnut or soya bean sauce served with plantains or mashed potatoes).
Fairness is my other name!
Let us get into the practice of visiting homes of elderly people to support them and to give them a sense of joy and hope.
6.2 Principles for meal planning
What factors should we consider while planning for meals?
Activity 6.7
1. Go through Table 6.1 with your friends. Compare the various RDAs for the different groups. For each nutrient, comment on the amounts for:
a) Boys and girls
b) The old and the young
c) Pregnant/lactating mothers and normal mothers.
Table 6.1: Recommended dietary allowances (RDAs) for common nutrients

2. What can you say about RDAs in infants?
3. Justify the energy requirement for the different categories of people.
Points to consider when planning meals
Discussion corner
1. How many meals do you eat in a day?
2. Specify the kinds of meals you eat. Why?
3. At what time of the day do you eat these meals?
• Nutritive balance - The foods should provide all the nutrients from all the five food groups in their correct proportions as required by the body. The meal must have at least a protein, a carbohydrate, a vegetable and a fruit. As a rule, always strive to serve balanced meals containing all nutrients as much as possible. The body does not store protective foods. They must therefore be supplied on daily basis. For proteins, if they are eaten without carbohydrates, they will be used to provide energy at the expense of building new cells and repairing worn out tissues.

• Individual requirements - Although we all need a balanced diet, the proportions of foods may vary from one person to another as determined by age, occupation, state of health, sex and body size. A healthful diet requires that a person does not exceed the acceptable daily intake (ADI) or recommended dietary allowances (RDA). Table 6.1 shows the recommended dietary allowed for various groups of people.
• Foods in season - This especially applies to fruits and vegetables. They tend to be easily available, cheaper and fresh when in season than out of season fresh. Foods give the best of their nutritive value than when they are less fresh.
• Availability of money to buy the food - The cost may vary as determined by type and quality of food. When planning meals, try to keep within the financial budget so as not to upset other family needs. Food budgets can also be kept low by buying foods in season as they are cheaper, rearing of animals for meat and milk, having a kitchen garden and proper use of left-over foods.
• Climate or time of the year - More warm foods are required during cold weather to meet the increased demand for energy to keep the body warm. It is wise to serve hot foods during the cold weather and cold foods when it is hot.
• Availability of time to prepare the foods - This determines the type of food to be included on the menu. Convenience foods take a shorter time to prepare therefore quite handy when time is a limiting factor. Some foods such as steamed pudding take a good deal of time therefore not appropriate when one has a short time to prepare the food.
• Occasions - these may include funerals, birthdays, graduations, anniversaries, weddings among others. They require great variety in choice and style of presentation as many different people are catered for.

• Knowledge or skills of the cook - Plan for what you can best prepare to ensure satisfactory results. Keep in mind too, conservation of nutrients during cooking for example, vegetables are best steamed or sautéed instead of boiling.
• Variety - Ensure variety in terms of colour, texture and flavour to guard against monotony of unattractive meals that may be less palatable.
• Satiety value - Ensure the quantity of food planned for is sufficient for all members partaking of the meal. Total amount served will vary as determined by one’s age, sex, occupation, body size and state of health.
• Facilities or fuel availability - these determine the foods chosen since the method of cooking will depend on fuel or facilities available. For example, baking would only be appropriate where there is an oven.
Types of meals
Which types of meals do you know? List them down. Give examples of foods that can be eaten under each category.
The facts
The three common types of meals are:
• Breakfast
• Lunch
• Supper or dinner
(a) Breakfast
This is the first meal of the day. Being the first meal of the day, it must be balanced and adequate to meet the nutritional needs of the body. It should prepare one for the activities of the day. The meal should also be easy to prepare and eat.
•A continental breakfast mainly consists of tea/coffee/cocoa served alongside bread, (rolls or toasts) with marmalade or jam.
• A complete or full breakfast consists of a cereal (weetabix/cornfl akes in milk, oatmeal and porridge), cooked protein (fried/grilled sausage, bacon, fish cakes, ham, boiled/fried/scrambled/omelet egg, roasted nuts), carbohydrate (toast/bread with butter, rolls, scones), beverage (tea, cocoa, coffee), fresh fruit drink (mango, orange, pineapple) and a whole fruit (grapefruit, slice of pineapple/mango, banana etc).

(b) Lunch
This is the mid-day meal. It should be balanced providing sufficient proteins (fish/meat stew or beans), carbohydrates (plantains) and vegetables (kales and carrots). Also fruits should be served during lunch.
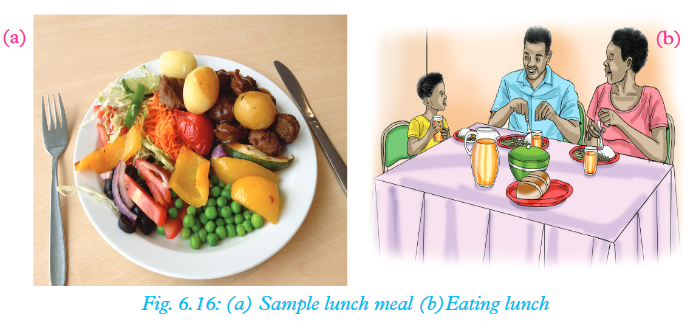
(c) Supper
This is the last meal of the day. It must be balanced, should be light and easy to digest as there is no much body activity at night. Proteins (meat balls), carbohydrates (boiled spaghetti) and vegetable can do.
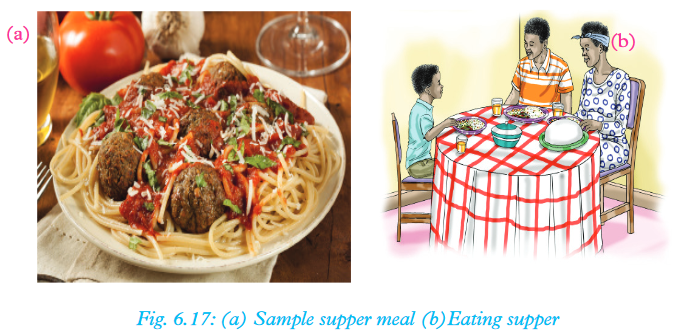
(d) Dinner
This is a heavy meal taken in the late afternoon or early evening. It is more formal and may have up to five courses including an appetiser(wine, melon),soup and an accompaniment (oxtail soup and bread rolls), maindish (protein, carbohydrate and vegetable), dessert (steamed pudding,pineapple crumble, jelly, ice-cream and fruit salad), tea/coffee with cheese or cheese biscuits.Other types of meals are:
• A luncheon - is also formal and may have up to five courses.
• Brunch is commonly served during mid-morning to cater for both breakfast and lunch.
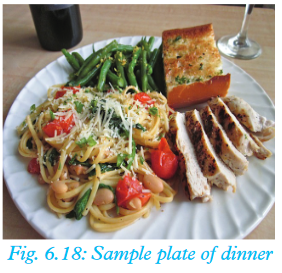
Note:Formal meals are more detailed and they can have up to six courses including:
• Appetiser (such as wine or fruit punch)
• Soup and bread rolls
• Main meal (protein, carbohydrates and a vegetable)
• Dessert or pudding
• Cheese or cheese biscuits
• Coffee

1. Which is your favorite meal of the day?
2. Give reasons for your answer.
Activity 6.8
Draft a week’s menu for a family of five (parents in their mid-40s, 2 teenage daughters and a toddler boy). Include menus for breakfast, lunch and supper
Remember the facts
• The quality and quantity of food varies considerably when catering for special groups.
• The special groups of people include expectant/lactating mothers, infants, children, the elderly, invalids, convalescents and adolescents.
• Breast milk remains the best food for infants in their fi rst months of life.
• More warm foods are required during cold weather to meet the increased demand for energy to keep the body warm.
• The three types of meals are:
– Breakfast
– Lunch
– Supper
– Other meals are that formal include dinner, luncheon and brunch.
Test your competence 6
1. What is a balanced diet?
2. When planning meals, we should consider a number of factors. What are they?
3. Which categories of people necessitate meal planning?
4. Your sister has just given birth to a baby girl. Advise her on the types of meals she should prepare for her baby.
5. Assuming your brother’s wife is pregnant. He wants to do food shopping for her. Advise him on the kinds of foods the wife currently needs.
6. What factors will determine the nutritive requirements of an individual?
7. What are the main characteristics of a meal that is supposed to be eaten as supper?
8. A Senior3 Home Science student is sick and he does not want to eat. What can he do to the food to make it comfortable to eat?
9. Describe a well-balanced breakfast meal while giving your own examples.
10. Differentiate between:
a) dinner and supper
b) brunch and luncheon
11. Plan, prepare and serve a lunch using locally available foods for your family members. Write down all the factors you considered and challenges you came across.
Glossary
ADI: This is an abbreviation for Acceptable Daily Intake. It has the same meaning as RDA.
Breakfast: This refers to the first meal of the day taken in the morning.
Brunch: This is a meal served in the mid-morning to cater for both breakfast and lunch.
Colostrum: This term refers to the thin yellowish fluid secreted by the mammary glands immediately after birth. It is rich in antibodies and often precedes production of true milk.
Convalescents: This term refers to a person who is recovering from illness
Dinner: Dinner is a meal taken in late afternoon before supper; mostly is a formal meal.Expectant mother: This is another word for pregnant mother.
Food pyramid: This is a pyramid-shaped diagram representing the optimised number of serving to be eaten each day from each of the basic food groups.
Infants: This term refers to small babies mostly between 0 month – 2 years fed on breast milk or fluids or soft foods.
Invalid: This is a term that refers to sick people in general.Lactating mother: The term lactating refers to a mother who is breastfeeding.
Lunch: This is a meal served during mid-day.
Luncheon: This is a term that refers to a formal lunch where light meal is served.
Minced: This is a term that refers to food that has been cut or is chopped into very small pieces.
RDA: This is an abbreviation for Recommended Diatery Allowance.
Supper: This is the last meal of the day often taken in the evening.
Teenager: Teenagers are boys and girls undergoing adolescence or who are at puberty.
Unit 7: Cooking methods
Key Unit Competency
To be able to identify and apply a variety of cooking methods.
Learning objectives
After studying this topic, I should be able to:
• Identify types of cooking related to boiling, frying, baking, grilling, roasting, broiling, poaching and smoking.
• Define food items best suited to the different methods of cooking.
• Describe recipe items that are used in various methods of cooking.
• Cook food using the different methods.
Introduction
Look at the following foods. Explain how each of the foods may have been prepared. Which meal will be the most enjoyable for you? Why is that the case?

What do your answers to above questions tell you about what you will learn in this unit?
Types of cooking methods
The foods we eat can be cooked in various ways. The choice of a cooking method is determined by the type of food to be cooked and the kind of results a cook intends to have.
Activity 7.1
1. Why do we cook food? Talk to your friend about this.
2. Look at the pictures below. What do you observe?

3. Which methods of cooking are they? Why were they chosen?
4. Write short notes then make a presentation to the rest of your class members.
The facts
Food in its raw state can be unsafe for consumption; unless you are eating fruits and selected vegetables. The following are some reasons why cooking food is important:
(i) To kill germs - Raw food is highly likely to contain disease-causing micro-organisms. Food should therefore be cooked to remove any germs or parasites that may be present. Foods such as meat, cereals, most vegetables and some fruits should be cleaned properly before cooking.
(ii) To improve the appearance of the food - Cooking food correctly will make it more palatable. Examples can be roasted chicken, meat and potatoes.
(iii)To improve the flavour of food.
(iv) To help make food tender - Some foods are very tough. Cooking such foods make them easy to chew by softening their fibres. An example is meat.
(v) To enable food to last longer without going bad.
Health check!
Ensure the food you eat is well-cooked. Bacteria and other disease-causing microorganisms thrive in food that has not been well-cooked.

Give other reasons for cooking other than the ones above.
Cooking methods
Before looking at the specific cooking methods and their recipes, let us look at some factors that may influence choice of a cooking method. They include:
• The life stage and health condition of the consumer of the meal.
• The available time.
• The available fuel or cooking resources.
• The available cooking equipment.
• The skill and knowledge of how to go about a cooking method.
• Type of food.
The cooking methods fall under two main categories:
1. Moist-heat methods - These involve wetting the food. Examples are boiling, poaching and frying.
2. Dry-heat methods - Here, no liquid is used for cooking the food. They include baking, grilling, roasting, broiling and smoking.
Let us now study these methods in detail.
1. Moist-heat cooking methods
The three methods under moist-heat cooking are:
a) boiling b) frying c) poaching
Note: You can boil food in both cold or warm water.
7.1 Boiling
This is cooking food while completely immersed in boiling water, that is at 100oC until it is ready. The length of time taken to boil a given food is determined by:
• The type of food being cooked.
• The person eating the food. For example, food for infants cannot be boiled at the same length of time as that for adults.
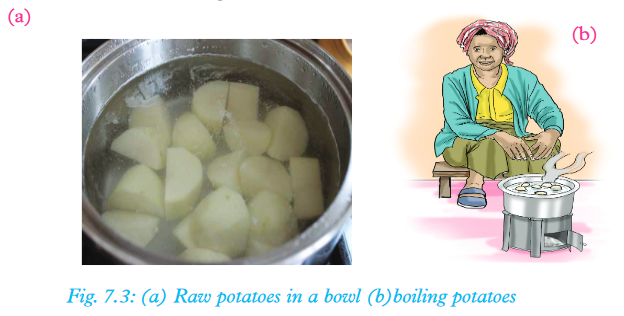
Examples of foods that can be boiled include:
- Root vegetables such as yams, sweet potatoes, cassava, Irish potatoes and carrots.
- Cereals such as maize, rice and wheat.
- Tough cuts of meat.
- Pulses such as beans and peas.
- Bananas or plantains.
General rules for boiling food
Activity 7.2
Your teacher will give you Irish potatoes to boil. Write down the steps that you followed. Compare your steps with the ones given below.
The facts The following steps are followed when boiling foods:
• Put the food in the cooking pot or pan then place in source of fire.
• Boil the food for some time.
• Ensure that you have a fitting lid to cover the pan or pot so that steam does not escape as you boil.
• After the food has boiled for some time, reduce the heat for the food to simmer. This helps to prevent the food from becoming too soft/ragged (maintains shape of food).
• Root vegetables should be cut into even sizes to allow even cooking.
• Vegetables should be boiled in just enough water. This should be done just before serving the meal so that they are served hot without reheating.
• Meat should be cut into large chunks and plunged into boiling water to seal in meat juices.
• The liquid that remains after boiling should be retained. It can be used to make stocks and soups.
Advantages of boiling food
1. The liquid used for boiling some foods can be used to prepare stocks, sauces and gravies for serving food.
2. It is a simple method that requires little attention during the cooking period.
3. It is a convenient cooking method when modern cooking equipment is not available.
4. Several foods can be boiled at the same time.
Disadvantage of boiling foods
1. Boiled foods rarely have pleasant tastes. They therefore need to be well-seasoned to be tasty.
2. Food may be damaged in form in case of over-boiling.
3. Many nutrients of the food are lost during boiling especially if the liquid used is discarded.
4. The colour of boiled foods will usually not be very inviting unless it is enhanced.
Based on the above, would you opt to boil or not to boil food? Why?
Activity 7.3
You will boil meat at home in this activity. Collect all the items that you need. Practice boiling the meat. Think of ways of improving the taste of your meat. Serve the cooked meat to your family members. What did they say the meat tasted like?
7.2 Frying
Frying is cooking food in hot fat or oil in a pan. There are three methods of frying:
• Dry-fat frying
• Shallow-fat frying
• Deep-fat frying
(i) Dry-fat frying
In this method, no oil or fat is added to the food. Food is cooked in its own fat in a shallow pan. It is used for cooking pan cakes, bacon, cuts of pork and very fatty beef.
(ii) Shallow-fat frying
This is cooking food in a frying pan into which very little fat is added. It is a suitable method for cooking eggs, thin slices of meat, fish, poultry joints and pancakes.

(iii) Deep-fat frying
Here, food is cooked by immersing it completely in hot oil. The oil should completely cover the food. A deep-fat fryer or a strong deep pan, a frying basket and a draining spoon are required for the process. It is a suitable method for cooking potato chips, meat chicken and some products from fl our mixtures.

General rules for frying foods
Activity 7.4
Come up with a recipe for frying eggs. This must include the ingredients and procedure. Write these down and use them to fry eggs. What steps did you use?
The facts
• The food should be prepared correctly. For example, pan-fried fish or meat must be cut to ensure thorough cooking. The cuts should not be more than 2.5 cm thick.
• Good quality fat should be used for frying. The fat should have a high smoking point to prevent the oil from burning when heated.
• Use a strong pan for frying so that the fat is not overheated.
• For deep-fat frying, fill two-thirds way up of the pan with oil to avoid overflowing which might cause fire outbreak.
• Heat the fat to the right temperature before cooling food. This prevents the food from absorbing fat and becoming too greasy and soggy. If the fat is too hot, it will burn the outside of the food and leave the inside undercooked. It should be tested with a small piece of food to be prepared. If the piece cooks within five seconds, then the fat is ready.
• Coat all foods to be deep-fried unless it is starchy, for example, potatoes and doughnuts. Batter or beaten eggs and breadcrumbs can be used for coating. Other foods to be fried should be thoroughly dry; an example is potato chips.
7.3 Poaching
Poaching is a type of moist-heat cooking technique that involves cooking by submerging foodstuff in liquid such as water or milk. It is differentiated from the other “moist heat” cooking methods, such as boiling in that as opposed to boiling, it uses relatively low temperatures (about 70–82 °C). The steps however remain the same. This temperature range makes it particularly suitable for cooking delicate foods such as eggs, poultry and fish which might easily fall apart or dry out when cooked using other methods.

It is often considered a healthy method of cooking because it does not use fat to cook or flavour the food.
Advantages of poaching
• Poaching prevents delicate foods from breaking during cooking.
• Poached foods are easy to digest.
Disadvantages of poaching
• Poached foods are not as tasty. This is because very little seasoning is done.
• It is only limited to cooking certain types of foods.
• Poached foods have an inferior colour unless enhanced.
2. Dry-heat cooking methods
As mentioned earlier, no liquid is involved here. The methods include:• baking• grilling• roasting• broiling• smoking7.4 Baking
Activity 7.5:Making a yeast bread
Ingredients• 500 g plain or ½ plain and ½ whole meal fl our.• 1 level teaspoon salt.• 20 g fresh yeast• 300 ml water or milk or a mixture of both.• 1 level teaspoon sugar.• 50 g margarine(optional)• OilMethod1. Mix the fl our, salt and yeast in a large bowl.2. Make a well at the center, add the oil and water. Mix well. If the dough seems a little stiff, add 1-2 table spoonfuls of water.3. Tip the dough onto a lightly floured work surface and knead it until the dough becomes satin-smooth.4. Place it in a lightly oiled bowl to proof. Leave to proof for 1 hour until doubled in size or place in the fridge overnight.5. Knock back the dough, then gently mold it into a ball. Place it on a baking tray lined with grease-proof paper to proof for a further one hour until doubled in size.6. Dust the loaf with fl our and cut across, about 6 cm wide, into the top of the loaf.Note:Baking temperatures should be maintained at 230°C. Reduce the temperature to 200°C after 5 minutes.7. Place the bread in greased loaf tin.8.Bake until golden brown and the loaf sounds hollow when tapped underneath.9.Test for readiness, remove from oven and turn on the cooling tray.10.Leave to cool and use as desired.The facts
Baking is a method of cooking whereby the food is kept in an enclosed space with high temperatures or in an oven. It is a dry method of cooking. Scones, biscuits, cakes and bread are the most common foods cooked by baking. However, others such as potatoes, plantains and some fruits can also be baked.General rules for baking
Discussion corner
Talk to your friends about the general rules to observe when baking. Why are these rules important?The facts
Some rules to follow when baking include:• Pre-heat the oven to the right temperature before putting the food in the oven.• Ensure that the food is well positioned.Note: The top part of the oven is always the hottest. Hot air rises. So, be careful when handling it!• Observe the baking time for the item being baked to ensure proper cooking.• Do not open the oven door before the fl our mixture sets to avoid letting in cool air which will make the mixture sink in the middle.• Avoid banging the oven door during the baking process as this may let in cold air.• Test baked foods for readiness using a skewer for fl our mixtures before removing them from the oven.• Turn baked foods on a cooling tray or rack to cool as necessary, unless the foods are to be served in the dishes in which they were baked.
Advantages of baking foods
1. It does not require a lot of attention if the temperature is set well.2. Baked foods are light and easy to digest hence can be used by the sick and young children.3. Baking saves on fuel since several dishes can be cooked at the same time in the oven.Disadvantages of baking foods
1. It is limiting since it is only suitable for certain dishes.2. It requires expensive equipment.Recipe for baking cake
Activity 7.6
Practice baking cake using the ingredients below at home with guidance of your parents. Serve the baked cakes to your family members. Find out from them whether they liked the cakes. If not, why? See where to improve.Ingredients• Self-rising fl our – 200g• Granulated sugar – 100g• Margarine – 100g• A pinch of salt• Milk/liquid – 200ml• 1 eggMethod1. Sieve all the dry ingredients in a bowl together.2. Add margarine and rub the fat into the dry ingredients until it appears like fine bread crumbs.3. Make a well in the middle and break the egg in a saucer and drop it in the mixture.4. Add the milk slowly by slowly and stir the mixture gently following the same direction to trap in air.5. Stir until the right consistency is attained.6. Pre-heat the oven to 180°C.7. Grease the baking tin and dredge it with fl our.8. Pour the mixture gently without breaking into the tin. Level the mixture and bake it in the middle part of the oven for about 40 minutes.9. Test the cake for readiness by putting a skewer or a knitting needle through it. If the needle comes out with some mixture, then the cake is not cooked yet. If it comes out clean, then it is cooked.10. Turn the cake on a wire mesh and allow it to cool.11. Serve as desired.7.5 Grilling
Activity 7.7
You will grill meat in this Activity.Ingredients• Steak meat• Salt• Absorbent papers or kitchen towel• Grill• Knife• Chopping boardProcedure1. Dry or pat the meat. This entails removing moisture from the meat using absorbent papers or kitchen towel.2. Season with salt and pepper before grilling.3. Place the meat on the grill and give it time to grill undisturbed.4. Once the meat has browned and all water is released, turn it round to allow even cooking.5. Remove the meat from the grill, allow it time to cool for about 10 minutes then slice or chop it and serve. Grilling is cooking by radiant heat from a metal grid or grill heated by gas or electricity. Suitable foods for grilling are meat, sausages, bacon, fillet, tender loin, chicken, pork among others.
7.6 Roasting
Activity 7.8
You will roast chicken in this activity.Ingredients• Chicken meat• Salt and pepper• Oven• Butter• Onions and carrotsProcedure1. Rinse the chicken to remove left over feathers or excess fat. Pat the outside dry. Add salt and pepper.2. Brush the outside of the chicken with butter then again, sprinkle salt and pepper.3. Preheat the oven to 220ºC.4. Cut the onions and carrots and place them on the roasting pan.5. Spread melted butter around the bottom of the roasting pan then place the chicken on top.6. Allow the chicken to roast in the oven for one and half hours or until the juices run clear when you cut between thigh and leg.7. Remove the pan from the oven and place its contents in an aluminium foil and cover. Let it stay for 20 minutes.8. Slice the chicken and serve together with the vegetable platter. Roasting is a process of cooking food over direct fire such as glowing charcoal. It is suitable for cooking meat, maize, sweet potatoes, yam, arrow roots and fish.Another way of roasting is cooking food in a heated oven or while it is rotating on a spit. In both cases, fat is used to baste the foods. Basting is applying hot oil on food being roasted in order to prevent it from drying. It is a suitable method for cooking meat or chicken.
General rules for roasting foods
What precautions would you take when roasting food?• The joints to be roasted should be seasoned properly before putting in the roasting pan.• The food to be roasted should be of good quality. For example the cuts of meat should not be too tough.• If oven roasting, the oven should be pre-heated to the correct temperature before putting the food.• If using charcoal, the burner must be red-hot before putting the food so as to quickly brown the top and seal the juices. It also ensures that food is free from smoke and preserves the nutrients.• Frequent basting or turning of food is necessary to keep it moist and ensure even cooking.• If pot-roasted, the juices from meat or chicken should be used for making gravy and soups.• Avoid pricking the surface of the meat to avoid the juices from running out as this makes the food to dry.
Advantages of roasting foods
1. Roasted food is easy to digest.2. Roasting is a very quick method of cooking.3. Roasted food is tasty, especially meat.4. Roasted food is also appealing to the eye.Disadvantages of roasting foods
1. Roasting is expensive because it requires high quality foods which are costly to buy.2. It requires constant attention when cooking because it can easily dry up or burn.3. The food being roasted must be basted and turned constantly to prevent it from burning and getting over-dried.7.7 Broiling
Activity 7.9
You will broil fish fillets in this activity.Ingredients• Cooking oil• Fish fillets• Salt and pepper•Onions, carrots and tomatoes• Broiler• Mustard sauceProcedures1. Pre-heat the broiler2. Cut onions, carrots and tomatoes and place them on the broiling pan.3. Add cooking oil and pre-cook for about 5 minutes.4. Arrange the fish fillets on the broiling pan and sprinkle salt and pepper.5. Broil for 2 minutes. Put the mustard sauce over the fillets, then continue broiling until the fillets are just cooked or have turned golden brown.6. Transfer the fillets to plates and serve.The facts
Broiling is cooking food using the direct, dry heat from an oven broiler. The cooking is done by exposing food to direct radiant heat either on a grill, over live coal or below a gas burner or electric coil.The temperatures used for broiling are higher compared to those used for roasting. The broil indicator of a household range is typically set around 288° C. Fish, fowl and most red meats are suitable for broiling. Steaks, popularly broiled over coal can also be broiled in the oven set on a seasoned wooden plank.
Advantages of broiling
• It is a quick method of cooking.• It is a simple method.• The food has a caramelised taste and fl avour.Disadvantages of broiling
• The food is left dry.• It requires a lot of attention.7.8 Smoking
Have you ever eaten smoked fish? How about smoked meat or chicken? How is the smoking done?The facts
Smoking is the process of flavouring, cooking or preserving food by exposing it to smoke from burning or smoldering material; for example, wood. Meat and fish are the most commonly smoked foods; though cheeses, vegetables and ingredients used to make beverages such as beer and tea can also be smoked. Health check!Avoid foods with too much fat. This can cause obesity which can bring about Cardiovascular Heart Diseases (CHD). Eat Healthy. Live healthy!Remember the facts!• Cooking methods include boiling, frying, baking, grilling, roasting, broiling, poaching and smoking.• Cooking food properly is important because:- Germs are killed.- Appearance of food is improved.- The flavour of food is improved.- Food is made more tender.- Food is able to last longer without going bad.• Cooking methods fall under two main categories:- Moist -heat methods- Dry -heat methods• Moist-heat methods of cooking include boiling, poaching and frying.• Dry-heat methods of cooking include baking, grilling, roasting, broiling and smoking.• The methods of cooking are chosen according to the time available, type of food, the skill and knowledge of the cook and the facilities available.
Test your competence 7
1. Explain how cooking can be used to improve one’s life in general.2. What factors must be considered when selecting cooking methods?3. What cooking methods would be more appropriate for baby food? Explain.4. Use True or False to answer the following questions.(a) Boiled food is crunchy and has a good appearance. ______(b) Frying is moist method of cookung. _______(c) Fried foods are easy to digest. ______(d) Baking preserves the nutrients in the food. ______(e) Grilling is the best method for cooking food for the sick. ______(f) Broiling and roasting are one and the same thing. ______(g) Baked foods are easy to digest. ______5. You want to bake a cake. Explain the rules you must follow when baking the cake.6. (a) Why would a poached egg be healthier than a fried egg?(b) Why is roasting a popular cooking method compared to most others?7. Which one is the ODD one out?(a) Poaching, Frying, Baking. _______(b) Grilling, Broiling, Baking. _______(c) Poaching, Frying, Boiling. _______(d) Baking, Roasting, Grilling. ______8. Why must pan-fried fish and meat be cut into pieces when being cooked?9. Fill in the gaps in the sentences that follow.(a) Cooking food in hot fat is called ____________.(b) Cooking food in enclosed radiant heat is called ____________.(c) Moist-heat methods of cooking are _______, _______ and _______.(d) Dry-heat methods of cooking are _______, _______, _______.10. (a) What foods must be baked only?(b) Why do you think baking is the only appropriate way of cooking the foods above?11. Your friend wants to start a bakery. What equipment must she have in her bakery?12. Complete the following sentences.(a) Grilling method of cooking is closely related to _____ and _____ methods.(b) Poaching, ____ and ____ are the best methods for cooking food for the sick.(c) Baking, _____, _____, _____, and _____ methods make the food to have a good appearance, tasty and crunchy.(d) _____ method is the best method for cooking tough cuts of meat.13. Match the following characteristic with the correct cooking method using a line. 14. Develop a recipe for and cook the following foods for the categories of people given.(a) Mashed potatoes for infants.(b) Meat for the elderly.(c) Chicken for a pregnant mother.Which methods did you use? Why?
Glossary
Baking:This is a method of cooking where food is enclosed in a container with radiant heat from an oven.Broiling:This refers to cooking food over high grilling heat. Foods such as meat, fish and chickenare best cooked using this method.Coating: This is applying or spreading a layer of food over the main food to cover its surface.Grilling: This is a method of cooking where radiant heat from a metal grid or a grill heated by gas or electricity is used.Oven: In cookery, an oven refers to an enclosed heating compartment or a grill heated by gas or electricity where food is either baked, roasted or grilled.Poaching:This is a culinary technique that involves cooking something in a liquid with a temperature ranging from 60ºC –80ºC.Roasting: This is a cooking method that uses dry heat whereby the food is enveloped in hot air cooking it evenly on all sides with temperatures exceeding 150ºC either from an open fire, oven or any other heat source.Recipe: This refers to a set of directions with a list of ingredients used to prepare a particular type of food.Unit 8: Bread making techniques
Key Unit Competency
To be able to bake a variety of breads.
Learning objectives
After studying this topic, I should be able to:
• Distinguish between various types of bread.
• Describe the steps in bread making.
• Apply techniques used in making breads appropriately.
Introduction
At what time of the day do you eat bread? Have you ever visited a bakery? Do you know how bread is baked in a bakery?
Look at the picture above. What do you think is happening in the picture?
8.1 Types of bread
Bread is a popular food in many countries in Africa. It is mostly taken during breakfast. Apart from the bread that we normally buy at the shop, there are many other types of breads. These breads are made at bakeries. However, we can also learn how to make bread in our own households.
Discussion corner
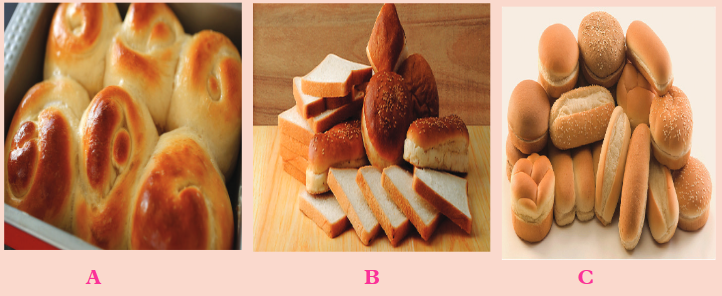 Have you ever seen these breads? What type of bread is your favourite? How are they made? Can you make such a bread at home?
The facts
Bread is a staple food prepared from a dough of fl our and water, usually by baking. Throughout recorded history, it has been popular around the world and is one of the oldest artificial foods having been of importance since the dawn of agriculture.There are many combinations and proportions of types of fl our and other ingredients, and also of different traditional recipes and modes of preparation of bread. As a result, there are wide varieties of types, shapes, sizes and textures of breads in various regions. Also, bread may be leavened by many different processes ranging from the use of naturally occurring microbes (for example, yeast) to high-pressure artificial aeration methods during preparation or baking. However, some products are left unleavened, either for preference, or for traditional or religious reasons. Many non-cereal ingredients may be included as well, ranging from fruits and nuts to various fats. Commercial bread in particular commonly contains additives, some of them non-nutritional, to improve flavour, texture, colour, shelf life, or ease of manufacturing. Further, bread can be simple or complex.• Simple bread - is made using basic bread making ingredients and techniques. The basic ingredients include flour and yeast.• Complex bread - this in addition to basic ingredients, has other ingredients like additives, flavours and non-cereal ingredients such as nuts, etc.Either way, the process of making bread is quite rigorous. Apart from just the ingredients and methods of cooking, there are various other factors that need to be considered when making bread.8.2 Steps of bread making
Activity 8.1: Research Activity
Go to the library. Find out from textbooks the factors to consider when making bread. What ingredients do you need and what should you do? You can also do internet search. Write down main points then share with your group members.The facts
Ingredients for making simple bread and their functions
The basic ingredients in bread making include fl our, water, yeast and salt. Others are optional such as milk, eggs, fat, sugar and ascorbic acid.(a) Flour
Bread flour or wheat fl our is recommended because it has high quality and quantity of glutein. The high quality and quantity of glutein is necessary in order to produce the best volume and characteristics of bread texture. The starch in the fl our is a source of food for the yeast.The starch gelatinises when subjected to moist heat and makes the bread rigid and crumby. Whole meal flour produces bread that is coarse in texture, darker in colour and smaller in volume. (b) WaterWater is a medium in which the ingredients are allowed to mix. Salt and sugar dissolve in the mixture through the water. Water creates the moisture required by the yeast in order to be able to grow. Water hydrates the fl our mixture as well. Water hydrates the starch during cooking and creates a medium for gelatinisation. When the water is heated, the steam acts as a raising agent.(c) YeastYeast grows and produces carbon dioxide when subjected to favourable conditions. The carbon dioxide is used as a rising agent.(d) SaltSalt adds flavour to the dough. It also has an inhibiting effect on the development of glutein in the fl our. Dough made without salt is sticky.
 (e) FatIt tenderises the bread crumb. Fat also reduces the volume of the bread and causes it to become stale faster.
 (f) SugarIt is usually an activator for the yeast. It provides food for the yeast. Too much sugar retards the action of yeast and development of glutein. Sugar improves the flavour and colour of the bread as well.(g) EggsThey give the baked product a rich flavour and a darker colour.
 It gives the bread crust a richer brown colour. Milk also brings a rich fl avour to the bread.(i) Ascorbic acidIt is used to improve the development of glutein.
Importance of balancing the bread recipe ingredients
Liquid to flourThe liquid should not be too little because it makes the fl our to be stiff. Stiff fl our does not become suffi ciently elastic. Hence, rising and expansion of the dough during cooking is limited. The resulting bread will be small and tough. Too much liquid makes the dough to be sticky and have a course open texture.YeastToo little yeast will delay the fermentation process while too much of it will produce a sour product.SaltIt should not be more that 2% of the weight of the fl our. If too much salt is used, it inhibits the action of yeast and the development of glutein. This results in a bread that is small in volume, course and with a closed texture and with a salty taste. If too little yeast is used, the bread tastes fl at and is poorly risen on the top.SugarIt should not be more than 10% of the weight of the fl our. Too much sugar draws water from the yeast cell and slows or even kills them (osmotic effect). This causes the bread to have a close texture.FatExcess fat inhibits the yeast from coming into contact with water and hence slows their action. Fat slows down hydration of the fl our causing slow development of the glutein and this causes the bread to be tough.The 12 steps of bread making
Activity 8.2: Making a simple bread
Ingredients• 500 g plain or ½ plain and ½ whole meal fl our.• 1 level teaspoon salt.• 20 g fresh yeast• 300 ml water or milk or a mixture of both.• 1 level teaspoon sugar.• 50 g margarine(optional)• OilMethod1. Mix the fl our, salt and yeast in a large bowl.2. Make a well at the center, add the oil and water. Mix well. If the dough seems a little stiff, add 1-2 table spoonfuls of water.3. Tip the dough onto a lightly floured work surface and knead it until the dough becomes satin-smooth.4. Place it in a lightly oiled bowl to proof. Leave to proof for 1 hour until doubled in size or place in the fridge overnight.5. Knock back the dough, then gently mold it into a ball. Place it on a baking tray lined with grease-proof paper to proof for a further one hour until doubled in size.6. Dust the loaf with fl our and cut across, about 6 cm wide, into the top of the loaf.Note:Baking temperatures should be maintained at 230°C (450°F). Reduce the temperature to 200°C after 5 minutes.7. Place the bread in greased loaf tin.8.Bake until golden brown and the loaf sounds hollow when tapped underneath.9.Test for readiness, remove from oven and turn on the cooling tray.10.Leave to cool and use as desired.The twelve steps followed when making bread are given below:Step 1: Scaling or measuring ingredientsThis is putting everything in place. Choose and accurately weigh ingredients and assemble equipment and other supplies.Step 2: MixingThis involves combining all ingredients into a smooth, uniform dough. It also involves kneading to ensure even distribution of the yeast throughout the dough in order to allow development of the gluten. Step 3: Primary fermentationThis is the process during which yeast acts on the sugars and starches in the dough. Cover the dough, leave it aside, either at room temperature for a quicker rise or in a cool place to slow the process down and thus give it more time to develop flavor and character. Up to about 75% of the flavour of the bread is developed at this time.
 Step 4: Punching/ foldingThis refers to deflating the dough by expelling the carbon dioxide gas produced during fermentation process. It helps to redistribute the yeast and relaxes the glutein. It also helps to equalize the temperature in the dough.
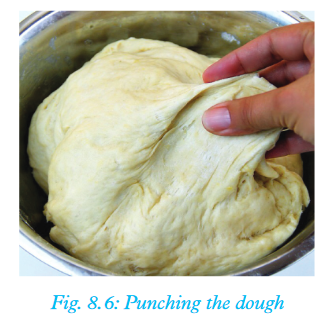 Step 5: Pre-shaping of the doughThis is dividing the dough into pieces of the same weight based on the product to be made. It helps to prepare the dough for shaping.
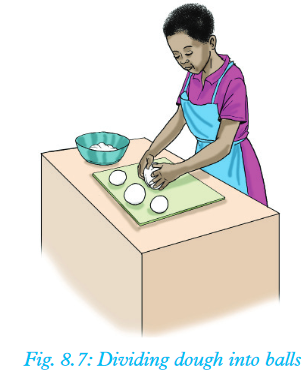 Step 6: Moulding of the doughAt this stage, dough is moulded into desired shapes, which range from smooth round balls to the shape of the bread as we know it.
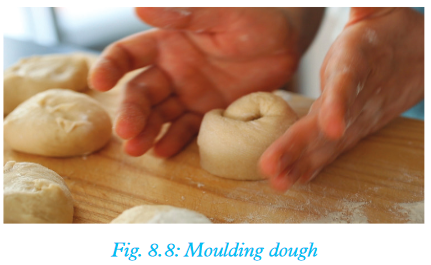 Step 7: Benching(Secondary fermentation)This is resting the dough on the table (bench) to allow the gluten to rest or the dough to continue to ferment.Step 8: ScoringThis refers to giving the bread final artistic look. You can include decorations of your liking or any other form of artistic work including inscribing names, words, etc.Step 9: ProofingThis stage ends the period of secondary fermentation. Heat and humidity are supplied to help the dough to rise and maintain a supple appearance.Step 10: BakingDuring baking, the bread is subjected to enough heat for the bread to form. At this stage, the bread is said to produce ‘oven spring’ which refers to when the gases are exposed to heat. Coagulation of proteins occurs and formation and browning of the crust occurs as well.
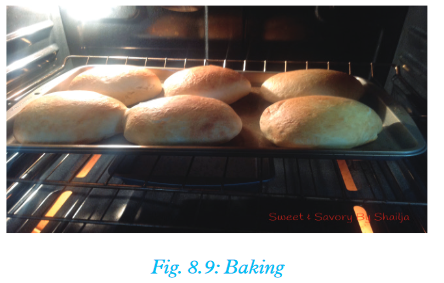 Step 11: CoolingAfter the bread has formed, it is removed from the pan or oven and allowed to cool. This should take like 30 minutes. Cooling prevents the bread from becoming soggy.
 Step 12: Storing or eatingThis involves placing the bread in an appropriate area or wrapping the bread to prevent staling or freezing. Also, the bread is ready to be eaten at this point.
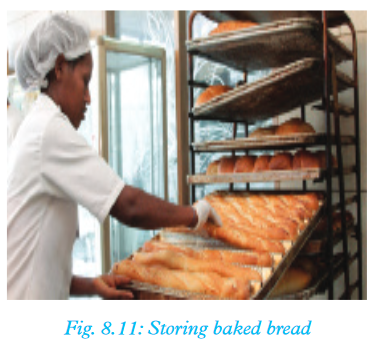
Precautions to take when making bread
The following are important factors which need to be adhered to in order to get the best results when making bread.(i) Temperature of the liquidYeast cells are sensitive to heat. They require warmth to grow. The liquid should therefore be heated to between 25-27oC. Cool temperatures retard the action of yeast. Too high temperatures kill the yeast cells. Also, salt and sugar dissolve much faster in warm liquids. (ii) Distribution of yeast cellsIf possible, yeast should be mixed with either water or milk for easy distribution into the fl our mixture. Yeast can also be distributed by compressing it by kneading the dough thoroughly. Fine yeast can be sieved together with the dry ingredients to ensure complete distribution of the cells.(iii) MixingThis is very crucial as it distributes the yeast cells. Mixing yeast with a liquid and fl our ensures proper hydration. This helps in providing a perfect medium for the yeast to grow. Hydration also ensures a good medium for the development of the glutein.(iv) KneadingThis helps in the development of high quality glutein. During kneading, air is incorporated which makes the dough to become elastic, which can hold enough gases in itself. Under-kneaded or over-kneaded dough leaks gas and makes the product to have a heavy texture.
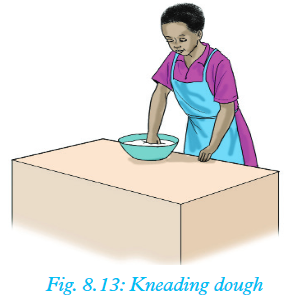 (v) FermentationThis is done by putting the dough in a bowl and leaving it to stay for sometime. The bowl should be kept in a warm place. If the temperatures are too high, this can kill the yeast cell, the dough will rise rapidly and fall back, the bread will have a sour taste. During fermentation, yeast cells grow and produce carbon dioxide and lactic and acetic acids. The carbon dioxide produced makes the dough to have foam. As the gas tries to escape, it pulls the glutein strands upwards, a condition which causes the dough to double in size. The process of fermentation should be allowed to continue until the dough doubles in size and becomes very elastic. Fermentation process gives bread its desirable taste. The process should not be overdone to avoid the dough from losing its elasticity. Inadequate fermentation causes the bread to be heavy in texture, have a fl at taste, and small in volume. The dough is also very sticky and unmanageable.
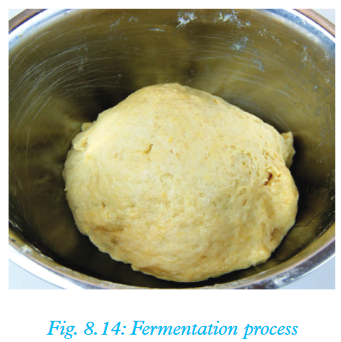
Qualities of a well baked bread
1. It should have a symmetrical shape which has the top smoothly rounded.2. The crust should have a rich brown colour.3. It should be well risen on all sides.4. It should have a light texture.5. It should be moist and not dry.6. It should have a good flavour which is not sour.Uses of bread
• Eating directly when we feel hungry.• Bread mixture is also used as a pizza base.• For making sauces – bread sauce.• Used for coating for example, bread crumbs for coating foods like fish, chicken.• Bread can be used for garnishing, for example, toasted bread can be used as a garnish.8.3 Cooking the bread
In this section, you are going to practice making various types of bread. Bread should be baked in temperatures of about 200°C. It should be cooked in high temperatures of about 230°C in the first five minutes to kill the yeast. If oven proofing is allowed to continue, the bread usually ends up with a sour taste. The flavour and aroma of the bread develop during cooking. The starch gelatinises and becomes soft and the glutein becomes hard during cooking. The bread then becomes rigid and has a definite shape. A crust forms on the surface of the bread due to loss of water. Under-cooked bread has a heavy texture and the crust does not change colour. However, if the bread is over-cooked, the crust becomes dark-brown and the bread is dry. You are now going to use the recipes given below to make the various types of bread.Basic recipe for making bread
Activity 8.3: Making a cold and closed meat and vegetable sandwich bread
Ingredients• 200g minced meat• 4 tomatoes• 1 onion• 1 tablespoon cooking oil• 2 leaves lettuce• 1 cucumber• Margarine• 200g loaf of sliced bread (or bread made in Activity 8.2 Above)• SaltMethod1. Put the meat in a saucepan and boil in little water until cooked.2. Add the oil, diced onion and salt. The meat should be dry from any soup.3. Clean the vegetables and shred the lettuce, slice the cucumber and tomatoes separately into thin slices.4. Butter the bread slices and place them on a plate.5. Spread two tablespoons of the minced meat on the bread, place a piece of the lettuce and slices of cucumber and tomatoes on top and cover with another slice.6. Serve with tea or juice.Note: The above ingredients can be used for making a hot sandwich by placing it in a sandwich maker for one minute.Complex bread
Activity 8.4: Making butter bread
Ingredients• 1 Package dry yeast + 1 teaspoonful sugar• 4½ Tablespoons sugar• 1½ Teaspoon salt• 1 Teaspoon baking powder• 4½ Cups all-purpose fl our• 1 Egg, lightly mixed• ¼ Cup butter, melted• ½ Cup fl our for dusting• 1¾ Cup warm milk (not hot)• ½ Cup warm water• 1 Teaspoon butter for brushing doughMethods1. Combine salt, baking powder and sugar, flour and mix. In small cup/bowl, combine dry yeast sugar and little warm milk, mix and let yeast activate. 2. Add lightly mixed egg, activated yeast, mix then add melted butter. (You can add dry fruit before adding wet ingredients)
 3. Pour warm milk and mix. Slowly add water and mix with wooden spoon. Then knead the dough dusting with fl our.
 4. Knead dough until you form a ball, for about 10 minutes or so. Cover and let it rise for about 45 minutes to 1 hour in warmer area. (For example, turn off oven or microwave).
 5. Dough should double in size. Knead again and grease/butter baking dish. Pre-heat oven at 400o F6. Place dough in the baking pan and let it rise to the edges of the pan. Butter the top with melted butter.
 7. Bake for about 40-45 minutes at 400o F. Bread should be golden. Let it cool down on a rack or covered with kitchen towel before slicing it.
The facts
Certain ingredients can be added to the basic recipe of simple bread to provide varieties in the product i.e (produce a complex bread). Ingredients such as sugar, fruits and nuts can be used to produce a sweet bread, nut-bread, chocolate bread and fruit-bread. The shapes of bread can also create varieties such as bread rolls, scones, various types of buns and croissants. The table below gives a summary of these types of breads.Table 8.1: Various types of complex breads and how to make them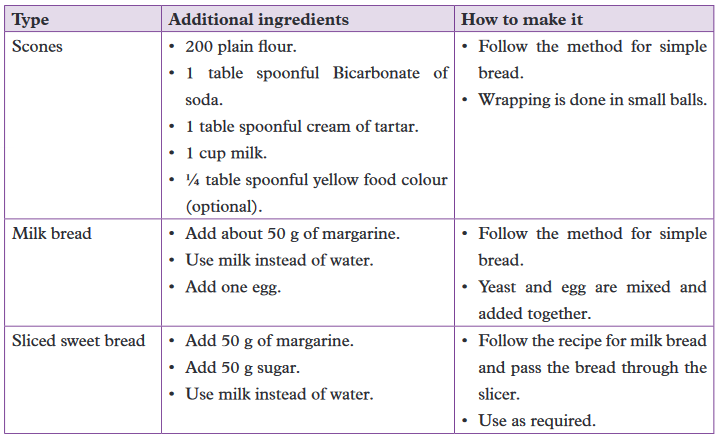
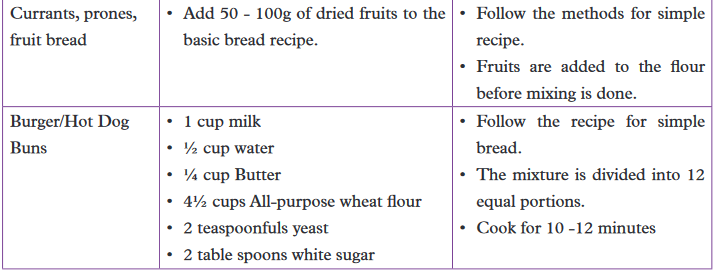 Other types of complex bread include:• Chocolate bread• Butter breadFollow the procedures below to make a chocolate bread.
Activity 8.5: Making chocolate bread
Ingredients• 1½ cups all-purpose fl our• ½ cup baking cocoa• ½ teaspoon salt• ½ teaspoon baking powder• ½ teaspoon baking soda• ½ cup (1 stick) butter, softened• 1 cup granulated sugar• 2 large eggs• 1 cup buttermilk or sour milk ( optional)• ¼ cup semi-sweet chocolateMethods1. Pre-heatoven to 350° F. Grease 9 x 5-inch loaf pan.2. Mix fl our, cocoa, salt, baking powder and baking soda in medium bowl. Beat butter and sugar in large mixer bowl until creamy. Add eggs, one at a time, beating well after each addition. Gradually beat in fl our mixture alternately with buttermilk. Pour into prepared pan.3. Bake for 20 minutes. Top with chocolate and continue baking for 30 to 35 minutes or until wooden pick inserted in center comes out clean. Cool in pan or wire rack for 10 minutes; remove the wire rack to cool completely. Serve with Chocolate Honey Butter.Common faults in making bread and their causes
Activity 8.6
Visit a bakery around your school and find out the problems workers face when making bread. Do they always get the product they expected? Why?Prepare a report and present to the rest of your class members.The facts
The common faults in bread-making that should be avoided include:1. Heavy texture - This is as a result of:• Insufficient raising agent.• Very cool oven during cooking.• Keeping the mixture for too long after mixing in a cool place and before cooking.2. Bread burnt on the underside and uncooked on top - This results from:• Cooking too low in the oven.• Baking sheet used being too light and without lining.3. Uneven rising - This is caused by:• Uneven rolling.• Inadequate mixing of ingredients.• Over-proofing dough.4. Well raised bread but with wrinkled surface - This is caused by:• Over-proofing dough causing the glutein strands to overstretch and collapse.• The oven may have not been hot enough at the beginning.5. Badly risen loaf with a close texture - Caused by:• Too little liquid in the dough.• Under-proofing6. Bread that has sour unpleasant flavour - Caused by:• Stale yeast.• Too much yeast.• Too slow a proofing process, that leads to development of acids.Activity 8.7
1. Use recommended recipes to make different bread products from fl our mixture.2 Identify different faults in the products made; if any.3 Suggest possible remedies for the faults found. 1. Discuss the factors which determine the quality of bread2. Explain how variety can be achieved in bread making3. Discuss the qualities of a well-made bread.4. Give some abnormalities that indicate bread making process gone wrong.Remember the facts• Wheat flour is commonly used for bread making because it contains high glutein content.• Sugar, fat, salt and liquid are the major determinants of the quality of glutein obtained in wheat flour.• Bread is best made using temperatures of between 200 – 230 °F.• Flour can either be strong, whole meal, germ fl our or white fl our.• The main ingredients of bread making are: wheat fl our, sugar yeast, salt, liquid and ascorbic acid. Eggs and fat are optional to use.• The process of bread making involves: ensuring a good proportion of ingredients, mixing, fermentation, punching, scaling, benching, shaping, baking, cooling and storing.• Bread variety can be provided by fruits, sugar and nuts. It can also be given in different shapes such as rolls, buns, scones among others.
Test your competence 8
1. Discuss the differences between bread and cake.2. Name the two types of breads. What is the difference between them?3. Explain why bread is cooked in a lot of heat for the first five minutes of baking.4. Explain the significance of using ascorbic acid in bread making.5. Match the description with the process using a line. 6. The following are steps of bread making. Which one is not?A. FermentationB. KneadingC. ProofingD. Creaming7. Make a yeast bread for a family of three people. Come up with a list of ingredients, get the ingredients and complete the task in 2 hours. Which steps did you follow? List them down?8. Use True or False to answer the following questions.a) The bread and cake fl our mixtures are reffered to as doughs. ______b) Bread is a type of pastry. _______c) Bread can be cooked without yeast. ______d) Too hot water makes yeast to grow faster. ______e) Too much yeast makes bread mixture raise more. ______f) Too much sugar has no effect on yeast. ______g) Acids have no effect on the bread mixture. _____9. Your friend tells you that he cannot bake bread because he is a man and that bread making is a career for women. What would you advise such a friend?10. Assume you want to venture into a project of making scones in your local community. Plan and execute your plan to get the project started. What resources will you use? What challenges do you think you will come across? How will you overcome them?
Glossary
Aerate: This is the act of introducing air into a light fl our mixture.Ascorbic acid: This is another name for vitamin C.Batter: Batter is obtained by mixing fl our, eggs and liquids such as water or milk.Bakery: This is a place where products such as bread, cake, biscuits and other pastries are made.Baking: This is a method of dry-heat cooking whereby food is cooked and browned by radiant heat from an oven..Butter: Butter fat is obtained from milk.Complex bread: This is bread that involves additional ingredients and additives to improve flavour, nutritive value and appearance.Fermentation: This term refers to any of the chemical reactions induced by micro-organisms such as yeast or enzymes that split complex organic compounds into molecules.Garnishing: This is a term used to decorate food or to embellish food in order to improve its appearance.Glutein: This is protein found in wheat fl our.Kneading:This refers to the act of preparing the dough into a uniform mixture by pressing, folding and stretching during bread making.Proofing:This is a term used to refer to letting the yeast to eat up the sugars in the dough thereby creating attractive flavour and making the bread to rise.Punching: This term refers to defl ating the dough by expelling carbon dioxide gas produced during fermentation.Recipe: This is a set of instructions detailing how to prepare or make a certain type of food.Relax: To allow dough in batter to rest before use.Rub-in: To rub-in means mixing fat into fl our until it resembles fine bread crumbs.Scaling: This is a term that refers to the act of measuring ingredients before baking bread.Simple bread: This is bread made using simple techniques and basic ingredients.Yeast: These are minute forms of fungi, which multiply when subjected to moisture, food and warmth. It releases carbon dioxide, which causes raising during bread-making.References
Bull, W. (1989): Introduction to Needlework, New Metric Edition. Longman: KenyaCartwright, D. (1978): How to Sew Things for your Home. Longman: KenyaJeffrey. H. (2004): Bread: A Bread Book Techniques and Recipes. John Wily & sons.JILL, D. (2000): Cooking Explained. Pearson Education Limited. Edinburgh Gate, Harlow. London.Hart, D. (1977): Senior Needlecraft. Evans Brothers ltd. Campfield press: EnglandMichael, C (1973): Human Nutrition in Tropical Africa; UNICEF.M.O.E (1990): Secondary Home Science Student’s Book for Form 4. Nairobi: KenyaOigo eta al (2006): Longhorn Secondary Home Science Form 1 Student’s book. Nairobi:KenyaOigo eta al (2006): Longhorn Secondary Home Science Form 2 Student’s book. Nairobi: KenyaOigo eta al (2006): Longhorn Secondary Home Science Form 3 Student’s book. Nairobi: KenyaReinhart. P (2001): Mastering the Art of extraordinary Bread. Ten Speed Press.Valarie Cliffe, (1961): Design and Embroidery: A course for Schools. Edward Arnold Ltd. Londonwww.maggiescritchet.com/products/garden-tea-coziez.(Accessed on 16/11/16)WYK, C E et...al (1986): Moderm Home Economics. Maskew Miller Longman Ltd. Horward Drive, Pinelands, Cape Town.