General
- Fine Arts an crafts S2 SB File Uploaded 24/01/22, 15:12
- S2: Fine Arts & Crafts TG File Uploaded 11/08/22, 21:48
UNIT 2:Motifs, Patterns and Design Process
My goals
By the end of this Unit, I will be able to:
⦿ Identify patterns from the surroundings.
⦿ Develop a motif for printing.
⦿ Print patterns on surfaces using stamping and stenciling.
⦿ Share ideas with others about own work.
Introduction
In Unit one, we explored objects from the environment for
drawing and painting. But the same objects can be used
in a different way. Look at the different objects from your
surroundings (such as shirts, dresses, skirts, carpets and
curtains). What patterns can you see? Now look at the examples
in Figure 2.1 and do activity 1.
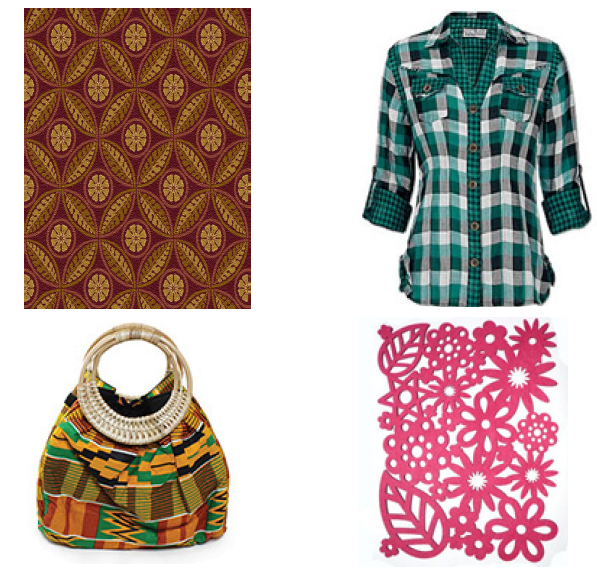
Figure 2.1: Objects with different patterns
Activity 1
Identifying patterns
1. Look at the designs on the works in Figure 2.1. Identify
the shapes that were used to develop the patterns.
2. Find some other patterns including some which look
really Rwandan, either traditional or modern.
3. Identify the shapes that were used to develop the
patterns.
4. Which shapes are natural and which ones are
geometric?
5. Mention some natural objects from which these patterns
might have been gotten from.
Indeed such interesting patterns can be got from objects from
our environment. These include both natural and artificial
objects. You may pick interest in their shapes, texture and
colour in order to create your own pattern. Now look at some
of the possible sources of patterns from the environment in
figure 2.2

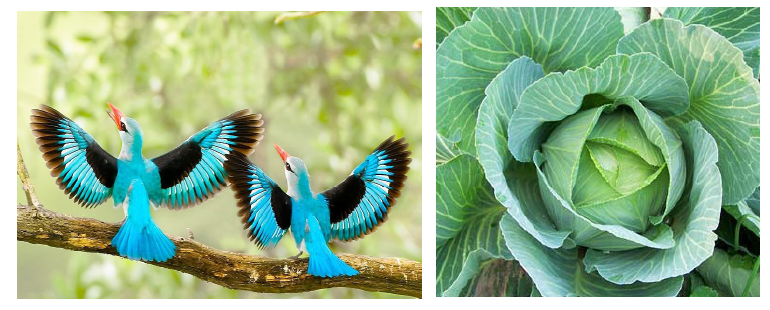
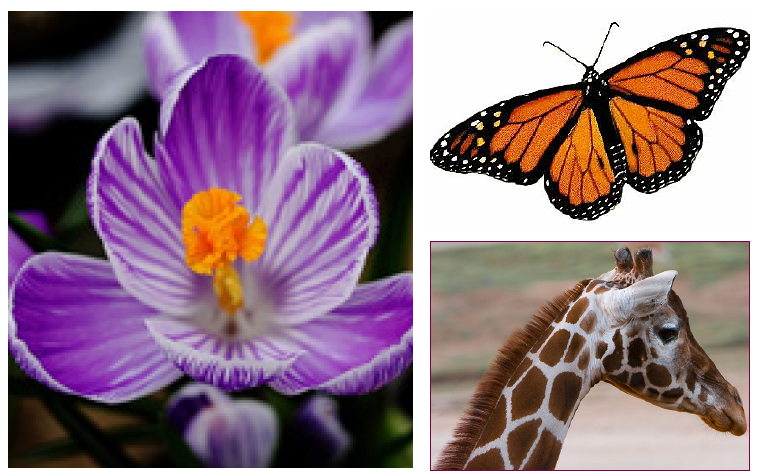
Figure 2.2: Objects with patterns
How to make a motif
The process of making a motif (pattern) is what we call a
design process. In order to make your pattern, you go through
several steps and changes. For example, study the following
steps of creating a motif from a frog.
 Step 1
Identify an interesting
object from your
surroundings. This is
often called a source
of inspiration. Draw
it on a piece of paper
as shown in Figure
2.3.
Figure 2.3 A toad
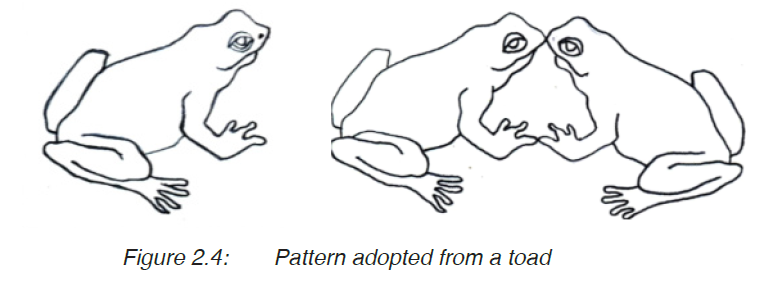
Step 2
Simplify the shapes into outlines. You could join two of these
shapes facing and touching each other, to create a pattern
as shown in Figure 2. 4. This can be done with the help of a
tracing paper
 Step 3
Shade these shapes into
black patches to create
positives as shown
in Figure 2.5. The
remaining white space
is called negative.
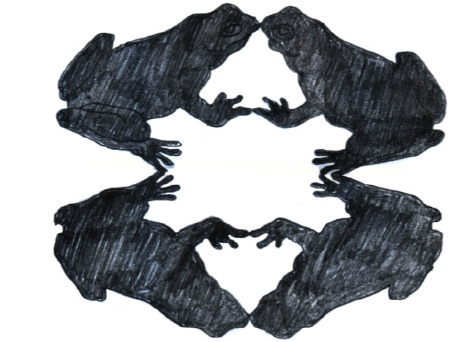 Step 4
This could be repeated
and joined as a reflection
on the same paper, as
shown in Figure 2.6.
Look at the pattern being
formed.
Figure 2.6: Repeating the patterns to enrich the design
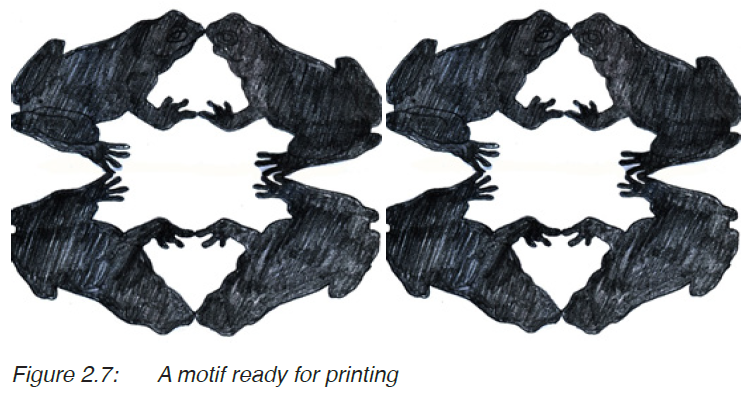
Step 5
The design can be repeated to create an interesting pattern
for your motif. Look at Figure 2.7. The black patches form the
positives and the white space forms the negatives.
Activity 2
1. Choose a different natural object, animal, flower or plant
(not a toad).
2. Follow the steps above and develop your own pattern for
printing.
3. Display your work and discuss it with your friends
regarding its attractiveness and movements.
Take note:
·· When you are creating a pattern for printing, try to balance
the positives with negatives.
·· There is no particular way of organising the shapes for your
pattern. The arrangement largely depends on your creativity.
·· While creating a motif, it is very important to follow rhythm
(Movement and balance).
After developing a pattern on a piece of paper, it is your duty
as a designer to transfer it on to another material where it
can be used for other purposes. This can be done by printing.
Printing is a process of reproducing a pattern or design on a
given surface. Printing is done in several ways, but at this
moment we are going to look at impression, stamping and
stenciling.
Printing by impression
Sometimes you can transfer a pattern from one source to
another by impression. In order to use this method, you need
a pattern from a hard surface, such as a stone, tree bark, a
coin, shoe sole, etc. Then you use this pattern to create an
interesting design in colours of your choice. For example, you
can develop a pattern by following the steps below.
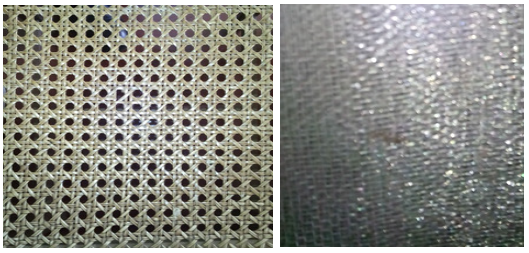 Step 1
Get a surface from
your surroundings,
with an interesting
pattern. For
example, look at
the surfaces in
Figures 2.8 and
2.9.
Figure 2.8: Texture of a
chair seat
Figure 2.9: Texture of a
wire mesh
Step 2
Put the piece of paper on top of the object with the pattern
and rub the surface with a pencil so that the pattern is seen on
the paper. For example, the pattern in Figure 2.10 was taken
from a wire mesh.

 Step 3
Repeat this several
times until you cover
the whole space with
the pattern. You could
use different coloured
pencils to enrich your
pattern as shown in
Figure 2.11.
Activity 3
Creating a pattern by impression
1. Pick an object with a pattern from your environment and
create a pattern using the impression printing technique.
Use different colours of your choice.
2. Display and discuss your work with your classmates.
Focus on the choice of colours, neatness and
attractiveness of the pattern.
Take note:
·· Printing by impression is used to create designs on a small
scale and it is better used on paper.
·· Using different colours makes the pattern look more attractive.
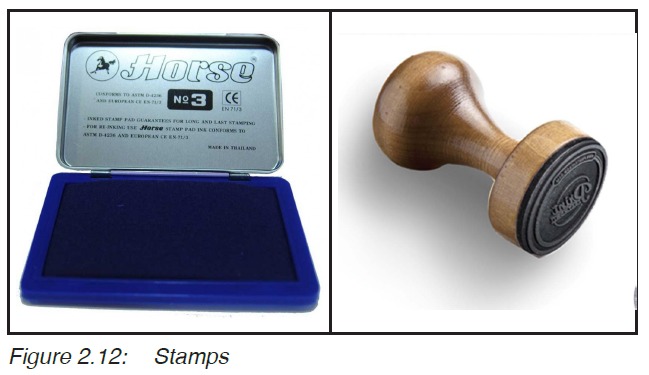
Printing by stamping
Probably you have seen stamps with letters and images, used
in different places such as schools, post offices and hospitals.
These are sometimes circular, square or rectangular. Such
stamps are used to pass on the same message to many
sources.
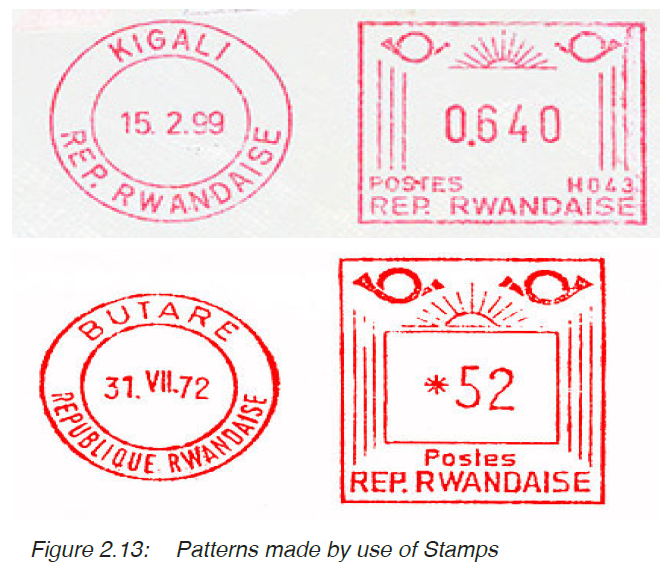
Observe the pictures in Figure 2.12,as well as Figure 2.13
and answer the questions in activity 4.
Activity 4
Creating a pattern by stamping
1. What is unique or special about the letters and images
on these stamps?
2. How do these stamps operate?
You may have observed that these stamps have images which
stick out but they are inverted, that is the reverse of the stamp
you want. When a stamp is pressed on to an ink pad, it picks
up ink and when it is pressed on a piece of paper, it releases the
ink following the protruding or sticking out images.
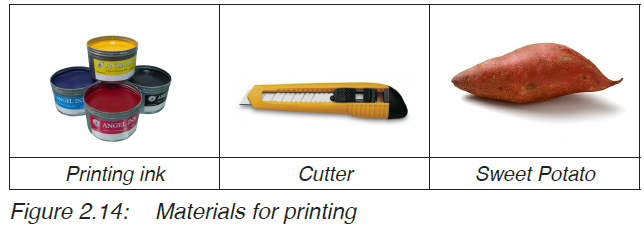
The same idea can be used to create patterns through a process
called stamping. This was briefly introduced to you in Senior
One. You can use soft materials such as irish potatoes, or
sweet potatoes and a cutter. You need the following materials;
materials for printing, photo cutter, printing ink as shown in
Figure 2.14.
Consider the following steps.
Step 1
Draw a simple pattern on paper as shown in Figure 2.15. This
can be developed from objects from your surroundings.

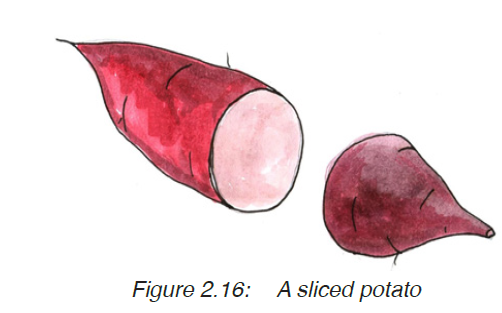 Step 2
Slice the sweet
potato into two parts
as shown in Figure
2.16. (Make sure
the sliced part is
flat)
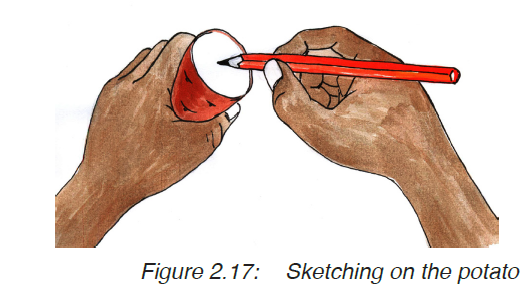 Step 3
Sketch the pattern on
the flat surface of the
potato with a pencil.
Look at figure 2.17.
 Step 4
Then use a cutter to
cut away the negative
space to retain the
pattern on the surface.
Your pattern should
be left protruding as
shown in Figure 2.18.
Figure 2.18: Cutting the pattern on a potato
 Step 5
Dip the pattern in
colour or ink as shown
in Figure 2.19. Make
sure that it is only the
pattern which touches
the colour and the rest
of the potato remains
clean.
 Step 5
Print your pattern on another
surface (such as cloth or
paper). The printing is repeated
to form a complete design on
the surface as shown in Figure
2.20.
Figure 2.20: The printed pattern
The final work appears as shown in figure below

Figure 2.21: The printed pattern
Activity 5
1. Follow the steps above and create your own design.
2. Display your work and discuss it with your classmate.
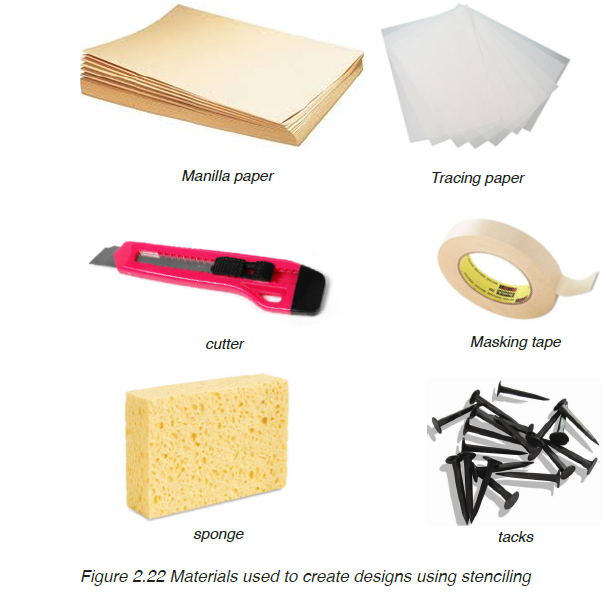
Printing by stenciling
Stenciling as a printing technique, comes from the use of
a stencil to transfer a given design on a given surface. A
stencil can be made from a hard material (Figure 2.18) such
as manilla paper or transparences. You need the following
materials in place, then follow the steps given to make your
print.
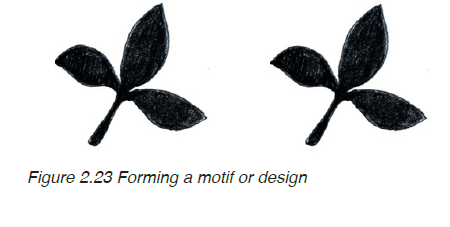
Step 1: The design process
Making a print usually begins with the design process. At this
stage you make sketches of an object which inspires you from
your surroundings as studied in Unit 1. The process continues
until you prepare your motif or design on a piece of paper
such as the one in Figure 2.23. Remember always to develop
a well-balanced motif.
Step 2: Fixing the stencil on to the motif
If your stencil is transparent, use a masking tape to fix it on
top of your motif on paper, along a flat surface. This can be on
top of a table or desk as shown in Figure 2.24. This is done
so that you can observe the design from underneath. If you are
using an opaque stencil such as a manilla paper, use a tracing
paper to transfer your design on to the stencil.

Figure 2.24 Fixing a stencil on the motif
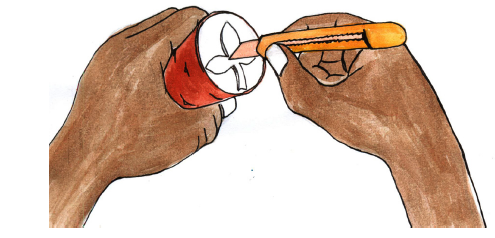
 Step 3: Cutting out the
positives
Use a cutter to cut out
the pattern on the stencil
as shown in Figure 2.25.
When cutting the stencil,
you should only cut out
the positives and leave out
the negatives. Take care to
avoid hurting yourself
Figure 2.25 Cutting the pattern on a stencil
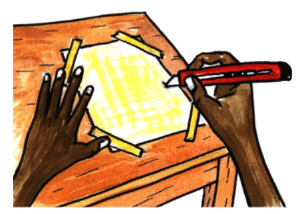
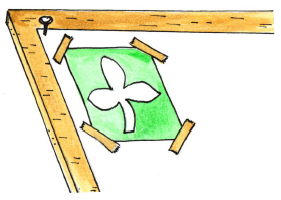
Step 4: Stretching out the
cloth
 Stretch the cloth on top of the
table. You can use tacks to fix
it in the same position. Look
at Figure 2.26. Remember
before printing the cloth has to
be washed, dried and ironed
in order for your printing paste
to register well.
Figure 2.26 A cloth stretched on a table ready for printing
Step 5: Fixing the stencil on
the cloth
Place your stencil on the
surface of the material you
are going to print on as shown
in Figure 2.27. You could use
pins to fix the motif in position.
Figure 2.27: Fitting the motif on the cloth for printing
Step 6: Printing with a sponge
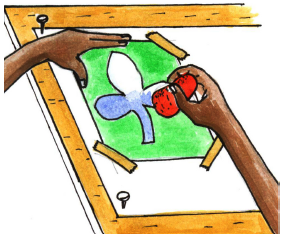
Use a sponge to print your design
as shown in Figure 2.28. Repeat
the process until the whole cloth
is covered with the design. Take
care as you print; when you apply
a lot of force, the printing ink can
easily spread beyond the intended
lines. On the other hand, if you
print with too gently, the design
becomes faint.
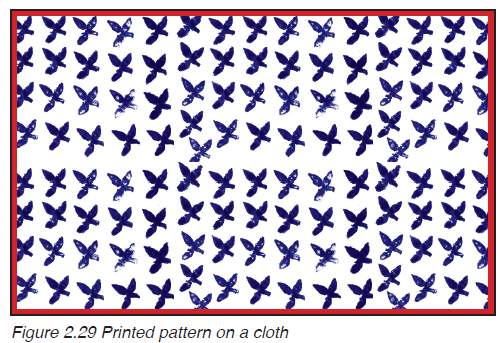
Figure 2.28: Printing the pattern on a cloth with a sponge
Activity 6
1. Design your pattern on cloth by following the steps
given.
2. Display your work and discuss it with friends regarding
balance, rhythm and neatness.
Assessment
1. Get a source of inspiration from your surrounding and
develop a motif.
2. Choose a method of your choice (either stamping or
stencilling) and print your motif on a cloth of half a square
meter.
3. What is the use of a stencil in the process of printing?
4. What is the difference between stamping and stenciling in
printing?
Take note: Your design should be balanced and flowing.
Glossary
Balance: a state of equilibrium where elements of art are seen
to agree with each other in a work of art.
Design process: steps taken to develop a design or motif. This usually
involves sketching of the ideas as they are developed.
Flow: movement of patterns in a design.
Motif: a set of patterns in a design.
Pattern: a repeated form or design mainly used to decorate
something.
Rhythm: repeated art elements to form an interesting movement.
Source of inspiration: something from which an idea is got.
Stencil: a thin material with a design cut into it for printing
purposes.
Design: the art of making arrangements or patterns to produce
a decorative work of art.
Stamping: a technique of creating patterns by pressing a motif
with ink on a given surface.
Stenciling: creating a design by use of a stencil.