General
- Geography S2 SB File Uploaded 24/01/22, 16:02
- S2: Geography TG File Uploaded 11/08/22, 21:52
Unit 3: INTERPRETATION OF PHOTOGRAPHS AND VIDEO IMAGES
Key unit competence
At the end of this unit, you should be able to interpret the relationship between physical and human features on photographs and draw sketch diagrams of a photographIntroduction
In Unit 2, we defined photographs, identified different types of photographs and pointed out different parts of a photograph.
Activity 3.1
1.Working in groups, draw a table similar to the one given below in your notebook. Use the knowledge gained from the previous unit to fill in all the information required. Present your summary to the class for discussion. 2. Use the Internet, dictionary and other academic materials to differentiate between photographs and video images.In this unit, we will learn how to interpret photographs and video images. To achieve this, we will study in detail the following sub-units:
3.1 Types and divisions of a photograph
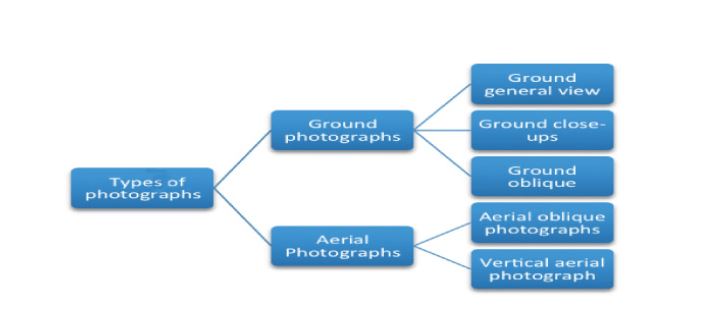
i) Types of photographs
From Activity 3.1, you must have identified the following types of photographs:
These two broad categories are further categorised as follows:
Activity 3.2
Study the following photographs carefully.
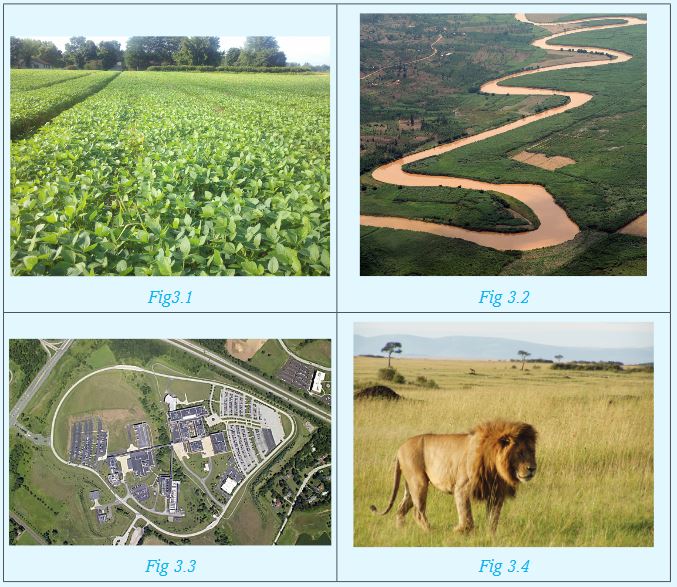
Working in groups of five:
1.Categorise each of the photographs into any of the five categories.
2.Explain which of the five categories of photographs is missing.
ii) Divisions of a photograph
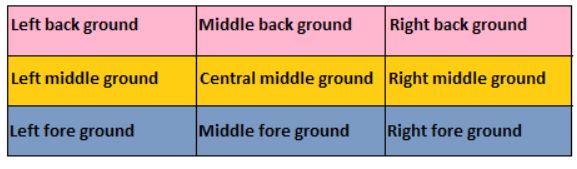
These refer to the sections of a photograph.In Unit two, we identified the three major sections of a photograph. Apart from the three divisions identified in Unit 2, three more divisions can be made of a photograph as shown:

From the divisions above, the foreground, middle ground and background can therefore be further subdivided into three parts each. This is to precisely state or locate position of objects in a photograph. The following figure illustrates how this subdivision can be done.
Activity 3.3
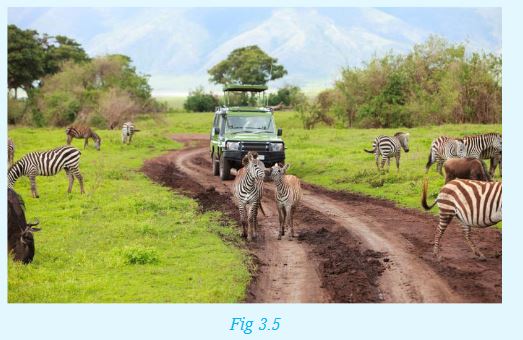
Draw the figure above in your notebooks. In each rectangle, indicate what is found in each of the nine parts identified, using the photograph given below.Activity 3.3Draw the figure above in your notebooks. In each rectangle, indicate what is found in each of the nine parts identified, using the photograph given below.
3.2 Identification of human and physical features on photographs and video images
The main difference between a photograph and a video image is that a photograph is a still image of an object while a video image is a display of moving pictures that may be recorded over a certain period of time together with sound.
a) Identification of human activities on photographs and video images
Activity 3.4
1.Identify the different human activities each of the following photographs is showing.
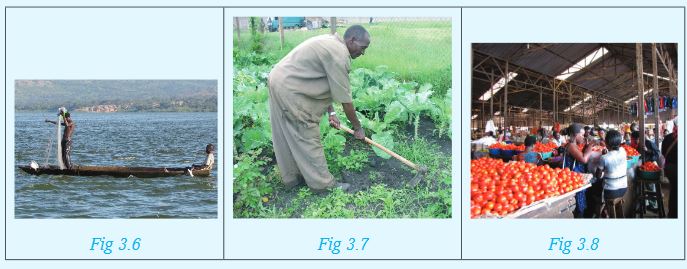
2. Obtain photographs from newspapers such as Newtimes, Umuseso and Umuvugizi published in 2016 that show various human activities. Display these photographs in class for others to see.
Human activities refer to the work done by people in order to earn an income, or improve their standards of living. The main human activities include farming, mining, forestry, fishing, trading, transport, settlement, manufacturing and processing.Human activities in video images are easy to identify. This is because they show how people carry out these activities, from the start to where the recording stopped. For example, a video recording can show how raw materials (such as sugarcane) is processed through various stages to final products (such as sugar or sweets).
Activity 3.5
1. Your teacher will play a video in class showing how milk is processed into any of the following products by Inyange Industries: Packed pasteurised milk, cheese or yoghurt. In groups, summarise the various stages and make a class presentation.
2. Susanne visited an irrigation farm in their rural village. She recorded a video that showed where the water was being obtained for this purpose, they type of crop being irrigated and water conservation measures being employed. Narrate how such a video is likely to be. Make your narration as interesting as possible
b) Identification of physical features on photographs and video images
Activity 3.6
1. Study the following photos carefully.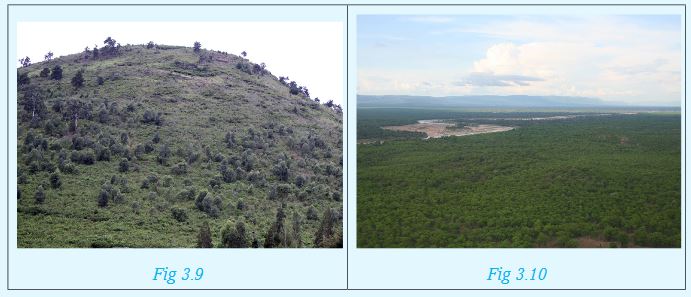
Identify the physical feature each of the photographs is showing.
2. Your teacher will play a video showing a visit to the national park. Working in groups, Identify the physical features you will identify in the video. Explain your answers through a class presentation.
Relief features that can be deduced from a photograph include mountains, hills, slopes, valleys, plateaus and plains.
3.3 Relationships between different features (human and physical aspects)
Activity 3.7
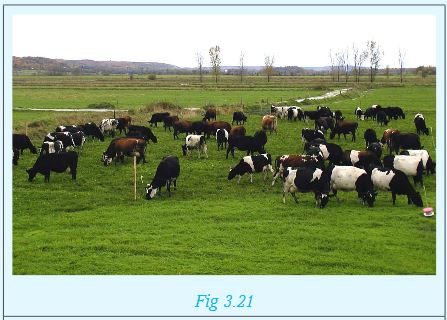
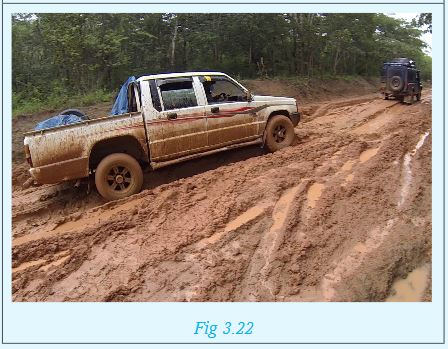
Using the following photographs, discuss in groups the relationship between human and physical aspects. Make a written report and a class presentation of your findings.
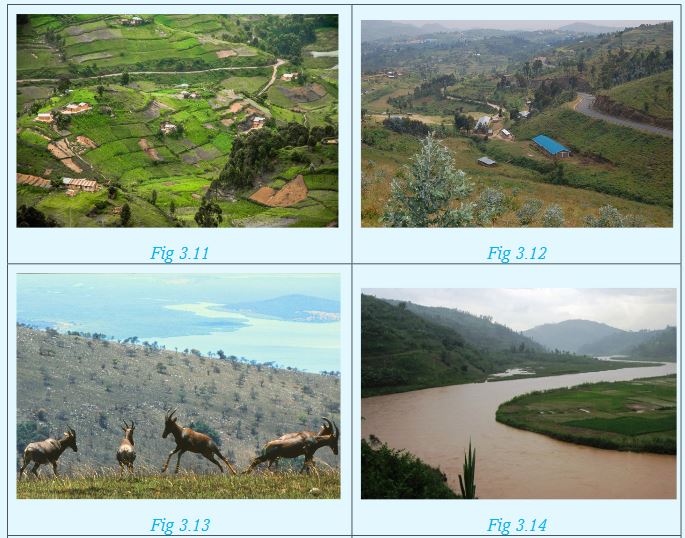
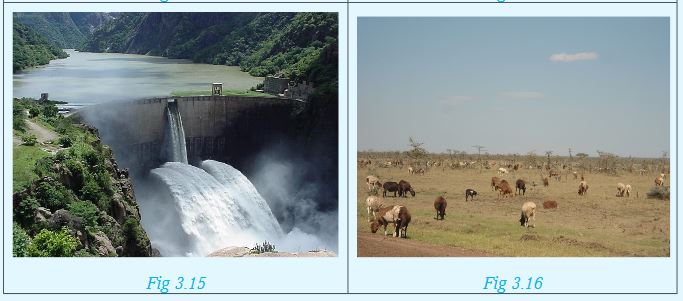
Physical aspects of the land refer to the nature of the landscape, that is, whether mountainuous, hilly or plain. There always exists a relationship between different features, that is, human and physical aspects. The nature of the landscape determines the various activities that may take place.
a) Mountainuous landscape may be an indication of a possible source of rivers, especially if it is forested.
b) Hilly landscape may be indications of a highland area, while dissected landscape in a hilly area indicate that the area has undergone erosion.
c) The type of drainage in a photograph can also provide a hint on the nature of the landscape. Swamps suggest a flat and waterlogged area; long and narrow lakes indicate faulting while a lake on top of a hill is an indication of a crater lake.
d) Human activities shown on a photograph are also dependent on the nature of the landscape. Crops like tea grow well in highland areas while a coconut plantation is evidence that the land may be a coastal area. On the other hand, large scale irrigation farming usually takes place in gently sloping areas. Dairy farming takes place in highland areas that are on the windward side while pastoralism and tourism thrives on the leeward side.
e) Infrastructural development in an area is also dependent on the landscape. A road between two hills for instance indicates that the land is characterised by passes. A winding railway line is an indication of a rugged landscape.
f) Vegetation type shown on a photograph can also indicate the nature of the landscape. For instance, scattered trees shrubs can show the leeward side of a mountain or a dry, fairly flat arid land.
g) Settlement patterns as may be shown on photograph are also determined by the nature of the landscape. Areas with steep slopes are usually avoided while those that are relatively flat are preferred.
3.4 Drawing sketch diagrams from photographs
Activity 3.8
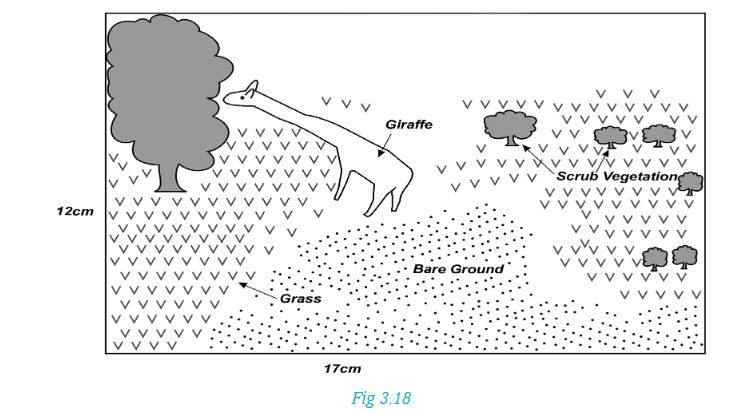
The photograph on page 34 shows wildlife in their natural habitat.
1.Identify the animals shown.
2.Identify the types of vegetation on the left foreground and right background.
3.Which other feature can you see from the photograph?

Before you draw a sketch of a photograph, you need to highlight the main features shown. It is also good to point out their locations in the area covered by the photograph.
Procedure:
1.If the photograph given is rectangular, draw a rectangular box to fit in the details. If it is squared, draw a squared box. The size of the box can be the same as that of the photo, half its size or twice its size.
2.Using clear pencil lines, draw the main features in the frame, ensuring they remain proportional to those in the original photo. Try to locate them in your frame as accurately as possible.
3.Using symbols and a key, label the features on the sketch.
4.Give your sketch a title.
The sketch of the above photo will appear as follows:
Sketch of a Photograph showing Features
Activity 3.9
1. The procedure can be used in drawing a sketch as shown below:
a) Identify the feature shown by the photograph whose sketch has been drawn.
b) What are the main focal points in the photograph?
c) What is the most likely title that can be given to the sketch?
2. Draw sketches of the following photographs. Ensure your sketches have a key for the main features, a title and a frame.
3.5 Reduction and enlargement of photographs
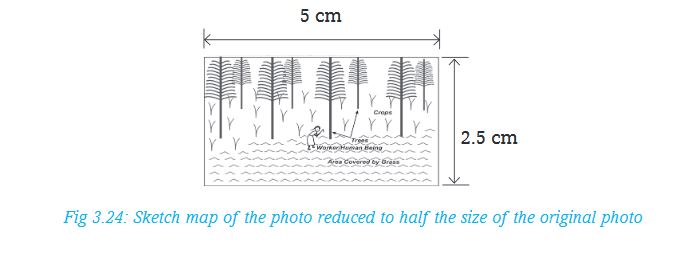
a)Reduction of photographs
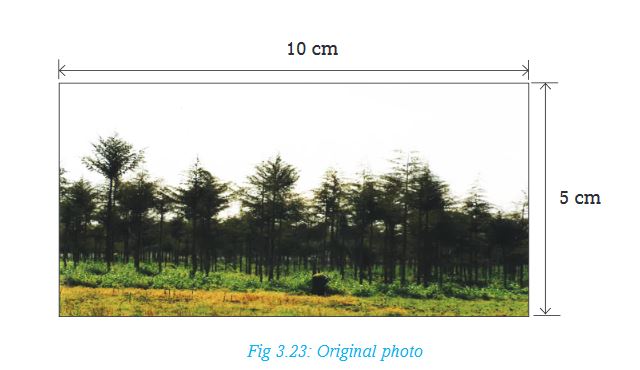
You can draw a sketch map of a photograph, in a rectangle or square smaller than the original photograph, for example to half its size.To do this:
i. Measure the dimensions of the photograph. If the length is 10cm and the width 5cm, divide them by 2, to get 5cm by 2.5cm rectangular box.
ii. Identify the main features to be shown on your sketch. Maintain their accurate position as much as possible.
iii. Give the key and title of the sketch.
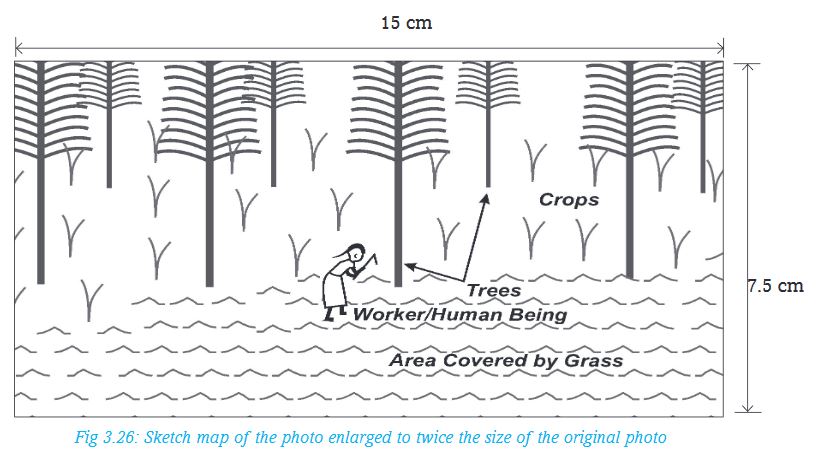
b) Enlargement of photographs
You fit the details shown on a photo on a larger frame than the actual size. The drawing will be larger than the original photo. For example, this can be one and a half times or twice the size of the original photo.Enlargement by 1.5 of the original size:
i.Measure the dimensions of the photograph. If the length is 10cm and the width 5cm, multiply them by 1.5, to get 15cm by 7.5cm rectangular box.
ii.Identify the main features to be shown on your sketch. Maintain their accurate position as much as possible.
iii.Give the key and title of the sketch.

Work to do
Your teacher will provide you with a photograph for this exercise.
i. In pairs, draw a sketch using the photograph you have been provided with. Fit the details in the frame provided below.
ii. Identify the main features to be shown on your sketch.
iii. Draw the sketches of the main features. Maintain their accurate position as much as possible.
iv. Give the key and title of the sketch.

END OF UNIT REVISION EXERCISE
1.Write brief notes on each of the following types of photographs:
(a) Ground close-ups
(b) Oblique photographs
2.Describe the procedure you will use when drawing a sketch from a photograph.
3.Explain briefly how you can accurately show features on a sketch drawn from a photograph.