General
- ICT Y1 SB File Uploaded 1/11/21, 16:59
UNIT 3:ADVANCED WORD PROCESSING
Key Unit competence:
Apply advanced skills to create suitable word documents
Introductory Activity
A student teacher doing an internship was asked to prepare a document presenting the features of his/her TTC .
The document to prepare must contain at least five images which present the most aspects of the school.
Those images can be classrooms, administrative blocks, dormitory, refectory and student teachers on the school assembly.
The document must contain titles and have highlights of words to which more attention is needed.
The highlighted words can be made bold, italic, underlined or can have any other color depending on the preferences.
a. Prepare such a document with at least 4 pages and give it the title “My beautiful TTC”
b. Insert page numbers in the created document
c. Create a table of content for that document
d. Create a cover page that is going to be the first page in the document but with no page number
3.1. Formatting a document
Activity 3.1
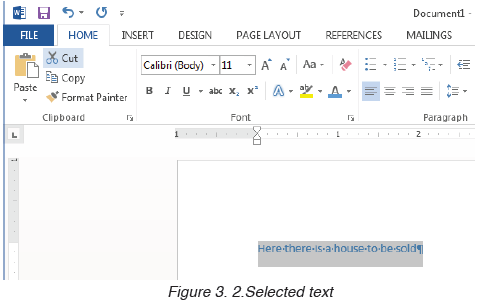
Instruction: Open a blank document in Ms Word and save it as”Inzu”;
then type in the document “Hano hari inzu ikodeshwa “
Do the following:
1. Change the font size to 36
2. Change the font – type to Book Antiqua.
3. Change the text font color to red.
4. Change text to Bold Italic and Underline it.
5. Change text to the UPPERCASE.
Formatting a document refers to the appearance or presentation of a
document which is done in order to make that document look more beautiful
by looking like a readable document rather than a letter or note to a friend.
3.1.1. Change the font
Text formatting allows the changing of the appearance and layout of text and other characters within a document.
The font determines the way the text appears on the screen and when the document is printed.
The more common font types are Times New Roman, Verdana and etc. there are also different font colors and size which are used depending on the user’s choice.
It is possible to apply a font to either an entire document or to certain portions of a document. To apply a font:
- Click on the Home tab
- Go to the Font group
- Select/click on the font to apply
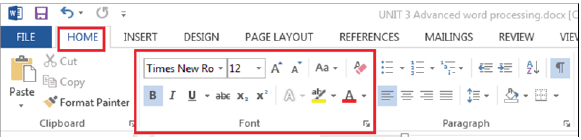
Figure 3. 1. The font group (found under the Home tab)
Note: When the font is to be applied on a text already written the steps to
apply a font will be preceded by selecting that text
A. Changing font size
The most used size of word characters is 12, however character size in word varies from 1 to 72 but can increased even up to 1638 for Microsoft Office word 2013. To change the font–size go through the following steps:
1.Select the text for which the size is going to be changed
2. On the Home tab, click the Font size drop-down arrow. Select a font size from the menu.
If the font size needed is not available in the menu, click the Font size box and type the desired font size,
then presses Enter. In the image below the font size of the text is now changed to 36.
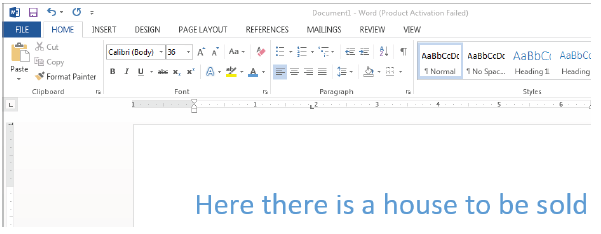
Figure 3. 3. Font size changed to 36 using the font drop down arrow
Note: It is possible to change font size using the Increase Font Size and Decrease Font Size commands(

B. Changing font type
By default, the font type of each new document is set to Calibri. However, Ms
Word provides many other fonts to use in customizing the text. It is advisable
to use the font type “Times New Roman” and the font size 12.
To change text’s font type go through these steps:
1. Select the text to modify.
2. On the Home tab, click the drop-down arrow next to the Font box. A menu of font styles will appear.
3. Select and click on the font type to apply. Immediately the font types
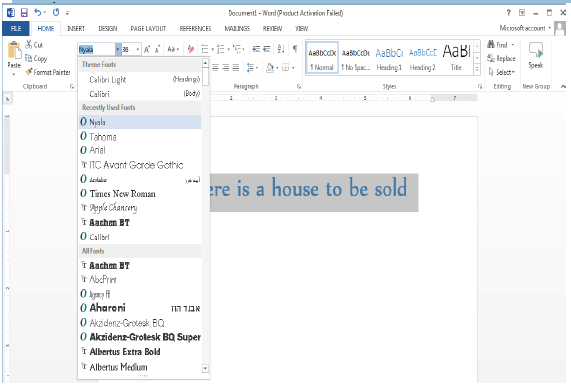
Figure 3. 4.Font style dialog box with different font types
C. Changing the font color
The most common font color for word text is automatic (near black) but there
are other fonts available. To change the font color:
1. Select the text to modify.
2. On the Home tab, click the Font Color drop-down arrow. The Font Color menu appears.
3. Select the font color to use. The font color will change in the document.
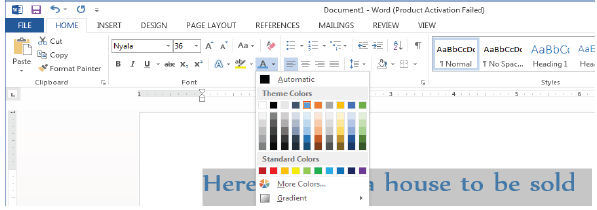
Figure 3. 5.Changing the font color
The Color to choose from are not limited to the drop-down menu that appears.
Select More Colors at the bottom of the menu to access the Colors dialog box and choose one of the colors.
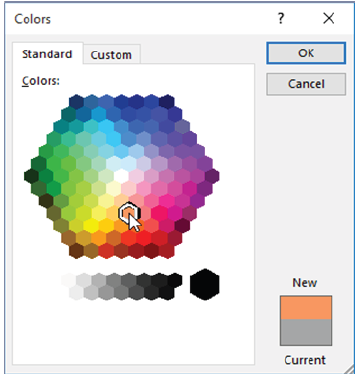
Figure 3. 6.Colors dialog box
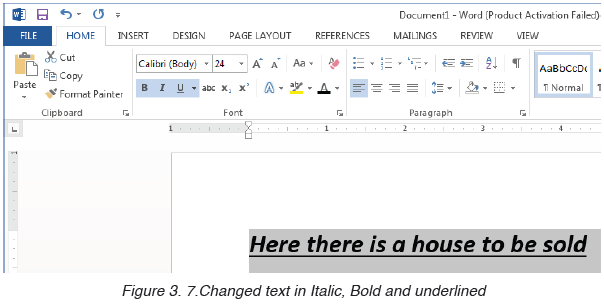
D. Making text Bold, Italic, and Underlined
The Bold, Italic, and Underline commands are used to help draw attention
to important words or phrases. To make text have these attributes do the following:
1. Select the text to modify.
2. On the Home tab, click the Bold (B), Italic (I), or Underline (U) commands in the Font group.
3. The selected text will be modified and made bold, italic and underlined as in the next image if all
the corresponding icons were clicked on.
D. Changing text case
The text case is about the presentation of characters in words. A character can be in capital or small letter.
The available cases are: Sentence case, Lower case, Upper case, Toggle case and Capitalize each Word.
When changing the text case is needed, use the Change Case command instead of deleting and retyping the text.
To change the case:
1. Select the text for which to change the case.
2. On the Home tab, click the Change Case command in the Font group.
3. A drop-down menu will appear. Select the desired case option from the menu.

Figure 3. 8.Change case options
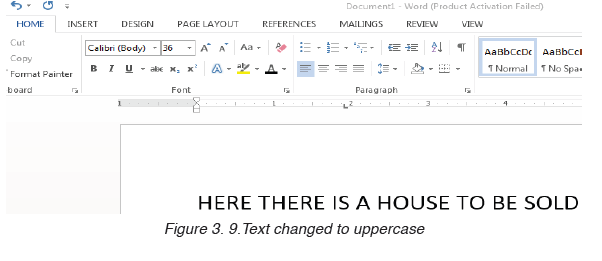
The text case will be changed in the document like in the next image whose
text was in small letter before changing to upper case.
Application activity 3.1
Write at least four lines of text which describes peace and do the following:
1. Change font type of the first and second sentences to “Poor Richard” ,font size to “14”, font color to “Blue” and make the
sentences italic.
2. Change the third and fourth sentence to the font type ”Tahoma”,
font size “12”, font color “Red” and underline those sentences.
3.2. Paragraph group
Activity 3.2
1. Type text in word processing software which describe your last holidays.
The first paragraph talk about your daily activities, the second about what made you happy and sad during the holidays.
Save it as “my activities” and do the following:
a. Apply on the text a line spacing of 1.0
b. Using the numbering option number your paragraphs as 1 and 2
c. Apply an indentation of 2.1 to the left on your paragraphs
A paragraph is a distinct section that describes a special idea.
Paragraph format contains one or more lines with a combination of words, numbers and other characters.
Various commands are used to format a paragraph such as: Text Alignments, Bullets, Numbering, Multi-Level
list, Paragraph Indents, Sorting Text, Line Spacing and many others.
3.2.1. Indent
Indent means how far to move the paragraph away from the left or from the right margin.
A. Method 1 of changing indent: the Tab key
The quickest way to indent is to use the Tab key which creates a first-line indent of 1/2 inch. That is done in this way:
1. Place the insertion point at the very beginning of the paragraph to indent.
2. Press the Tab key and the paragraph will be moved to the right by 1/2 inch.
3. The first line of the paragraph will be indented.
B. Method 2: Indent markers
In some cases, there is a need to have more control over indents.
Word provides indent markers that allow to indent paragraphs to the needed location.
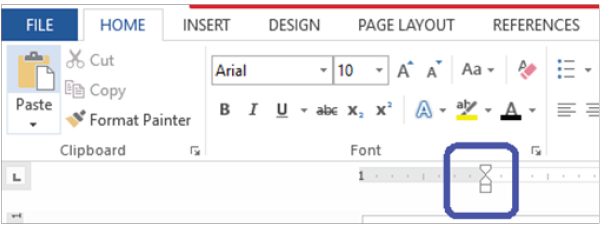
Figure 3. 10.Indent marker
The indent markers are located to the left of the horizontal ruler, and they
provide several indenting options:
- First-line indent marker
 adjusts the first-line indent
 - Hanging indent marker
 adjusts the hanging indent
 - Left indent marker
 moves both the first-line indent and hanging
indent markers at the same time (this will indent all lines in a paragraph)
Indent using the indent markers goes through the following steps:
1. Place the insertion point anywhere in the paragraph to indent, or select one or more paragraphs.
2. Click and drag the desired indent marker.

3.2.2. Line Spacing
Line spacing is the space between each line in a paragraph. Word processing program allows to customize the line
spacing to be single spaced (one line high), double spaced (two lines high), or any other space size.
Steps to format line spacing:
1. Select the text for which to change the line spacing.
2. On the Home tab, click the Line and Paragraph Spacing command, then select the desired line spacing.
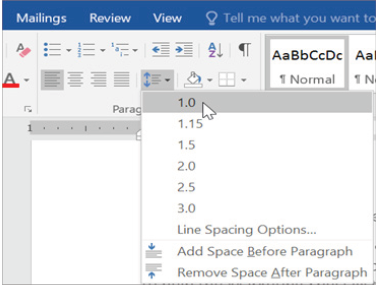
Figure 3. 12.Line and Paragraph Spacing
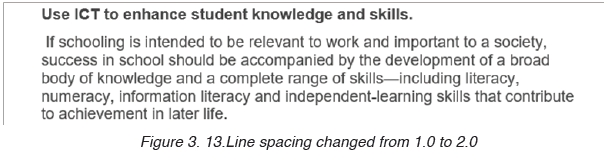
The line spacing will change. In the the image below the line spacing is 1.0
3.2.3 Bullets and Numbering
Bullets or numbering are used for a list. It is possible to apply automatically
simple bullets and numbering to lists in the document as it is being written.
Method 1: Custom made bullets and numbering
1. Start a bulleted list in Word by typing a character to use as a bullet
at the beginning of the first item in the list and pressing the “63” key.
2. After pressing the “Spacebar” on the keyboard, the asterisk will turn into a bullet point.
3. Type the first line of the list and press the “Enter” key to move to the next line.
The bulleted list will continue to be created.
4. To discontinue the bulleting, press “Enter” two times when finished with the list
Note: The character to use as a bullet can be a number or a letter. It can also be followed by a dot or a closing parenthesis.
Method 2. Bullets and Numbering found in the paragraph group
The paragraph group has bullets and numbering that can be chosen from.
To apply them Go to the Home tab, in the Paragraph group, choose the Numbering button and then the
style of bullets and numbering to use.
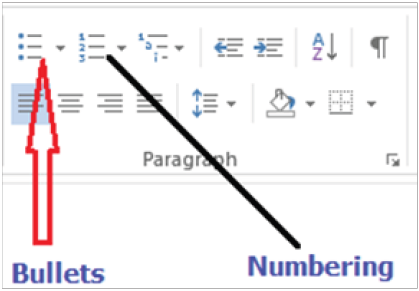
Figure 3. 14.Numbering buttons
3.2.4 Alignment
It refers to the arrangement of text relative to the left or right margin of a page.
There are four types of alignments namely: Left, Right, Centre, and Justified Alignments.
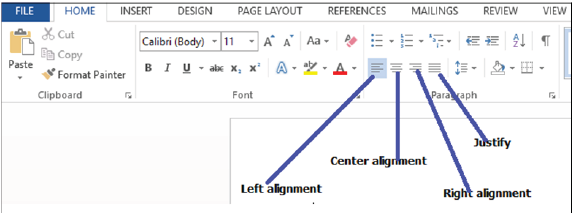
Figure 3. 15.Left, Right, Centre, and Justified alignments
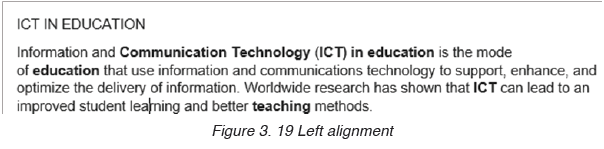
Left alignment: Text is evenly positioned along the left margin but uneven at
the right margin. Typing begins at the left margin and does not have to end at the right margin.
Application activity 3.2
Instruction: Using MS Word type a text from an English book, then do the following:
1. Indent the first sentence,
2. Change the font type to “Time New Roman “ , size =”12” , line spacing =”2.0
3. Change alignment from Left to Justified alignment
3.3. Referencing a word document
Using Ms Word type text about the use of ICT in Education and do the following tasks:
1. Insert page header text “ICT tools in education”
2. Insert page footer text “Enhancing students’ learning”
3. Insert 2 footnotes to the text “My First Footnote” and “Second footnote”
3.3.1. Header and Footer
Headers are lines of text or graphics that appear above the top margin of a page or selected pages while Footers
are lines of text or graphics that appear below the bottom margin of a page or selected pages.
To insert a header and footer do the following:
Step 1:Click Insert Tab from the menu bar; then click on Header or footer command from the ribbon.
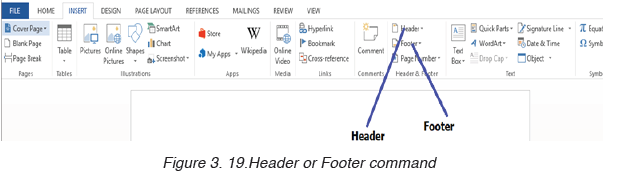
Step 2: A drop down menu appears showing the different styles of footer or header. Click on the desired option.
Step 3: In the Header & Footer regions type the desired content to use as header or footer respectively. Then press Enter.
After entering the text to use the respective header and footer will look like in the following images:


3.3.2. Insert Footnotes and Endnotes in Word
Footnote is the note citing a particular source or making a brief explanatory comment placed at the bottom of a page corresponding to the item cited in the corresponding text while endnote is a note citing a particular source or
making a brief explanatory comment placed at the end of a research paper and arranged sequentially in relation
to where the reference appears in the paper.
To insert footnotes and endnotes do the following:
Step 1: Place the cursor where the superscript number for the first note should appear.
Step 2: Select the References tab in the ribbon.
Step 3: Select the dialog box launcher in the Footnotes group.
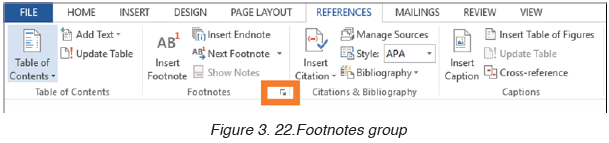
Step 3: Select Footnotes or Endnotes in the Footnote and Endnote dialog box.
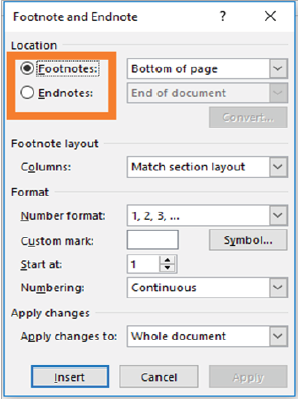
Figure 3. 23.Footnote and Endnote dialog box
Step 4:Select the note’s location from the drop-down menu.
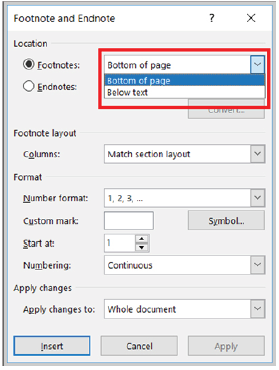
Figure 3. 24.Drop-down menu
Note: It is also possible to choose additional options in the Footnote and Endnote dialog box such as number formatting
and whether the numbering applies to the whole document or to a specific section.
Step 5: Select the Insert button to create the first note.
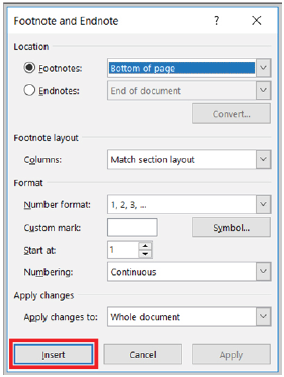
Figure 3. 25.Insert button to create the first note
After Word has created the superscript number, the cursor will automatically
move to the note location selected in the Footnote and Endnote dialog box.

Place the cursor where the superscript number for the next note should
appear in the text and then select Insert Footnote or Insert Endnote in the
Footnotes group in the ribbon to insert the next note.
3.3.3. Converting Footnotes to Endnotes
Step 1:Open the document and select the References tab.
In the Footnotes group, click Show Notes.

Step 2:Select the notes to convert, and then right-click and Select Convert to Footnote or Convert to Endnote.
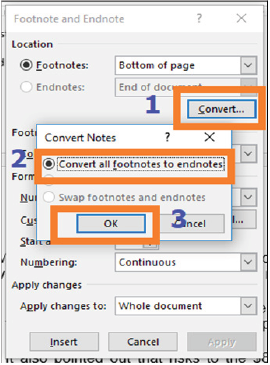
Figure 3. 28.Footnotes and Endnotes dialog box
Application activity 3.3
1. Differentiate footnotes and endnotes?
2. Open “use of ICT in Education” file created in the activity 3.3 and
create 5 endnotes of your choice in that document:
3. Convert all the above Endnotes to Footnotes?
3.4. Creating and updating a table of contents
3.4.1 Creating table of content
Activity 3.4
Using MS Word, write text which describe computer hardware and software and save it as “Information and Communication Technology”.
The text to write should contain titles and in order to do it quickly you can copy text from the softcopy books available on the REB website. Make sure the document has at least 3 pages. Do the following with the created document:
1. Change the Font-Type to “Book Antiqua”
2. Change the Font Size to 12 and Line Spacing =”2.0”
3. Change Heading 1 to “Arial Black ” and Font-size =”14”
4. Change Heading 2 to “Times New Roman ” and Font-size =”13”
5. Change Heading 3 to “Book Antiqua ” and Font-size =”12”
6. Insert the table of content at the beginning of the document
A Table of Contents (TOC) is an organized listing of chapters and major sections of a document.
The role of Table of content is to help readers immediately see how the document is organized.
A clear, concise, and well formatted Table of Content is the first indicator of a good document.
Below are steps to create a table of content:
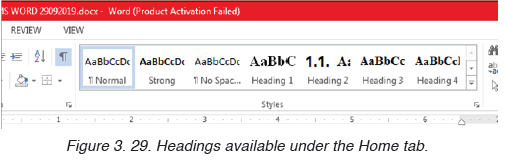
Step 1: Set different titles to different headings depending on their importance.
Heading 1 is the biggest title in the document if it is a unit for example the
heading 1 may be the unit name. The other headings are those under the
Heading 1. In Heading 1 there are many Heading 2 and in Heading 2 there
are many Heading 3 and so forth. The font properties of the headings can be set by the computer user.
To set a title’s heading select the title and while in Home click on the desired heading
Note: MsWord will create a table of contents based the headings created in
the whole document so do this for all of the text that will appear in the table of contents.
Step 2: Place the cursor where the table of contents will appear usually at the beginning of the document
Step 3: Go to References and Choose Table of Contents
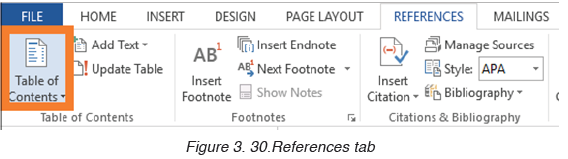
Step 4: Choose the style to apply as the table of content.
Immediately the table of content will be inserted where the cursor is.
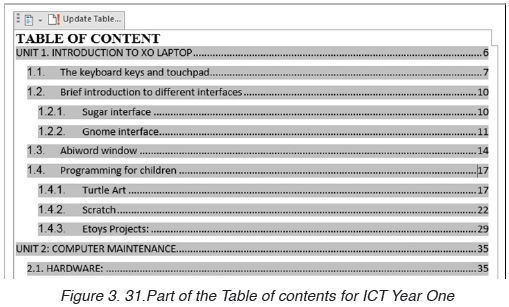
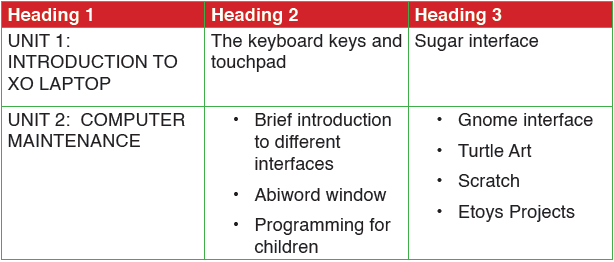
The table of content above is that of one part of the Student Book of ICT Year One in TTC schools.
To create a table of content like the one above, the titles have been set to the following headings:
Note: If the Custom Table of Contents option is chosen, it is possible to
format the way the table of contents will look: Choose a different style, hide
page numbers, include more heading levels than the default three levels, and more.
3.4.2. Updating the table of Content
As more titles are added and some removed, page numbers changed, the
table of content needs to be changed to reflect the actual document.
To update the table of content go through the following steps:
Step 1: Click on the Table of Contents to highlight the whole area (the whole area becomes grayed-out)
Step 2: Right-click to bring up the Table of Contents menu
Step 3: Click on Update Field
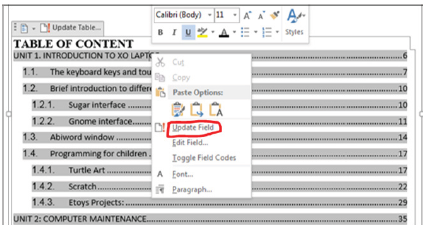
Step 4: Click on Update page numbers only or Update entire table
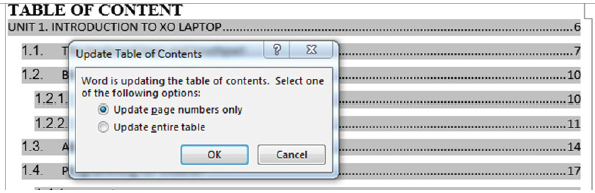
Figure 3. 32. The option to update page numbers only or entire table
Note: Use ‘update page numbers only’ to keep the table exactly as it is and just update the numbering or ‘update entire table’ if MsWord will regenerate the Table of contents.
Application activity 3.4
1. Create a document on ICT which has the following headings:
Computer Hardware (Heading 1)
Generate a list of computer hardware available in the school’s
computer Laboratory on the following categories which will be Heading 2
- Input Hardware
- Output hardware
- Processing hardware
- Storage hardware
Create additional headings in Heading 2 where possible. Those
headings will be Heading 3 and Heading 4
2. Add a new title “SOFTWARE” in the document. Make that title
a heading appropriately and in it create other headings. Update your table of content
3.5. Page layout tab command
Activity 3.5
Using Ms Word, write a document which has a title Benefit of Learning ICT
as Future Teacher and apply on it the following:
1. Change page orientation from Portrait to Landscape
2. Organize the text into 3 separate columns
3. Change page margin from 1.0 to 1.5 points
3.5.1 Page Setup Group
It is found on the ribbon when the Page Layout tab is clicked. It is used to
specify the margins and the orientation of a page, size, number of columns
among other specifications.
3.5.2. Setting Margins
Page margins are the blank spaces around the edges of a page. Text and
graphics are normally inserted in the printable area between the margins.
However, some items can be positioned in the margins such as headers,
footers, and page numbers among others.
To set the margins do the following:
Step 1: Click Page Layout tab, from the Page Setup group and click
Margins command.
Step 2: Click the margin type desired from the pull-down menu that appears.
The margins are automatically adjusted.
Step 3: To set a customized margin, either click Margins, then select Custom
Margins command or click on the dialog box launcher at the bottom of Page
Setup group. A dialog box is displayed.
Step 4: Click on Margins tab on the dialog box that appears.
Step 5: Specify all the desired options and click OK to apply.
3.5.3. Page Orientation
This refers to the positioning of the page in relation to the text or graphics.
There are two types of page orientation.
- Portrait: This is where text and graphics are printed with the longest
side placed vertically and the shortest placed horizontally.
- Landscape: This is where text and graphics are printed with the longest
side placed horizontally and the shortest placed vertically.
A. Changing the page orientation of an entire document
To change the page orientation of an entire document, proceed as follows:
Step 1: Click on the Page Layout tab, in the Page Setup group, click Orientation.
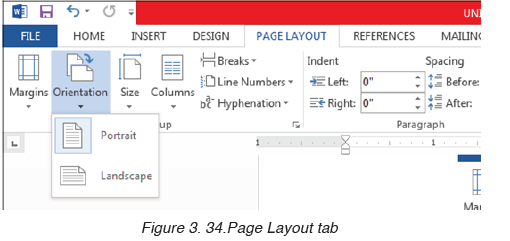
Step 2: Select either Portrait or Landscape.
B. Using both portrait and landscape orientation in the same document
There can be a need to have both landscape and portrait pages in the same
document. Such a need can arise for example when the document is in a
portrait format and that there is a big table that cannot fit in the document if
the page is not made landscape. Go through these steps:
Step 1: Select the content on the pages or paragraph(s) whose orientation
is to be changed to portrait or landscape.
Step 2:Click on the Page Layout tab, in the Page Setup group.
Step 3: Click Margins, then select Custom Margins command or click on
the dialog box launcher in the Page Setup group.
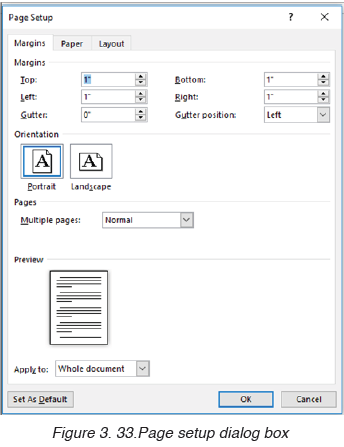
Step 4: Click on the Margins tab on the dialog box that appears.
Step 5: Under the Orientation section, select the desired orientation (Portrait or Landscape).
Step 6: Under the Apply to section, choose selected text option and click OK to apply.
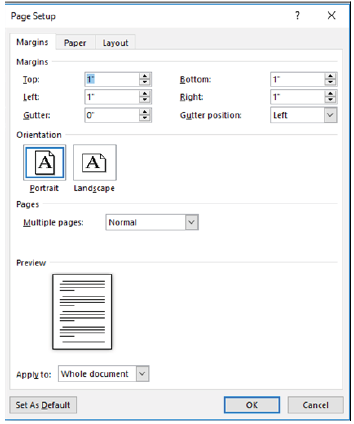
Figure 3. 35.Page setup dialog box
Note: If some but not all of the text on a page is selected to change to
portrait or landscape orientation, Word places the selected text on its own
page, and the surrounding text on a separate page.
3.5.4 Columns
Columns are created to enhance the look of a document. The flow of the
content from the bottom of one column to the top of the next one in the same
page should be consistent. Columns can either be created using predefined
or user-defined options.
i. Predefined
To create a predefined column, do the following:
Step 1: Select the text.
Step 2: Click Page Layout tab from the menu bar; then click on the Columns command under Page Setup group.
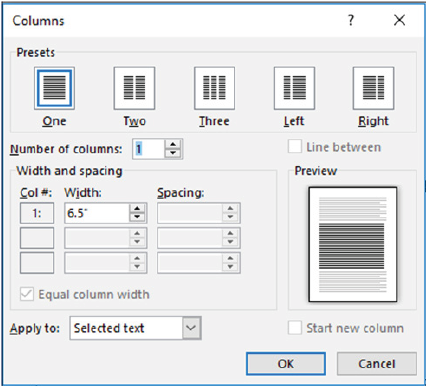
Figure 3. 36.Columns dialog box
Step 3: Click on the number of columns desired from the drop-down menu displayed.
ii. User Defined columns
Step 1: Select the text.
Step 2: Click Page Layout tab from the menu bar then click on the Columns command under Page Setup group.
Step 3: Select More Column option from the resulting pull down menu.
Step 4: Specify the column width and spacing, line between columns, number of columns, and where the column is to be applied.

Figure 3. 37.User defined columns
Step 5: Click OK to apply once all the desired options have been selected.
Application activity 3.5
1. Type Microsoft word document which describes “your school environment” and then do the following:
a. Split the paragraph into 2 columns.
b. Make the page Landscape
3.6. Protecting a document from unauthorized access and changes
Activity 3.6
Write a word document which describes the benefit of studying in TTC
especially in your Option and protect it with a password.
A word document can be protected from unauthorized access.
This protection is done when the document contain sensitive and private information to
which the owner does not want anyone to have access to.
3.6.1 Protecting Word files with a password
The followings are steps to follow when protecting a word file with a password.
Step 1: Select File then Info
Step 2: Select the Protect Document option
Step 3: Choose “Encrypt Document with Password”
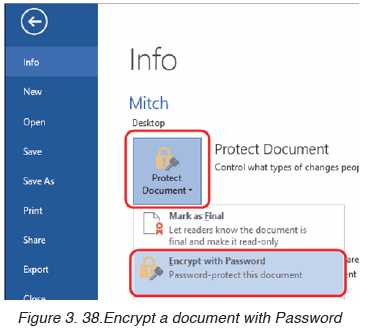
Step 4: Type the password to use, and then select OK
Step 5: Type the password again to confirm and then select OK
3.6.2 Protect a document and mark the parts that can be changed
Step 1: On the Review tab, in the Protect group, click Restrict Editing.
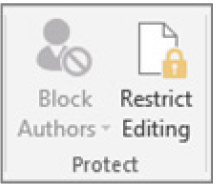
Figure 3. 39.Restrict Editing command
Step 2: In the Editing restrictions area, select the Allow only this type of editing in the document check box.
Step 3: In the list of editing restrictions, click No changes (Read only).
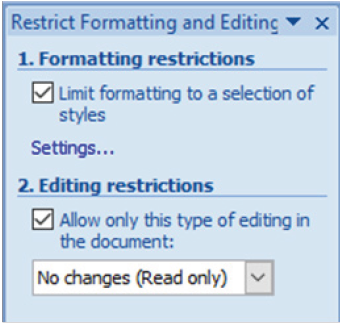
Figure 3. 40.Restrict Formatting and Editing window
Step 4: Select the part of the document where to allow changes.
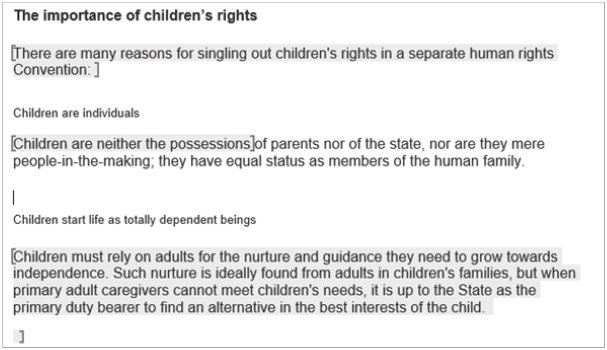
Figure 3. 41.Select the part of the document where changes are allowed
The selected words in bracket, show where the other user can make change only.
To select more than one part of the document at the same time, select
one part then press CTRL and select more parts while holding down the CTRL key.
Step 5: Under Exceptions, do one of the following:
- To allow anyone who opens the document to edit the part that was
selected, select the Everyone check box in the Groups list.
- To allow only particular individuals to edit the part that was selected, click more users, and then type the user names.

Figure 3. 42.Exception Selection
Step 6: Click OK and select the check boxes next to the names of the
individuals that are to be allowed to edit the selected part.
Note: If more than one individual are selected, those individuals are added
as an item to the Groups box, so that you can quickly select them again.
Step 7: Continue to select parts of the document and assign users permission to edit them.
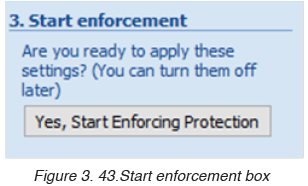
Step 8: Under Start enforcement, click Yes, Start Enforcing Protection.
Step 9: Do the following:
To assign a password to the document so that users who know the password
can remove the protection and work on the document, type a password in
the Enter new password (optional) box, and then confirm the password.
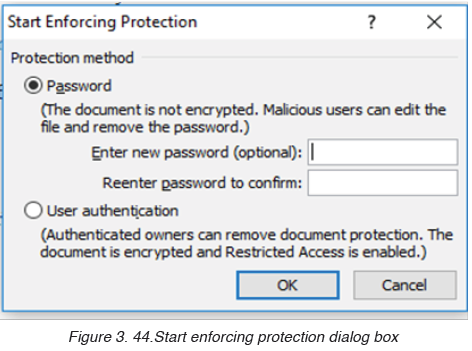
Use the above option if other people are going to work on the document at the same time and make sure to use strong passwords that combine uppercase and lowercase letters, numbers, and symbols.
Step 10: To encrypt the document so that only authenticated owners of the document can remove the protection, click User authentication. Encrypting the document prevents others from working on the document at the same time.
3.6.3 Unlock a protected document
To remove all protections from a document, use the password that was
applied to the document or there is a need to be listed as an authenticated owner of the document.
For an authenticated owner of the document or if you know the password for removing the document protection, do the following:
Step 1: On the Review tab, in the Protect group, click Restrict Editing.
Step 2: In the Restrict Editing task pane, click Stop Protection
Step 3: If prompted to provide a password, type the password.
3.6.4 Make changes in a restricted document
When opening a protected document, Word restricts what can be changed
based on whether the document owner granted the permission to make changes to a specific part of the document.
The Restrict Editing task pane displays buttons for moving to the regions of the document for which there is permission to change. If no permission is granted to edit any parts of the document, Word restricts editing and displays the message, “Word has finished searching the document” when the buttons in the Restrict Editing task pane is clicked
3.6.5 Finding word document parts to edit
If the Restrict Editing task pane is closed and there is a need to make changes where the user has not been granted permission, Word displays the following message in the status bar: “This modification is not allowed
because the selection is locked”.
To return to the task pane and find a region where there is permission to edit, do the following:
Step 1: On the Review tab, in the Protect group, click Restrict Editing.
Step 2: Click Find Next Region I Can Edit or Show All Regions I Can Edit.
Application activity 3.6
Using Ms Word,
1. Open a document which describe the benefit of learning in your option that you protected and remove password
2. Type any text related to your career, Protect it and mark the parts that can be changed
End unit assessment
1. Explain the following concept
a. Formatting
b. Paragraph
2. Write at least one page on XO laptop hardware and do the following :
a. Change line spacing to 1.5
b. Change font-type =”Book Antiqua” , size=” 14” color =”Blue” , and alignment=”Justified ”
c. Insert header =” ICT for children” and footer=” XO laptop for fun ”
d. Protect the document with a password of your choice and save it