Key Unit CompetencyBy the end of the unit, you should be able to build standard compliant web pages
using HTML.
Unit Outline
• Fundamentals of World Wide Web
• HTML syntax and structure
• HTML Elements
• Introdcution to XHTML
• Designing HTML pages
• Introduction to HTML5
• Migration from HTML to HTML5
Introduction
Over the past three decades, large corporations, medium-sized and small-scale business organizations have been using website to communicate company information, manage their projects and transact on a paperless environment. Furthermore, people who didn’t know what the Internet was several years ago are now reconnecting with their friends and family members on social media such as Facebook. It is now a fact that web technologies are no longer a reserve of business entities but for each one of us in the society. In this unit, we will begin by reviewing basic concepts relating to world wide web. Later, we take you step-by-step on how to develop and publish websites using HTML4, XHTML and HTML5.
Activity 16.1: Evolution of HTML
In groups, discuss and write an essay on how the Internet and World Wide Web
(WWW) evolved from just a Project to the current trends seen today in Web 2.0.
Why is Tim-Berners Lee credited with the Invention of the WWW and the language
used to develop the web pages?
16.1 Fundamentals of World Wide Web
World wide web is an internet-based system or platform that allows hypertext documents to be interconnected by hyperlinks. A hyperlink is a word or phrase a user can click to move from one website or webpage to another. Website simply referred to as Web resides on one or more computers, referred to as web servers. Hypertext enables you to read and navigate text and visual information in a nonlinear way based on what you want to read next. The idea behind hypertext is that instead of reading text in a linear structure like in a book, you can easily jump from one point to another based on interests. The Web is cross platform because a user can access it on various devices such as desktop computers, tablets and mobile phones.
16.1.1 Hypertext Markup Language
Hypertext Markup Language (HTML) refers to a language used to structure hypertext (web) documents for presentation on the World Wide Web. Unlike programming languages like C++, HTML is not a programming language but can be thought of as a presentation language used to instruct the browser on how to present text and multimedia content on the Web.
16.1.2 Evolution of HTML
The HTML was invented by Tim-Berners Lee, the founder of world wide web. Lee’s original HTML version was based on a more complicated document processing language known as Standard Generalized Markup Language (SGML). Soon, Lee released different versions of HTML causing incompatibilities between different developers using different versions. This led to:
1. A consortium known as World Wide Web Consortium (W3C) was
established to standardize HTML.
2. The first standard version of HTML that was developed and maintained
by W3C was HTML 2.0 released in 1995. It specifies a set of tags that must
be supported by all browsers.
3. In 1996, release of HTML 3.2 standard then later HTML 4.0 in 1997.
4. Most web browsers today support a more strict variation of HTML known
as Extensible Hypertext Markup Language (XHTML) that supports mobile
web applications too.
5. Today, we have HTML5 which many browsers and developers are using to
develop web applications.
Activity 16.2: Evolution of HTML
In groups, research on the internet the history of SGML in terms of the inventor,
purpose, and syntax of the language.
16.2 HTML Syntax and Structure
HTML tags are used to define a set of common web page features such as titles,
paragraphs, and lists, tables, forms, images and multimedia. Below is a sample HTML
code that creates a blank web page. Using the basic code below, you can add more
and more features as you insert text and pictures. Notice that every tag has a start
tag e.g. <tagname> and an end tag e.g. </tagname>.

1. In Microsoft Windows, open Notepad by clicking All Programs, Accessories and then click Notepad.
2. Write or the HTML code above. To avoid syntax error, make use correct punctuations and tags.
3. To save the file, on the file menu, select Save As command to display the Save As dialog box.
4. In the file name box, type the name of the file with htm or html extension such as MyWebsite.html, and then select All files from Save as type dropdown list. Once you finish creating the web page, you may need to view it in a browser such as Explorer, Mozilla, Chrome or Safari. For example, to view mywebsite.html, proceed as follows:
1. Start your favourite browser and look for a menu or command button labeled
Open or Open File. Alternatively, in Windows, press Ctrl+O to display the Open
dialog box.
2. Select the drive or folder in which the html page was saved.
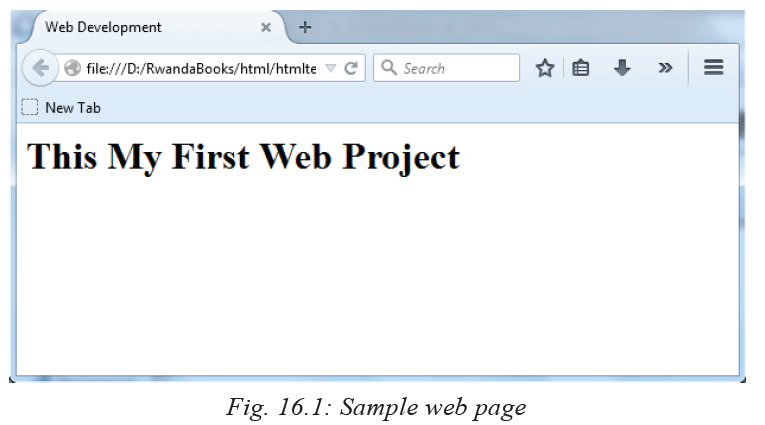
3. Double click the file to open it in your browser. The browser displays the web
page as shown in Fig. 16.1.
16.2.1 Types of HTML elements
HTML has different elements that perform different functions. The three most
common elements are:
1. Structural elements.
2. Presentational elements.
3. Hypertext.
Let us look at each of these and examples of elements under each.
Structural elements
A structural element is one that is used to describe the structure of a web page content
i.e. the way the content is displayed on the page relative to each other conveys a
particular meaning to the user. For example, content under a heading h1 (first level
heading) would be considered as more important than content under a lower heading
level e.g. h2 (second level heading). Similarly, content within the same list block will
be considered as similar e.g. a list of towns within Rwanda etc.
Presentation (style) elements
Presentational elements are used to specify the web page style or how the content will
be displayed on the page e.g. font size, color, margins, borders, layout etc. Examples of presentation elements are:
Hypertext
The content on a web page is usually created and presented in the browser using a special format called hypertext. Different hypertext pages are linked together using hyperlinks. A hyperlink is special text or an image that the user can click on in order to jump to another section on the same page or to a different web page. One such element is the anchor written as <a> that makes text or image clickable. Once the user clicks the hyperlink, the web page pointed to is loaded e.g.
16.2.2 DOCTYPE and HTML Versions
The <!DOCTYPE> declaration is the first line in an html document placed before the <html> tag to help a browser to interpret the version of HTML used. These interpretations are found in the *.dtd file. The <!DOCTYPE> statement must be exact in spelling and case in order to have the desired effect.
HTML versions
HTML can be classified into various versions depending since the first version dubbed
HTML 1.0 was released in 1991 by Tim Berners-Lee. Each version has a DOCTYPE used by a web browser to identify the version of HTML your document is using. In this section, we highlight four official set of HTML standard released since 1994.
1. HTML 2.0 standard was released in 1994 by the HTML Working group lead by Tim Berners-Lee and Dan Connolly. The following DOCTYPE tells the browser to interpret the document using HTML 2.0 specification:
2. HTML 3.2: This standard was released in 1997 amidst competition by Microsoft and Netscape Communications control of the Internet. The HTML 3.2 DOCTYPE is written as:
3. HTML 4.0: HTML 3.2 was enhanced by W3C into HTML 4.0 specification that was published late in 1997 and. The standard was finally approved as HTML 4.01 with the following three DOCTYPE declarations:
• The following HTML 4.01 DOCTYPE declaration is used for documents that use
frameset element to divide a document page into partitions known as frames:
• The HTML 4.01 Strict declaration that emphasizes on structure rather than formatting of HTML document. This means that elements and attributes such as font used for presentation are not supported: The following is DOCTYPE declaration for HTML 4.01 strict:
• Unlike HTML 4.01 Strict, HTML4.01 transitional supports both structural and presentational elements and attributes. The following is DOCTYPE declaration for HTML 4.01 transitional:
4. HTML 5 is the latest W3C standard that was published in 2014. The standard deprecates presentation tags and attributes used in HTML 4 as discussed later. Unlike HTML 4 DOCTYPE declaration that DTD, HTML5 uses the following simple DOCTYPE:
16.3 HTML Elements
16.3.1 Tags and Attributes
HTML tags are used to mark up the start and end of an element. The general format of a tag is tag name enclosed in a pair of less than and greater than symbols (< >) as follows:
The opening tag e.g. <title> “turns on” the element while the closing tag such as </title> turns it off. Through the unit, we provide adequate activities that will help you learn more about opening and closing tags. For example, to instruct a browser to present text as a paragraph, use the <p> opening and </p> closing tags as follows:
<p>This is a new paragraph separated from others by a blank line</p>
An attribute is used to define the property or characteristics of an element inside the
element’s opening tag. All attributes are made up of two parts: name and value. For
example, a paragraph may be right aligned using align attribute as follows:
<p align=”left”>This is left aligned</p>
In this section, we use basic example to describe commom tages used in HTML4.
Activity 16.3: HTML elements and attributes
To create an HTML document, use a text editor or commercial tools such as Adobe Dreamweaver. Download and install Free HTML editors for Windows, Linux or Macintosh Operating Systems. Once you install your favourite editor, write the following HTML code and save the file as mypage.html.
<!DOCTYPE html>
<html>
<head>
<title>Page Title</title>
</head>
<body>
<div>
<p>some content comes here...</p>
</div>
<div>
<p>some other content comes here...</p>
</div>
</body>
</html>
In the following subsection, we highlight common HTML tages used to create a web page illustrated by this basic code.
16.3.1.1 <html>
The <html> tag is the first page structure tag that indicates that the content of the page conforms to HTML specifications. Thus, <html> serves as a container for all the the the other tags that make up a web page. Always remember to close the element tag with </html> tag as shown in the following HTML code. Fig. 16.2 shows how the HTML page is displayed on the browser.
<!DOCTYPE html>
<html>
...your web page...
</html>
16.3.1.2 <head>
The <head> tag is a container for other tags that contain information about the web page itself. This type of information that is not intended for the user is referred to as metadata. Generally, only a few tags are used in the <head> section to define title,and information about the web page (metadata) and. Never put any content intended to be displayed on the web page in the header tags. Here’s a typical example of how you should structure the <head> element:
<!DOCTYPE html><html>
<head>
<title>Welcome to My First Website </title>
</head>
...your page...
</html>
16.3.1.3 <title>
The <title> element is placed within the <head> to describe the content of the web page on the browser’s title bar. The text defined in the title is stored in as a bookmark making it easier for a search engine such as Google to display your page in the results page.
16.3.1.4 <body>
The <body> tag marks the actual content of your web page. This includes text, images,
hyperlinks, video and any other type of content intended for the visitors of a website. The following is a skeleton web page showing how to use the opening<body> and
closing </body> tags:
<!DOCTYPE html>
<html>
<head>
<title> Welcome to My First Website </title>
</head>
<body>
...your content...
</body>
</html>
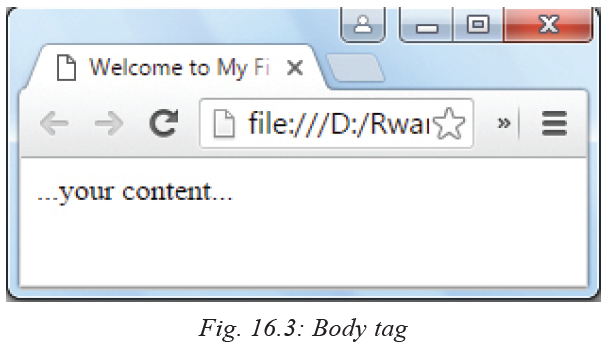
Fig. 16.3 shows how the sample page appears when displayed on a browser. Note that the title welcome to ... is displayed on the title bar of the browser. The only content in the body section is ... your content...
16.3.1.5 Heading tags
Heading tags are used in the body section to define section headings that stand out from the rest of text. HTML provided six levels of section headings - <h1>, <h2>, <h3>, <h4>, <h5>, and <h6>. Note that the size of the heading reduces progressively with h1 being the largest while h6 is the smallest. By default, when headings are displayed, the browser adds one line before and one line after that heading. The general syntax of heading element is:
<headlevel> tex</heading level>
For example to display Breaking News as heading using the following syntax:
<h1> Breaking News! </h1>
The following HTML document displays the six heading levels (h1 to h6)
<!DOCTYPE html>
<html>
<head>
<title>Heading Example</title>
</head>
<body>
<h1>This is heading 1</h1>
<h2>This is heading 2</h2>
<h3>This is heading 3</h3>
<h4>This is heading 4</h4>
<h5>This is heading 5</h5>
<h6>This is heading 6</h6>
</body>
</html>
Fig. 16.4 Shows how the headings appear when displayed on a browser such as chrome or Mozilla Firefox.
16.3.1.6 Paragraphs
The <p> tag offers a way to structure your text into paragraphs that are seperated from each other by a blank line. To add several paragraphs, each of the paragraphshould be enclosed between the opening <p> and closing </p> tag. For example:
<!DOCTYPE html>
<html>
<head>
<title>Sample Paragraphs</title>
</head>
<body>
<p>This is the first paragraph of text.</p>
<p> This is the second paragraph of text.</p>
<p> This is the third paragraph of text.</p>
</body>
</html>
Fig. 16.5 Shows how the paragraphs are displayed on the browser. By default, paragraphs are separated by blank lines.
16.3.1.7 Comments
Comments are used to explain parts of HTML statement especially in complex documents to increase readability. They help other web developers understand the code even in future in case of modification. If used, comments are ignored by a browser when the page is displayed. To indicate that a statement is a comment, enclose it within <!-- …--> tags. For example, the following statements are interpreted by the browser as comments hence they are not displayed on the screen.
Having looked the syntax of HTML 4, Table 16.1 gives quick overview of some of the elements discussed in this section.
Activity 16.4: HTML tags
1. Using heading and paragraph elements create a page that briefly describes topics that you would like to cover in your personal website, also known as a blog. The website should contain information such as brief description about yourself, academic profile, and career aspirations in separate paragraphs.
2. Explain what happens if you insert a blank line between the paragraphs but enclose the paragraphs within a single <p> ..</p> pair.
16.4 Introduction to XHTML
As earlier mentioned another markup language is known as Extensible Markup Language (XML). The letter X in XHTML stands for extensible which means that an XHTML developer can define new elements.
Although XHTML and HTML 4.01 are almost same in terms of elements, the main difference between the two is that XHTML has strict rules for defining document structure. The following are some of the differences between the XHTML 1.1 and HTML 4.01 standard:
• Unlike HTML 4, XHTML is case sensitive, hence all tags must be in lower case
e.g. <html>, <body>, <div>, <p>, <b> etc. No upper case or mixed case is allowed.
• Each tag must have a closing tag e.g. <div> </div> , <li> </li>.
• Unlike in HTML standard in which you can define an attribute and leave it blank, in XHTML each attribute must have a value.
Throughout the remaining part of this unit, we adhere to basic XHTML rules but
base our examples on HTML 4.01 standard. To take care of both standards, we use
HTML without the version number to stand for this hybrid approach.
16.4.1 XHTML syntax and structure
XHTML standard contains doctype and elements used to define various parts of a
webpage. The following is a general structure of an XHTML document:
<!DOCTYPE html PUBLIC “-//W3C//DTD XHTML 1.0 Transitional// EN”
The above HTML page when viewed on a web browser appears as shown in Fig. 16.6 shown below.
In the following subsection, we briefly discuss some of the features of XHTML starting with DOCTYPE declaration.
16.4.2 DOCTYPE and XHTML Versions
Based on <!DOCTYPE> declarations, there are four versions of XHTML i.e. versions
1.0 Strict, 1.0 Transitional, 1.0 Frameset, and 1.1. declarations must be on the first line of the page.
1. XHTML 1.0 Strict:
Contains all HTML elements and attributes. However, it does not include presentational or deprecated elements (like font) and framesets are not allowed. Tags must be written as well-formed XML. It is declared as:
2. XHTML 1.0 Transitional:
Contains all HTML elements and attributes, including presentational and deprecated
elements (like font) but framesets are not allowed. Tags must be written as wellformed
XML. It is declared as:
3. XHTML 1.1:
Equivalent to XHTML 1.0 Strict, but allows you to add modules e.g. different language
support modules etc. It is declared as:
<!DOCTYPE html PUBLIC “-//W3C//DTD XHTML 1.1//EN”
“http://www.w3.org/TR/xhtml11/DTD/xhtml11.dtd”>
16.4.3 XHTML elements and attributes
Observe the following rules when using XHTML:
1. Write a DOCTYPE declaration at the start of the XHTML document.
2. All elements and attributes should be written in lower case e.g <body>.
3. Each opening tag must have an equivalent closing tag.
4. Nest all the tags properly.
5. Attribute values must be enclosed in quote marks e.g. <td rowspan = “3”>.
6. Elements such as <b> and <i> have been replaced by <strong> and <em>
respectively.
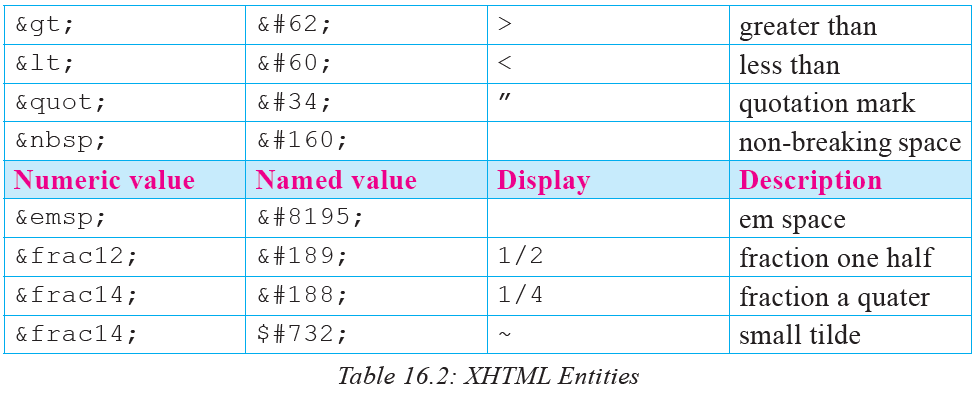
16.4.4 XHTML entities
An entity can be defined as a special character or symbol which may not be readily
available on the keyboard e.g. numeric, latin and special characters that can be
embedded on a web page using character entity references. The references have
both a numeric value as well as a named value. You can use either as summarised
in the table below:
Activity 16.5: XHTML entities and page codes
Use the entities in Table 16.2 to do the following:
1. Insert the copyright symbol on a web page
2. Display: y > x on a web page
3. Display: 1/2 + 1/4 = 3/4 on a web page.
4. Most web browsers have a way of letting users view the HTML source of a web page. Demonstrate how you would display the source code of a REB home in Firefox, Windows Explorer, Chrome, Safari and Opera. Identify some similarities between the source code of viewed pages and the one you created in activity 16.3 in terms of organization and tags used.
Assessment Exercise 16.11. Write the following acronyms in full:
(a) HTML
(b) XHTML
2. Differentiate between an HTML tag and HTML element.
3. Using examples, illustrate how the following HTML tags are used:
(a) Title
(b) Body
(c) Paragraph
(d) Heading
4. Using an example, describe the general structure of an HTML page.
5. Explain the importance of using HTML comments in a web page.
6. Why should DOCTYPE appear at the start of every HTML page.
7. Describe the steps you would follow to create a website.
8. List three software tools you can use to create a web page.
9. Write the entity that would display a copyright symbol on the screen.
16.5 Designing HTML pages
In this section, we demonstrate how to design and present content in the body element using ordered lists, unordered list, image, hyperlink, and table elements.
Activity 16.6: Designing HTML page
In groups, discuss how you can add different types of web content such as text, tables, forms, and images, audio and video clips. Explain how you would preview each of the content separately in a web browser.
16.5.1 Ordered and Unordered Lists
HTML offers web developers with elements for displaying information in numbered or bulleted list. HTML supports three types of lists namely ordered list, unordered list, and definition list. The three are different in that:
• Ordered <ol> list is a container for enumerated items ordered using numbers such as 1, 2,3.
• Unordered list <ul> is a collection of related items that have no special order or sequence.
• Definition list <dl> is used for definitions such as glossaries that pair each label with some kind of description. The three list elements consist of nested tags that define the type of list.
16.5.1.1 Creating ordered list
Ordered lists are lists in which each item is numbered or labelled with a counter such as alphabetic letters or roman numerals. It is advisable to create numbered lists only when the order or sequence of items on the list is relevant. To create an ordered list, use the <ol>...</ol> tags within which you include one or more <li>...</li> (list item) tags as shown in the following HTML document.
<!DOCTYPE html>
<html>
<head>
<title>Numbered List</title>
</head>
<body>
<ol >
<li>Boot-up the Computer</li>
<li>Insert System DVD</li>
<li>Run the Setup Wizard </li>
<li>Restart the Computer</li>
</ol>
</body>
</html>
Fig. 16.7 shows the list of four items after displaying the page on a browser.
You can customize the numbering style of an ordered list using the type attributes
as follows:
<ol type = “counter-type”>....</ol>;
Example
<ol type = “a”> ...</ol>
Activity 16.7: Ordered list
Suppose that you wanted three items in a list of ingredients to be in roman i, ii, iii instead of the default 1, 2, and 3. Modify the HTML document for Fig. 16.5 to display the items in roman numerals starting from v instead of 5.
16.5.1.2 Creating unordered list
Unordered list is similar to ordered list only that the items are listed using bullets. To create unordered list, use <ul>...</ul> instead of <ol>..</ol> element as shown in the code below.
<!DOCTYPE html>
<html>
<head>
<title> Fruits Menu</title>
</head>
<body>
<ul>
<li>Orange</li>
<li>Banana</li>
<li>Guava</li>
<li>Mango</li>
</ul>
</body>
</html>
Fig. 16.8 is an example of a bulleted list of four items as displayed on a browser.
You can customize unordered lists using type attribute and values that denote bullet types such as disc, square, or circle. For example, to change the bullets displayed in Fig. 16.9 from round to square, use the following syntax:
<ul type = “bullet-type”>....</ul>;
For example, to display unordered list shown in Fig. 16.7 as a square, bullets, use
the style attribute as follows:
<ul type = “square”> ..</ul>
Activity 16.8: Ordered list
Suppose you wanted three items in a list of ingredients to be in numbered in Roman
I, II, III instead of number 1, 2, and 3. Create a webpage with an ordered list of items
displayed in uppercase Roman numbers I, II, III ...
16.5.2 Creating definition list
A definition list is used to present a glossary of terms, or other definition lists like dictionary and encyclopedia. To create a definition list, use <dl> ... </dl> element in which you place <dt> ... </dt> to mark up the term and <dd> ... </dd> to mark up the definition part. Therefore a definition list consists of the following parts:
• <dl> - Defines the start of the list
• <dt> - A term
• <dd> - Term definition
• </dl> - Defines the end of the list
For example, the following HTML document shows a definition list for three terms:
XTML, HTTP and CSS.
<!DOCTYPE html>
<html>
<head>
<title>Glossary of Terms </title>
</head>
<body>
<dl>
<dt><b>XHTML</b></dt>
<dd>XHTML stands for Extensible Hyper Text Markup Language</
dd>
<dt><b>HTTP</b></dt>
<dd> HTTP stands for Hyper Text Transfer Protocol</dd>
<dt><b>CSS</b></dt>
<dd>CSS stands for Cascading Style Sheet</dd>
</dl>
</body>
</html>
Fig. 16.9 shows how the definition list of the code above is displayed on a browser.
Activity 16.9: Definition list
Suppose that you want to display 10 Glossary terms using the definition list Modify the HTML document above to display the terms and their meaning.
16.5.3 Creating nested lists
To create a nested list, put the entire list structure inside another list as shown below:
<!DOCTYPE html>
<html>
<head>
<title>sample Nested List </title>
</head>
<body>
<ol>
<li>World wide web</li>
<li>Organization</li>
<li>Introduction to HTML</li>
<li>
<ul>
<li>Definition of HTML</li>
<li> HTML Syntax</li>
<li>Doc structure</li>
<li>Headings</li>
<li>Paragraphs</li>
<li>HTML Comments</li>
</ul>
</li>
<li>Hyperlinks</li>
<li>Advanced HTML</li>
</ol>
</body>
</html>
Fig. 16.10 shows an illustration of a nested list from the HTML code above.
16.5.4 Inserting Images and Background
One of the most compelling features of latest HTML standard is the ability to embed images that make your website more attractive. The three types of images supported by HTML4 are GIF (Graphics Interchange Format), JPEG (Joint Photographic Experts Group) and PNG (Portable Network Graphics).
To insert an image onto a web page, use the <img> tag; img is an abbreviation of the word image. The <img> is an empty tag does not require a corresponding closing tag. The general syntax for inserting a graphical object or image is:
<img src=”Image URL” ... attributes-list/>
The src in the img tag is an important attribute that specifies the location (source) or URL of the image you want to insert onto the page. For example, The following HTML code displays an image called house:
<!DOCTYPE html>
<html>
<head>
<title> This is my House </title>
</head>
<body>
<p>This is the house I call My Home</p>
<img src=”house.jpg” alt= My House />
</body>
</html>
Fig. 16.11 shows how the web page looks when displayed on the browser
NB: use of the alt attribute is a good practice to specify alternate text for an image, if the browser cannot display or locate the image.
16.5.4.1 Setting Image size
You can specify the size using width and height attributes. The two attributes sets width and height of the image in terms of pixels or percentage of its actual size. For example, to set the size of the hows to occupy quarter of the screen, use:
< img src = “house.gif” width =”25%” height = “25%” alt = “House” />
16.5.4.2 Image Alignment
The <img> tag uses the align attribute to align an image on top, bottom, left or right of the browser window. For example, to align house.gif on top of the page, use align attribute as follows:
<img src = “house.gif” align = “top” alt = “House”/>
NB: Although some browsers currently support align attribute, it is no longer supported in HTML5.
16.5.4.3 Setting page Background Colour
HTML4 comes with background formatting elements such as color and bgcolor. However, since we do not intend to go against current trends in XHTML and HTML5, we deliberately avoid using these elements and their attributes.
Activity 16.10: Embedding images
Using the image tag, embed various images on one of the web pages created earlier.
How do you insert images from a different location other than your current working folder?
16.5.5 Inserting Hyperlinks
A hyperlink is a text, phrase or image that you click to go to another web page or a section within the current page. In most browsers, hyperlinks are often in blue and underlined. When you move a mouse pointer over a hyperlink, the arrow changes to a hand pointing at the link. Clicking the link takes you to a new page or place in the current page.
Activity 16.11: Hyperlinks
A hyperlink can be plain text, image or email. In groups, research on the web how each of these three types of links can be added on HTML page to direct visitors to a section of the same page or another web page.
From activity 16.10 you may have observed that hyperlinks allow visitors to navigate
between web sites by clicking on words, phrases, or images.
16.5.5.1 Text Hyperlinks
To create a link in HTML, you need to know the name of the file (or URL of the file to which you want to link) and the text that will serve as the clickable hyperlink. To create a hyperlink use the anchor element: <a>...</a>. The <a> tag is called an anchor tag because it is used to create anchors for hyperlinks.
16.5.5.2 Linking to a different Page
To create a link to other web pages, user the <a> tag and href hypertext reference attribute as shown in the following general syntax:
<a href=”Document URL”...attributes-list>Clicable Link Text</a>
The href attribute is used to specify the URL of the file the link points to. For example,
to open a page with URL “
http://www.tutorpoint.edu” use:
The following code shows how to add text-based hyperlink into a HTML page:
<!DOCTYPE html>
<html>
<head>
<title>Creating Hyperlinks</title>
</head>
<body>
<p>Click following link</p>
<a href=”http://www.tutorpoint.edu” >Visit Tutorial Site</a>
</body>
</html>Fig. 16.12 shows how the link is displayed on the browser.
In most browsers, a hyperlink is an underlined text and blue in colour. In our case, once the visitor clicks on the link, he or she is taken to the web page of the tutorial site as long as it is a valid URL.
16.5.5.3 Linking to Page Sections
To create a link to a particular section of the same page, we use the name attribute
of the <a> tag. This is a two-step procedure as follows.
1. Create a link to the target web page within which you want to visit a specific
section using the following general syntax:
<h2>Link to a Page Section <a name=”sectionname”></a></h2>
2. Create a hyperlink to the named section of the document where you want to visit.
For example, the following HTML code shows how to visit the top section of a
web page:
<a href=”/html/html_text_links.htm#top”>Go to Top</a>
16.5.5.4 Image hyperlinksTo take care of people with special needs, you can also provide an image as a
hyperlink. Similar to defining a text link, we use anchor (<a>) tag as follows:
<a href= “www.tutorpoint.edu >
<img src=”/images/logo.png” alt=”Tutorials” border=”0”/> </a>
16.5.6 Using Relative and Absolute URLs
To link web pages that are contained in the same or different locations, we use relative
or absolute URLs. A relative URL points to a file depending on its locations relative
to the current file. On the other hand, absolute URL points to a file depending on
actual locations.
16.5.6.1 Specifying Relative URL
To specify relative URL we use the forward slashes (/) to refer to a directory within
the current or two dots (..) refer to the directory above the current. Table 16.3 shows
how to use relative URL to access flowers.html
16.5.6.2 Specifying Absolute URL
Absolute URL points to a page by starting at the top level of directory hierarchy and working downwards to the target file. To specify an absolute path, you must start with a forward slash as shown in Table 16.4.
16.5.7 Creating Tables
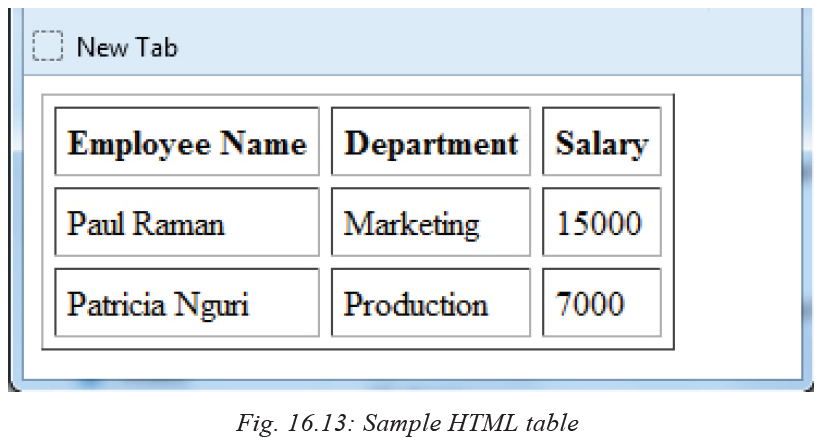
Tables are used to organize data such as numbers, text, links and images into rows and columns. An intersection of a row and a column forms data cell in which table data is held as shown in Fig. 16.13. In HTML tables are created using the <table> tag which is a container for <tr> (table row) tag used to create rows and <td> (table data) tag used to create data cells. Before you create a table such as shown in Fig. 16.13, consider the following table-features:
• Caption: indicates the type of data presented in the table
• Table headings: the row that indicate the data displayed in each column
• Table cells intersection of rows and columns in which we insert data.
• Table data is the data or values in the table.
To create a table, we use the <table>…</table> element within which the following
elements are nested:
• <caption>..</caption> used to create the table caption
• <th> ...</th> tag is used to create the table heading
• <tr>...</tr> tag is used to create table rows
• <td>...</td> tag is used to create data cells
The following HTML code produces the table shown earlier in Fig. 16.13. Notice that the table starts with a <table> tag followed by border, cell padding and cell spacing attributes and ends with the closing </table> tag.
<!DOCTYPE html>
<html>
<head>
<title>HTML Table Cellpadding</title>
</head>
<body>
<table border=”1” cellpadding=”5” cellspacing=”5”>
<tr>
<th>Employee Name</th>
<th>Department</th>
<th>Salary</th>
</tr>
<tr>
<td>Paul Raman</td>
<td>Marketing </td>
<td>15000</td>
</tr>
<tr>
<td>Patricia Nguri</td>
<td>Production</td>
<td>7000</td>
</tr>
</table>
</body>
The following are basic atributes used to define or format an HTML table.
16.5.7.1 Border Attribute
The border attribute takes numeric values that specify thickness of the border that surrounds all the table cells. If 0 is used, the border is invisible while. In our example above, the statement below create a border of 1 pixel thickness.
<table border=”1”>
16.5.7.2 Height and Width attributes
To set the size of the table, use width and height attributes. The height and width attributes take width or height values in terms of pixels or percentage of the screen. For example, the statement below sets the table size to width of 400 pixels and height of 150 pixels.
<table border=”1” width=”400” height=”150”>
16.5.7.3 Table Caption
The caption tag will serve as a title or explanation for the table and it shows up at the top of the table. However, it is important to note that the caption tag is deprecated in newer versions of HTML.
Activity 16.12: Tables
In groups, use sample HTMP pages to demonstrate use of the following table features:
• The three elements used for separating a table into three sections header, body, and footer as shown.
• The table attributes such as colspan, rowspan, cellpadding, cellspacing used to format table cells.
16.5.8 Creating Forms
You may need to gather information such student’s details and store such information in the server. The most common method for gathering such information is by using a form. For example, Fig. 16.14 shows a sample HTML form used to collect user registration details such as first name, last name, nationality and phone.
When users fill forms and clicks the submit button, the data keyed into the form is sent (posted) to the web server for processing or storage into a database. To create HTML forms, we use the <form> ... <form> element as follows:
<form action=”Script URL” method=”GET|POST”>
form elements like input, textarea etc.
</form>
For example, the following HTML code produces the form shown earlier in Fig. 16.15 in the next section, we discuss other elements and attributes used to format HTML forms.
16.5.8.1 Form Action Attribute
The <form> tag takes several attributes key among them the action and method attributes used to accomplish the following:
• Action: This attribute is used to specify the file on the server that receives data from the form for processing. For example, the action attribute in the form tag below specifies a file named register.php that receives registration details after the user clicks the submit button:
<form action=“register.php”> </form>
16.5.8.2 Form Method Attribute
The Method attribute specifies how the data is to be sent to the web server. The two types of methods used are the post and get.
• Get Method: If a “GET” method is used, the data supplied in the form is appended
at the end of the URL as shown below:
Note that in this example, using get method in a login form is not recommended unauthorized users may see actual username and password. The alternative is to use the post method.
• Post Method: Unlike the GET method, post method does not display submitted form data on URL because the parameters are passed as body of a HTTP request.
Activity 16.13 Form attributes
In groups, discuss the difference between the post and get methods in terms of how
the two attributes send data to the back-end server script. Which method is preferred
for sending sensitive data such as username and password. Defend your argunment
using sample HTML pages.
16.5.9 Form Controls
There are different types of form controls that you can use to facilitate data collection
information using HTML form. The most common controls include: text, textarea,
select, radio buttons, checkboxes, file select, command button and reset buttons.
16.5.9.1 Text input
Input control is used to capture alphanumeric data such as text, password and hidden.
For example, the following statement defines text input for capturing username.
<label> Username:
<input type=”text” name=”uname” size = “15” />
</label>
16.5.9.2 Hidden input
Sometimes it is importat to conceal the identity of information entered in the form using the input type. This is achieved by use of hidden input type. To create hidden input, set the input type to hidden as shown below:
<input type=“hidden” name=“userid” value=“132”/>
16.5.9.3 Textarea
Textarea control is a multi-line text input used when the user is required to give details
that may be longer than a single sentence. The attributes used with textarea tag are:
name, rows, and cols. For example, the following statement defines textarea named
comment that has 3 rows and 10 columns:
<form >
Comments: <br />
<textarea rows=”3” cols=”10” name=”comment”>
</form>
16.5.9.4 Checkbox
Checkbox controls are input type used when more than one option is required to be selected from a list of check boxes. However, the input type attribute must be set to checkbox value as shown by the following statement:
16.5.9.5 Select
The select control also known as dropdown box provides the user with various options in form of drop down list, from which a user can select one or more options. For example, the following select defines a dropdown for selecting only one option:
<select name=”dropdown”>
<option value=”maths” selected>Mathematics</option>
<option value=”computer”>Computer Science</option>
</select>
16.5.9.6 Submit and Reset Button
Submit input type used to create a button that automatically submits form data to web server. On the other hand, reset is used to refresh (reset)form controls to their default values. The following statements creates submit and reset buttons with values set to Send and Reset respectively:
The following is an HTML code that implements input, textarea, checkbox, and select elements.
The illustration shown in Fig. 16.15 shows how form controls discussed earlier are
displayed:
Activity 16.14: Form controls
Create a form that contains textarea, password, checkboxes and select, textarea, readonly
controls and radio buttons. Demonstrate how such a form would be used to post collected information to a web server for processing and storage.
Assessment Exercise 16.21. State three advantages of using commercial web development tools such as Dreamweaver over text editors such as Notepad.
2. Explain five main features of an HTML form.
3. Explain four types of image formats that can be inserted into a web page.
4. Giving examples, differentiate between the following features
(a) Absolute and relative URL.
(b) Post and Get methods..
(c) Tag and attribute.
5. Outline a step-by-step procedure you would follow to insert the following Dreaweaver objects:
(a) Table
(b) Form
(c) Image
6. Differentiate between GET and POST methods used to senf form content to a web server.
16.6 Introduction to HTML5
HTML5 is the fifth revised and newest version of HTML standard offering new features that support multimedia content more effectively than ther previous versions. In the long run, the new standard is meant to be a replacement for HTML 4.01, XHTML 1.0, and XHTML. To be supported by majority of browsers, HTML5 has been developed in collaboration with browser makers. This explains why most browsers are supporting the new HTML5 specification. In comparison to HTML4 and XHTML, HTML5 standard has adopted a flexible hybrid approach by:
• Relaxing some of the relaxing some of the rules that were imposed by XHTML 1.0 version.
• Removing elements and attributes deprecated in previous versions of HTML4 and XHTML.
• Removing elements and attributes that had been introduced in previous standards but are now superseded by Cascading Style Sheets.
• Providing new elements and attributes that allow for backward compatible with current and older browsers.
16.6.1 HTML5 Syntax and Structure
HTML5 has a “custom” syntax that is compatible with HTML4 and XHTML documents published on the Web. However, the standard does not support most SGML-based features inherent in HTML4. In this sections, we discuss some of the unique features of HTML5. The code below shows the general syntax of HTML5 documents.
The following is an example of an HTML5 document that further demonstrates structural elements of HTML5 like header and footer.
Fig. 16.16 Shows the output on the screen once document is loaded on a browser.
In the following subsection, we discuss some of the new features of HTML5 such as DOCTYPE declaration, elements and attributes.
16.6.2 HTML5 Doctype
DOCTYPEs in previous HTML versions were longer because HTML4 and XHTML required a reference to SGML-based DTD. HTML5 standard is a radical departure from SGML restrictions to new features based on cascading style sheet (CSS) and Javascript. This is why doctype is a short statement written as:
<!DOCTYPE html>
16.6.3 New HTML5 Elements
Basically HTML5 is about extending HTML4 and XHTML standards with new rich elements and attributes while deprecating or removing some. New elements have been introduced in HTML 5 to define structural elements, text-formatting instructions, form controls, input types, and multimedia content. The new HTML5 elements may be classified into three categories namely: structural, Input, and media elements.
• Structural elements: HTML5 offers new semantic elements used to define the
structure of a web page. Examples of structural elements include <article>,
<aside>, <header>, <footer>, <main>, <section>, <summary> and <nav>
• Input elements: New input types were introduced to address specific form input and formatting requirements for user input such as dates, numbers, and telephone numbers. Examples of new input types include color, date, datetime, time, email, number, tel, url
• Media elements: Due to high demand of multimedia content on the web, WC3 introduced new set of media elements in HTML5 to handle different media types without need for additional plugins such as Adobe flash. New media elements include <embed>, <audio>, <source>, <track> and <video>
Table 16.18 provides a summary of new structural, input and media element supported
by the HTML5 standard:
Activity 16.15: HTML 5 elements
In groups search for tutorials on HTML5 and list and new elements supported by HTML5. Explain whether the element is structural or media type.
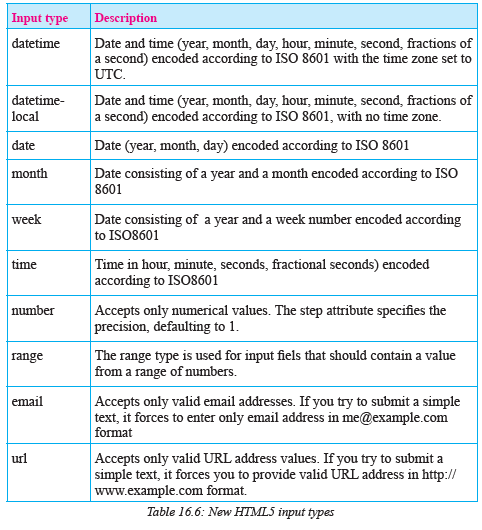
16.6.4 New HTML5 Inputs Types and Restrictions
In HTML4, we discussed some of the input elements that use the type attribute to specify the data input such as text and hidden. HTML5 supports new input types for forms that are meant to improve user experience and shorten web development time. Table 16.6 shows some of the new input types other than text, hidden and password used in the previous versions of HTML.
16.6.5 New Input Attributes
The HTML5 input element has several new attributes to specify the form behaviour and format. Some of the new attributes used for restricting input include: min, max, required, pattern and step. Other attributes used to enhance user input include. Such attributes include autocomplete, autofocus, placeholder, formvalidate, list, formaction,
form method, and formtarget.
To demonstrate how the new input types and attributes are used, below is sample HTML5 document used to get text, telephone, e-mail, date, time and numbers. The code also shows how to restrict input for the e-mail and range of number:
Fig. 16.17 shows a sample output from HTML5 code above. Note the restrictions placed by HTML5 standard on user input such as email that must be provided and range of numbers shown by a drop down list.
Activity 16.16: HTML 5 new input types
The new type called tel in HTML5 expects a telephone number. However, tel does not enforce any validation because many telephone numbers are alphanumeric or start with a + symbol e.g. +250 252 123 123.
• Research on internet the importance of tel input type.
• Explain how the new HTML5 pattern (regexp) attribute can be used to validate telephone number input.
16.7 Migrating from HTML4 to HTML5
For smooth transition from HTML4 to HTML5, there are a number of design and factors to be considered. The two key factors that web developer need to consider are use of deprecated elements, and browser support.
16.7.1 Deprecated elements and attribute
Deprecated elements are features that have been rendered obsolete but that browsers may continue supporting them. Examples of deprecated features are border attribute used with <img/> element and name attribute in the anchor <a> element. Other deprecated elements and attributes include: <applet>, <acronym>, <center>, <font>, <noframes>, <command> and <tt>.
16.7.2 Browser support
Browser support is one of the key factors to consider when migrating from HTML4 to HTML5. Fortunately, since HTML5 became a W3C recommendation in October, 2014, major browsers like Safari, Chrome, Firefox, Opera and Internet Explorer 9.0 have started supporting to HTML5 features. Furthermore, most web browsers that come pre-installed on mobile phones that run on iOS and Android operating systems have support for HTML5 features.
Activity 16.17: Migrating from HTML4 to HTML5
1. HTML5 may be a disruptive technology that will bring most of the sites on the web down due to the following issues:
• Removal of support for HTML frameset element in HTML5 standard.
• Removal of deprecated elements and attributes supported by earlier versions of HTML.
• Tables should not be used to create web page layout. Instead web developers are required to use CSS rules
• Attributes that let people create those perfectly laid-out tables, like align, bgcolor, border, cellpadding, cellspacing, height, nowrap, rules, valign, and width are gone.
2. In groups, research on internet the difference between HTML4 and HTML5.
3. Discuss previous versions of HTML that have been standardized by a consortium
known as W3C (W3C stands for World Wide Web Consortium).
4. Debate this argument by support it or giving justification why migrating from HTML4 to HTML5 is a brave decision that should not be held back due to few people who are resistant to change!
Assessment Exercise 16.31. Define the following terms used in HTML 5:
(a) Deprecated attributes
(b) Pattern
(c) Form validation
2. Distinguish between HTML4 and HTML5 syntax in terms of elements, case sensitivity, and input restrictions.
3. Identify at least three factors that are making it deficult for older browsers to support HTML 5.
4. Once you have created a website on your local machine, demonstrate how you would validate conformity to HTML5 specifications.
Unit Test 16
1. Define the term web server.
2. Differentiate between internet and web.
3. A program, such as Mozilla Firefox that that lets a user display HTML-developed
web pages is referred to as _________.
4. The two standard languages used to create web pages are_____ and _____.
5. Write sample HTML statements to demonstrate how to insert the following:
(a) Scrolling images at the top part of a page
(b) An image of a house
(c) Table with 3 rows and 5 columns
6. Explain statement: <form action=“student.php” method=“get”>
7. Explain at least four types of controls that are used to create a form object.
8. Differentiate between the following terms:
(i) Hypertext and hyperlink
(ii) XHTML and HTML5 standards
9. Giving examples, explain restrictions that were imposed by XHTML that have been relaxed in HTML5.
10. Discuss three key factors that a web developer should consider before developing a website.
11. Build a static website for your school that consists of five hyperlinked pages
containing the following information:
(a) Home page – This is the index page containing general information about the school.
(b) About page – Contains mission, vision and background (History) of the school.
(c) Academic pages – Contains subjects, teachers and school programmes.
(d) Gallery – Contains important photos taken during school events.
(e) Contact page – Contains postal, email, web and mobile phone contacts of the school administration.
 Presentation (style) elements
 Hypertext
 16.2.2 DOCTYPE and HTML Versions
 2. HTML 3.2: This standard was released in 1997 amidst competition by Microsoft and Netscape Communications control of the Internet. The HTML 3.2 DOCTYPE is written as:
 3. HTML 4.0: HTML 3.2 was enhanced by W3C into HTML 4.0 specification that was published late in 1997 and. The standard was finally approved as HTML 4.01 with the following three DOCTYPE declarations:• The following HTML 4.01 DOCTYPE declaration is used for documents that use
 • The HTML 4.01 Strict declaration that emphasizes on structure rather than formatting of HTML document. This means that elements and attributes such as font used for presentation are not supported: The following is DOCTYPE declaration for HTML 4.01 strict:
 • Unlike HTML 4.01 Strict, HTML4.01 transitional supports both structural and presentational elements and attributes. The following is DOCTYPE declaration for HTML 4.01 transitional:
 4. HTML 5 is the latest W3C standard that was published in 2014. The standard deprecates presentation tags and attributes used in HTML 4 as discussed later. Unlike HTML 4 DOCTYPE declaration that DTD, HTML5 uses the following simple DOCTYPE:16.3 HTML Elements
 The opening tag e.g. <title> “turns on” the element while the closing tag such as </title> turns it off. Through the unit, we provide adequate activities that will help you learn more about opening and closing tags. For example, to instruct a browser to present text as a paragraph, use the <p> opening and </p> closing tags as follows:<p>This is a new paragraph separated from others by a blank line</p>An attribute is used to define the property or characteristics of an element inside the
 16.3.1.2 <head>
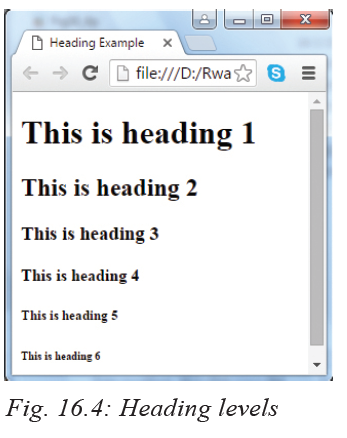 16.3.1.6 Paragraphs
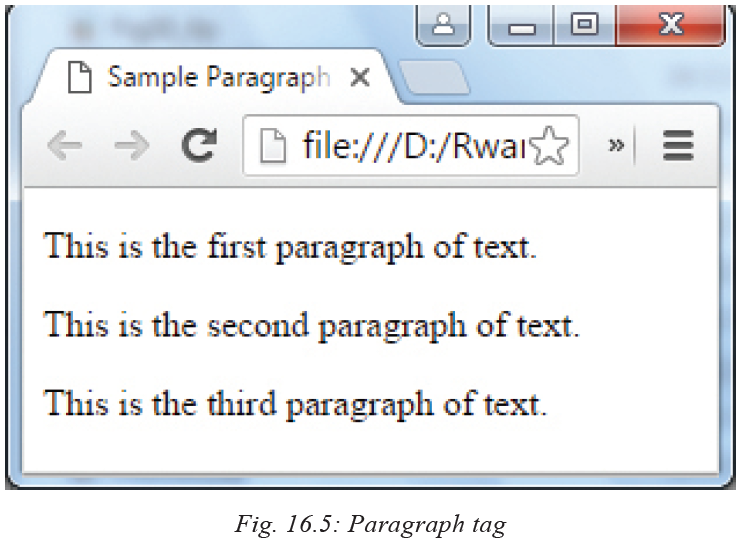 16.3.1.7 Comments
 Having looked the syntax of HTML 4, Table 16.1 gives quick overview of some of the elements discussed in this section.
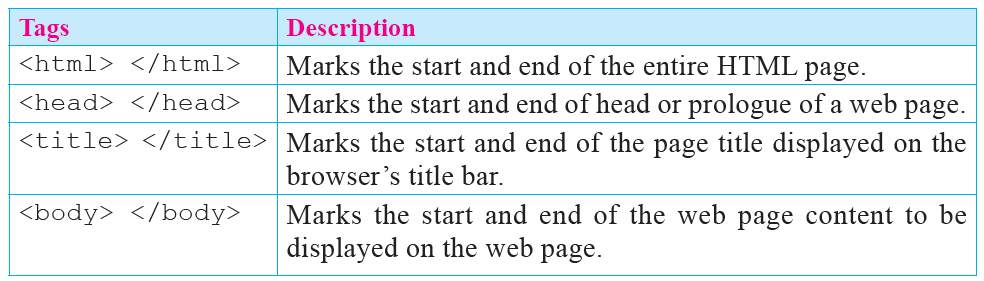
 Activity 16.4: HTML tags
 In the following subsection, we briefly discuss some of the features of XHTML starting with DOCTYPE declaration.16.4.2 DOCTYPE and XHTML VersionsBased on <!DOCTYPE> declarations, there are four versions of XHTML i.e. versions
 Activity 16.5: XHTML entities and page codes
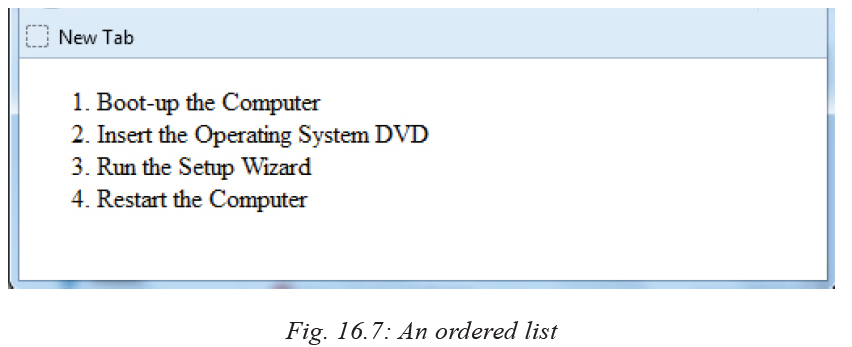 You can customize the numbering style of an ordered list using the type attributes
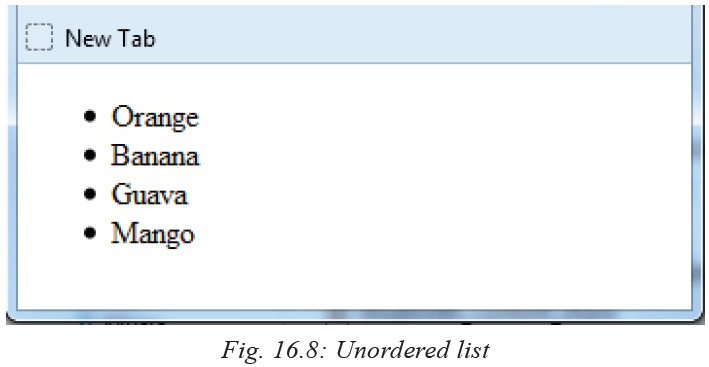 You can customize unordered lists using type attribute and values that denote bullet types such as disc, square, or circle. For example, to change the bullets displayed in Fig. 16.9 from round to square, use the following syntax:
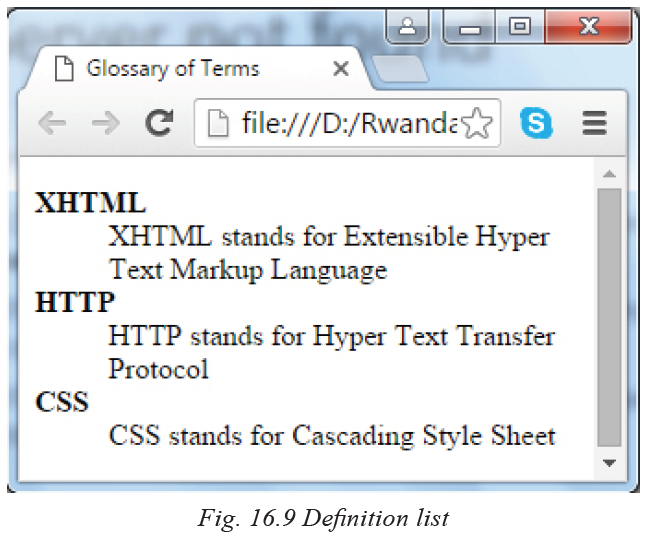 Activity 16.9: Definition list
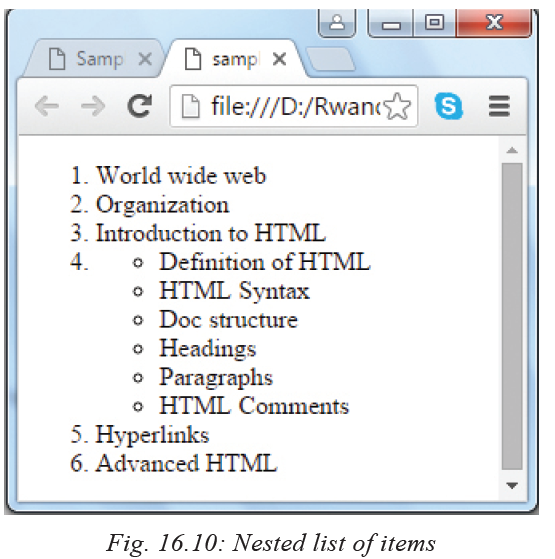 16.5.4 Inserting Images and Background
 NB: use of the alt attribute is a good practice to specify alternate text for an image, if the browser cannot display or locate the image.16.5.4.1 Setting Image size
 In most browsers, a hyperlink is an underlined text and blue in colour. In our case, once the visitor clicks on the link, he or she is taken to the web page of the tutorial site as long as it is a valid URL.16.5.5.3 Linking to Page Sections
 16.5.6.2 Specifying Absolute URL
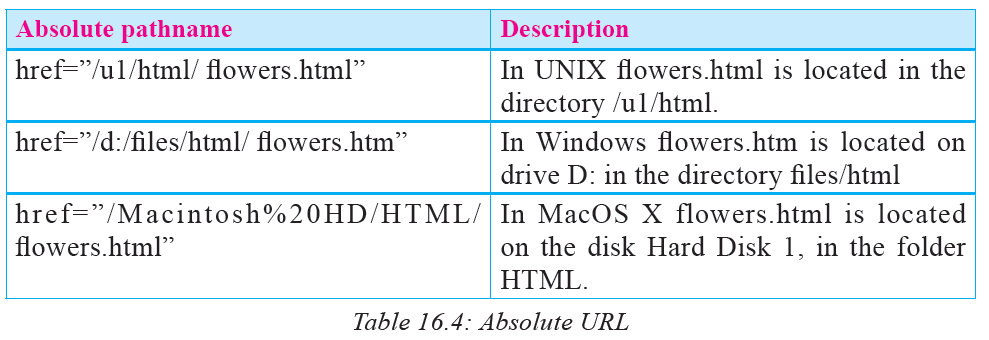 16.5.7 Creating Tables
 When users fill forms and clicks the submit button, the data keyed into the form is sent (posted) to the web server for processing or storage into a database. To create HTML forms, we use the <form> ... <form> element as follows:<form action=”Script URL” method=”GET|POST”>
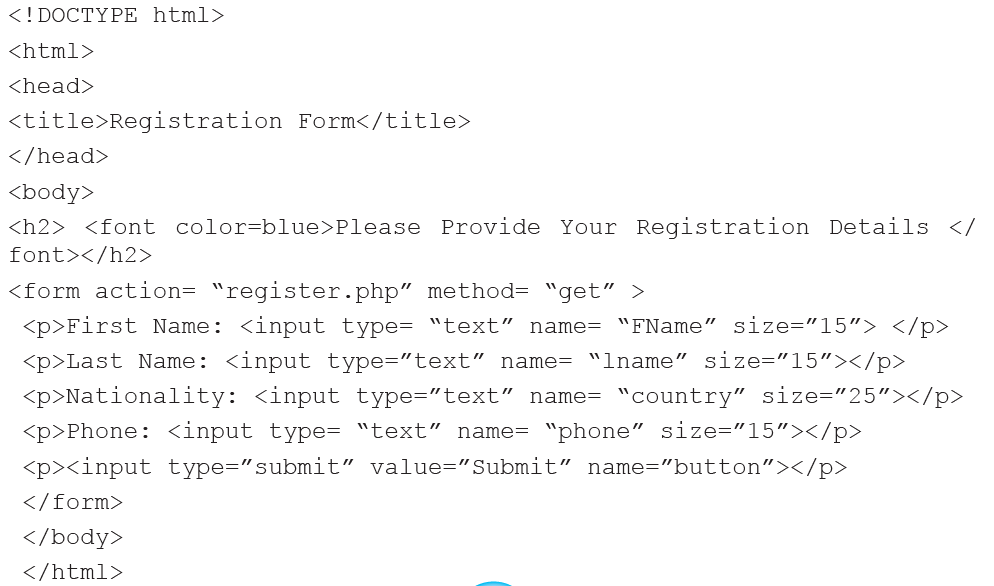 16.5.8.1 Form Action Attribute
 16.5.9.5 Select
 The following is an HTML code that implements input, textarea, checkbox, and select elements.
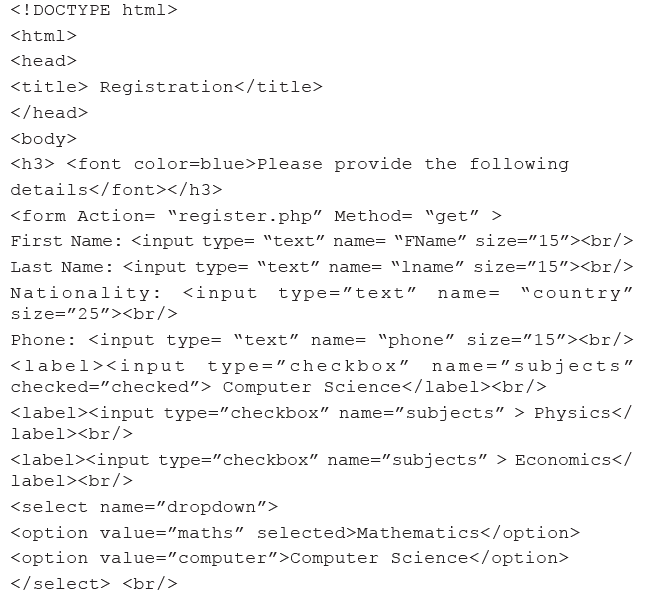
 The illustration shown in Fig. 16.15 shows how form controls discussed earlier are
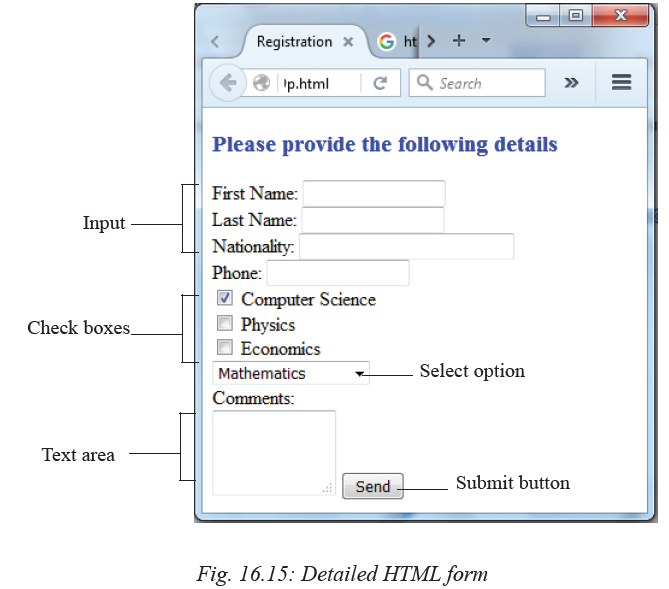 Activity 16.14: Form controls
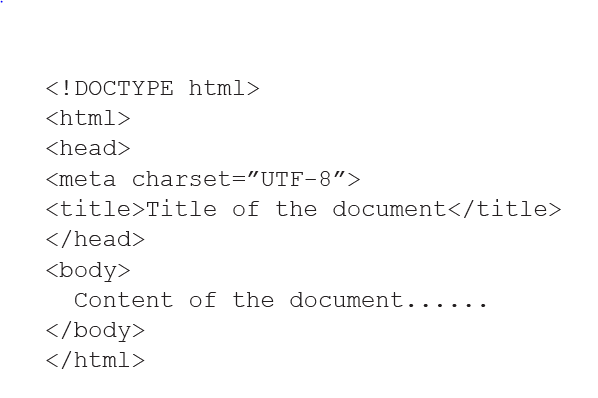 The following is an example of an HTML5 document that further demonstrates structural elements of HTML5 like header and footer.
 Fig. 16.16 Shows the output on the screen once document is loaded on a browser.
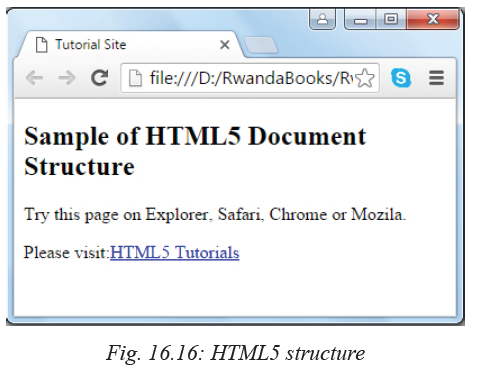 In the following subsection, we discuss some of the new features of HTML5 such as DOCTYPE declaration, elements and attributes.16.6.2 HTML5 Doctype
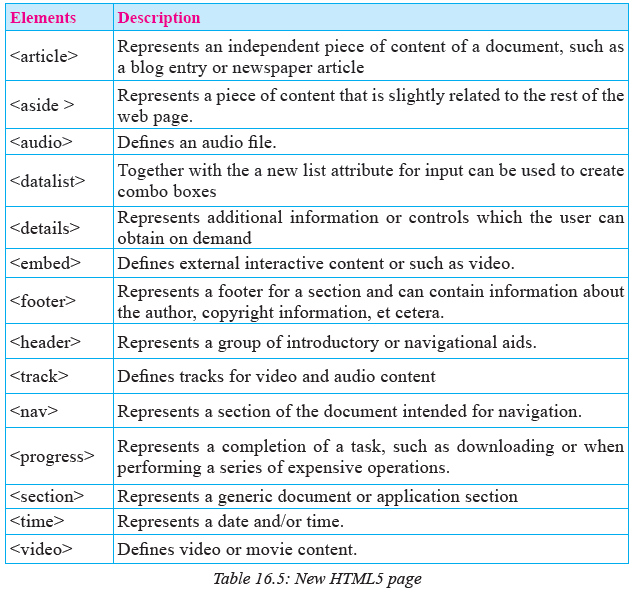 Activity 16.15: HTML 5 elements
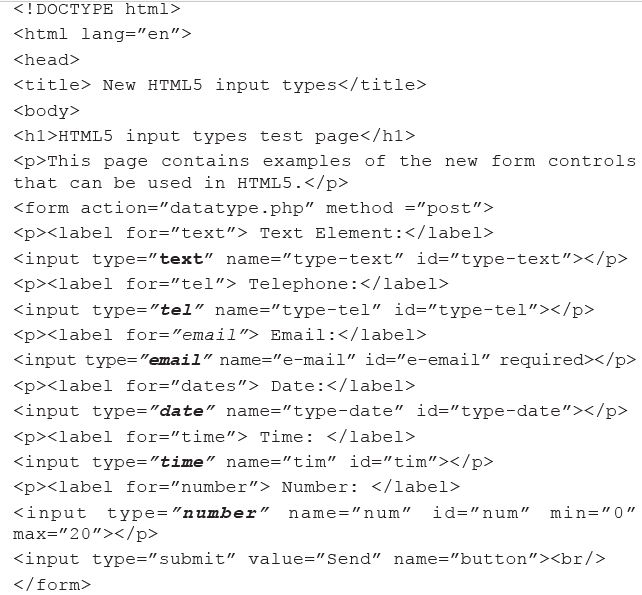
 Fig. 16.17 shows a sample output from HTML5 code above. Note the restrictions placed by HTML5 standard on user input such as email that must be provided and range of numbers shown by a drop down list.
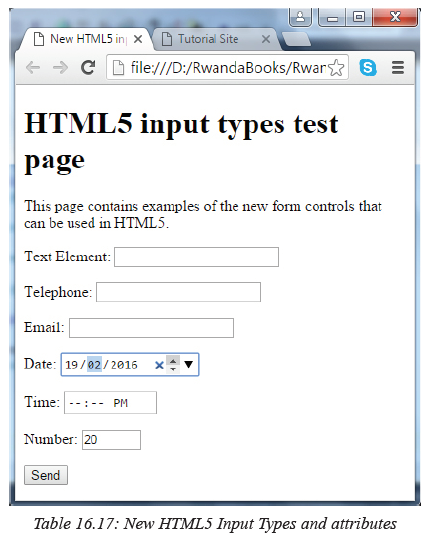 Activity 16.16: HTML 5 new input types