Topic outline
General
- P6: Physical Education and Sports File Uploaded 31/07/22, 11:52
- P6: Physical Education and Sports TG File Uploaded 1/08/22, 09:37
PART I. GENERAL INTRODUCTION
I.0. About the teacher’s guide
This book is a teacher’s guide for Physical Education and Sports for P6. It is designed to help teachers in the implementation of competence based curriculum.
As the name says, it is a guide that teachers can refer to when preparing their lessons. Teachers may prefer to adopt provided activities/games/exercises and related guidance but they are also expected to be more creative and consider their specific classes’ contexts and prepare accordingly.I.1. The structure of the guide
This section presents the overall structure of this guide, the unit and lesson structure to help teachers to understand the different sections of this guide and what they will find in each section.
Overall structure
The whole guide has three main parts as follows:
Part I: General Introduction
This part provides general guidance on how to develop the generic competences, how to integrate cross cutting issues, how to cater for learners with special educational needs, active methods and techniques of teaching Physical Education and Sports and guidance on assessment
Part II: Sample lesson plan
This part provides a sample lesson plan, developed and designed to help the teacher developing their own lesson plans.
Part III: Unit development
This is the core part of the guide. Each unit is developed following the structure below. The guide ends with references.This teachers’ guide has some changes considering pre-established number of units in Upper Primary Physical Education and Sports syllabus.
Unit 1(Motor control), unit 2(Body control and balance), unit 3(Gymnastics) and unit 9(Infectious diseases) were combined to make one unit under the name of Physical conditioning and Healthy body. Thus they are no longer called units; they became lessons under the new unit.
However, the total number of periods allocated for each lesson remains intact, except for volleyball unit which changed from 4 periods to 5 periods.
Structure of a unit
Each unit is made of the following sections:
- Unit title: syllabus
- Key unit competence: syllabus
- Prerequisites (knowledge, skills, attitudes and values
• Cross-cutting issues to be addressed
This section suggests cross cutting issues that can be integrated depending on the unit content. It provides guidance on how to come up with the integration of the issue. Note that the issue indicated is a suggestion; teachers are free to take another cross-cutting issue taking into consideration the learning environment.
• List of lessons/sub-heading
This section presents in a table suggestion on the list of lessons, lesson objectives copied or adapted from the syllabus and duration for each lesson. Each lesson /subheading is then developed.
End unit assessment
This part provides guidance on how to conduct the end unit assessment in a practical way. It suggests activities/ games as well as guidance on criteria to be considered such as:
• Cognitive skills (e.g.: level of concentration, memory, capacity of anticipation, problem solving);
• Technical competences (e.g.: to throw the ball, to catch it, to dribble it, to pass it to others etc);
• Strong emotional points such as self-confidence and feeling secure;
• Social competences such as cooperation and solidarity;
• Attitudes and values: e.g.: optimism, confidence, respect and impartiality.Additional information/activities
This section provides:
• Additional games/exercises for the teacher to have a wide range of activities/games related to the unit.
• Adapted activities for learners with special educational needs
• Remedial Activities for learners who need more time and exercises to achieve a certain level of performance
• Extended activities: for talented learners.Structure of each lesson
Each lesson/sub-heading is made of the following sections:
• Lesson title 1: ……………………………..
• Introduction: This section gives a clear instruction to the teacher on how to start the lesson
• Teaching resourcesThis section suggests the teaching aids or other resources needed in line with the activities to achieve the learning objectives. Teachers are encouraged to replace the suggested teaching aids by the available ones in their respective schools and based on learning environment.
• Steps of the lesson
This section provides activities/games/exercises and guidance step by step: introduction; lesson development and assessment.
I.2. Importance of PES subject
• Physical Education and Sport enables learner global development:
- Physically, PES subject facilitates biological maturation (muscle development, widening of heart cavity, better pulmonary ventilation, coordination and motion speed). It also helps to prevent and correct the morphological and physiological defects;
- Intellectually, the learner acquires knowledge and ability of concentration: he/she observes, recalls, performs experiments, uses strategies, evolves and makes decisions;
- Emotionally, the learner is deeply involved: he/she discovers his/her own potentials; develops self-confidence, gets enthusiasm and happiness;
- Socially, the learner makes friends through playing and develops attitude and competence of communicating, cooperating and building positive relations with others.• Game and sport provide learners with an excellent context of learning how to develop and protect their health and welfare. Through the game, a learner discovers that he/she has to take care of him/herself and of others;
• PES is a powerful way of building personality because it promotes self-confidence and competition skills. It develops knowledge and self-monitoring, respect of the law, will, attention, courage, and communication with others;
• This subject enables early detection and enhancement of sport talents for young learners;
• When games are carefully planned taking into account learner’s age, they enable learners to acquire practical competences such as respect, honesty, comprehension, communication, empathy, problem solving, comprehension of rules foundation and the way of complying with them.
• Success in play and sport activities is a source of self-confidence which contributes to the improvement of performance in other subjects even for students with low academic performance;
• Games contribute to bridge psychological gaps which usually exist between learners and teachers: when teachers regularly play with their learners, the mood becomes much more cordial and learners become more open.
• Recreational and sport activities provide learners with a real relaxation after hours of intensive concentration.I.3. Methodological guidance
I.3.1. Developing competences
Since 2015 Rwanda shifted from a knowledge based to a competency based curriculum for pre-primary, primary and general secondary education. This called for changing the way of learning by shifting from teacher centered to a learner centered approach. Teachers are not only responsible for knowledge transfer but also for fostering student’s learning achievement, and creating safe and supportive learning environment. It implies also that a learner has to demonstrate what he/she is able to do using the knowledge, skills, values and attitude acquired in a new or different or given situation.
The competence-based curriculum uses an approach of teaching and learning based on discrete skills rather than dwelling on only knowledge or the cognitive domain of learning. It focuses on what learner can do rather than what learners know. Learners develop basic competences through specific subject unit competences with specific learning objectives broken down into knowledge, skills and attitudes. These competences are developed through learning activities disseminated in learner-centered rather than the traditional didactic approach. The student is evaluated against set standards to achieve before moving on.
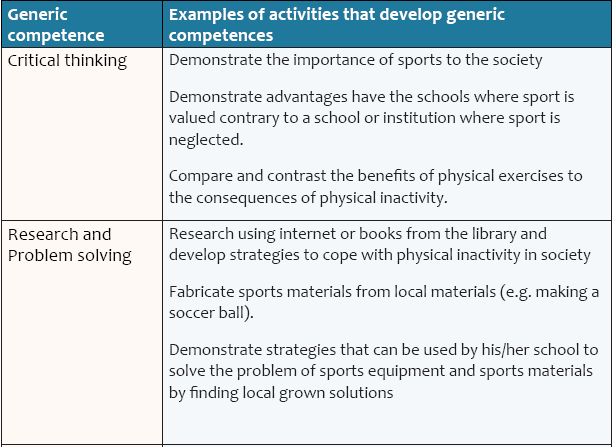
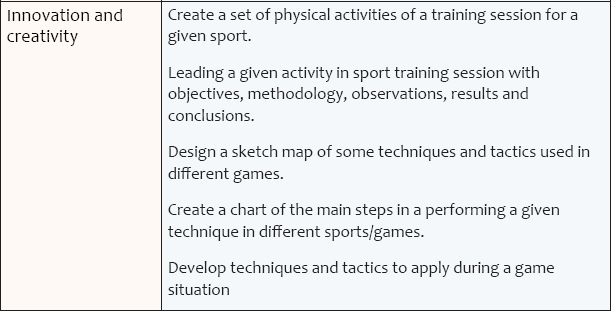
In addition to specific subject competences, learners also develop generic competences which are transferable throughout a range of learning areas and situations in life. Below are examples of how generic competences can be developed in Physical Education and Sports:

I.3.2. Addressing cross-cutting issue
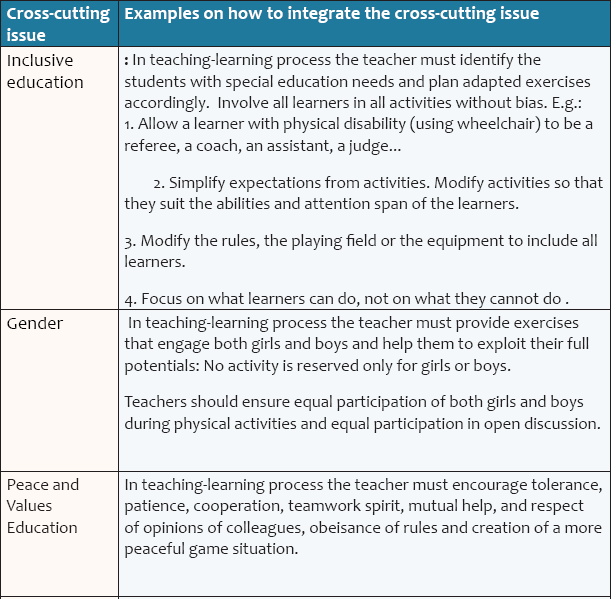
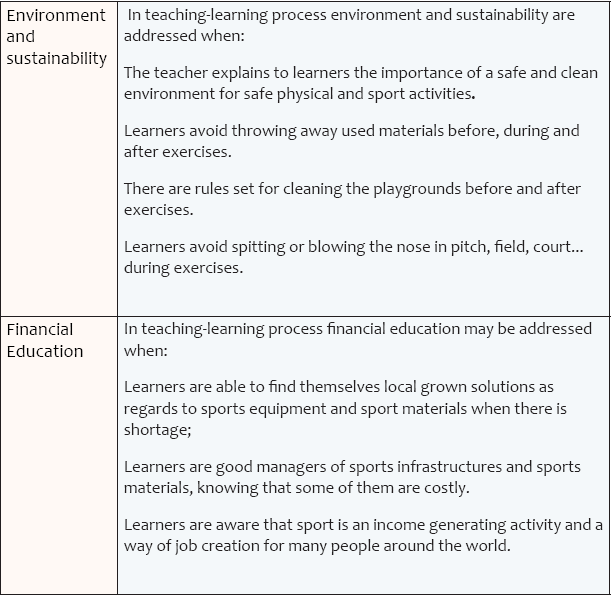
Among the changes in the competence based curriculum is the integration of cross cutting issues as an integral part of the teaching learning process-as they relate to and must be considered within all subjects to be appropriately addressed. The eight cross cutting issues identified in the national curriculum framework are: genocide studies, environment and sustainability, gender, Comprehensive Sexuality Education (CSE), Peace and Values Education, Financial Education, standardization Culture and Inclusive Education.
Some cross cutting issues may seem specific to particular learning areas or subjects but the teacher need to address all of them whenever an opportunity arises. In addition, learners should always be given an opportunity during the learning process to address these cross cutting issues both within and out of the classroom so as to progressively develop related attitudes and values.
Below are examples on how crosscutting issues can be addressed in PES:

I.3.3. Special educational needs
Learners or people with disabilities did not always have equal opportunities in society. As far as games and sports are concerned, these learners are often relegated to the passive role of spectators rather than players. Currently we are convinced that games and sports are very beneficial to people with physical, mental, emotional and psychological disabilities.
What attitude to adopt?
To promote the integration of learners with disabilities during recreational and sports activities, the following tips may help teachers / educators in the training of these learners:
• Adopt an approach of sport and game which is based on skills and focus on what learners are capable of doing. In this respect, you can introduce small changes in games and activities for learners with disabilities;
• Be relaxed and natural when you are with people with disabilities. Do not treat them as if they need your pity or your charity. Do not think they necessarily need help. Let them do and say things themselves;
• Avoid keeping learners living with disabilities out of the game: in a regular class, let them participate in other’s games. However, avoid being too demanding about the level of their performance.
• What can we modify?
Within the framework of integration of learners in games, according to the nature and the gravity of impairment, learners can, in some cases, participate in games designed for all learners. In other cases, the teacher or educator should think about changes he/she can make to meet the special needs of learners he/she has in the group. He/she should also think about adaptation of the game, the playground, equipment and duration of the game.Below are some examples of adaptation to initiate:
Adapt roles and rules
• Make the game easier or harder by changing some rules;
• Let learners play different roles and in different positions;
• Allow players to play in different ways, for example, sitting instead of standing;
• Simplify expectations of the game;
• Simplify instructions.Adapt the playground
• Change the size of the playground. Enlarge or reduce the playground;
• Change the distance: for example, put a target closer;
• Change the height of a target;
• Allow more or less space between players;
• Let learners move from different spaces.Adapt the materials
• Reduce the size or weight of materials;
• Choose balls of various textures, bright colours or balls which make noise.Adapt the duration of the activity
• Reduce or extend the time allotted to the activity.
Aspects to consider when you want to modify an activity
Ask yourself the following questions:
• Does the modification damage the activity? This should not be the case;
• Does the modification correspond to the ability and duration of learners’ attention?
• Will the learner with disability be able to play with others?
• Is the activity proportional to ages of participants?
• Does the activity respond to the needs of all participants?Strategies to help learners with physical disabilities or mobility difficulties:
• Adapt activities so that students who use wheelchairs or other mobility aids, or other students, who have difficulty moving, can participate.
• Ask for adaptation of sports equipment e.g. the height of the volleyball net may need to be changed to make it easier for a student to reach it or fit their legs or wheelchair under.
• Encourage peer support between students.
• Get advice from parents or a health professional about assistive devicesStrategies to help learners with hearing disabilities or communication difficulties
• Always get the student’s attention before you begin to speak.
• Encourage the student to look at your face.
• Use gestures, body language and facial expressions.
• Use pictures and objects as much as possible.
• Ask the parents/caregivers to show you the signs they use at home for communication using the same signs yourself and encourage other students to also use them.
• Keep background noise to a minimum.Strategies to help learners with visual disabilities
• Help students to use their other senses (hearing, touch, smell and taste) to play and carry out activities that will promote their learning and development.
• Use simple, clear and consistent language.
• Use tactile objects to help explain a concept.
• If the student has some sight, ask them what they can see. Get information from parents/caregivers on how the student manages their remaining sight at home.- Make sure the student has a group of friends who are helpful and who allow the student to be as independent as possible.
I.3.4. Guidance on assessment
Assessment in PE must be a continuing process that arises out of interaction during teaching and learning process. It includes lesson evaluation during RCA after each session and end of unit assessment. This formative assessment should play a big role in teaching and learning process. The teacher should encourage individual, peer and group evaluation of the activity done.
In this step the teacher sets exercise to assess abilities, skills, knowledge and attitudes of individual learner basing on unit or lesson objectives. During assessment activity, learners perform exercises individually or work in teams. The teacher avoids intervening directly. In fact, results from this assessment inform the teacher on next steps for the whole class and individuals. In some cases, the teacher can end up with giving remedial and extra activities.
I.3.5. Teaching methods and techniques
a. Suitable Methods / techniques to teach PES)
Physical Education and Sports is taught in the class rooms (e.g. using a projector and videos to teach steps of performing a technique, a system of game play, using a chalk board to teach rules of the game…), in the play fields/courts, in the gymnasiums, in the tracks and fields and in the swimming pools.
Teaching methods include:
• Demonstration method: A teacher makes him/herself a demonstration or asks a learner to do a demonstration. It is advised not to do a demonstration if you are not sure to do it better than every individual learner.
• Verbal Explanation: A teacher describes/explains activities he/she want learners to perform.
• Practice session: Learners are given time to practice exercises intended to develop the desired skills.
• Supervision: During a PE lesson the teacher plays a role of supervision where he/she must move around in field and make corrections for individual learner during exercises.
• Correction: Corrections are done starting by group correction to individual correction. Corrections for inaccuracy in performing given techniques are done immediately.
• Evaluation: Let learners do their own evaluation each other, then help them by giving some advice using encouraging words. Evaluation is a continued activity throughout the exercises.• Discussion: Discussions are used before and after teaching learning activities in open talks
• Application: Use of learnt skills in different situations to solve a given problem.
Physical education in small schools or schools with limited facilities
Where schools have specific problems related to a lack of indoor and outdoor space, consideration might be given to:
• The use of the classrooms, corridors and school grounds for exercises which do not require specific playgrounds
• The provision of markings on the playground for athletic activities and small-sided games
• The use of local facilities, e.g. community centres, parish halls, youth clubs, etc.
• Co-operation with other primary or secondary schools in sharing facilities
• Allocating more time to physical education in good weather
• Visiting an outdoor education centre providing facilities for many worthwhile activitiesb. Steps of a PE lesson
A PE lesson using play-based approach follows these steps: Opening discussions; warm-up activities; main activity or game itself; cool down and R-C-A discussions. (Right To Play, 2017)
Introduction
Step 1: Opening discussions
The opening discussions prepare learners for the learning experience. Discussions encourage them to think about the learning objective of the play. Opening discussions include 1 to 2 quick questions to stimulate learners’ curiosity and engagement.
Strategies for good discussions:
• Set appropriate arrangement for good discussions: e.g. semi-circle, circle, U-shape
• Set ground rules which create a safe atmosphere for learners
• Prepare learners for discussions
• Ensure interactive and inclusive discussions
• Acknowledge each learner’s contribution
• Ensure classroom management and controlStep 2: Warm-up activities
A warm-up is performed before a game/play. It helps the body prepare itself for exercise and reduces the chance of injury. The warm-up should be a combination of rhythmic exercise which begins to raise the heart rate and raise muscle temperature,and static stretching through a full range of motion.
Lesson Development
This part has two steps as follow ( step3 and step 4)
Step 3: Main activity or game itself
A game/play is chosen according to the age of learners and skills you want to develop. Adapt the games to the differences among learners.
Step 4: Cool down
A cool down activity is an easy exercise that allows the body to gradually transit to a resting or near-resting state.
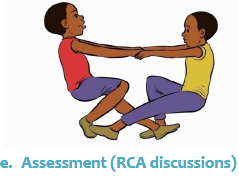
AssessmentAssessment in PE lesson is done when learners are performing exercises/activities/games. At this level, through the RCA discussions the teacher allows learners to do their self-evaluation and provide the feed-back.
Step 5: Final discussions/ RCA
Reflect-Connect-Apply is a teaching and learning strategy that leads learners through a 3-step discussion about their experience:
• Reflect on the game/play. The teacher asks questions about their experience and feelings during the game. Examples: What was interesting? What was easy? What was challenging? What strategies have you used to win? How did you feel in case of success or failure?
• Connect to life experiences and lesson content. The teacher asks questions like: How does this game connect to what you already know, believe or feel? Does it reinforce or expand your view? The teacher also asks questions that connect the game to lesson content
• Apply acquired experience to another situation. The teacher asks questions like, “How could you use what you have learned from this experience? How could you use your new learning to benefit yourself, others, your community?” Learning is transferred and applied.
RCA is based on the work of educationalists such as Freire, Brown, Piaget, Brantford and others who support the concept of an educational process that is active, relevant, reflective, collaborative and applied, and has its roots in experiential learning theory (Kolb, 1984).Play-based learning technique is closely linked to the Experiential Learning Cycle. It starts with a game or play-based activity and ends with a closing Reflect, Connect and Apply (RCA) discussion linked to the subject matter.
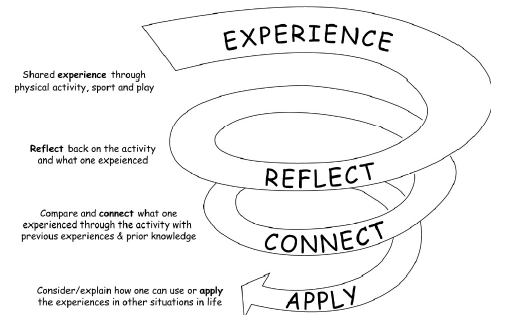
(Figure 1): Experiential Learning Cycle (David A. Kolb, 1984 – Experiential Learning Theory)
Label: 1File: 1UNIT 1: PHYSICAL CONDITIONING AND HEALTHY BODY
1.1. Key unit competence
After completion of this unit, learners will be able to perform muscular exercises and gymnastics movements with flexibility and agility. Learners will be able to demonstrate skills for prevention from infectious.1.2. Prerequisites knowledge and skills
Students will learn better this unit if they are able to perform exercises and games which develop the body and strengthen the muscles of the body: jumping, walking slowly taking short steps
Learners should also be able to perform exercises of rotating and sitting while hands are set forward or back and demonstrate the safe use of different gymnastics equipment.1.3. Cross-cutting issues to be addressed
1. Gender: In teaching-learning process the teacher must provide physical exercises that engage both girls and boys and help them to exploit their full potentials. Teachers should ensure equal participation of both girls and boys during physical activities and equal participation in open discussion.
2. Inclusive Education: In teaching-learning process the teacher must identify the students with special education needs and plan adapted exercises accordingly. Involve all learners in all activities without bias.
Allow a learner with physical disability (using wheelchair) to be a referee, a coach, an assistant, a judge.1.4. List of lessons
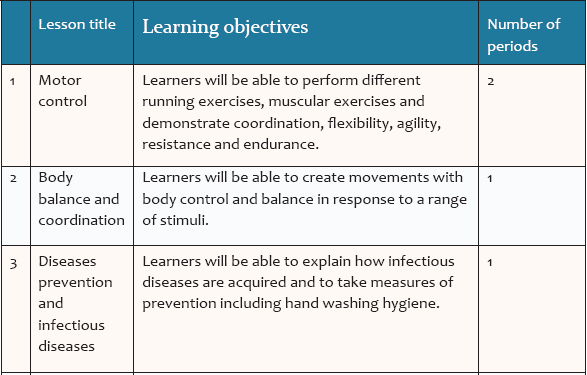
Lesson 1 : Motor control
a. Prerequisites
Learners will learn better this lesson if they are able to perform aerobic and muscular exercises with increasing independence and to perform exercises of rotation of different parts of the body: neck, shoulders, knees, vertebral column.
b. Teaching resources
Playground, mat, whistle, rope, lanes, balls, bench, stopwatch, double- decametre/ tape measure, cards etc.
c. IntroductionOpening discussions (in the playground in a semicircle formation)
In this part of the lesson you need to check the readiness of learners, check the sport uniform and give instructions and rules of the game.
• Ask learners examples of previous learnt physical activities which develop aerobic capacities.
• Tell learners to make teams/groups
• Ask learners to choose assistants and determine the limits of the game playing area and to enforce respect of the rules.
• Choose a learner to lead warm-up activities and stretchingWarm-up activities
Learners start by running slowly and steadily around the playground and then they increase the acceleration and speed in a progressive way until they are warmed-up.
Variation of Running:
• Running with high knees
• Butts kicks running
• Running with legs extended• Sideways running
• Backward running
Exercises of stretching (In columns formation not exceeding 6 columns)

The activity of stretching helps learners to well Stretch shoulders, stretch triceps and biceps, stretch wrists, stretch quadriceps, stretch calves, stretch hamstrings, stretch hips, stretch groin, stretch the upper back, stretch the neck, and stretch the jaw.
NB: Never stretch before you warm up.Some stretching exercises to use are given below:
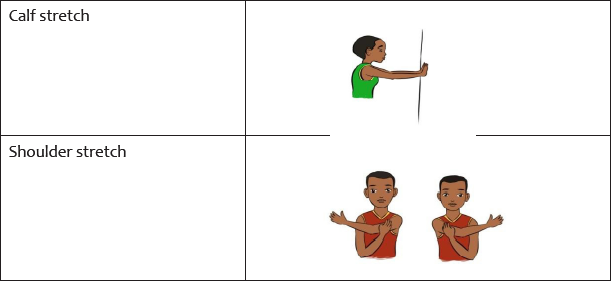
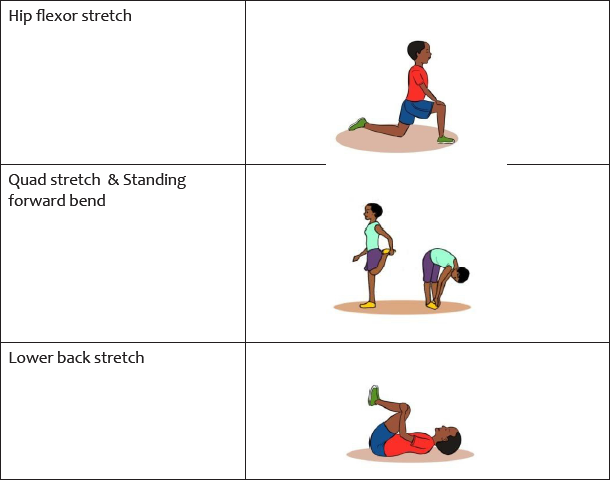

d.Lesson development
In this lesson learners will perform these 4 exercises:
• Running exercises : Help learners increase their physical condition and aerobic capacity,
• Jumping exercises: Help learners increase their coordination ability and muscles strength,
• Push-ups and sit-ups : Increase also muscle strength.
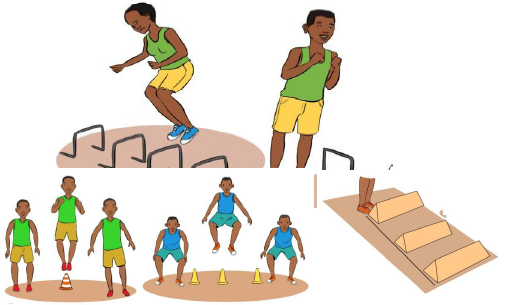
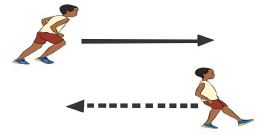
Teams in running exercise are composed by 10 learners. You need to put short (40cm Height) hurdles in lanes for each team. Learners must start by running exercises, jumping exercises, push-ups and sit-ups.
Let learners perform and intervene where necessary especially make corrections for bad body posture in push-ups and sit-ups. Correct body postures and samples are given below.
For push-ups and sit-ups, encourage learners to maximise their full potentials.Exercise number 1: Running exercises (150 meters of distance running).

Process
Each team has to run around a course of 150 m (in 8 minutes) (see figure above) from a given starting point.
Each team member tries to run around the course as often as possible in 8 minutes.
The start command is set for all teams at the same time by blowing a whistle.Each member of the team starts with one card (ball, piece of paper, cork or similar) which he/she has to take back to his/her team after each completion of a round trip course, and before starting again, he/she takes a new card or similar and so on.
After 7 minutes, the last minute is announced by another blow of a whistle.
After 8 minutes the completion of the run is indicated by a final signal.Scoring
After having finished the course, all participants hand the collected cards to the assistant who counts them for scoring. Only completed rounds are counted; those which are not completed are ignored
The role of assistants
For efficient organization of the event, at least two assistants per team are required. They are responsible for designating the starting line, as well as for dealing, collecting and counting the cards. They also must record the scores on the event card.
In addition, a starter is required for time keeping and giving the other signals (last minute and final signal).
• Two lanes are necessary for each team: one lane with and the other lane without hurdles.
• The first distance is the hurdle distance and then the team members run the sprint distance as a regular Relay.
• The event is completed once each team member has run both sprint and hurdle distances. The relay is conducted so that the changeover is made with the left hand.Ranking
The ranking is evaluated according to the time;the winning team being the one with the best time. The next teams are ranked according to their finishing time.
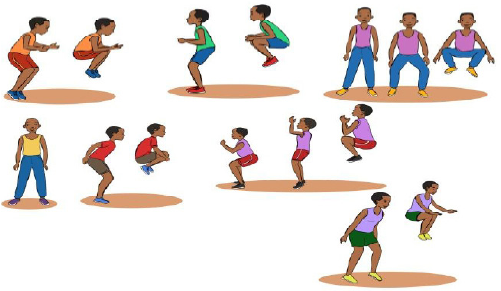
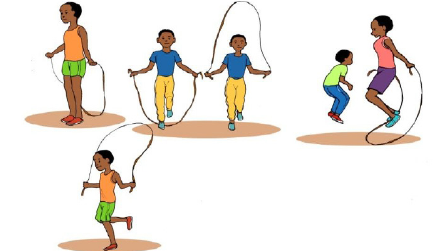
Exercise number 2: Jumping exercises
Help learners to perform different types of jumping exercises over an adapted obstacle considering their ability and progression. For variations of jumping exercises, they will jump over a rope, do consecutive tuck jumps... Always check coordination ability and encourage for improvement.
Jumping over the rope techniques
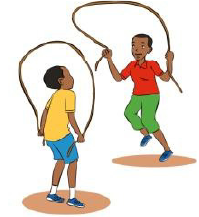
• Feet (together)
• Standing nice and tall
• Elbows in
• Thumbs out
• The rope is on the ground
As learners progress in the jumping over the rope exercise, tell them to increase speed of spinning. Tell learners these variations: side jumps right and left, forward and backward jumps over the rope.Jumping over the bench

Variations: lateral jumps (left, right) forward jumps. The bench or any other obstacle must be adapted to the age and potentials of learners. Doing many repetitions according to learners’ ability.
Successive tuck jumps: doing many repetitions
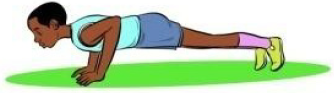
Exercise number 3: Push-ups

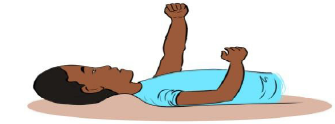
Exercise number 4: Sit-ups

Cooling down exercises
Why cooling down after a Physical Activity ?
Cooling down has several benefits such as: Bringing heart rate and breathing back to normal, prevents fainting or dizziness, prepares your muscles for the next exercise session, remove waste products (such a lactic acid), which can build up during vigorous activity, reduces the immediate post-exercise tendency for muscle spasm or cramping, reduces muscle soreness and stiffness.
In cooling down learners perform the exercises given below. The teacher must ensure that learners take the correct posture and demonstrate the correct body position.Exercise number 1: Low-to moderate-intensity aerobic exercises: walking slowly
Exercise number 2: Low-to moderate-intensity aerobic exercises: balancing legs and arms in slow movements
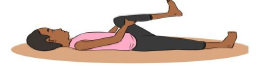
Exercise number 3: Supine shoulder flexion to stretch the muscles of the shoulders and back
Exercise number 4: Supine hamstring stretch to stretch the muscles of the back of the thighs

Exercise number 5: Side-lying quadriceps stretch to stretch the muscles of the front of the thighs

Exercise number 6: Supine hip flexor stretch to stretch the muscles that flex the hips
Exercise number 7: Supine spinal twist to stretch the muscles of the trunk and relieve tension in spine
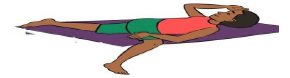
Exercise number 8: Upward-facing dog to stretch the muscles of trunk, pelvis, and hips
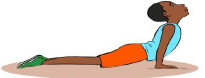
Exercise number 9: Downward-facing dog to stretch the entire body, with specific focus on the calves, hamstrings,

Exercise number 10: Stretching your back

Exercise number 11: Stretching shoulders and elbows
Reflection
• How did you feel before, during and after exercises?
• What can you say about the heart rate before, during and after exercises?
• What are muscles were engaged in activities? During push-ups? During sit-ups?
• What were the challenges?
• What are the areas to improve for you?Connection
How do you relate today’s work to your previously learnt physical activities?
Application
• What will you do in your daily life to stay physically fit?
Lesson 2: Body balance and coordination
a. Prerequisites
This lesson will be successful if learners are able to perform different aerobic exercises with increasing coordination, flexibility and balance.
b. Teaching resources
Playgrounds, radio, drums, drum stick, piano, rope, CD player, balls, ladder, stairs.
c. Introduction
Opening discussions (in a semicircle formation)
After checking learners’ readiness to work out, you ask them to give examples of previously learnt physical exercises similar to coordination exercises and exercises of balance.Warm-up activities
Jogging around the playground with rhythmic exercises until they are warmed-up
Exercises of stretching (Use the same as in previous lesson)
Stretch shoulders, stretch triceps and biceps, stretch wrists, stretch quadriceps, stretch calves, stretch hamstrings, stretch hips, stretch groin, stretch the upper back, stretch the neck, and stretch the jaw.d. Lesson development
Below you have examples of coordination and balance exercises and instructions to give to the learners. Learners must perform each exercise by the help of the teacher. Encourage learners to dare performing every exercise. Ladder and stairs exercises can be performed on a rhythmic music if it is available.
Exercises of coordination
Coordination is the ability to choose the right muscle at the right time with proper intensity to achieve proper action.
Exercise number 1: Jumping rope: running in place while spinning the rope, hope on one foot, alternate kicking one foot and cross the rope in front of you.Experiment with different footwork to challenge coordination (e.g.: jumping over the rope after spinning it two, then three times).
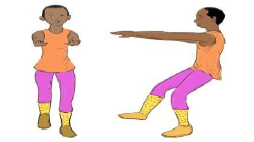
Exercise number 2: Lateral plyometric jumps: Place plyo box 6 inches in front of you. Get into a squat position with your feet about shoulder-width apart. Squat and explode up using your entire body, including your arms.
Exercise number 3. Speed ladder agility drills:
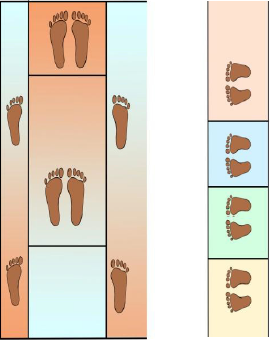
Ladder drills help developing a number of different footwork and movements such as: stride length, speed and agility on the running track.
Variations on this exercises: - Ladder linear run (forward or backward),
• Ladder running with high knees/jumping strides,
• Ladder running with lateral quick steps,
• Backward jumps,
• Lateral single leg hops.Exercise number 4: Plyometrics jump box drills:
Variations: Lateral jumps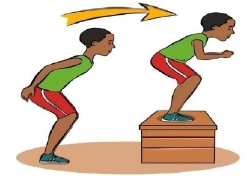
Exercise number 5: - Forward, backward drills
• Tuck jumps

Exercise number 6: Stairs running:
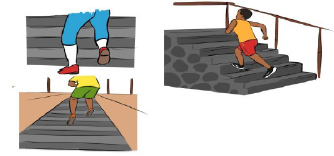
Stairs running help develop a wide range of coordination, agility and speed.
Variations:• Increase of acceleration and speed,
• Linear run (forward or backward)
• Running with high knees/jumping strides,
• Running with lateral quick steps,
• Lateral single leg hops. …Exercises of keeping balance
1. Standing one leg up to 30 seconds. (Repeat with the other foot.)
When you can easily keep your balance for 30 seconds without support, consider adding modifications like these for more of a challenge:
Close your eyes while lifting your foot.
Stand erect and swing the raised foot slowly from front to back.
2. Touching down
With feet hip width apart, reach out one leg and go down as you are going to tap the floor in front of you, arms straight extend forward. Do not bend your back until you sit on your heel of the back leg.
3.Walk the line (draw a line on the floor)
Place the heel of one foot directly in front of the toes of the other foot so that they touch or nearly touch. Hold your arms out to each side, then begin walking by moving the back foot to the front and placing the heel just in front of the toes again. Try turning your head side to side while you walk for a more advanced version of this exercise.
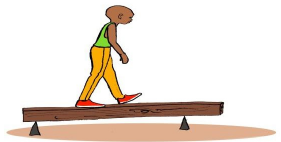
4. Walking on one tree bridge
5. Side leg swing
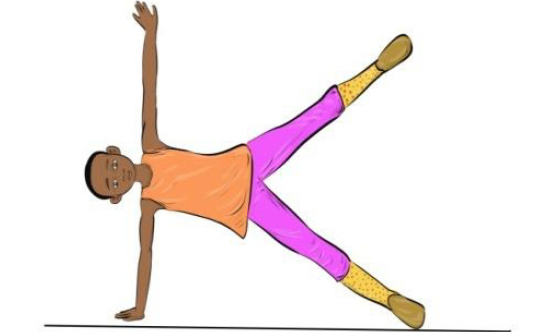
Stand in a side lying position on your right leg and right arm and raise the left leg off the floor. With the left arm extended at your sides, swing your left leg forward, backward and upward. Now, repeat the moves, but don’t allow your foot to touch the ground. Switch the leg and repeat.
Exercises
of cooling down (Same as for the lesson 1)
e. Assessment (RCA discussions)Reflection
• What did you noticed as key to a coordinated movement?
• What additional activities to ameliorate balance?• What were challenges?
• What are the areas to improve for you?Connection
Give some examples of previous learned exercises which develop coordination and balance.
Application
How will you use the learnt physical activities in your daily physical exercises and sports?
Lesson 3: Diseases prevention and infectious diseasesa. Prerequisites
This lesson will be successful if learners are able to identify different types of diseases and infectious diseases and their causes
b. Teaching resources
Teaching materials needed are given for each of the three described games.
c. Introduction
Opening discussions (in a semicircle formation)
After checking learners’ readiness to work out, ask them to brainstorm examples of infectious and their methods of prevention.
Warm-up and stretching activities
For warm-up and stretching exercises see lesson 1 of this unit.
Exercises of stretching (Use the same as in previous lesson)d.Lesson development
Game 1: Partners in Hygiene
Objective of the game:
Acquire the knowledge and learn strategies to ensure good hygiene.
A team by team competition that consists in finding out the partner who possesses the same object as that used for hygiene.Materials needed:
A pair of objects used for ensuring hygiene care (for example, 2 bars of soap, 2 tooth brushes, 2 tubes of toothpaste, 2 towels, 2 bottles of drinking water, 2 nail files or 2 clippers, and so on) ,blindfolds: 1 by child, whistle.
Organization and rules of the game:
1. Make groups of 6 to 10 children
2. Make off a small boundary of the playground
3. Ask 2 or 3 volunteers around the boundaries of the playground in order to ensure that all children are safe (see image).
4. Give every child a blindfold
5. Explain and demonstrate:
• All the children have a blindfold that covers their eyes.
• Every child is given an object that can be used for hygiene (for example a piece of soap, a toothbrush, a tooth-paste, a towel, drinking water, a nail file or a clipper, hard brush or hair brush).
• The objective of the game consists of the children to find out what their object is, and then find the partner who has the same object and stand close to him/her.
• When the children are looking for their partner, they move around the playground saying “I need a partner”.
• When children have found their partners, they move around with him/her saying“I’ve found my partner”
6. The game ends when all the children have found their partners. Children must keep their blindfolds until every child has found his/her partner.
7. Exchange their roles so that other children can play the role of volunteer guards and take other objects used for hygiene.
8. At the end of the game, take time to help children identify what each object is and what it is used for.Points to check
• Do children come to know their object?
• Are children safe while searching for their partners (do they go slowly)?Closing discussion
Reflection
• What is the hygiene routine that you do every day?
• Are any hygiene routines so important than others?
• What can you do to ensure good hygiene for yourself?
• How are those strategies important for good hygiene?
• Why is good hygiene important?Variations
• When all children have found their partners and removed their blindfolds, ask them to explain to the group what their object is used for and why it is important.
• Instead of searching for a partner who has the same object, ask the children to find somebody who has a complementary object (for example, a toothbrush and toothpaste, a bar of soap and water).Game 2: Viruses Protection
Objective of the game:
Acquire knowledge and learn necessary strategies to avoid and treat illnesses and diseases that can be prevented. To make healthy choices all the time.
Summary description of the game
A game in which children form a circle and pass quickly among themselves, sponges and balls which represent the viruses and medicine.
Materials needed:
Water balloons or any ball (you will need to have extra on hand), 10 sponges (or other material that can be easily passed to another player), Prepared questions about viruses, a whistle.
Organization and rules of the game
1. Make groups of 6 to 10 children.
2. Ask each group to sit in circle.
3. Ask children to give examples of viruses
4. Give 2 water balloons and a sponge to each group
5. Tell children “balloons represent viruses, and sponge medicine”.
6. Explain and demonstrate:
• At start of the game, children begin passing balloons and sponge to one another quickly in the circle clockwise.
• When you say “stop”, children who possess the balloons turn around and face the outside of the circle.
• The game continues, with some children sitting facing inside of the circle and others facing outside.
• Children sitting facing outside the circle can turn to face inwards if they get the sponge the next time you say “stop”.
• If children facing outside the circle get the water balloon again, they will be asked a question related to health (see examples of such questions on page J431)
• If a water balloon bursts (or if the balloon drops down), the child holding it must also answer a question related to health.• Children may ask other players to help them answer the question.
• If the children give correct answers, the game continues. If they don’t, the child holding the balloon is given an exercise as a punishment of your choice (for example, hoping, turning around him/herself and touching on his/her toes, and so on). The child may rejoin the group after performance.
• Make sure the children are given feasible punishments and that they do not make them feel ill at ease
7. Ensure that you have extra balloons to replace damaged onesPoints to check
• Do children know answers to the health questions you are asking?
• Do children pass the balloon to one another gently and help one another to answer questions?Closing discussion
Reflection
• When you were holding the balloon (which means that you contracted a virus), what could you do to feel safe once again?
• What could you do in the game in order to answer the question correctly?
• Were some of the questions really easy? Really difficult? Why?
Connection
• Have you ever contracted a virus? How did you feel?Application
• Whom, apart from the group members, can you go to when you have a health problem and you do not know the answer?
• Where do you get medicine in your community when you get sick with a virus?
Variations
• Increase the difficulty of the questions you ask.
• Give more balloons to each group.Game 3: Infection Protection
Objective of the game
Acquire knowledge and learn strategies to avoid illnesses and make regular healthy choices.
A game in which the “virus” chases the “body” and the “immune system” protects the “body”.
Materials needed:
Whistle
Organization and rules of the game
1. Make groups of 5 or 6 children
2. Ask a volunteer from each group to play the role of the virus
3. Ask a volunteer from each group to play the role of the body
4. Tell the remaining members of the groups to play the role of the immune system
5. Explain and demonstrate:
• Children who play the role of the immune system stand around the circle holding one another’s hand.
• The body stands inside the circle
• The virus stands outside the circle
• The virus must try to touch the body; the immune system moves in order to prevent the virus from touching the body.
• When the virus touches the body, the latter falls sick and has to hop on one leg.
• At this time, one member of immune system joins the virus and both try to touch the body
• Whenever the body is touched, a new member from the immune system joins the virus team
• When only one child remains in the team of the body inside the circle, children may restart the game.
• They switch roles, by choosing a new virus and a new body.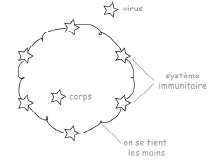
Points to check
• Are the children playing the role of immune system working hard to protect the body?
• Are the children playing the role of the body change their roles when the virus touches them?Closing discussion
Reflection
• How did you feel when you were playing the role of the body?
• What made you worried?
• What made you feel safe?
• Now that you have participated in this game, what do you think is the role of the immune system?Connection
• How does the immune system work to protect our body?
Application
• What can you do in order to make your immune system strong?
Variations
Tell the children that the body has to make an effort to avoid the virus. The immune system must make work hard to protect the body. If the virus touches the body once, the body has to hop on one leg, and a member of immune system team must join the virus. If the body is touched twice, children must change their roles.
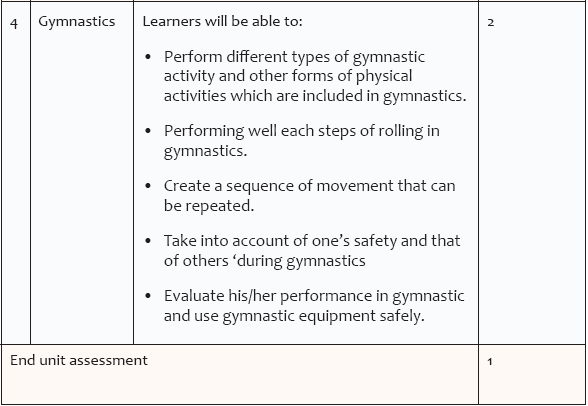
Lesson 4: Gymnastics
a. Prerequisites
Learners will learn better this lesson if they are able to perform basic techniques of rolling forward and backward, to perform basic exercises of rotation. They must also be able to perform exercises of stretching the cervical areas, the pelvic guard and scapular guard and of the backbone safely.
b. Teaching resources
Playground or natural grass, carpet, whistles, balance bars, benches, rope etc.
c. Introduction
Opening discussions (in a semicircle formation)
After checking learner’s readiness ask them to show examples of previous learnt exercises of gymnastics movements and discuss on the safety measures in gymnastics. Ask one learner to lead warm-up activities. Intervene where it is necessary to give them a demonstration. Warm-up activities for this lesson are set below.
Warm-up activities
• Jumping rope: Starting slowly, increase speed of spinning as they warm-up
• 10 Jumping jacks: Jumping to a position with the legs spread wide and the hands touching overhead, sometimes in a clap, and then returning to a position with the feet together and the arms at the sides.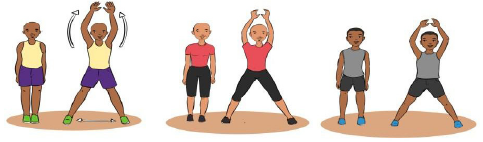
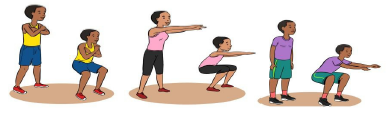
• 10 Body weight squats
• 5 lunges (each leg)

• 10 hip extensions: We are extending our hip anytime we increase the angle between the thigh and the front of the pelvis and that can start from any degree of flexion.
• 5 hip rotations each leg (like you’re stepping over a fence)
• 10 forward leg swings (each leg)
• 10 side (lateral) leg swings (each leg)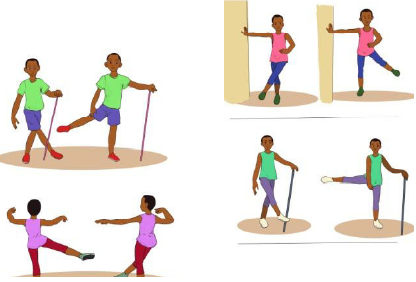
• 10-20 pushups (scale based on level of fitness)
• 10 Spiderman steps (each leg)
Exercises of stretching: in a semicircle formation
The teacher chooses one learner to help classmates to stretch their body after warm-up.
They will use stretching exercises seen in the previous units to: Stretch their shoulders, stretch triceps and biceps, stretch wrists, stretch quadriceps, stretch calves, stretch hamstrings, stretch hips, stretch groin, stretch the upper back, stretch the neck and stretch the jaw.d. Lesson development
Rolling in gymnastics include: backward rolling, forward rolling and wheel round rolling.
For each roll: Tell learners how to execute with explanations for each step and if possible do a demonstration yourself or by the help of a genius learner. Always avoid doing a demonstration if you cannot do better than every single learner. Describe techniques step by step and genius and quick learners will help you to make a demonstration for other learners.Let learners practice based on instructions and provide necessary support
1. Forward Roll

Technical Steps of performing a forward roll
Step 1 Standing on a carpet in a wide open space: A forward roll can be done indoors on a gym mat or outside in the grass. The teacher must look for a flat space where learners will have plenty of free space. Alternatively, learners can do a forward roll on a downward incline and use gravity to help them move into the roll.
Step 2 Getting in starting position: Learners get into a squat position with their feet together. Feet must be placed together and knees bent as they are squatting.
They have to place their hands on the ground in front of them with their elbows bent. Their hands should be evenly spaced at shoulder width.
Alternatively, they can start in an upright standing position with their hands stretched straight over the head.
Step 3. Dropping the head between arms: At this step, tell learners to tuck in their chin. As they move into the roll, they don’t want to place weight on their neck - it should move directly onto the upper back. Tucking in their chin will help ensure that they don’t put pressure on the neck.
Step4. Rolling forward: At this step, tell learners to push over onto their upper back, so that their body rolls forward and the hips are pushed over the head. Tell them to follow the curve of their spine as they roll, keep their back curved and keep their hands in position.
They must not roll from side to side - They must roll straight forward along the spine. Otherwise, they may fall to one side or the other.
Have straight legs and pointed toes. Throughout the roll, legs should stay straight and the toes pointed. Bend the legs only at the end of the roll, when it’s time to stand up. This is the standard positioning for a beginner’s forward roll.
However, some gymnasts prefer to tuck in the legs during a forward roll. If it helps you gain momentum to keep your legs tucked, learners can practice that way, too.Stand without using your hands for support. At the end of the roll, feet are placed flat on the floor and the gymnast move into a standing position without putting his/her hands on the ground. Here you must straighten your legs, then finish upright with your hands over your head.
2. Backward Roll
Step 1: Start in a squat position with knees together and back straight, thighs parallel to the floor. Hold your hands out in front of you if you need a help balancing
Step 2: Hold your palms facing the ceiling: Bend your arms close to your body. Place your palms facing towards the ceiling just above the shoulders. Tuck your chin to your chest like you are looking at your bellybutton.
Step 3: Drop your butt: from the squat position, drop your butt down by bending your legs. Push back with your heels. You will start to roll onto your back.
Step 4: Push with your hands and shoulders: As you roll backward, keep your knees tucked to your chest. Roll quickly enough so that you get some momentum. Your weight need to shift from your lower back to your upper back.
Step 5: Straighten your arms: As you straighten your arms, your hips will start to lift up. This will roll your body over your head. Land on your feet.
Develop sequences with others
Two or more learners can start at the same time a forward or a backward roll. They will execute rolling movements simultaneously so as to make beautiful sequences in a team play situation.
Exercises of cooling down
For cooling down, let one learner lead the process. Provide guidance and support where necessary. In cooling down, use the exercises below.
• Tuck up: Lay on your back with your legs and arms flat on the mat. Then, rise up in sit-up position and grabs your legs with your arms. Hold this position for a few second and then let you go, slowly returning to the mat.
• Foot balancing: Hold one foot up in the air behind yourself. Then, focus on one spot in the area and hold the position for several seconds. This not only helps stretch the muscle out, but also helps your mind relax well.
• Touching toes: Stand straight up and the slowly reach down and try to touch your toes with your fingers. You may not be able to reach the toes comfortably, but the goal is to try and reach towards them (Do not force). This helps stretch out the leg muscles.
• Walking: Walking slowly around a track to lower heart rate and help the learners to breath well after work out.e. Assessment (RCA discussions)
Reflection
• What have seen as main skill in doing forward and backward rolls in gymnastics?
• What is more challenging between forward and backward rolling in gymnastics?
• What is common in both rolls?
• What were the challenges in general?
• What are the areas to improve for you?Connection
• Relate this lesson to the previously learned gymnastics exercises.
Application
• Where do you think you can use gymnastics sequences in your daily activity?
1.5. Additional information
In physical conditioning exercises it is better to maximize one’s full potentials. As teacher you need to control passive and slow learners as many of them will show less
Summary description of the game:
A type of game in which learners run around avoiding being caught by a learner who is in the centre. The learner is self-esteemed, self-confident and happy.
Materials needed: A whistle, cone or mark: (1 per team), piece of chalk (something that can be used to draw a starting line).Organization and rules of game:
1. Divide the playground in three zones: a play zone and 2 smaller safe zones (see image).
2. Ask each team to line up inside the safe zone.
3. Tell learners that in this game they are going to play the role of « students ».
4. Ask learners to list different distractions that prevent them from doing their homework. (For example: house hold chores, playing with friends, lack of time, etc.).
5. Ask a volunteer to play the role of « distraction ».
6. Explain and demonstrate:
• The learner who plays the role of distraction positions him/herself inside the play zone.
• He/she tries to catch students as they run across the play zone towards the safe zone.
• Make sure that learners touch one another gently.- When the learner who is playing distraction is ready for learners to run across, he/she shouts out
- « It is time to do homework! ».
- motivation in some activities.
1.6. End unit assessment
• Set exercises for learners of rolling forward and backward to evaluate their level of achievement from different departure positions.
• Set muscular development exercises: push-ups and sit-ups
• Set various running exercises to evaluate aerobic capacity (sprints, resistance and endurance running)
• Prepare a competition and if possible reward for best performers.1.7. Additional activities
• Encourage learners to participate actively in mass sport in their villages
• Encourage learners to organize recreational sports activities in their villages during weekends and holidays with their neighboring learners
Exercises and games of developing patience, pardon and happinessa. Title of the game: Students crossing
Objective of the game:
Develop self-esteem and self-confidence, happiness and pardon
Summary description of the game:
A type of game in which learners run around avoiding being caught by a learner who is in the centre. The learner is self-esteemed, self-confident and happy.
Materials needed: A whistle, cone or mark: (1 per team), piece of chalk (something that can be used to draw a starting line).Organization and rules of game:
1. Divide the playground in three zones: a play zone and 2 smaller safe zones (see image).
2. Ask each team to line up inside the safe zone.
3. Tell learners that in this game they are going to play the role of « students ».
4. Ask learners to list different distractions that prevent them from doing their homework. (For example: house hold chores, playing with friends, lack of time, etc.).5. Ask a volunteer to play the role of « distraction ».
6. Explain and demonstrate:
• The learner who plays the role of distraction positions him/herself inside the play zone.
• He/she tries to catch students as they run across the play zone towards the safe zone.
• Make sure that learners touch one another gently.
• When the learner who is playing distraction is ready for learners to run across, he/she shouts out
• « It is time to do homework! ».
• Students then try to run across the play zone without getting caught.
• Once they have reached the safe zone, they cannot be caught.
• If a child is caught, he/she joins distractions and helps in catching others.
• Continue to play until all students have joined the team for distractions.
7. Restart the game by choosing another volunteer to play the role of distraction.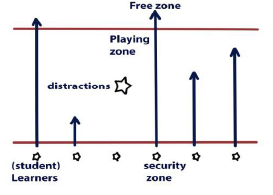
Points to check
• Do children run across the play zone when the child who is playing the role of distraction shouts « It is time to do homework! »?
• Do children who are caught join distractions?Closing discussion
Reflection
• How did you feel when you were playing distraction?
• When did the game become very tough for students? Why?Connection
• Is there a time your friends wanted you to do something that prevented you from doing what you had to do?
• Was it difficult to refuse? Why?Application
• How can you prevent your friends from compelling you to do something you do not like?
Variations
• Ask children to dribble a ball in the play zone without getting caught by the child playing the distraction.
• Children who are caught by the distractions hold one another in hands and try to catch others.b. Title of the game: Say it without words
Objective of the game:
Develop and encourage self-expression and creativity.
Summary description of the game:
A team challenge in which children try to guess the activity that one of their colleague is miming in silence.Materials needed:
Cone or mark: (1 per team), Piece of piece of chalk (something that can be used to draw
a starting line), A whistle.Organization of the game:
1.Draw a clear starting line.
2. Make teams of 3 to 6 children.
3. Ask each team to line up behind the starting line
4. Position a cone or a mark at the distance of 3 meters from each team (see image).
5. Explain and demonstrate:
• It is an activity of relay race.
• The first child of each team (A) must hop to the mark, choose one of his/her preferable activities and mime it in front of his/her teammates (for example: football, the kitchen, reading, dancing, etc.).
• Children must only use gestures miming their activities; they are not allowed to speak.
• Each team must collaborate to guess their teammate’s activity.
• Once team A has guessed the activity, child A can join his/her team. The second child, B, then starts. When B arrives at the mark, he/she must first mime the activity of child A before miming his/her own activity (for example, if A has mimed a match of football, B mimes a match of football first, and then his/her own activity).• The third child, C, mimes activities of A and B, then his/her own activity, and so on.
• That means that the last player of each team must remember all activities of his teammates.1. Decide when to end the game.
Points to check
• Do children manage to guess the activities?
• Do they work in teams?Closing discussion
Reflection
• What activity did you like to mime? Why?
• What are your favourite activities in life?Connection
• In which situation did you have to express yourself without using words?
Application
• When you can’t use words, what else can you do to make yourself understood?
UNIT 2: ATHLETICS
2.1. Key unit competence
After completion of this unit learner will demonstrate techniques of jumping, running, and throwing objects from different positions.
2.2. Prerequisites knowledge and skills
Learners will learn better this unit if they are able to perform different types of basic techniques of athletics and understand their importance. Learners must know to explain the rules and their importance and to demonstrate techniques to improve his/her performance in athletics and use rules of athletics in the game situation.
2.3. Cross-cutting issues to be addressed
1. Financial Education: Learners must be able to manage well athletics equipment. Some of them are costly and can easily be damaged like javelins, batons etc.
2. Standardisation Culture: In Athletics, the selection of teaching materials and equipment must meet the accepted standards according to learners’ age and sex. These materials are shot, discus and javelin, hurdles in races ... As a teacher you need to watch out for the size, weight and height of these tools according to learners’ age and sex as well as their abilities.2.4. List of lessons


Lesson 1: Different types of jumping, running, and throwing
a. Prerequisites
Learners will learn better this lesson if they are able to perform:
• Forward squat jump, jumping over short obstacles, and long jump.
• Exercises of running: sprint, hurdles, shuttle relay, ladder running, and resistance races.
• Exercises of throwing: throw heavy objects at small distances by using one hand.b. Teaching resources
Playground/track, whistles, mat, hurdles, javelin, discus, batons, shot, cones, stopwatch, pole, etc.
c. Introduction
Opening discussions
In this part of the lesson you need to check learners’ readiness to work out and set clear rules and instructions concerning safety measures as throwing can cause accidents if a learner hits his classmate with the thrown objects.
Warm-up activities
To warm-up ask one learner to lead the activity. They will do jogging with increasing acceleration and speed in a progressive way until they are warmed-up.
Exercises of stretching in (In semicircle formation)
Tell one of the learners to lead the stretching activity (use stretching exercises in the first unit, lesson 1).
Tell learners to focus on hamstring to prevent from hamstring tearing which is a common injury in sprints.d. Lesson development
• Different types of jumping include: Long jump, triple jump and high jump
•Different types of running include: Sprint, middle and long distance running and race walking.
• Different types of throwing include: javelin throw, discus throw and shot put throw.
In this lesson, you need to teach preparatory exercises of jumping, throwing and running. Techniques will be seen in next lessons.
Let learners practice based on instructions and provide necessary support.
Exercises to practice are listed below but you can enrich them by your own research.1. Jumps in athletics
Physical activities to develop skills of jumps: long, triple and high jump.
• Exercises of running with speed in the run-up phase for both long and triple jump on track
• Exercises of taking-off and landing without techniques after run-up phase with maximum speed.
• Exercises of jumping high without applying specific techniques
• Exercises of leap-frog with sufficient repetitions
• Exercises that emphasize coordination in all movement.
• Those exercises include: running up on the runway track with leaping strides.
• Exercises to help learners recognise their taking-off leg and the number of strides every learner needs to make during the run-up phase.2. Runs in athletics
Different types of running in athletics include the disciplines explained below. In teaching put emphasize on the sprints and middle distance running because considering the age of learners they are adapted to their capability.
1. Sprints: In this activity includes:
• 100 m, 200 m, 400 m
• 4x100m and 4x400m relay
• 100m, 110m hurdles.2. Middle distance running: 800m,1500m,3000m and 5000m.
3. Long distance running: 10000m
Physical activities to develop skills of running
Exercises of running sprints:• Reduce the distance and ask learners to run at their maximum speed.
• Increase the distance and ask learner to run at their maximum speed.
• Doing leaping strides (coordination and agility is important for this exercise).
• Big arms movement (arms swings): emphasize elbow back and the hand up near the face when running on their top speed.
• Running from different departure position: lying down, standing, bent, kneeled down etc. this helps to improve their reaction time which is extremely important in sprinting.
• Ladder running to develop frequency of strides and coordination. Variations to be done by mixing forward ladder run with lateral ladder run.
• Running exercises with obstacles: start by short obstacles and increase progressively, start by short distances and increase progressively.
• Exercises to help learner to recognise the starting leg in sprint, positioning himself/herself in starting blocks and being able to start on time after the starting signal (Whistle, starting gun, any other tool which can make sound).
• Learners must be able to recognise the following starting signals: 1. On your marks, 2. Set and 3. The final starting sound which is produced by a starting gun, a whistle or any other object which can make a sound.
• Exercises of resistance and endurance running: Ex: teacher will choose between 4,6,8,10,15 minutes running without stopping according to learner’s abilities and the progression they are making.
• Alternate speed running with slow running, alternate speed running and walking
• Exercises to help learners stretch their stride at the maximum stride (e.g. running up stairs by skipping some stairs).• The teacher also must help learners to be able to start on time after the starting signal (Whistle, starting gun, any other tool which can make sound) and to start with the correct foot.
3. Throws in athletics
In teaching learning process let learners practice and guide them.
1. Javelin
• The teacher helps learners to perform exercises of gripping the javelin properly
• Learners perform exercise of running-up by holding the javelin high over the head (elbow level with neckline)
• Tell learners to do many repetitions of gripping the tool and running-up holding the javelin correctly.
• Learners may use batons if there is shortage of appropriate tools.2. Shot:
Using shot or similar objects learners may be given exercises of throwing at the longest
distance they are able to throw. Smooth techniques will be developed in next lessons.
3. Discus:
Using discus or similar objects learners may be given exercises of throwing at the longest distance they are able to throw. Smooth techniques will be developed in next lessons or next years.
e. Assessment (RCA discussions)
• Reflection
1. What difference have you noticed between sprint and endurance races?
2. What are the types of high jump?
3. What are the disciplines or track races running?
4. What are the disciplines of throws?
• Connection
Give some examples previously done physical activity in connection with this lesson.• Application
Where do you think the activities of today will be beneficial in further lessons?
Lesson 2: Jumping exercises with techniques
a. Prerequisites
Learners will learn better this lesson if they are able to perform different exercises of jumping. Learners must also be able to perform wide range exercises of jumping: forward squat jump, jumping over short obstacles and long jump.
b. Teaching resources
Track and field with jumping equipment, tape measure, whistle, mat, land pit
c. Introduction
• Opening discussions (in a semicircle formation)
After checking learners’ readiness, discuss with them safety measures of jumping to prevent from possible accidents.• Warm-up activities (same as for the previous lesson)
• Exercises of stretching (refer to unit 1, lesson 1)Stretching exercises are the same as for the previous lesson but learners must emphasize legs’ muscles to prevent from possible injuries in throwing.
Let one learner lead the stretching and intervene for necessary support
d. Lesson development
• Jumps include: Long jump, triple jump and high jump.
• Different techniques of high jump: Scissors, Eastern cut-off, Western roll, Straddle and Fosbury flop (which most used).
• For each discipline you have different steps described with details. Set clear instructions and guide learners to perform each step based on your guidance. Pole vault will not be taught; learner will be given basic skills to jump long jump using pole.
• In high jumps techniques emphasize fosbury technique as it is the most used in modern competitions.
Let learners alone practice based on instructions and provide necessary support
1. Jumps
1. Long jump
Techniques of long jump

Step 1: Run up. In the run up phase, be consistent and speedy.
The teacher needs to have an idea of what is an appropriate length run-up for learners according to the age of his/her learners. This can be done by matching their age with a recommended number of strides in their run-up. As guide:
10 years = 10-11 strides
11 years = 10-12 strides
12 years = 11-13 strides13 years = 12-14 strides
14 years = 13-15 strides
15 years = 14-16 strides
16 years = 15-17 strides
17 years = 15-21 stridesStep 2: Take-off: The take-off leg is the one that stays on the ground to support your weight when you kick a ball.
Find out which foot the learner jumps off. Is it their left or right foot that hits the board? This is their “take-off” foot.
Ask the learners to show you how they like to stand at the start of their run-up. Is their take-off foot forward or back? If it is forward, the learners will need to take an even number of steps in their run-up to ensure that foot hits the board. If it is back, they will need to take an odd number of steps in their run-up.
You will find that there are learners who will tell you that they don’t know which foot they like forward at the start of a long jump run-up. If this occurs, ask them to show you a standing On Your Marks racing position. The position that they take is generally how they will begin their long jump run-up.Step 3: Flight
Step 4: Landing. After the peak of the jump, the arms sweep forward and down to the hips. The feet are extended out until the jumper hits the sand. The knees and hips absorb the impact of the landing as the body continues to move forward.
2. Triple jump
Techniques of triple jump
Jumpers take off in the “hop” phase and land on the take-off leg. They take one step onto the other foot (step phase), then jump. Otherwise, triple jump rules are identical to those of the long jump. Jumps are measured from the nearest impression made in the landing pit by any part of the jumper’s body.
There are three phases of the triple jump: the “hop” phase, the “bound” or “step” phase, and the “jump” phase. These three phases are executed in one continuous sequence.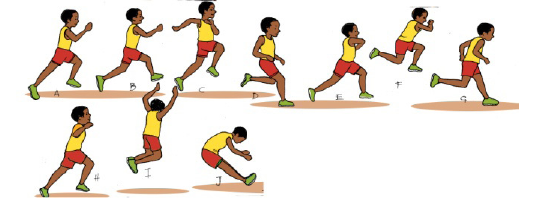
Step1. Run up to the board and jump. This will begin the first phase: hop. Generally, learners will want to use their dominant foot. They need to get a running start (lasting about 17-18 strides) so they can forcefully jump off the board.
Tell learners to pull their opposite foot up behind themselves.
Tell learners to make sure not to run beyond the board during the hop, as doing so is considered a foul.Step 2. Tell learners to keep their arms extended in front of their body.
While they are airborne during the hop, they must skip, and jump, never let their hands drop lower than their chest or higher than their chin.
Tell learners to move both arms forward, as if they are grabbing something in front of them. If their arms are too high, they are more likely to fall out of position when they hit the ground.
They must not position their arms behind their back. Doing so will slow them down during take-off and landing.
Step 3. Hit the ground with the foot flat. During the hop and step, tell learners to land with their dominant foot flat. They must not put pressure on either their heel or toes. Once they have touched the ground, they must roll forward onto the balls of their feet and prepare for the step.
Step 4. Start the step with the same foot. Again with their dominant foot, they will jump with their back leg extended behind the body. They will keep their back leg’s heel up to prepare for the landing. They must land with their back leg forward to complete the step and prepare for the final phase: which is the jump.Learners must keep their knee high and parallel to their hips for correct form.
For the step, the goal is to get off the ground as soon as possible
NB: Begin the final phase (jumping) with your opposite foot.During the jump, leap with the opposite foot or formerly back foot. By this point, they will be close to the sandpit.
Learner has to bring both feet together with knees parallel to chest as he/she jumps into the pit.
Unlike the first two steps, they must land the jump with the heels first.3. High jump
There are 5 styles of high jump. The most used in modern athletics events is Fosbury flop
1. Scissors
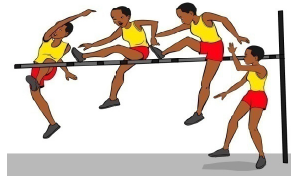
2. Eastern cut-off

3. Straddle

4. Western roll
5. Fosbury flop
Steps Of Fosbury Jump
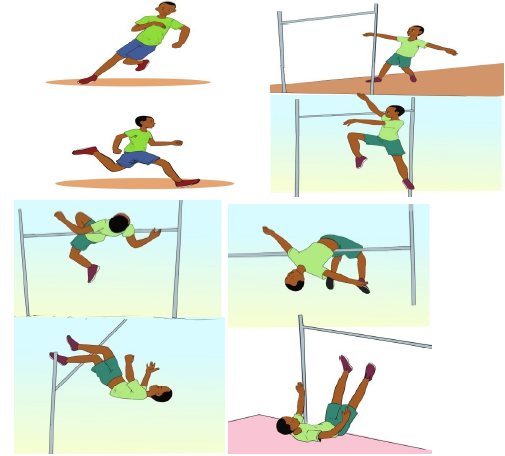
High jump phases:
• Run-up phase/ Approach
• 2 or 4 stride lead into a checkpoint
• Non take-off foot hits this checkpoint
• Followed by a curved 5 stride approach to the take-off point
• In the last 3 to 4 strides the athlete is inclined away from the bar
• Final strides to be fast and hips kept highTake-off phase
• Take-off point is approx 0.5 metres to 0.75 metres from the near upright along the bar and out from the bar
• Take off foot is slightly ahead of the athlete’s body
• Take-off foot plant is heel first to provide the maximum lever
• Take-off foot is pointing towards a position halfway between the middle of the bar and the far upright (10o to 20o)
• Take-off foot is in alignment with the take-off leg
• Hips are forward• Inside shoulder is high
• The trunk is upright and leaning slightly back - not leaning towards the bar
• Hips are at 45° to the bar and the shoulders at 90°
• There is quick and vigorous movement of free limbs
• The inside shoulder does not drop in towards the bar
• Rotation comes from the non-jumping side i.e. the free leg and shoulder pulling across the body
• The leg nearest the bar is driven up bent and high at the opposite upright, thigh and foot parallel with the ground and lower leg vertical both arms are swung forwards and upwards with the free legFlight phase (bar clearance)
Inside knee stays up at bar level
• Heels are pulled back towards the head (arching the back), Knees bent and wide apart
• Arms in a crucifix position or held by the side
• Head back and looking towards the far back corner of the mat (forces the hips to stay high)
• Once the hips are over the bar the legs are snapped straight from the knees
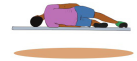
• landing on the shoulders.Landing
Land on your upper back or shoulders on the mat; your feet will land over your head.
e. Assessment (RCA discussions)
Reflection
What are the techniques of long jump?
How can I improve my long jump?
What are the styles of high jump?
How do they measure the triple jump?
What are the rules of the high jump?
What are the various techniques used in high jump?
What are the rules of the high jump?Connection
Relate this lesson to what you have learned in previous years.
Application
Give examples of where you can use the learned physical activities in your daily life?
Lesson 3 : Running exercises with uniform acceleration and endurance
a. Prerequisites
Learners will learn better this lesson if they are able to perform:
• Exercises of running: sprints, hurdles, shuttle relays, ladder running, and 8 minutes’ endurance races.
• Exercises of using basic athletic equipment.b. Teaching resources
Playground or track, whistles, stop watches, hurdles, starting block, cones, batons.
c. Introduction
Opening discussions (in a semicircle formation)
1. Checks the readiness of learners, check the sport clothing, give instructions and rules of the game.
2. Asks learners to give examples previously learned exercises of running with uniform acceleration and endurance.Warm-up activities
Learners do jogging by increasing the acceleration and speed in a progressive way around the racing track until they are warmed-up.
Exercises of stretch
In stretching, use the same exercises as for unit 1, lesson 1.
d. Lesson development
• Different types of running include: Sprints, middle and long distance running, steeplechase and race walking.
• For each running activity techniques are described with details below. You need to let learners practice based on your instructions and provide necessary support.
Sprints:
• 100m, 200m, 400m
• 4x100m and 4x400 relays
• 100m&110m hurdles.Basic elements of correct sprinting technique
There three starting signals in running activities; two are vocal and the third is made by a sound maker tool (often a fire gun).
On your marks: focus on track, feet placed in the starting block, fingers on the ground behind the starting line, hands slightly wider than should width, muscles relaxedSet: Get hips slightly above shoulder level, feet pushed hard into the blocks, hold breath and ready to race
After bang/sound
• Exhale and run out the blocks not jumping. Then acceleration up to the maximum speed
• Hold your torso straight and vertical.
• Hold your head still, but relax your face and neck.
• Bend your elbows at 90 degrees.
• Pretend you are lightly gripping a small bird in each hand.
Techniques teacher must observe in learners and help them performing well.Start phase
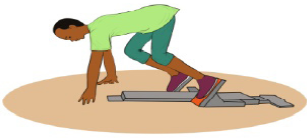
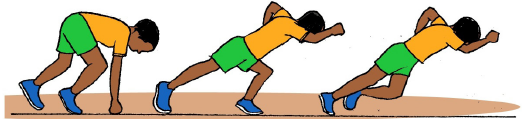
a. Weight distributed over four contact points in the start position (i.e. hands and knees). Front knee angle is about 90o, rear knee angle about 100-130o.
b. Explosive push off with both legs. Front leg extends remaining in contact with the ground while back leg swings forward. Extended front leg and trunk form a straight line.
c. Arms swing opposite to legs, elbows flex to approximately 90o and fists swing towards forehead.Acceleration
d. After first two strides, foot touches down in front of center of gravity.
e. Forward body lean begins to decrease until normal sprinting position is reached after about 20 meters. Head is relaxed, eyes focused straight ahead.
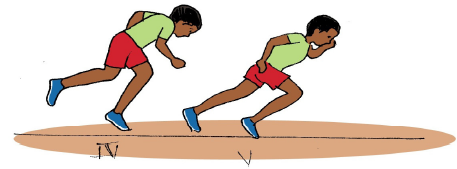
Maximum speed phase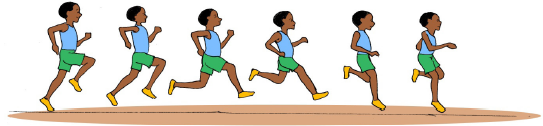
f. Push-off angle from ground is about 50-55o. Trunk is almost erect with about 5o forward lean.
g. (Midflight) Push-off leg folds tightly towards buttocks in a relaxed heeling motion. Front leg thrusts forward and upward at maximum speed (~44mph in elite sprinters). When front thigh reaches maximum possible knee lift, lower leg swings forward in a relaxed movement.
h. Foot meets ground with ankle slightly extended (plantar flexion) directly under center of gravity. Bodyweight is balanced so that only the ball of the foot touches the ground.
i. Shoulders remain steady, elbows flexed at ~90o, kept close to body throughout all phases. Hands swing forward and up above shoulder height, down and past hips. Arms and hands should have an aggressive hammering action. Head aligns naturally with trunk and shoulders and facial/neck muscles are relaxed by keeping the mouth slightly open.Races over 100m, 110m, 200m and 400m hurdles distances
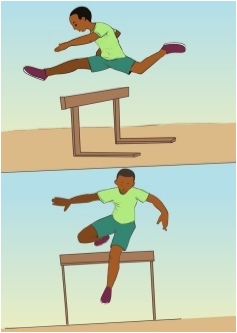
• Racing techniques are the same as for sprint. Learners need to learn how to jump over the obstacles/ hurdles.
• Hurdles height: 83.8cm,
• 100m hurdles (mainly run by women): The first hurdle is placed after a run-up of 13 metres from the starting line. The next 9 hurdles are set at a distance of 8.5 metres from each other, and the home stretch from the last hurdle to the finish line is 10.5 metres long.
• 110m hurdles (men counterpart of 100 m huddles): the first hurdle is placed after a run-up of 13.72 metres from the starting line. The next nine hurdles are set at a distance of 9.14 metres from each other, and the home stretch from the last hurdle to the finish line is 14.02 metres long.
• 200m hurdles: rare events.
• 400m hurdles: The official height of the hurdles is to 91.4 cm for men and 76.20 cm for women. The hurdles are placed on the course like this: the first hurdle after 45 metres from the starting line, a distance between the hurdles of 35 metres each, and a home stretch from the last hurdle to the finish line of 40 metres.
Relay
• 4x100m: The 4 × 100 metres relay or sprint relay is an athletics track event run in lanes over one lap of the track with four runners completing 100 metres each. The first runners must begin in the same stagger as for the individual 400 m race.
• 4x400m: The 4 × 400 metres relay or long relay is an athletics track event in which teams consist of four runners who each complete 400 metres or one lap. It is traditionally the final event of a track meet. At top class events, the first 500 metres is run in lanes.There are two types of baton exchange in the relay races:
1. Visual
2. Non-visual
NB: visual exchange does not require specific techniques.
Non visual exchange techniques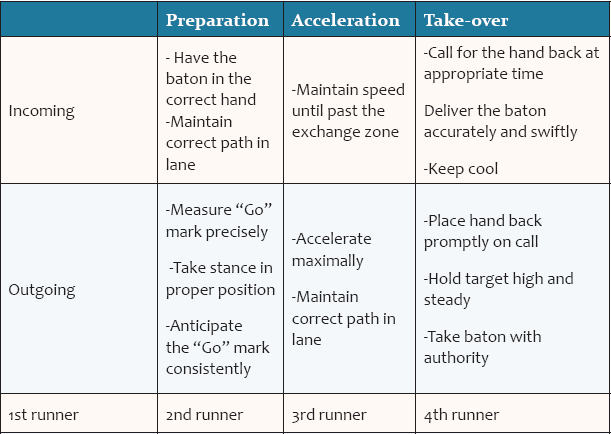

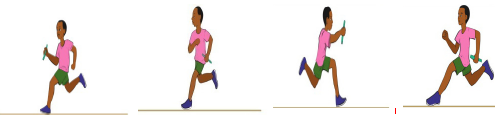
Techniques of transmitting the baton: 1) Up-sweep, 2) Down- sweep, and push pass
Non vision transmission

Vision transmission

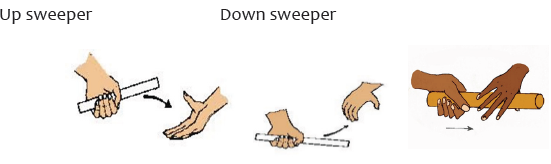
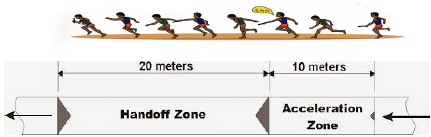
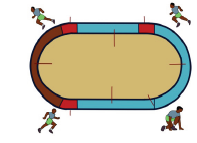
Lesson 4: Exercises of throwing technically heavy objects
a. Prerequisites
Learners will perform better in the lesson of throwing if they are able to perform exercises of throwing heavy objects at small distance by using one hand.
b.Teaching resources
Playground/ Track and field, javelin, tape measure, shot, discus, stick, baton
c. Introduction
• Opening discussions (in a semicircle formation)
After checking the readiness of learners, you need to discuss with learners the measures for safety use of throwing tools and set clear rules governing the session.
• Warm-up activities
1. Jogging by increasing the acceleration in a progressive way
2. Goings and backs running while balancing the arms
• Exercises of stretching
For stretching use exercises in unit 1 but focus on shoulders, triceps and biceps.d. Lesson development
Different types of throwing include: Javelin throw, Discus throw, shot put and Hammer throw (to see in next grades)
• For each throwing techniques are described with details below. You need to let learners practice based on your instructions and provide necessary support.
• Pay attention to possible injuries and accidents. Here you need to align learners in a way that they have a free space where they can throw their tools.Throwing techniques
Javelin throw
The javelin’s minimum length is 260cm in men’s competition and 220cm for women. It has a minimum weight of 800g for men and about 600g for women. The javelin’s grip measures about 15cm (6 in) long.
Technique of throwing javelin has two phases: Approach phase and delivery phase.Approach phase
Step1. Grip the javelin correctly
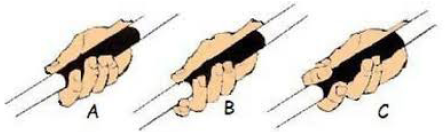
To hold the javelin properly, you have to place it in the crease of your hand. Here are the three types (learners choose to use what he/she sees is simple for him/her):
A. American grip: The American grip is done by holding the javelin with the cord in between the thumb and index finger.
B. Finnish Grip: The Finnish grip is done by extending the index finger under the shaft for control and then gripping the cord in between the thumb and middle finger.
C. “V” grip: The “V” grip is done by gripping the shaft in between extended index and middle fingers.
Step 2. Hold the javelin up near your head: Before you begin running, lift the javelin up above your shoulder so that it is about even with your head.
Step 3.Take the Approach phase: After you have the javelin in position, you can start the approach.
Step 4.Perform the “Withdrawal” The withdrawal phase is when you get your body into the proper throwing position.
Step 5. Make the “Transition” This is also known as the “cross-over”. This is where you get into the javelin tosser’s “lean-back” position by putting your right foot ahead of your center of gravity.
The delivery phaseStep 1. Do the “pre-delivery stride:” This is the step you take just before you throw the javelin. Move your left leg forward and direct your shoulders and hips towards your target.
Step 2. Perform the “delivery:” Throw the javelin when your arm is up as high as possible. Once the left foot hits the ground, your left side must be ready to hold the weight of your right leg, which drives up and forward and brings the hips into a right angle with the throw.
Step3. Move into “recovery:” You have to make sure to follow through after you throw the javelin, allowing your throwing arm to travel diagonally across your body. If you’re throwing with your right hand, the hand should end up in front of your left side. The left foot is on the ground. The right leg passes it and then stops you. How quickly you stop depends on how much momentum you built during the run-up.Discus throw
1. Body position
• Stand facing the throwing direction.
• Take a step with your right foot.
• Place 80% of your body weight on the right foot.
• Put your body in an athletic position in relation to your right leg.
• The alignment of your body should be chest- right knee- right to
2. Holding the discus
• Place discus in your throwing hand
• Spread fingers out with index finger in line with wrist
• Place fingers first knuckles over the discus3. Phases of releasing the discus
• When releasing the discus have your palm down
• Squeeze the discus out (bar of soap)
• The discus will come off the index finger
• The discus will spin in a clockwise direction for a right handed thrower
For men, the discus measures from 21,9cm to 22cm in diameter and 44mm to 46mm in thickness; it weighs 2kg. For women at all levels, the dimensions are 18cm to 18,2cm across, 37mm to 39mm (1.5 t in thickness, and 1 kg in weight). At the high school level, boys use a discus that is 20,9cm in diameter and weighs 1.62kg.Shot put
1. Grip the shot
• The shot is held at the base of the fingers not the palm
• The fingers are slightly spread apart with the thumb for support.
• The hand will be bent back in the cocked position when holding the shot.
2. Neck placement
• Raise the shot above your head
• Lower the shot straight down until it is under your jaw
• Push the shot into your neck
• Lift your elbow parallel to the floor. Don’t squeeze your elbow towards your back
• Check to see that your thumb is pointing down towards your clavicleA. Throwing from the power position
• Over exaggerate the use of the legs in the throw especially the hips
• Sequence of the throw will be legs - hips - back – arm
• Push the weight from right leg to the left leg in an upwards direction
• When driving up with your legs your right heel (hips) needs to be turned out
• There will be a stretch reflex reaction between your upper body and lower body
• The upper body will start coming around
• As your upper body comes around sweep the left arm around and then bring it tight to your body
• Stop the left side of your body to aid in accelerating the shot
• Deliver the shot as mentioned aboveB. Glide techniques
1. Body position in glide techniques
• Stand at the back of the ring facing away from the throwing direction
• Place shot against your neck
• Put your body in an athletic position facing away from the sector
• Extend your left arm out – relaxed
• Extend the left leg back towards the toe board
• Most of the body weight should be on the right leg
2. Gliding into the power position
• Tap your left leg for balance
• Draw up the left knee even with the right knee, remember to keep the left leg straight
• Do not allow your left leg to curl behind the right leg
• Allow your hips to start to fall
• Violently extend your left leg towards the toe board, do not lift up with your back
• Push and then pull your right leg underneath you, it will look like the last part of your body leaving the circle is your right heele. Assessment (RCA discussion)
• Reflexion
1. What type of javelin grip do you prefer more and why?
2. What is the releasing angle of javelin and why?
3. What are the challenges did meet during sessions?
4. What is similar in shot put and discus throwing?
5. What is better between throwing from a power position and glide position?• Connection
What connection between this lesson and the previous learned physical activities?
• Application
Participation in athletics competitions
Lesson 5 : Use of basic athletics equipment
a. Prerequisites
Learners will learn better this lesson if they are able to enjoy athletics activities using athletics equipment.
b. Teaching resources
Playground/ track and field, whistles, stopwatch, mat, tape measure, javelin, shot, discus,
c. Introduction
• Opening discussions (in a semicircle formation)
1. Check the readiness of learners and the sport uniform,
2. The teacher asks learners examples of learnt different types of basic athletics equipment.
• Warm-up activities
Warm-up activities: consider activities in previous lesson
• Exercises of stretching: Consider exercises in previous lessond. Lesson development
• Basic equipment in athletics include: racing tracks, jumping field, throwing field.
• Equipment used in races are baton in relay races, hurdles and water jump in steeplechase
• Equipment in throwing are: javelin, shot, discus and hammer
• Basic equipment in high jumping are: mat and the 2 elevated posts with a crossbar.
• Basic equipment in long jump are: running way and the sand pit.
• For each equipment for each track: show learners how to use it with explanations and if possible demonstrate.
• Let learners practice based on instructions and provide necessary support
• Let learners evaluate one’s own and others’ performance and provide guidance where necessary.
• Track and field with the appropriate equipment as well as the way of evaluating performance results are shown below with roles of judges in athletics. In teaching process, some learners are performers, others are officials. They will switch the roles.
• In absence of track and field, by the help of learners on your guidance you can mark the limits using local sand or other available materials.
1. Athletics track
NB. One lap of athletics track: 400 m• 800m : 2 laps,
• 1500m : 3 laps plus 300m,
• 3000m : 7 laps plus 200m,
• 5000m : 12 laps plus 200m,
• 10000m : 25 laps.

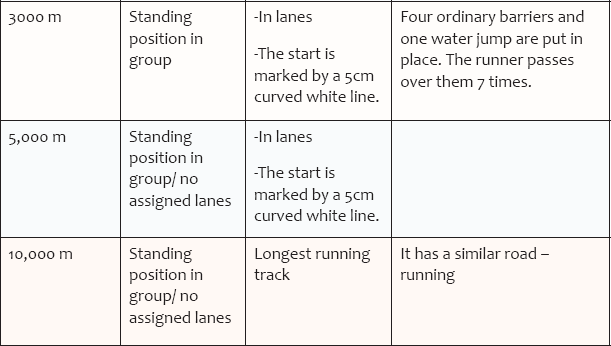

False start: If a sprinter begins his/her starting motion from the set position before the starting gun is fired. If he/she does it twice, he/she disqualified.
Standard athletics track lane: six to nine lanes of 1.22m width.
2. Running events officials and responsibilites1. Head judge
2. Lanes judges: report on infractions or irregularities during the race (e.g.: a lane judge must be put at each exchange zone in relay races)
3. Starter: Fire the starting gun/ give the starting sign
4. Timekeepers: responsible for turning on and turning off the timing devices (stopwatches...) and capturing each runner results.
5. Finishing line judges: Stay at the finishing line and assist the timekeepers to keep the children in order when they finish their track events. The athletes are then taken to the recording table to have their time recorded.
3. Throwing field
Javelin field with all details (angle, distance etc.)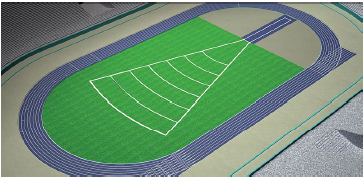
Shot put field

The diameter of the circle is 2.135 metres. A stop board of 10 cm is put at the front of the circle.
A high school discus ring has a diameter of 2.5 metres.
4. Throwing events officials and responsibilites
Javelin: Tasks of judges in javelin throw are: range athletes in their throwing order; watching for foul throws, finding and marking the point where the javelin legally (vertically) hits the ground, pulling the measuring tape through the center of the runway, recording measurements and (with the assistance of the competitor) returning the javelin to the run up area.
Shot: Tasks of judges in shot put throw include: range athletes in their throwing order; watching for foul puts; marking the point where the shot put hits the ground; pulling the measuring tape through the center of circle; recording measurements and returning (with the assistance of the competitor) the shot put to the ring.
Discus: Tasks of judges in discus are mainly the following: watching for foul throws, recording measurements, pulling the tape through the center of circle, finding and marking the point of impact and (with the assistance of the competitor) returning the Discus to the ring.
Evaluation of individual level of performance
In throwing and jumping events, each competitor is allowed three trials. The three trials are recoded all of them and the best one among them is the one who is considered in classifying competitors.5. Long jump and triple jump officials and responsibilites
Head judge: rules on all trials, reads measurements and records results
Official 1: marks attempts and supervises the action around the landing pitOfficial 2: pull tape measure (double-decametre).
Official 3: (the flight coordinator): calls the jumping order and enforces the time limit
Assistants 1 and 2: Level the pit (e.g.: remove any marker left from previous attempts)
Jumps: Long jump field
High jump and pole vault jump track
6. Jumping events officials and responsibilites
1. Two officials: responsible for setting the bar when it is dislodged.
2. The bar official: responsible of the landing pit and declaring legal jump.
3. The flight coordinator: responsible of calling the names of the competitors in the proper order.
4. Primary recorder: is responsible for recording all missed and successful attempts for each competitor.
7. Official dimensios of throwing equipments
Javelin: The javelin measures between 2.6 and 2.7 m in length and 800 g in weight for men, and women throw a javelin between 2.2 and 2.3 m in length and 600 g in weight.
Shot
In international and collegiate track, men put a 7 kg shot. High school boys put a 5 kg shot. Women put a shot that weighs shot in high school, collegiate, and international events.
2.5 Additional information
• In teaching-learning process the teacher must by the help of learners find local grown solution considering athletics equipment to use.
• In running events: marking lanes using ropes, using chalks, carpentry residuum, making hurdles using ropes and pieces of trees, …
• In throwing events: Using javelin shaped sticks in place of the real javelin, using shaped stones in place of the shot put• In jumping events: drawing on the ground a sand pit, making a high jump track using ropes and pieces of trees to enable a wide range of learner’s participation.
• Some athletics events like pole vault were not popular in our country.2.6 End unit assessment
• Set exercises of long and high jump to help learners to demonstrate their ability to jump with improved techniques
• Set running exercises of various courses (sprints, resistance and endurance races) which will help to evaluate individual learner‘s ability and use of improved techniques. Verify the starting techniques and running techniques
• Set exercises of throwing javelin and evaluate individual learner ‘ability and use of improved techniques: griping the tools and the throwing techniques
• Record individual learner’s performance.
• Organize a school competition and if possible give prizes.2.7 Additional activities
As additional activities to give to your learners you need to:
• Encourage learners to actively participate in athletics training sessions organized by different coaches and private individuals in training centers.
• Encourage learners to participate actively in school organized competitions as well as in Sector, District and national competitions (e.g.: Inter-school’s competition organized by FRSS)
• Encourage learners to participate all youth competitions available. (e.g.: District, Imbuto foundation, Right to play, FRA/RAF, can organize such competitions).
• Encourage learners to create local athletics competitions in their villagesUNIT 3:FOOTBALL
3.1 Key unit competence
Learners will be able to develop skills of football and apply techniques and tactics of kicking, passing, and using appropriate parts of the body.
3.2 Prerequisites knowledge and skills
Learners will perform better in this unit if they are able to apply simple techniques and tactics to improve one’s performance in football, to create individual technical skills and to evaluate his/her performance in football.
Learners also should be able to demonstrate qualities like team work, team spirit, fair play and respect of regulations and rules during the game.3.3 Cross-cutting issues to be addressed
1. Comprehensive Sexuality Education: In teaching-learning process of football the teacher together with the learners must set instructions that prevent sexual harassment, such as body bad touches.
2. Peace and Values Education: In football lesson, the teacher together with the learners must create peaceful game situation by the use of respect of rules.3.4 List of lessons
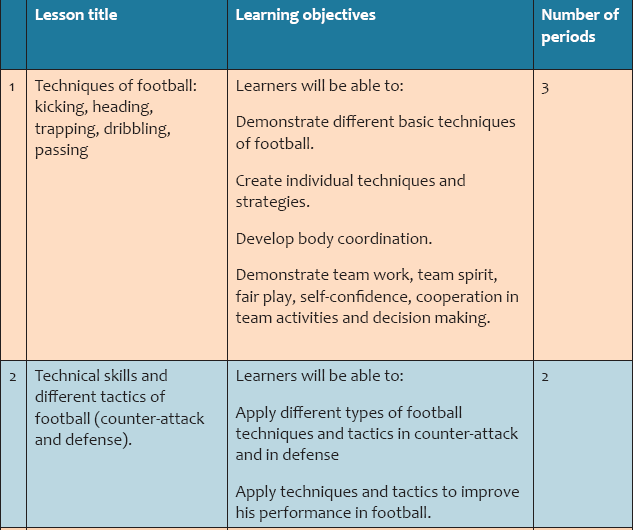

Lesson 1. Techniques of football: kicking, heading, trapping, dribbling and passing
a. Prerequisites
Learners will learn better this lesson if they are able to perform basic exercises of kicking the ball: kicking the motionless ball, kicking the positioned ball, corner-kick, penalty kick, free kick.
b. Teaching resources
Playground, whistles, stopwatch, balls, sticks, cones, narrow band and chasubles/ pinnies.
c. Introduction
Opening discussions (in a semicircle formation)
• After checking learner’s readiness, give instructions and rules of the game
• Forms groups basing on the quantity of resources available as well as on the class size.
• Discuss with learners how to maximize the use of all the available resources.
• Discuss with learners what parts of the body they are accustomed to use in football and why.Warm-up activities
Jogging by increasing the acceleration and speed in a progressive way until they are warmed-up. Once warmed up and flexible, the learners should introduce a football and go through functional activities. These include heading, short and long passing with both feet, running backwards, sideways, skipping, stopping/starting, sprinting and turning.
Exercises of stretching (In columns formation not exceeding 6 columns)
Refer to unit 1, lesson one. For this lesson emphasize the stretching of leg muscles and thigh muscles.
d. Lesson development
Techniques of football include: kicking, heading, trapping, dribbling, passing
For each technique: show learners how to execute with explanations and if possible demonstrate (NB: Always remember that you must not give a demonstration if you are not sure to perform better than every individual learner).
After setting clear instructions and rules, let learners practice based on instructions and provide necessary support• You may not work in sufficient conditions: lack of enough balls, no cones, no chasubles/pinnies…
• Together with your learners you may find a solution:
• Make balls in banana fibers. These may not bounce but they will help you to teach dribbling the ball, trapping a ground ball, juggling the ball etc.
• Find other suitable materials to use in place of cones,
• Mark the lines of the playground using local material like sand, carpentry residuum…1. Kicking techniques
Punt kick

Hook kick
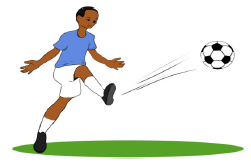
Push kick
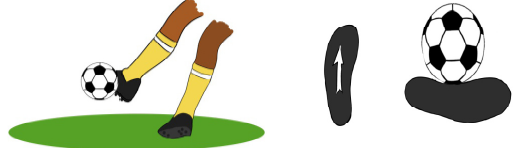
Inner side or instep kick
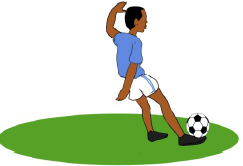
Outside kick

Back heel kick
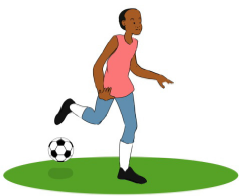
2. Heading technique
Players use headers to make plays on balls that are in the air, either to pass or to make a shot on goal. To make a header, they knock the ball with the forehead, using power generated from the neck muscles. When a ball is high in the air, members of both teams will jockey for position on the ground in order to control the header. Tall players and those who can jump high have a distinct advantage in these situations.
Defensive header: e.g. In defense to clear a goal or to disallow an opponent an aerial pass, to clear a free kick shoot of a corner kick ballOffensive/attacking header: In attack to score from a corner kick or a free kick
Technique for properly heading a ball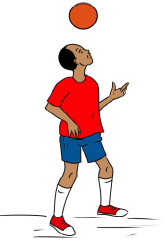
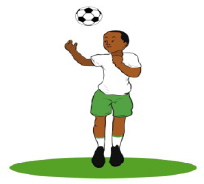
Description of the heading technique
• Contact with the ball should be made on the forehead between the eyebrows and the hairline.
• Ball must be struck and not bounce off the head
• Learners must use muscles in their back and stomach to approach the ball
• Back must be slightly arched as ball approaches, slightly leaning forward after striking the ball
• Neck must be stiff, young learners can be taught to tuck their chin towards their chest to stiffen the neck
• Head moves toward the ball
• Eyes must remain open and on the approaching ball
NB: Timing is essential. For balance, knees must be slightly bentTeaching activities for heading technique
a. Heading techniques
Hold a ball and stand 10 m away from your partner. Throw the ball into the air to her/him, who hast to hit it with her/his head and bring it back to you, and you throw it again. After 10 times, switch the roles.
b. Attacking and defensive heading teaching activities
Have two teams of defenders and attackers. Have some learners in line on the left or right sidelines, or even where a corner kick is normally placed. The first defender crosses the ball in the air into the box and the learners in defending team strive to clear the ball whereas the learners in attacking team strive to score. They must compete to be the firsts on the ball. After 10 times switch the roles.
3. Trapping
Players use trapping to gain control of loose balls that may be rolling, bouncing or flying through the air. To bring the motion of the ball to a momentary stop, players absorb the ball’s force with a part of their body. Most traps are made with the inside of the foot or the sole of the foot but balls may also be brought under control with the leg, chest, head, or top of the foot.
Types of traps in football
1. Step Trap: Simply step on the ball to trap it.
2. Inside Trap: Stop the ball with the side of your foot.


3. Thigh Trap: Use your thigh to trap the ball when the ball is lower than your chest but too high for your foot.
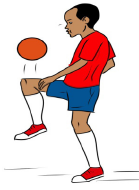
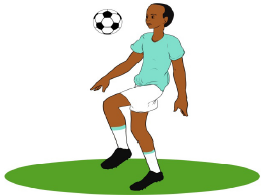
4. Chest Trap: Use your chest to cushion the ball down to your feet.
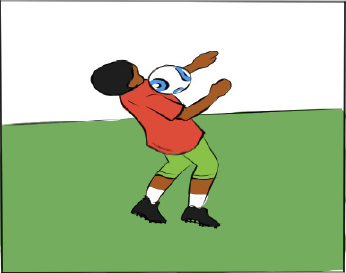
5. Head Trap: Similar to the chest trap but you use your head to knock the ball down to your feet.

Teaching activities of trapping technique
a. Trapping in pair (with a partner learner)
Hold the ball on ground and stand 10m away from your partner. Pass a ground ball to your partner, who has to trap it using her/his feet. She/he then passes it back to you and you pass it again. After 10 times, switch the roles.
Hold a ball and stand 10 m away from your partner. Throw the ball into the air to her/him, who hast to trap it with her chest and bring it down to her/his feet under control. She/he then passes it back to you, and you throw it again. After 10 times, switch the roles.
Using this kind of exercise given above, let learners practice trapping the ball with their chest, head, inner thighs and the sides and tops of their feet.b. Trapping competition
The teacher drop-kicks the ball in the air as high as she/he can and then calls out the names of two learners. As soon as these two learners hear their names, they race to the dropping ball to see who can trap it first
c. Trapping and shooting
Have two teams of defenders and forwards. Have defenders in line on the left or right sidelines, or even where a corner kick is normally placed. The first defender crosses the ball in the air into the box and the first forward in line rushes to the ball, traps it and shoots.
4. Dribbling
The most basic of all football skills is dribbling. It is the ability to carry the ball (moving slowly or very fast) when you are in control of the ball. Dribbling helps to create free spaces.
Most observed dribbles on the court are:
Low dribble, speed dribble, change-of-pace dribble, cross -over dribble, hockey dribble, half-reverse dribble, reverse dribble.... Note that dribbling is an individual skill; one can create his/her own dribbling style as the objective of dribbling is to carry the ball at a certain distance on the court and get a free space.
Dribbling teaching- learning activities
Players move the ball small distances by dribbling. Dribbling entails tapping, dragging, or rolling the ball in front of the body while running. The objective is to advance the ball while keeping it in control and protecting it from defensive players.
A player with good dribbling skills can make quick stops, change direction, and move the ball from one foot to another with ease. Advanced players can also fake one way with the ball, only to turn and move in the opposite direction.Dribbling teaching activities
Learners will perform dribbling exercises illustrated by the pictures below.
Learners will start by dribbling the ball over the given distance using the inner foot side. After mastering the techniques, they may switch to using outside part of the foot.
Making the exercises more challenging for quick learners: they will conduct the ball over the same distance by juggling it using the feet, the thighs and or head.
6. Passing
In football we use several variations types of passes. The type of the pass used depends on the positioning of opponents and teammates.
Offensive passes are used to create a strong offensive drive and scoring opportunities, while defensive passes are used to slow down the game or maintain possession of the ball when under pressure.
Passes help to move the ball around the field more quickly than dribbling. Passes are like kicks, but they require less power and more control. Players usually pass by using the inside of the foot to push the ball in a certain direction, though sometimes the outside of the foot is used. Talented players can pass with both feet in all directions, including behind them. There is an air pass and a ground pass.Push pass

Backward pass
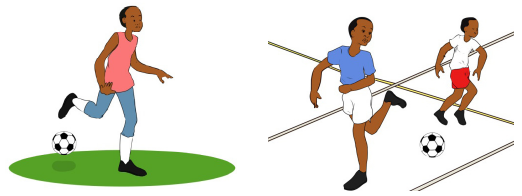
Piercing pass
Wall pass/ a one two pass
Passing teaching-learning activities
Foot internal pass
Exercise number one: The teacher put learners in two opposite lines facing each other at a minimum distance of 5m, they exchange passes. After making his/her pass the learner in front goes behind to give the place to the next learner in line until they all have a chance to experience the technique.
Variation of exercise number one: -Increasing the distance between the opposite lines of learners to teach them short and long pass according to the progression they are making.
Variation of exercise number one: Same exercise but run to the other side (pass and pursue). After making a pass, the learner run to the other side and stands behind the last learner in the opposite line. The learner in front does the same after making a pass.

Variation of exercise number one: Always the same exercise, but run to meeting the pass. Learners will start by exchanging passes only. The learner who finishes making his pass goes behind his/her line. In the second time, the learner runs to meet the pass and after making pass he/she pursues the ball and goes to stand behind last at the opposite line. Learners do the exercises until they all have a chance to experience the exercise.

Variations
Pass in zigzag with control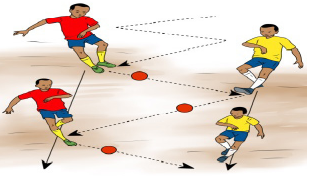
Pass in triangle or Wall pass

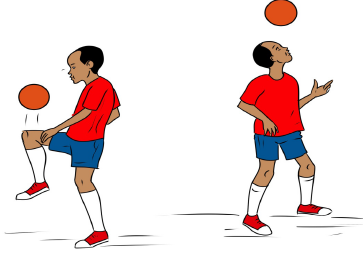
In football, the pass is a form of communication, transmission, participation, a link or a contact.
e. Assessment (RCA discussions)
Reflection
• What are the techniques of pass?
• What are the phases of the heading technique?
• What are the parts of the body to use while trapping a ground ball? an air ball?
• What is important in dribbling?
• What are the challenges have met during the lesson?Connection
Give some examples of encouraging words.
Application
What are the benefit of football game for our school and the society?
Lesson 2: Technical skills and different tactics of football
a. Prerequisites
Learners will learn better this lesson if they are able to perform exercises with rolling the ball in front of the body while running, to move the ball from one player to another player, to male short and long pass and being able to play in a team.
b. Teaching resources
Playground, whistle, stopwatch, balls, cones and chasubles/ pinnies
c. Introduction
Opening discussions (in a semicircle formation)
Engage learners in discussion about previously acquired skills which will help them in this lesson.Let learners form teams on their own.
Together with learners discuss on the whole process of the lesson.Warm-up activities
Same as the previous football lesson
Exercises of stretching (In columns formation not exceeding 6 columns)
Choose one learner to lead stretching exercises using exercises from unit 1 lesson 1.d. Lesson development
• Form teams with equal number and gender balanced. Let learners choose on their own, positions to take in the field. Positions of players in the field are given below.
• You need to let learners themselves recognise when it is better to start a counter attack in a game situation. Guide and provide only necessary support. Game situations from where a counter attack may be initiated are given and described below.
• Guide learners and provide necessary support while teaching tactics of defending in football. Exercises to help teaching defense are given below. But you can extend them by doing your own creativity and research.
• After setting clear instructions and rules, let learners practice based on instructions and intervene where it is necessary.
• Give only positive reinforcement
• Reduce the playing area dimensions for learners of less physical conditioning
• Reduce the rules for slow learners (e.g.: Not sanctioning the hand ball if it occurs by maladroitness.)Players’ position in football
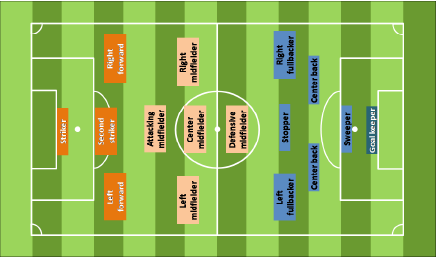
Football tactics
1. Counter attack
• Opposition attack and commit players forward. Goalkeeper gains possession of the ball, this might be from a cross or a save. They quickly run to the edge of their area and kick or throw long and early, taking opposition players out of the game. Needs aggressive and quick runners to chase the ball down before the opposition can reorganize.
• Opposition is high and attacking. The ball is lost and an early ball over the top is played for runners in behind. Very effective if your team has quick forwards.
• Positive and aggressive running with the ball. The runner has pace, runs quickly, aggressively and with their head up, looking to break the defensive line of the opposition and team mates run forward to support for a cross or pass.
• Aggressive pressing in midfield area. The ball is won and counter attack with quick passing, forward runs or running with the ball.
• Pressing high up the pitch. Need to commit players, which can be risky, but potentially big rewards if the ball can be won. Closer to the opposition goal when the ball is won, less time for them to recover.
• Defend deep and be organized. Invite the opposition to attack and commit players forward. Look to win or intercept the ball. Break quickly, before the opposition can recover and get behind the ball with quick passing, running with the ball and runners off the ball.2. Defense
There are two types of defense tactics:
1. Zone defense: a zone defense is where defenders stay between the ball & the goal they are defending & are assigned a position relative to their teammates (e.g., right, center, or left)2. Man to man defense: and man-to-man defense is where players are assigned to guard specific opponents (this is called a “marking” defense). We use some type of zone defense, but mark attackers who come into their “zone”. You must teach your learners to mark attackers who are in scoring range (i.e., “dangerous Attackers”) regardless of whether you play a zone or man-to-man.
Man to man exercise:
• Learners form teams of equal number.
• Each team can nominate a “sweeper”.
• Everyone except the sweeper picks a player to mark and must stay with that player.
• You can only tackle your direct opponent but can intercept passes.
• If your direct opponent scores you perform 5 press-ups so your team is then playing “numbers down”.
• The “sweeper” can tackle anyone.Zone defense exercise
• Use flat markers to divide the pitch.
• Learners are now freed up but must mark in the same zone as their nearest opponent.
• Both teams can play with a “sweeper” to organize play.
• In the diagram, the blue forward away from the ball has come inside to cut off the sweeper as a passing option, the opposite side full back being the least dangerous opponent.
• The blue sweeper should try to stay free but may have to push a midfield player forward and then take up a marking job.
• Both keepers can be encouraged to play as “sweepers” when the ball is at the other end of the pitch.d. Assessment (RCA discussions)
Reflection
• Where do you apply a man to man defense in game situation?
• Who is responsible to initiate a counter attack?
• Can we always apply zone dense in whenever at wherever?Connection
Give some examples of encouraging words.
Application
What are the benefit of football game for our school and the society?
Lesson 3: Safe play using basic rules
a. Prerequisites
Learners will learn better this lesson if they are able to show respect of rules of football in the game situation and are able to explain their importance. Learners are able to describe how football can be played in a safe, varied, effective and enjoyable way. Attitudes like decision-making ability and leadership skills are helpful in teaching this lesson.
b. Teaching resources
Playground, whistle, red and yellow cards.
c. Introduction
Opening discussions (in a semicircle formation)
• Discuss with the learners about their readiness and proper wearing
• Ask learners to make teams of equal number and gender balanced
• Set clear instructions to follow in teaching basic rules during a game situation.
• Discuss on the importance of adhering to rules in football matchWarm-up activities
Let one learner lead the warm using the following exercises
• Jogging in continuous increasing acceleration and speed until learners are warmed-up.
• Twenty meters goings and comings sprints 5 times.Exercises of stretching
By using stretching exercises given in unit 1 lesson 1; ask one learner to lead the stretching. Always provide guidance and support.
d. Lesson development
• In this lesson you need to teach learners to adhere to football rules while playing and demonstrate safe play.
• Let learners form 3 teams of equal number of players and equally gender balanced (Teams: A, B and C).
• Together with the learners set the limits of the playground (make clear lines).
• A plays against B and C plays the role of refereeing.
• Teams must switch the roles: When A plays VS C, learners in B are the referees and learners in team A are referees when B plays VS C.
• Provide guidance and support where necessary, especial as regards decisions to take and correct hand sign to use.
• Sick learners and learners with disability may serve as coaches.FOOTBALL BASIC RULES
The official football law contains 17 rules. We will put an emphasis on the most important among them.
17 laws of the game according to IFAB, Laws of the game 2017-2018
1. The field of play
2. The ball
3. The players
4. The player’s equipment
5. The referee
6. The other Match officials
7. Duration of the match
8. The start and restart of the match
9. The ball in and out of play
10. Determining the outcome of a match
11. Offside
12. Fouls and Misconduct
13. Free Kicks
14. The Penalty Kick
15. The Throw-in
16. The Goal Kick
17. The Corner Kick1. The playground and its dimensions

The field must be rectangular in shape. That is the length of the touch line must be greater than the length of the goal line. The length of the touch line must be not less than 90 and not exceeding 120m and the length of the goal line not less than 45m and not exceeding 90m.
Main lines of the play ground
Two touch lines to demarcate the boundaries of the playground in the direction of the length.
Two goal lines to demarcate boundaries of the playground in the direction of width. There are goal posts in the middle of each goal line.
The half-way line. In its middle there is a centre spot. In each camp, there is:
A line that demarcates the zone of penalty area of 16.50m from the inside of goal post and 16.50m from inside the field (any offence committed by a defender r inside this area, the opponent team will be awarded a penalty).
A line of goal area that demarcates the zone of 5.50m from the inside of the goal post and 5.50m from inside the play.
Within a penalty area, there is a penalty mark located at 11metres from the midpoint between the goalposts. From this point, an arc of a circle with a radius of 9.15m from the centre of each penalty mark is drawn outside the penalty area (to keep players at prescribed distance during penalty shooting).2. The ball and its characteristics
It is spherical, made of leather or other suitable material, its circumference of not more than 70 cm and not less than 68 cm. The net weight is 450g or at least 410g at the beginning of the match. Its pressure is 0.6 - 1.1 atmosphere (600 - 1,100 g/cm2).
3. Number of the players
A match is played by two teams, each consisting of not more than eleven players, one of whom is the goalkeeper. A match may not take place if either team consists of fewer than seven players.
Officially, three substitutions are allowed, but rules of any competition must set clearly the number and it is recommended for the children to allow a big number of substitutions.4. Ball in and out the play
During a game, the ball remains in play as long as it stays within the end lines and the sidelines. If the ball leaves the field it is returned to play by throw-in, goal kick, or corner kick, depending on where the ball left play and who knocked it out of play. The only time that play stops is when a player commits a foul, a player is injured, or a goal is scored.
5. Fouls and misconduct
Ten major infractions are:
- Intentionally kicking, tripping, or jumping at an opponent (3);
- Violently charging, striking, holding, pushing, or spitting at an opponent (5);
- Tackling an opponent without the ball (1);
- Touching the ball with the hands (1).
If a player commits any of these fouls, the opposing team is awarded a free kick. If a player commits any of these offenses inside his own penalty area, the opposing team is awarded a penalty kick.Direct free kick and indirect free kick
When a major infraction occurs outside the penalty area, free kicks are taken at the spot of the infraction. Players from the defending team must remain at least 9 m (10 yd) away from the ball until the kick is taken. These fouls are broken into two categories: direct free kicks and indirect free kicks. A direct free kick is awarded for major infractions, such as pulling an opponent to the ground by grabbing the jersey. The ball may be kicked directly into the goal from the spot of the foul. An indirect free kick is awarded for lesser infractions, such as obstructing an opponent while pursuing the ball. The ball must touch one other person (a teammate, opponent) before a goal can be scored.
Offside
Another major rule in football, in addition to the prohibitions against striking the opponent and touching the ball with the hands, is offside.
An attacking player is offside if, when receiving a forward pass from a teammate, there are not at least two opponents (usually one defender and the goalkeeper) ahead of the receiver that is between the attacking player and the opponents’ goal line. A player cannot be ruled offside when receiving the ball from a throw-in or if the player is in his or her own half of the field. The referee or the referee’s assistants determine offside infractions and signal them by waving their flags and pointing to the spot where the infraction occurred. An indirect free kick from the point of infraction is then awarded to the defending team.Substitution
A player enters to make a substitution always with the permission of referee. If a player enters to make a substitution without the permission of referee, the match is stopped and the substitute concerned is warned (with a yellow card) and must leave the play; The match resumes with a ball on the ground where it was when the match was stopped.
Players’ Equipment
For security purposes, a player must not use equipment or wear anything that is dangerous to himself or another player, including any kind of jewelries.
The basic compulsory equipment of a player comprises the following separate items:
- Jersey or shirt with sleeves;
- Shorts - if undershorts or tights are worn, they must be of the same main color as the shorts);
- Stockings;
- Shin guards and
- Footwear6. Referee and other match officials
The referee is the person responsible for enforcing the Laws of the game during the match. He or she is the final decision-making authority on all facts connected with play and is the only official on the pitch with the authority to start and stop play and impose disciplinary action against players during a match. At most levels of play the referee is assisted by two assistant referees (formerly known as linesmen), who are empowered to advise the referee in certain situations such as the ball leaving play or infringements of the Laws of the game occurring out of the view of the referee; however, the assistant referees’ decisions are not binding and the referee has authority to overrule an assistant referee. At higher levels of play the referee may also be assisted by a fourth official who supervises the teams’ technical areas and assists the referee with administrative tasks.
7. Duration and tie-breaking methods
A standard adult football match consists of two halves of 45 minutes each. Each half runs continuously, meaning that the clock is not stopped when the ball is out of play. There is usually a 15-minute half-time break between halves. The end of the match is known as full-time. The referee is the official timekeeper for the match, and may make an allowance for time lost through substitutions, injured players requiring attention, or other stoppages. This added time is called additional time in FIFA documents, but is most commonly referred to as stoppage time or injury time, while loss time can also be used as a synonym.
The duration of stoppage time is at the sole discretion of the referee. Stoppage time does not fully compensate for the time in which the ball is out of play, a 90 minutes of the game typically involves about an hour of effective playing time. The referee alone signals the end of the match.In matches where a fourth official is appointed, towards the end of the half the referee signals how many minutes of stoppage time he intends to add. The fourth official then informs the players and spectators by holding up a board showing this number.
e. Assessment (RCA discussions).
Reflection
What do you think is the importance of football rules for a safe game situation?
What are the challenges to play adhering to rules?Connection
Give some examples of rules from other games similar to football rules.
Application
What are the benefit of football game for our school and the society?
3.5. Additional information
• You may not work in sufficient conditions: lack of enough balls, no cones, no chasuble/ pinnies…
• Together with your learners you may find a solution:
• Make balls in banana fibers. These may not bounce but they will help you to teach dribbling the ball, trapping a ground ball, juggling the ball etc.
• Find other suitable materials to use in place of cones,
• Mark the lines of the playground using local material like sand, carpentry residuum…3.6. End unit assessment
Set exercises of kicking stationary ball and rolling ball, exercises of trapping a ground and an aerial ball, exercises of moving the ball (dribbling) slowly and fast at the top speed, exercises of passing short and long passes.
Set exercises of defending (man to man and zone defense) and counter-attacking.
Organize a football match and observe these techniques in a game situation and the ability to respect and use football basic rules.Observe:
• Learners’ ability to referee the match applying basic rules.
• The use of correct football techniques: pass, dribbling, trapping, kicking
• The organization of teams in defense (man to man and zone defense) and in counter-attack.3.7 Additional activities
As additional activities to give to your learners you need to:
• Encourage learners to actively participate in football training sessions organized by different coaches and private individuals in training centers.
• Encourage also learners to participate in football community competitions if there are any (e.g.: Kagame cup competitions, right to play….)
• Encourage learners to participate actively in school organized competitions as well as in Sector, District and national competitions (e.g: Inter-school’s competition organized by FRSS)
• Encourage learners to participate in all youth competitions available (e.g.: Competitions organized by FERWAFA and other stakeholders).
• Encourage learners to create local football competitions in their villages.UNIT 4: VOLLEYBALL
4.1 Key unit competence
Learners will be able to improve techniques of passing, blocking, setting, and serving and use these techniques in game situations.
4.2 Prerequisites knowledge and skills
Learners will perform better in this unit if they are able to apply basic techniques and tactics in volleyball. Learners should be able to perform individual techniques and tactics in attack: under head serve, overhead serve, jump serve, hitting or smash, blocking exercises and using basic rules during the short games.
4.3 Cross-cutting issues to be addressed
1. Inclusive education: In teaching-learning process of volleyball the teacher together with the learners must set instructions that include all learners. Learners with physical impairment will be referees. Modifying the height of the net to meet individual learners.
2. Standardization culture: In volleyball lesson, the height of net and the balls must be adapted to learners’ age according to the accepted standards.4.4 List of lessons
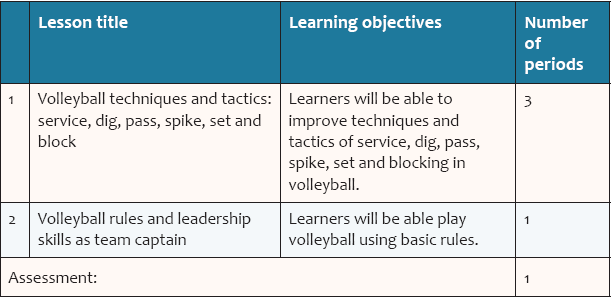
Lesson 1 : Volleyball techniques and tactics: service, dig, pass, spike, set and block
a. Prerequisites
Learners will learn better this lesson if they are able to perform basic exercises of service, dig, pass, spike, set and block.
b. Teaching resources
Playground, whistles, balls, chairs, cones, bibs, sport uniforms
c. Introduction
Opening discussions (in a semicircle formation)
• After checking learner’s readiness, give instructions and rules of the game.
• Forms groups basing on the quantity of resources available as well as on the class size.
• Discuss with learners how to maximize the use of all the available resources.d. Lesson development
In this lesson there are different techniques seen in previous grades. As a primary 6 PE teacher you have to help learners improving their skills. Let learner practice and make correction where necessary. Examples of drills (teaching exercises) are given but it is advised to do further research to enrich your session.
Volleyball techniques and tactics include: service, dig, pass, spike, set and block.
For each technique: show learners how to execute with explanations and if possible demonstrate (NB: Always remember that you must not give a demonstration if you are not sure to perform better than every individual learner).
After setting clear instructions and rules, let learners practice based on instructions and provide necessary support.Warm-up activities
1. Various courses on the court (forward and backward drills)
2. High knees by balancing arms: Prepares the lower body for eventual explosive activity.
3. High knees laterally: Same as high knees, except it focuses on pushing muscles in the legs to prepare the body for explosive lateral activity.
4. Front straight leg run: Wakes up the ankles, muscles around the lower leg and posterior chain.
5. Lateral lunge: Works on active stretching through the entire range of motion of a lunge transition move.
6. High skips: This plyometric exercise should be used when the body is warm. It prepares the body for full explosive movements (i.e. approach jumps).
Exercises of stretching in (In columns formation not exceeding 6 columns)Refer to unit 1, lesson one. For this lesson emphasize the stretching of leg muscles and thigh muscles. Arms and wrist also should be well stretched.
1. Service
The serve is an attack action; it should be safe and aggressive at the same time. This requires great concentration as it is the key to engagement.
• It is always the player in post 1 who serves the ball. The server must stand behind the end line of his court (without touching the line with the foot), where he wants in-depth, but remain within the field width.
• He must hit the ball with one hand. Prior to the shot, the ball must be thrown or dropped (it cannot be held).
• If the ball touches the net, but passes into the opponent court, the service is valid.
• When serving, players must respect their position to the current rotation in order to avoid a false position. There is no error in the server’s position relative to other players during the service.• With the exception of the server, all players must be entirely within the
• field during the service: they must not touch the ground outside the lines.
• Once the ball is hit, players can leave the court and change positions (players in positions 1-6-5 and players in positions 2-3-4 of them). Players’ positions are shown below.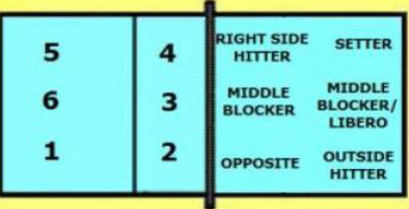
Description of the technique
Underhand Serve techniques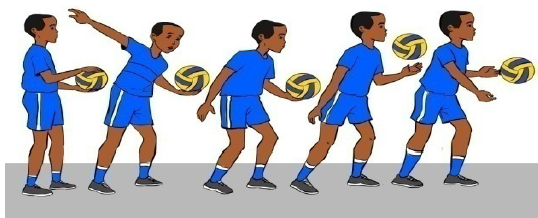
In underhand serve the ball is given a slight under-hand toss from about waist high and then struck with a closed fist by the opposite hand.
The underhand serve is usually the first type of serve taught to a beginning player in youth volleyball.This is the easiest serve to execute, it´s usually used by beginners. The server takes the ball with his left hand (for right-hand), stretch that arm forward at this level of the pelvis, slightly launch the ball high and hit it from bottom with your right hand to make it “flying”. (See figure above)Overhand Serve
The overhand serve is done by tossing the ball up into the air then striking it with the opposite hand above the shoulder.
This is the most popular serve in competitive volleyball. There are many variations that you can master with practice. As in any serve, make sure you don’t touch or cross the end line at any time during your serve.
This type of serve offers speed and type does not require the use of legs.
• The player throws the ball high and hits it by using the same gesture of the attack, but without fold his hand completely.
• The ball will follow a floating trajectory that makes it uncertain exactly where the ball is supposed to touch the ground. This uncertainty therefore put the receiver in trouble.The Jump Serve
The smashed service is the most frequently used by professionals. This service requires the use of the lower limbs.
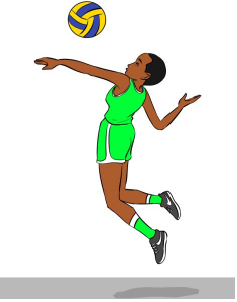
To do this, throw the ball very high and do a small run-up (same race as that of the attack) to hit his ball during the suspension, however, it is simple enough to be received because the ball rotating very fast and bounces off the receiver’s arms, which does not need to make efforts to bring it back into the air.
2. Dig
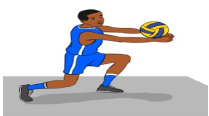
Starting Position: Always be stable and balanced.
Knees and hands position: You have to bend the knees to be close to the ground and have your hands in front of you.
Hands on dig: Always perform a dig with both hands, if possible. Two hands provide a much better tool for controlling the volleyball from going out of bounds.
Two or one: If it not possible to get two hands to the ball, they should use a fist in order to get it back in the air.
Toes and shoulders: Stand on your toes, with your weight balanced, so that you can easily move forward or side to side. Keep the shoulders over the knees to stabilize the body and gain momentum.
Know your ground: Know your portion of the court, as well as know to move to dig the ball when another player is unable to reach it.
Ready for anything: You have to be ready at all times for anything. It may not always be a hard hit from a spike. It could be a dump off by a setter or a tip by a hitter. There are a number of unexpected things that could happen, so it is important to always be focused.Read the position: Learn to watch for things such as which way a hitter shoulders are facing, if there is a hole in your team blocking, or if the line is covered. These things enable you to cover the ground where a setter or hitter will place the volleyball.
Overhand dig: If the volleyball comes at your head or face, you may need to use an overhand dig to get the volleyball back in to the air. This is where you need to use the bottom or heel of your hand to hit.
Diving: Sometimes the volleyball will be hit in a position where you are unable to get there in time on your feet, forcing you to dive. This is difficult because you have to reach out with your body off the ground, make contact with the volleyball, and get it to go in a certain direction so your setter is able to make the next move.Teaching exercises for digging in volleyball
For this technique, you need a setter, spikers and a defender (who has to dig). The hitter hits the ball from the setter over the net towards the learner in defense who has to dig it.
Variety of the spikes so as to help learners:• Learning to dig the ball in front of their body.
• Learning to dig the ball on the side of their body,
• Learning to dig the ball above their head (overhead dig),
• Learning to dig extremely hard driven ball
• Learning to defend a tip/roll shot
• Learning to roll/learning to dive3. Pass
Passing is the most important skill in volleyball. If you don’t get your pass right, you have a low chance of delivering an effective attack because it makes the set and hit suffer.
A. Forearm pass

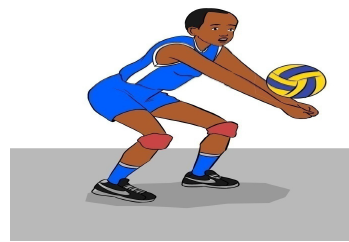
It is the motion used when the ball is low and / or rapid for the purpose of making a pass, making a reception for a serve, or make a defend a hit (attack).
Technical points to check for the teacher:
• Touch the ball with the forearm;
• Extend the arms straight and parallel;
• Play the ball by extending the legs
• Avoid an active movement of armsPractice drills:
a. Pipeline passing: This exercise will help learners to improve lateral movements while forearm passing.
This volleyball exercise needs two learners. Place two dotted lines of the court about 3m apart. All passing occurs between these lines. After one learner passes the ball to his/her partner, she/he must shuffle sideways to his/her right and touch the sideline. Next he/she must shuffle back before the pass arrives back from his/her partner. After 10 passes each, shuffle to the left sideline for 10 more.
Variations of pipeline passing: Increase the distance learners have to travel to make the drill more difficult. Also, learners passing the ball lower can make the volleyball drill more challenging.b. Partner passing series:
1. First progression: the first learner tosses the ball to the second learner who then passes the ball straight up to him/herself. The learner then adjusts her feet and passing platform so the ball is in line with the center of her body. The learner then passes the ball to her partner. This drill can be done in a continuous manner.
2. Second progression: This time, the learner turns so his/her right side is facing his/her partner and then adjusts his/her feet position and passes the ball angling his/her passing platform behind the ball. Learners can alternate passing from their right and left sides.3. Third progression: In this drill learners will alternate between short quick passes and high passes. From this drill, learners will learn to adjust their positioning depending on where they want to pass the ball. This drill will also help learners to use their legs when passing.
c. Individual bounce pass drill
Learners form a line at the end line facing the volleyball net. The teacher stands near middle front position on the court. The first learner in the line starts the drill by lying on his/her stomach on the ground looking at the teacher.
The teach slaps the ball and the learner gets up off the floor by pushing up with his/her arms. As the learner is getting up, the teacher bounce-passes the ball in the direction of the learner. The learner performs a run through technique to successfully get to the ball and pass it to the target.Variation:
You can also have the learners perform the drill near their base defensive positions. This will make this drill more game-like.
Volleyball passing drills
The objective of this exercise is to improve forearm passing accuracy.
This volleyball passing drill needs one server and three passers. Line up 3 passers in serve- receive. The server serves the ball as controlled and accurate as they can. They want to serve the ball in the way that is easiest for the passers to pass. The aim is to the develop the mind set of passers that they are going to pass accurate ball every single time.
Count the balls that hit the basket as good passes, not just the ones that go in.To make this volleyball drill harder:
• Have the server serve as though as they would like to do.
• Make the volleyball passing drills are often a lot more fun if they are turned into a competition or a game.B. Overhead pass
Technique description
• Hand position: fingers spread and firm, hands in front of face.
• Where to make contact: contact with ball should be made in front of face
• Foot position: feet and body must be behind the ball, feet (base) should be comfortable and solid.
• Making contact: hands and fingers should remain firm and strong on contact, not soft like when you set a hitter.
• Follow through as contact is made: push the ball to your target by extending your arms out from your face.
• Be aggressive: this is an aggressive skill, you have to go to the ball with strong hands and push the ball away from you. You will not be successful with this if you just allow the ball to come to you and you play it passively.Teaching drills for overhead pass
a. Pass and move
Form groups of 4 to 6 learners. After making his/her pass, the learner moves following the pass and change the side.
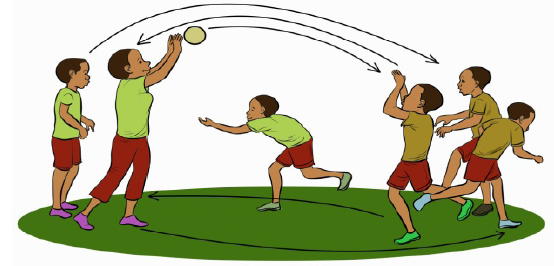
b. Pass and follow in triangle
Organize learners in a triangle; the same as the above drill. After making his/her pass moving following the ball.
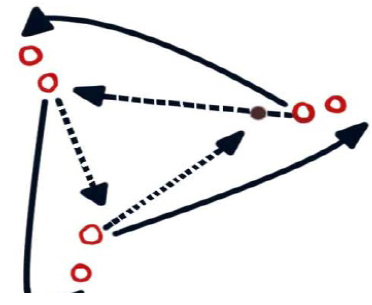
c. Pass in box
Form groups of 4 to 6 learners; A passes the ball to P and move; P repasses in the running direction of A, A passes the ball over the rope so that it falls in the box (or in a circle traced on the ground). The winning group is the one which manages to enter in the box many balls than others in 2 minutes.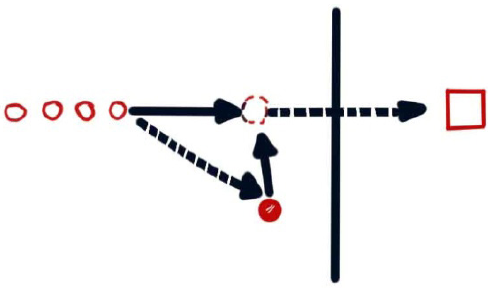
d. Three Passes in movement
Form groups of 6 learners, 3 at each side of the semi-court of the ground; at each side of the rope, there is a setter (S); A1 (B1) passes the ball to Setter, move towards the rope and passes the ball for the second time, this time he/she passes over the rope, afterwards she/he recuperates the ball and places him/herself at the end of the opposite line; B1 does the same.
e. Passes in chain in two triangles
2 teams of 3 learners in the playground of a mini-volleyball; A1 passes towards A2, A2 to A3; A3 passes over the rope and towards B1, B1 Passes to B2, B2 to B3; B3 passes over the rope towards A1 .
Competition: Which group is able to perform 15(30) successive passes without the ball touching the ground?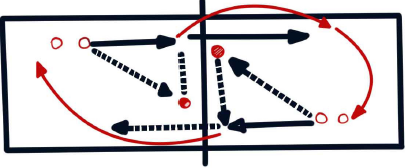
f. Vertical passes in the circle
The whole group of 6 learners trots in the circle formation; the ball is permanently played over in the air, learners trot under the ball.
g. Passes in diagonal
A1 makes a diagonal pass and goes to stand in the last position at the opposite line (B); C runs under the ball and passes to B1; B1 makes a diagonal pass and goes to stand in the last position at the opposite line (A); C runs under the ball and passes towards A2. After 10 (20) passes, the learner C is replaced.4. Spike
steps of spiking in volleyeball

Teaching drills of spiking in Volleyball
a.Spike in a fixed position
A partner leaner holds the ball higher in hand with outstretched arm; the spiking learner raises the arm and hit the ball with the hand towards the ground.
b. Running and spike
Learners are taught to perform the run-up phase and to take the impulse with the right take-off leg. They will perform this exercise in mimic activity in first.
NB: To trace the mark of a run-up way on the ground is a good methodology which will enable learners to take their impulse on the right.
c. Spiking a dead ball
Hold the ball higher than the edge of the net and also approximately 30 cm in front of the net.
d. Spike after a pass
A setter passes an overhead pass (very high) parallel to the net; the first learner in the line hit the ball after the running-up phase and correct impulse(take-off) on the right leg. (See figure in e).
e. Spike/smash after double pass
The first hitter in the line (A1) stands behind the attacking line and passes the ball using an overhead pass towards a partner in front of the net (P); the learner P passes the ball parallel to the net so that the ball descends in front of the net; the smasher hit the ball after the running-up phase and correct and powerful impulse (take-off) on the right leg; after the hit, he/she run at the opposite line and stands at the end(B).5. Setting in volleyaball
Description of the techniques
Hand Position
Step 1: Bring your hands together above your head.
Step 2: Face your palms toward the ceiling with fingertips touching.
Step 3: Form a triangle with your thumbs and index fingers, opening up the rest of your hands.
Step 4: Separate your hands so that volleyball would fit nicely in the pocket.
Setter Posture
Step 1: Place your feet shoulder-width apart for increased balance.
Step 2: Bend your knees slightly.
Step 3: Place one foot slightly behind the other.
Step 4: Position your elbows out to the side with your hands over your forehead.
Ball ContactStep 1: Relax your hands as the ball drops into them.
Step 2: Extend your arms and wrists, pushing the ball up immediately after the ball contacts your fingertips.
Step 3: Follow through with a complete arm extension as the ball is released.
Tips
Watch the ball after you have set it. If it spins, you are not contacting it cleanly. Slow down your setting motion, which allows you to get more fingers on the ball for better control and less spin.
WarningsAvoid being called for a “lift.” This is illegal and happens when the ball briefly stops on your fingertips before you set it.
6. Block
a. Description of the technique
1. Be ready at all times: Timing is one of the most important aspects in blocking; a fraction of a second could be the difference between stuffing an opponent’s attack and missing the ball completely. Being in the ready position will allow you to move more efficiently when attempting a block
2. Stand with your feet shoulder-length apart square to the net. Keeping your feet the proper distance apart will help with your footwork, another essential aspect of blocking. With your shoulders and hips square to the net you will be able to jump straight up more quickly.
3. Keep your knees bent. Keeping your knees bent is an essential part of the ready position. By keeping your knees bent you are ready to jump immediately rather than having to lower yourself and then jump up for the block. Be careful not to get lazy and stand straight up while waiting to block.
4. Keep your arms high. Keep your arms high with your elbows around shoulder height. This also reduces the time it takes to get your arms up for the block. If they begin by your sides, then they have much farther to travel to get high in the air.
5. Keep your palms facing the net. This puts them at the correct angle for blocking and again reduces the time needed to get your hands in position, making you a faster blocker.6. Stay a half arm’s length away from the net. If you touch the net while attempting to block you will get a violation. Allow sufficient space between your body and the net to ensure you do not accidentally touch it.
body in front of the hitter’s hitting shoulder to make the block. There are two footwork patterns that can be used to quickly get to the correct position: the sidestep and the crossover step.b. Footwork
The sidesteps are used when the hitter is within 1m–1.5 m of you. Take one step with the foot closest to the hitter and then follow with the other foot so they are shoulder-width apart once again. Keep your hips and shoulders square to the net as you sidestep. If it takes you more than two steps to reach the hitter then you should rather use the crossover step.
The crossover steps are used when you need to cover more ground, for example if the hitter is more than 1.5 m away from you. Step first with the leg closest to the hitter and then cross the other leg in front of your body. Although your hips may angle towards the hitter during the cross step, your shoulders should remain square to the net. Step again with the foot closest to the hitter to bring your feet back to shoulder-width apart and make your hips square to the net once more.Teaching exercises for the block
a. Blocking a dead ball
Four learners stand on chairs holding balls with two hands over the net. other learners form a line at the other side of the rope; they slide along the extent of the rope and jump high to touch the balls with two hands. They must push on the ball.
• Learner standing on chairs holding the ball
• The learner who is doing the block
b. Simultaneously blocking
Two partner learners standing (each one in front of the net, vis –a-vis), one of them holding the ball. They jump together and hold the ball over the net with two hands.
Variations:One of the learners with the ball jumps and tries to throw the ball over the net down on the ground, the other learner simultaneously jumps to block actively and try to push the ball in the opposite camp.
c. Combine smashing with the block
A1 passes towards P, runs and takes the impulse and smashes. After smashing he/she does the block for the smash of A2; after he/she goes at the line B. B1 does the same at the opposite side.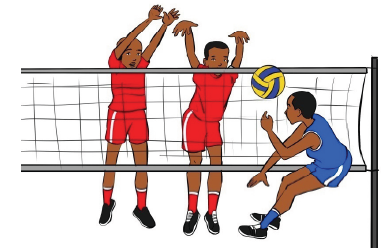
Mixed exercises of blocking and other techniques and tactics
a. Hitting, blocking, defence, warm up
This volleyball drill will practice defensive movements and transition into hitting from defensive movements.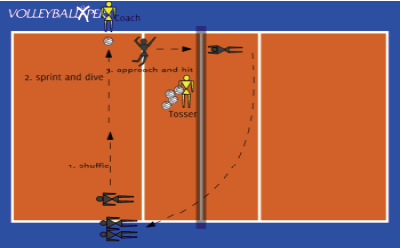
Description
Setup
• One learner on right sideline (will pass and then hit)
• One tosser
• One blocker on opposite side of net
• Line waiting to enter on sidelineInstructions
• Learner starts on right sideline and shuffles twice toward the center of the court.
• Learner turns and sprints toward opposite sideline (left sideline).
• Learner dives and touches ball.
• Learner gets up and gets into hitting position.
• Tosser tosses ball.
• Learner approaches and attacks.
• Blocker attempts to block.
• Blocker recuperates the ball and goes to end of line.
• The learner who was attacking replaces blocker.
• The teacher replaces ball.Variations
Go in the opposite direction to work both sides (from left sideline to right)
Teaching points
• Encourage learners to roll after dive if able to
• Check for learners to turn shoulders to passing target
b. Middle hitter, passing, hitting, serving, setting
Description
This drill focuses on hitting middle out of serve receive.
Setup1. A server on one side of the net with one middle blocker
2. Three passers on the opposite side with a setter and a middle hitter
Instructions
1. Server serves the ball over the net and in.
2. Middle hitter transitions into position to hit.
3. Serve receive passers pass ball to setter.
4. Middle hitter calls for set and approaches.
5. Setter sets the middle hitter.
6. Middle hitter attacks.
7. Blocker attempts to block.
8. Repeat until middle hitter gets a desired number of good hits, over the net, hard and in.
9. Middle hitter and middle blocker switch.Variations
• Alternate middles with each swing (for teams with more than 2 middles). Middles hitters will hit, then block, then wait, then repeat
Teaching points to focus on
• Making sure that middle hitters are calling the set they want in plenty of time for the setter to react
• Encouraging passers to focus on a perfect pass to the setter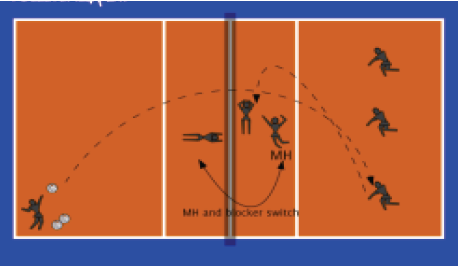
Volleyball serving, receiving, passing, setting, hitting, blocking, defence
Description
This drill is to practice serve-receive, and understand the importance of a good pass
Setup
1. One server
2. A team of 6 learners on the receiving side opposite the server
3. Three blockers on the same side as the server
Instructions
1. Learners on receiving side set up in serve receive for their first rotation.
2. Server serves to serve receive team.
3. Learners pass set and hit.
4. Blockers attempt to block.
5. Receiving side must get three hard swings in a row in order to rotate.
6. Change server when receiving team rotates.
7. Repeat until receiving side rotates all the way around.Variations
1. Change the goal to suit the team, either increase or decrease the number of swings necessary to rotate.
2. Instead of hard swings the goal could be the setter must be able to run the middle or right side attacker three times in a row.
Teaching points to focus on
Making sure that learners are concentrating on a good pass before worrying about anything else. A good pass will equal a good play.
c. volleyball blocking, passing, hitting
This drill teaches blockers when to block, hit an overpass, or back off the net and pass.
Description
This drill teaches blockers when to block, hit an overpass, or back off the net and pass.
Setup
1. Three tossers on one side of the net
2. Three blockers on opposite side of the net
Instructions
1. Tossers toss the ball over the net to the blockers
2. Blocker must decide whether to block the ball, step back and pass, or hit the ball
3. Reset blocker and repeat4. Tossers must change tosses: close on the net, on top of the net, over the net, etc. This allows blockers to make different decisions on what to do.
Variations
1. Add a second blocker for a double block
2. Make the middle blocker shuffle to outside hitters to form a double block
Teaching points to focus on
Blockers hands positions should be ready at all times
d. Pass, set, hit, dig, and warm-up.
Description
This drill is good for warm up while practicing communication and ball control.
Setup
1. Same number of players on each side behind the 3 m line
Instructions
1. The teach gives alternating sides free balls
2. Learners playing: dig, set, and back row attack while calling the ball
3. Each time a player touches the ball; they must run and touch the net before being able to touch the ball again
4. Play rally scoring games to a set number of pointsVariations
1. Add a blocker to each side
Teaching points to focus on
The fewer number of players on each side makes for more movement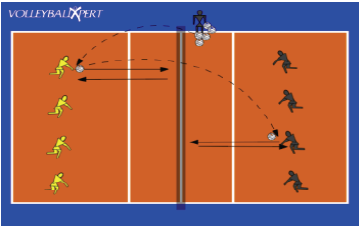
e.Volleyball offense, passing, setting, hitting, blocking
Description
This volleyball drill will practice hitting against the block and transitioning off the net.
Setup
1. Three blockers on one side of net
2. Three hitters, a setter, and two passers on one side
Instructions
1. The teacher tosses ball to passer
2. Passer passes to setter who sets any hitter running any team plays or sets
3. Blocking side attempts to block, focusing on attempting to double block every attack
4. Hitting side gets 1 point for every hard driven attack they can get past the block
5. Blocking side gets 1 point for every significant touch at the net
6. Have the setter and passers switch sides of the net to give the other players a chance to pass the free balls and attack
7. Play to a set number of points!Variations
1. Use a setter for both sides of the net and only have two front row hitters
Teaching points to focus on
Watching for significant touches at the net, not just barely touching the volleyball
f. Volleyball hitting, passing, blocking
Description
This high energy drill focuses on blocking, attacking and endurance
Setup
Instructions
1. Two tossers(the teacher may be one of the tossers) at the net
2. Follow letter diagrams for starting positions
3. Two tossers (the teacher may be one of the tossers) begin by tossing to their respective outside hitters
4. Hitters try to hit around the block to the middle back player
5. Middle back is trying for a good pass to the target area
6. Players rotate quickly and are ready for the next toss to the hitters
7. Continue drill by rotating: Hitter under the net to blocker, blocker to middle back, middle back to hitter, hitter under the net to blocker, blocker to middle back
8. Continue drill until all players have attempted a certain number of hits
9. Rotations go in alphabetical order on diagramVariations
Add two setters and keep ball in play
Teaching points to focus on
1. Watching to see if hitters “see the block” and aim to hit around them or adjust
2. Watching for blockers to adjust to toss where hitter will be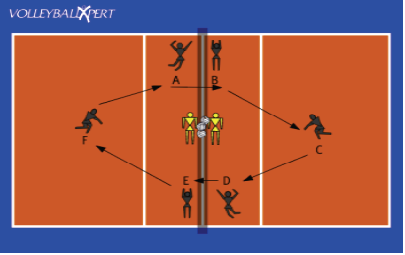
g. Volleyball blocking, passing, setting, hitting, defence, offense
Description
This blocking drill teaches how to face a double block.
Setup
1. 6 players on one side (attacking side)
2. 4 blockers, one server and two defenders on opposite side (defending side)
Instructions
1. Start with the defending side serving
2. Defending side starts with 4 blockers on the net
3. If attacking side gets the ball past the block, then the defending side plays the ball out
4. The fourth blocker (right side) steps off the court to get out of the way of the offense and returns to court when ball goes to attacking side
5. Give the attacking side a goal to meet: 3 out of 5, 7 out of 10 etc.Variations
Change sides for the 4th blocker
Teaching points to consider
Watching correct blocker positioning with footwork and hands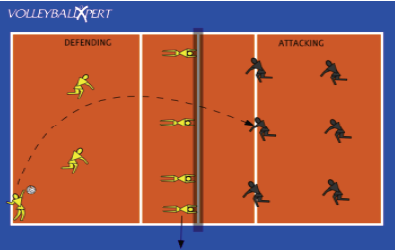
h. Volleyball warm up, blocking, middle hitter.
Description
This drill will focus on all the necessary footwork to be a middle hitter and blocker.
Setup
Two lines, one on each side of the court in the left front position
Instructions
1. The teacher will need to demonstrate and call out directions until all learners understand the footwork routine.
2. Starting at position
3. Shuffle into hitting position
4. Approach the net for a hit
5. Block jump
6. Crossover step outside and block again
7. Transition off the net
8. Approach the net for a hit
9. Go to the end of the lineVariations
Only use one side of the net and put one or two blockers on the other side of the net to practice fronting the hitter.
Teaching points to consider
Make sure the players are using the correct foot on the crossover step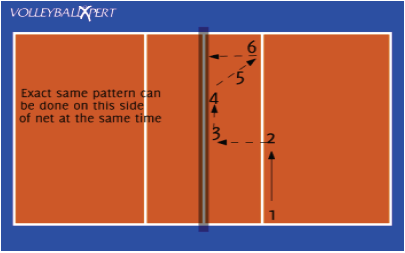
I. Volleyball coverage drill, hitting, blocking, defence
Description
This volleyball coverage drill will teach how to cover their hitters.
Setup
1. six learners in normal set on one side of the court (receiving the ball)
2. two blockers in each of the three blocking zones on the opposite side
Instructions
1. Teach tosses a ball to receiving side who plays the ball.
2. With so many blockers (6) chances are the returns will be blocked.
3. Receiving side covers the hitters and passes up the blocked ball.
Variations
Can encourage team to get three in a row before rotating positions.
Teaching points to consider
Look to see where holes are on coverage or in block.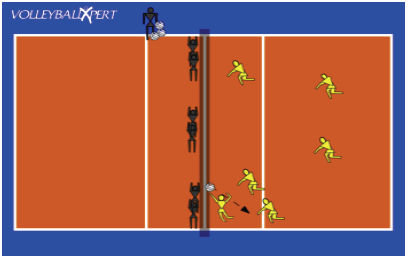
j. Blocking
Description
This drill works on blocking, footwork, and making sure the middle blocker closes the block with the right or left front player.
Setup
Set up a middle blocker, right side blocker, and left side blocker on both sides of the net. Have another player behind each blocker on the 3m line doing an abdominal strengthening exercise while they wait for their turn to block. (This should be 6 blockers total, and six other players waiting at the 3m line)
Instructions
1. When learners are in position, teacher calls out middle, right, or left. Middle blocker must either practice a block alone in the middle or use their footwork to block with the right or left blocker.
2. Middle blocker must re-set before next blocker is called.
3. Switch positions with players waiting on ten foot line when signaled by coach.
Variations
Teach can add a volleyball toss after calling out specific block for the players to practice with.
Teaching points to considerMiddle blockers are working on communicating with outside players to close block and jump together.
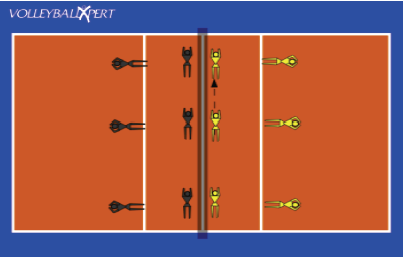
Description
This volleyball 3 versus 3 drill is great to teach your offense how to read and react to the defense. Players are forced to read whether the defense has blockers and must react to each scenario.
Setup
1. Learners form 2 teams of 3 (3 versus 3).
2. One team has 2 blocking players and a passer.
3. The other team has a passer, setter, and hitting player.
4. The coach should have a rack of balls off the court.
Instructions
1. The coach begins the drill by playing a free ball over the net to the team with the passer, setter, and hitter.
2. As the ball is played over the net the coach calls out whether the blockers should attempt the block or not.
3. The passer, setter, and hitter must react to the defense and quickly get into position to return the ball.
4. Players should play out the point 3 versus 3.Variations
Allow the defense to choose when to block or not.
Alter the drill to focus on blocking and focus on blocking communication and positioning.Teaching points to consider
Listen for good communication among the learners while playing.
Make sure the learners are reading the block and altering their position based on the blocking players.
3 Vs 3 reading the block
k. Volleyball pass and move, passing, ball controL
Description
This passing drill focuses on good passing technique as well as movement after the pass.
Setup
1. Set two target players with a ball each near the attack line.
2. Set two poly spot markers near the end line on each side of the court.
3. The passers start at the marker near the right side of the court.
Instructions
1. The target player in front of the passers tosses a ball to the first passer in line.
2. The passer returns the ball with a pass back to the target player and sprints to the attack line near the target, touches the line with their hand, and continues to the marker on the left end line of the court.
3. The next target player tosses a ball to the passer who again returns the ball to the same target player.
4. The passer then sprints to the net, shuffles across the court at the net while jumping up 3 times to simulate blocking.
5. The player returns to the end of the line.
6. The drill should be fluid and the next passer should start as the first target player receives their return pass
Teaching points to consider.Focus on good passing technique, moving after the pass, getting height at the net.

e. Assessment (R-C-A discussions)
Closing discussion
Reflection
• What is the definition of a pass in volleyball?
• What is considered an attack in volleyball?
• What does attack mean in volleyball?
• What is hitting in volleyball?
• What is attack block in volleyball?
• How is the spike ball hit?
• What is passing in volleyball?
Connection
Discuss importance of passing in volleyball compared with other games.
Application
What are the benefits of applying correct volleyball techniques?Lesson 2: Volleyball rules and leadership skills as team captain
a. Prerequisites
Learners will learn better this lesson they are able to demonstrate and use basic volleyball rules during the short games.
b. Teaching resources
Playground, whistles, Volleyball balls, chasubles, cards
c. Introduction
Opening discussions (in a semicircle formation)
• Discuss with the learners their readiness and proper wearing
• Ask learners to make teams of equal number and gender balanced
• Set clear instructions to follow in teaching basic rules during a game situation.
• Discuss on the importance of adhering to rules in volleyball match
Warm-up and stretching activities
For warm-up and stretching activities see unit 1d. Lesson development
1. Volleyball court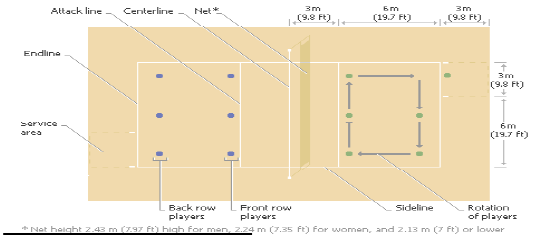
The field must be rectangular and symmetrical. The court length is 18m and 9m wide and be surrounded by a free area of at least 3 m wide on all sides. Lines are 5cm wide and must be light in color different from the court.
In each camp there is a line of attack, the outer edge is drawn in 3 meters from the axis of the center line and which marks the front area (players cannot take back pulse in the that front area to attack once they are in back area .
The height of the net is 2.43m high for men, 2.24m high for women and 2.13 m or lower for children aged 12 years or younger for high young players.2. The ball
It is spherical, flexible, light-colored synthetic leather cover. Smaller and lighter than a basketball, the volleyball is 63.5 to 68.6 cm in circumference and weighs 255 to 283, internal pressure: 0.30 to 0.325 kg/cm3.
3. Team and how to play
• A six-person volleyball team includes three front-row players, who stand near the net (4-3-2) from left to right position and three back-row players (5-6-1) from left to right position.
• When a team gains possession of the serve, its players rotate their positions, moving clockwise. For example, the player who was in the right-front position moves into the right-back, or serving, position.
• The server starting the game stands anywhere behind the end line. Only one attempt is allowed on the serve.
• By hitting the ball back and forth over the net, with the hands, forearms, head, or any part of the body, play is continued until one team fails to keep the ball in play (in the air) or until a rule violation is committed.
• The ball must be returned by a team over the net after no more than three hits, and no player may hit the ball twice in succession.
• The return over the net must be done without catching, holding, or carrying the ball, without a player touching the net, and without entering the opponents’ area.
• A player keeps serving as long as his or her team continues to win points. The serve must rotate to a new player each time a team wins back the service.4. Scoring system
Officially, a volleyball match is won by the team that wins the best of five sets or (3 wined sets). All sets are rally scored. In the rally score system, a point is awarded on each service or side out. This means that a receiving team’s error or penalty results in a point. Likewise, a serving team’s error or penalty results in a point and the ball for the receiving team to serve. It isn’t necessary for the winning team to be serving when the winning point is scored.
A set is won by the team which first scores 25 points with a minimum lead of two points. In the case of a 24-24 tie, play is continued until a two-point lead is achieved.
The deciding set of any match (3rd or 5th game) is played to 15 points. The winner is the first team to achieve 15 points with a minimum lead of two points. Play is continued until a two-point lead is achieved.
A default game results if a team cannot field six players or fails to begin play after the referee request. Default games are scored either 25-0 or 15-0 depending on the set being played. In a set to 25 points, if a default is due to injury, the losing team keeps its points and the winning team is credited with at least 25 points or up to 27 if necessary to provide a two-point victory.5. Officials
In competitive volleyball include a referee, scorer, umpire, and line judges.1st Referee
The first Referee is in full control of the match including settling all questions of rules and those things not covered by rules. The first Referee has the right to overrule all other officials. The first Referee also has the power to impose sanctions on players. The first Referee is positioned at one end of the net; with her/his head above the net. After blowing a whistle to stop play, the first Referee uses hand signals to indicate who won the point, the fault committed, or replay.2nd Referee
The second Referee is concerned with such matters as service order of each team, keeping time, assisting in making calls, supervision of substitutions, signaling the end of play, and replacing the first Referee, if necessary. The second Referee is positioned on the floor at the opposite end of the net from the first refereeScorekeeper:
The scorekeeper sits on the side of the court opposite the 1st Referee and records all scores, makes sure the serving order and rotation are correct, keeps track of substitutions and time outs, and keeps track of protests. The scorekeeper also indicates when a team has scored an 8th point in a deciding game so that sides can be switched.6.Rights and Responsibilities of the Participants
Only the playing captain or coach may ask for a time-out or substitution and only when the ball is not in play. Only the playing captain may speak to the referees. And the team captain is responsible for the conduct and discipline of his team. It is the only one allowed to speak to the referees when the ball is offside for an explanation.7. Players Equipment
Uniforms must be similar; each player wears a jersey, shorts and sneakers, clean and of the same color. The Libero, if used, will wear a uniform of contrasting color8. Misconduct
Individual sanctions may be assessed against a player or coach for a variety of unsportsman like actions during or between games including: shouting at an opponent; addressing officials about their decisions; trying to distract an opponent; or coaching in a disruptive manner.Yellow or Warning Card:
This is given for minor unsporting offenses. A second yellow card to an individual will result in an automatic red card. It goes together with 1 point for other team.Red or Penalty Card:
This is given for serious offenses. If a team is serving and receives a red card, they will lose the serve. When rally scoring their opponent also is awarded a point. If the team receiving serve get a red card, their opponent will receive a point.Expulsion:
This is given for extremely offensive behavior. The player is out for the rest of the game. No additional penalty is given.Disqualification:
This is called when a player receives a second expulsion during a match or when physical aggression is shown toward an official, another player, or a spectator. The player is ordered from the playing area for the balance of the match. No other penalty is given.
Positions of players in volleyball court.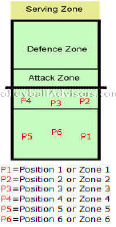

P1 = Right Back
P2 = Right Front
P3 = Middle Front
P4 = Left Front
P5 = Left Back
P6=Middle Back.
Basics of volleyball positions on the court
There are three players on each of the zone.
• Front row players are players who are allowed to block the opponent and attack the ball in the attack zone.
• Back row players are players who play defence by digging opponent’s attacks and attack the ball behind attack line (3 meter line).
• Players are rotating clockwise on the court after winning the rally after the opponent’s serve.
• Players have rotational positions (position 5, position 2 etc.) on the court from which they are allowed to move to their playing positions (opposite, middle hitter etc.) after the serve when appropriate.
Volleyball positions on the court can also be called zones. Position 4 being called zone 4 etc.Playing Positions in Volleyball
Volleyball positions in a team are :
• Outside hitter (also called wing spiker, left side)
• Right side hitter (wing spiker, right side)
• Opposite hitter (attacker)
• Setter
• Middle blocker (center, middle hitter)
• Liberoa. Outside Hitter (also called wing spiker, left side)
Outside Hitter is the player who carries the serve receive responsibility along with the libero.
Outside hitter most often attacks the balls which setter sets to the antenna to the left side of the court.Therefore, after the serve outside hitters place themselves to the left front position. Sometimes setters run offensive plays in which outside hitters run to hit balls inside around the middle blockers.
Outside hitters play both the front row and the back row. In modern high level volleyball outside hitters are responsible for hitting the 3 meter line attacks, usually from the middle back position when playing in the back row.
Playing on the outside hitter’s position requires great all around skills because they play through the front row and the back row.
Wing spikers have to have the skills to pass, attack, block, serve and play defence.
Wing spikers along with the opposites are often players who score the most points in the game.Outside hitter’s passing responsibility makes them extremely important player for the team
b. Right side hitter (also called wing spiker)
Right side hitter has the similar role than outside hitter, they play front row and back row and are carrying pass, attack, block, serve and defence responsibilities.
Right side hitters aim to place themselves to the right front playing position.
When playing top level international volleyball on the back court right side hitters often have 3 meter attacks responsibility from the middle back position.
Right side hitter can be also called a wing spiker.c. Opposite Hitter
The opposite hitter is the player who most often scores the most points in the team. Opposite hitters don’t have the passing responsibilities. They stand behind the passers on the rotation while libero and outside hitters pass the ball and place themselves to the left front, right front or right back playing position. The opposite usually gets the most sets in the game.
Often counter attack sets after the defensive play go to the opposite hitters; they carry the responsibility of hitting the ball against a solid block when the pass is off the net.
Opposites need to have great blocking skills since they play against the opposite hitter of the opponent or opponent’s outside hitter when in the front row.
Opposites also need to have defensive skills because they also play the back row where they are responsible of hitting 3 meter balls from the right back position.
In professional volleyball opposites along with setters have traditionally been the highest paid individuals; those are volleyball positions in most demand.d. Setter
The setter is the playmaker, point guard or the quarterback of the volleyball team. A setter’s responsibility is to run the team’s offense and build up offensive scoring opportunities for the team.
The setter plays both front row and back row, therefore s/he needs to be able to block, serve and play defence.
The setter needs to have good blocking skills because in front row position s/he plays against the opponent’s outside hitter who often carries big load of the attacking responsibility for the team.
The setter plays the right front or the right back positione. Middle blocker (Center, Middle, Middle Hitter)
Middle blockers main responsibility is to stop the opponent’s offense.
The middle blocker builds a block which stops the ball, or allows the team to dig the ball up.
Middle blockers’ job is to stop the opponent’s middle hitters or wing hitters in co-operation with teammates.
Middle blockers need to have great blocking, attacking and serving skills.
Note on the middle blockers in the back row:In competitive volleyball middle blockers usually play defence only on one rotation - after an own serve. After losing the rally after an own serving turn, a libero usually comes in and replaces the middle blocker.
The middle blocker usually doesn’t master in defence because they hardly play any of it. However, at junior level practicing defence and even passing is much recommended for the middles. Allow players to practice all the skills equally to ensure their overall skill development. This improves their athleticism and prepares players to play other positions - i.e. they may not be tall enough to play middle in the future.f. Libero
The libero is fairly new position in volleyball. The libero is a back row specialist who is allowed to play back court only.
The libero wears a different colour shirt in the team and is allowed to enter and exit the game without substitution request.
The libero can replace any player on the court and most often replaces middle blockers.
The libero is not allowed to serve the ball.
Since playing in the back court only, the libero needs to have the best passing and defensive skills in the team. The libero need to have exceptional serve receive skills because often they pass a larger area than other serve receivers in the team. Libero most often plays the left back position.Official hand signals for volleyball officials

e. Assessment (R-C-A discussions).
Reflection
• What are the six positions in volleyball?
• Can you hit volleyball with your head?
• Can you kick the ball in volleyball?
• What is the most important position on a volleyball team?
• Where yellow card is used to impose sanction? Red?
Connection
Give some examples of volleyball rules from other games similar to volleyball rules.
Application
What is the importance of applying volleyball rules in game situation?
4.5. End unit assessment
• Set exercises of passing, receiving and spiking the ball
• Set exercises of blocking in volleyball
• Organize a competition between teams and if possible reward for the winners.
4. 6. Additional activities for learnersAs additional activities to give to your learners you need to:
• Encourage learners to actively participate in volleyball training sessions organized by different coaches and private individuals in training centers.
• Encourage also learners to participate in volleyball community competitions if there are any (e.g.: Kagame cup competitions, right to play….)
• Encourage learners to participate actively in school organized competitions as well as in Sector, District and national competitions (e.g.: Inter-school’s competition organized by FRSS)
• Encourage learners to participate in all youth competitions available (e.g.: Competitions organized by FRVB and other stakeholders).
• Encourage learners to create local football competitions in their villages.UNIT 5: BASKETBALL
5.1. Key unit competence
Learners will be able to demonstrate defensive and offensive techniques and tactics in game situations.
5.2. Prerequisites knowledge and skills
Learners will learn better this unit if they are able to apply technical skills in game situations with increasing adherence to the rules.
5.3. Cross-cutting issues to be addressed
1. Inclusive education: In teaching-learning process of basketball the teacher together with the learners must set instructions that include all learners. Learners with physical impairment will be referees. Modifying the height of where the basketball rim is to meet individual learners.
2. Standardization culture: In volleyball lesson, the height of net and the balls must be adapted to learners’ age according to the accepted standards.5.4. List of lessons

Lesson 1: Types of passing in basketball
a. Prerequisites
Learners will learn better this lesson if they are able to perform exercises of consecutive passing, ten consecutive passes without the other team touching the ball
b. Teaching resources
Playground, whistles, basketball balls, pinnies, stopwatchc. Introduction
• Opening discussions (in a semicircle formation)
• After checking learner’s readiness, give instructions and rules of the game
• Forms groups basing on the quantity of resources available as well as on the class size.
• Discuss with learners how to maximize the use of all the available resources.d. Lesson development
There are different types of passes to teach in Basketball. Let your learners perform, do demonstration where necessary and make corrections for bad techniques or bad body postures.
Some techniques are described or illustrated by images where necessary. Some teaching exercises are given, but it is advised to do further research to enrich your teaching activities.Warm-up and stretching activities
Have your learners start off at the baseline, run to the near free-throw line, turn around and return to the baseline. Instruct them to run to midcourt and back, and then run to the far free-throw line and back. Finally, have them run from the near baseline to the far baseline and back. Allow them a one-minute break and repeat. This drill should get your learners’ legs and cardiovascular system ready for basketball.For stretching activities see unit 1, lesson 1.
Different types of passing in Basketball
There are essentially two types of passes:
Air Pass: The pass travels between players without hitting the floor.
Bounce Passes: The pass is thrown to the floor so that it bounces to the intended receiver
Each type of pass comes with its own variationsBasic Variations:
• Chest pass
• Bounce pass
• Overhead pass
• Wrap around passAdvanced Variations:
- Baseball pass
- Dribble pass
- Behind-the-back pass
- Pick and roll pass
a. Chest pass
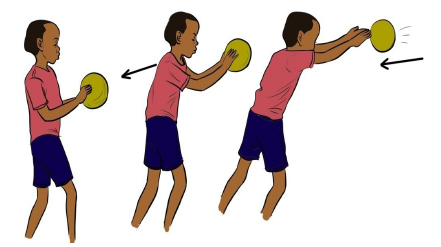
The chest pass is named so because the pass originates from the chest. It is thrown by gripping the ball on the sides with the thumbs directly behind the ball. When the pass is thrown, the fingers are rotated behind the ball and the thumbs are turned down. The resulting follow through has the back of the hands facing one another with the thumbs straight down. The ball should have a nice backspin.
b. Bounce pass
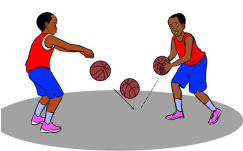
The bounce pass is thrown with the same motion (as chest pass) however it is aimed at the floor. It should be thrown far enough out that the ball bounces waist high to the receiver. Some say try to throw it 3/4 of the way to the receiver, and that may be a good reference point to start, but each learner has to experiment how far to throw it so it bounces to the receiver properly. Putting a proper and consistent backspin on the pass will make the distance easier to judge.
c. Overhead pass
The overhead pass is often used as an outlet pass. Bring the ball directly above your forehead with both hands on the side of the ball and follow through. Aim for the teammate’s chin. Sometimes it is advised not bring the ball behind your head, because it can get stolen and it takes a split-second longer to throw the pass.
d. Wrap around pass
Step around the defense with your non-pivot foot. Pass the ball with one hand (outside hand). It can be used as an air or a bounce pass. You will often see the wrap-around, air pass on the perimeter and the wrap-around, bounce pass to make an entry into the post.
e. Baseball ball passA baseball pass is a one-handed pass that uses the same motion as a baseball throw. It is often used to make long passes.
Be careful with young kids. You don’t want them throw their arms out.f. Behind-the-back pass
A behind-the-back pass is when you wrap the ball around your back to throw the ball. It is used to avoid the defender when making a pass across the front of you would be risky. It can also be used to throw the ball to a player trailing on the fast break.
Teaching points
When teaching passing, points of emphasis should be:
• A good pass is a pass a teammate can catch
• When passing, step toward your receiver.
• When catching, step toward the pass
• Like shooting, the ball should have a backspin to it. This is accomplished by following through on every pass.Exercises to develop passing techniques in Basketball
1. Pair passing
Learners are paired up and face one another about 2.5m apart. They then pass back and forth, making sure that they step toward their partner to pass and step to the ball to receive. Teach calls the type of pass to be thrown. Gradually, partners move further apart as they are comfortable and accurate.
Variations:
Chest pass, pass and overhead pass
Points to teach
Step to pass.-Follow through so the backs of your hands are together with the thumbs pointing down.
Step to catch.
Catch with your hands extended and guide the ball into your body to secure it into triple threat position.
2. Middle learner passingInstructions:
• Position three learners as shown in the diagram.
• Ask learners to use chest passes and less overhead pass.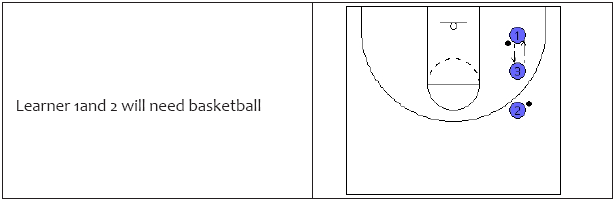


Points of emphasis
Continually tell your learners to:
• Make accurate passes.
• Move as quickly as possible without sacrificing form and accuracy.
• When passing, step toward your receiver.
• When catching, extend your hands step toward the pass.
• Like shooting the ball should have a backspin to it (This is accomplished by following through on every pass).3. Pass and switch
Instructions
Points of emphasis
Continually tell your learners to:
• Make accurate passes.
• Move as quickly as possible without sacrificing form and accuracy.
• When passing, step toward your receiver.
• When catching, extend your hands step toward the pass.
• Like shooting the ball should have a backspin to it (This is accomplished by following through on every pass).e. Assessment (RCA discussions).
Reflection
What are the different types of passes in basketball?
What are the important points to emphasise to make accurate passes?Connection
Recognise similarities between basketball passes and other passes of different sports.
Application
Apply passing technique in a small game situation.
Lesson 2: Different types of dribbling and shooting in basketballa. Prerequisites
Learners will learn better this lesson if they are able to perform basic dribbling and shooting exercises in basketball.
b. Teaching resources
Playground, whistles, basketball balls, pinnies, stopwatch
c. Introduction
Opening discussions (in a semicircle formation)
• After checking learner’s readiness, give instructions and rule of the game
• Forms groups basing on the quantity of resources available as well as on the class size.
• Discuss with learners how to maximize the use of all the available resources.d. Lesson development
In teaching-learning process, let your learners perform on their own basing on your instructions. Do demonstration where necessary and make corrections for bad techniques or bad body postures.
Some techniques are described or illustrated by images where necessary. Some teaching exercises are given, but it is advised to do further research to enrich your teaching activities.Warm-up activities
For warm-up exercises, use the activities in the previous lesson.
Stretching activities
For stretching activities see unit one, lesson one.
Dribbling technique in basketball
In basketball, dribbling is the legal method of advancing the ball by oneself, as opposed to passing it to another player or shooting for the basket. It consists of bouncing the ball on the floor continuously with one hand while walking or running down the court.
Dribbling teaching exercisesa. Cones dribbling
Cones dribbling instructions:
• Put learners in lines, each learner holding a ball if there are plenty of them.
• Learners will dribble one after another going thru the cones
• You can progressively reduce the distance between cones to make the drill more complex.
b. Two ball dribbling
Instructions:
• Give each learner two balls if you have plenty of them
• Each leaner has to dribble two balls simultaneously using both hands, each hand having its own ball
This exercise will help learners to:
• Use their weak hand
• Challenge their coordination
If a learner can dribble two basketballs at the same time, well then she/he or she will definitely be able to dribble one very well with either hand.
c. Dribling with a defenceEach learner has to dribble the ball with a passive defense of a partner.

Points to check always while learners are performing dribbles in Basketball
While learners are dribbling check that they are:
• Dribbling the ball hard,
• Keeping up their eyes all the time when dribbling,
• Use fingers tips to control the ball, not the palmShooting in basketball
Stationary basketball shooting form and technique
There are 8 steps of making an accurate shoot in basketball. Check if learners are doing it correctly based on your instructions.
1. Eyes on target
• To improve accuracy, locate the target (rim) as early as possible.
• Keep your eyes on the target and do not follow the flight of the ball.
• Feet are shoulder width apart for good balance.
2. Stance and balance
• Feet should be in a slightly staggered stance that is consistent and comfortable for you. Your shooting foot is slightly ahead of the non-shooting foot in a comfortable position.
• Point your feet in the general direction of the basket, but not necessarily directly at it. We prefer an open stance, but you can also use the closed (squared) stance if that’s more comfortable for you. With an open stance, your feet point towards one side of the basket. For example, a right handed shooter will point his or her feet just to the left of the rim for a more natural position and shooting motion.
• Once you develop a comfortable stance, line up your feet the exact same way on every shot. Whatever stance you use, consistency is critical.
• Flex/bend your knees on every shot.• Keeping your target focus is very important
3. Shot pocket
• As you catch the ball, move it quickly into the shot pocket.
• Line everything up so the ball and your shooting eye form a straight line to the basket. This is very important.
• Position the ball several inches above your waist.
• Grip the ball properly and be ready to shoot.4. Grip
• Place the air hole between the middle and index fingers.
• Line up your fingertip pads parallel to the long seams of the ball, so you can monitor the back spin.
• Leave space between the ball and the middle of your palm. You should be able to insert a pencil between the ball and your palm area.
• Position the ball in your shot pocket the same way every time you catch it.
• Spread your fingers far enough apart to comfortably balance the ball in one hand.
• The ball should sit on your finger pads.5. Balance hand

• Your non-shooting hand should be on the side of the ball.
• Your balance hand should not add force or spin to the shot.
• Your non-shooting hand should not move on delivery and should always come off the ball first.6. Delivery
• The ball should start motion directly upwards from the shot pocket.
• Your elbow should be positioned comfortably under the ball.
• The ball stays in front of you and should not go behind your head.
• Uncoil your body with your legs, core, and arm power all coordinated.
• Your elbow and wrist should extend in a straight line to the basket.
• Your shooting hand should extend in a straight line to the rim.
• Hand position on delivery is very important. The ball should come off the hand with perfect symmetrical backspin.
• As shown in the picture to the right, your guide hand stays to the side and does not influence the flight of the ball.7. Up force and landing
• Release the ball on the way up, just before the top of your jump.
• Use your legs to generate up force.
• You should land in the same spot that you jumped, which shows that you have good balance on your shot.
8. Follow-through
• Your wrists should be floppy (relaxed).
• Fingers should be pointed at the target (rim).
• Finish high. You should see your fingers at the top square of the back board.
• Hold your follow through position until the ball hits the rim.Sample exercises to develop shooting skills
Learners will be taught to shoot from the following different situations:
• Shooting from a stationary position
• Shooting off the dribble
• Catch and shoot
• Triple threat shooting
• On the move shootingPerforming a Lay-up
a. The opposite foot to the hand laying up the ball is jumped off.
b. The leg on the same side as the hand laying up the ball is driven up to help provide lift.
c. The jump has to be both up and towards the basket.
d. When the ball is picked up from the dribble the ball must come to make contact on the top of the chest and chin.
e. Once the ball is picked up, a player’s eyes should be focused on the basket.f. Once the ball is raised past the forehead of the player the two hands separate and the inside arm extends to protect the body and ball from defenders to the front and side.
g. The shooting hand should extend fully pushing through the ball and finishing with a flick of the wrist.
h. The ball should make a light touch off the backboard and into the basketball hoop.
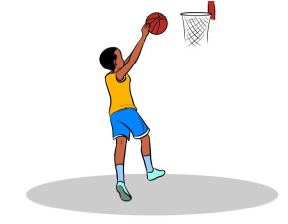

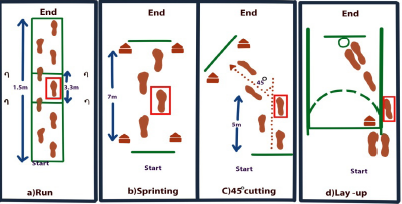
Teaching exercises for lay-up
1.Two lines layup exercises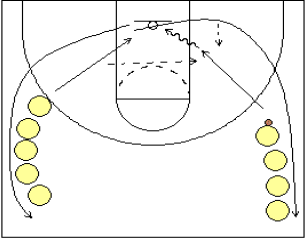
• Put learners in two lines as shown on the diagram
• Determine the shooting and the rebounding line (for left layup the rebounding line is the right line)
Process: The first learner (shooter) dribbling in and shooting the lay-up, while the first rebounder rebounds and passes to the next shooter cutting toward the basket. The shooter goes to the rebounding line and the rebounder goes to the shooting line.
After a few minutes, switch sides so that now the left line is the shooting line (for shooting left-handed lay-ups). As an option, run the drill with two balls. In addition to standard right and left-handed lay-ups, also get some reps on both sides doing reverse lay-ups.Teaching points
• Dribble with the left hand for left-handed lay-ups, and the right hand for right-handed lay-ups.
• Passes should be bounce passes.
• Make sure players are using correct footwork and technique (see lay-up correct technique)
• Make sure the two lines start well outside of the arc... if the lines are too close to the basket, there is little running and the drill tends to drag. Learners should run this drill at game speed.
• You can make a team competition out of it by requiring the team to make a certain number of lay-ups within two-minutes. If they fail, everyone does 5 or 10 push-ups. Making it competitive will force learners to run the drill up-tempo, but make sure they don’t cheat by allowing the lines to come in too close.2. Three-line lay-up exercise
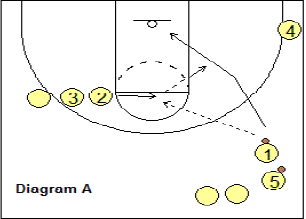
Process: Learner 1 passes to learner 2 and cuts down the right side-line, then makes sharp cut to the basket. Learner 2 passes the ball back to 1 who shoots a lay-up (see diagram A). After shooting, 1 goes to the top-of-the-key line.
Cutting technique in basketball
Cutting in basketball is a term which describes the action of a player moving across the court. It is used to describe a player making a concerted effort to move quickly across the court in an attempt to get open to receive a pass or draw the defense away from a teammate.
Find below ten most common cuts in basketball.1. Back cut
A back-cut is when a player cuts behind his defender towards the basket
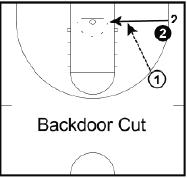
2. V-cut
They are executed by walking the defender a couple of feet inside the 3-point line, planting your foot, and then exploding out to receive the ball.

3. L-cut
L-cuts are a great way to get open on the perimeter when starting on the block.
This cut doesn’t require the offensive player to be quick; rather this cut will be most effective if good footwork is used and good use of the body.
Take the defender up to the elbow, get your top foot over theirs, give a small nudge to create space, and lead directly out to the wing while calling for the ball.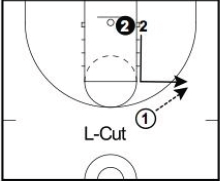
4. Curl cut
The curl cut is executing a curl around a screen.
This cut relies on the offensive player reading his defender. If the defense follows around the screen, then a curl cut is the best option to receive an open lay-up. But if the defense cheats on the screen and goes over it, then the best cut would be the next one on the list, the flare cut.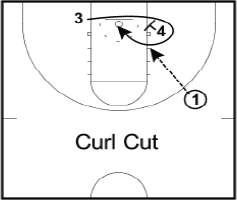
5. Flare cut
The curl cut and flare cut go hand-in-hand.
When the defender cheats on a curl and tries to cut it off, players should flare out to the corner.
6. Deep cut
A deep cut involves the player on one side of the floor to cut baseline behind everyone and to the other side.
This cut is used a lot against zone defenses because often the defense doesn’t see the player cutting if they’re pre-occupied with the ball and other players.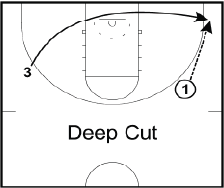
7. UCLA cut
The UCLA cut got its name because it was popularized by UCLA legendary coach John Wooden.
It involves a player at the top of the key making a pass to a perimeter player and then cutting directly to the block off a high post screen. If performed properly, this cut often leads to an open lay-up for the cutter.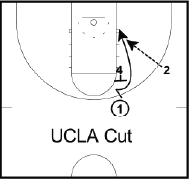
8. Front cut
The front cut involves getting on the ball-side of your opponent.
Usually this is executed by performing a jab step or a small cut behind the defense to get them to move back. Once they do, you cut in front of them closest to the ball.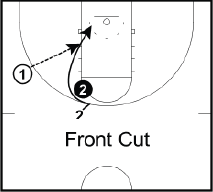
9. Shallow cut
A shallow cut is used when you’re exchanging positions with the person dribbling the ball. This means going underneath them and keeping your defender occupied while they fill the spot that you were in.
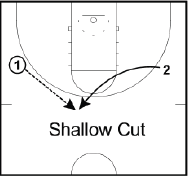
10. Flash cut
A flash cut is a quick, explosive cut made by a post player to the high post.

Exercises to teach cuts in Basketball
Instructions: Set up with one learner at top of key, one learner at wing, and rest of learners line up on the baseline. First learner in line has a ball and passes to 4.
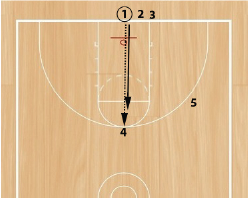
1 closes out on defence. 4 passes to 5. 1 stays and 4 reads the defence by making a face cut. 5 passes back to 4. 4 shoots the lay- up and goes to the end of the line.
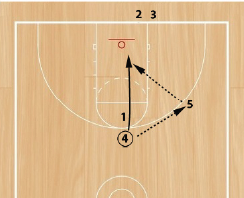
The next learner in line (2) rebounds the ball, passes to the wing (to player 5) and closes out.
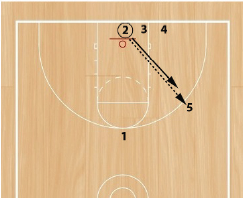
5 passes to 1. 5 reads the defence and makes a face cut toward the basket. 1 passes back to 5 and 5 makes a layup.
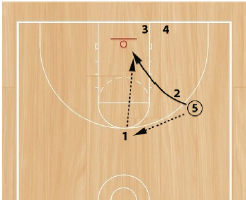
Progressions you can use:
Face cuts on right wing,
Backdoor cuts on right wing,
Face cuts on left wing,
Backdoor cuts on left wingPoints of emphasis
• Cut hard all the way to the basket.
• Passes should be on time so cutter can catch in stride and finish.
• Keep good spacing.
Sometimes learners will drift closer together. Make sure to go back to the correct starting points for good spacing. To help with this you can use chalks to mark starting positions.
Lesson 3: Man to man defense and playing in team adhering to rulesa. Prerequisites
Learners will learn better this lesson if they are able to use individual techniques and tactics in defence: even numbers, man to man defence but no contact, ten consecutive passes, ten consecutive passes without the other team touching the ball, dribbling and shooting applying the rules.
b. Teaching resources
Playground, whistles, basketball balls, pinnies, stopwatchc. Introduction
• Opening discussions (in a semicircle formation)
• After checking learner’s readiness, give instructions and rules of the game
• Forms groups basing on the quantity of resources available as well as on the class size.
• Discuss with learners how to maximize the use of all the available resources.
• Brief learners about basic basketball rules followed while playing
• Ask them to brainstorm some basketball rules they know
d. Lesson development
In teaching-learning process you need to:
• Form teams of equal number of learners and gender balanced.
• Start by teaching defensives drills, and then let learners play a short game adhering to basic rules of basketball.
• Guide and instruct always where necessary.
Warm-up activities
For warm-up exercises, use the activities in lesson 1 of this unit.Man to man defense
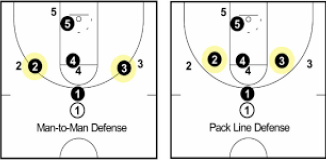
Man-to-man defense is a type of defensive tactic used in team sports, in which each player is assigned to defend and follow the movements of a single player on offense.
A screen in basketball
A screen: is a blocking move by an offensive player, by standing beside or behind a defender, to free a teammate to shoot, receive a pass, or drive in to score.
Teaching exercises for man-to-man defense
1. Slide footwork exercise
Guidelines for the exercise
• Arrange learners as shown above in the diagram. Give each learner plenty of room (space).
• The teacher, or an assistant learner, serves as the leader (dribbler). Dribble right, left, forward and backward.
• The individual learners react as if they were guarding the dribbler by moving from place to place using the slide step.The objective is to:
• Teach movement without crossing the feet.
• Encourage learners to watch the belly button of the offensive player.
• Conditions back and leg muscles to strenuous defensive play.
• To teach proper stance: one hand up to discourage shots and one hand down to deflect passes.
2. One defender versus the dribbler
Instructions and guidelines
• Divide the learners into an offensive group and defensive group at opposite ends of court (see the diagram above).
• The first offensive learner (dribbler) speed dribbles to the other end of the court, the other learner (defender) guards him/her until he stops, or the dribbler scores.
• Learners alternate lines.Objective
• Develop one-on-one defensive skills
• Force the dribbler to stop before he reaches his position by faking and retreating3. Forcing the dribble to break inside
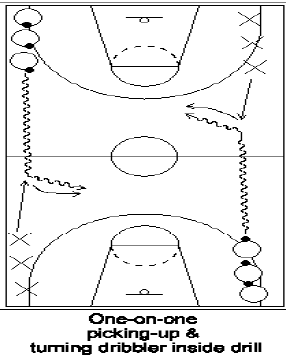
Instructions and guidelines for this exercise
• Divide the learners into two groups, one on each side of the floor.
• Break each group into defensive and offensive units.
• The first dribbler starts his move
• The first defender moves out to guard the approaching offensive player.
• After each performance, learners change lines.Objective
• Forces dribbler to turn to the inside.
• Develop good footwork, stance, and a competitive defensive attitude.
Playing in team adhering to rules
Instructions/ guidelines
• Divide your learners into teams by respecting the legal number of players (5 players for each team).
• Chose referees among learners.
• Ask learner to brainstorm basketball rules and help them where necessary.
• Let them play a normal basketball game adhering to rules.
• Let other teams wait outside for 5 minutes as they cheer up those on the court
• Correct errors and encourage the learners on the court.
• Supervise focusing on how rules are respected• Enforce the application of all learnt basketball techniques (pass, dribbling, shooting and man to man defense).
• Continue to switch teams’ roles until time is over.Basketball rules for beginners
Game purpose and basics1. To shoot the basketball through the hoop as often as possible.
• Each time this happens 2 points will be added to your team’s score.
• 3 Points will be awarded if the basketball is shot from outside the three-point line.
• 1 point will be awarded if the basket is shot from the free-throw line.2. Each team has a maximum of 5 players on the court at any time. Substitutes are made by the Coach to replace players on the court. They are substituted or subbed-off. This can only be done at certain times in the game and the referee will let you know when it is OK. This can take place as often as the coach likes.
3. The team who has control of the basketball is on offence. The team without the ball is on defense. Both parts of the game are equally important. Teams on defense are trying to stop the offence from shooting a hoop. The defense should always try to stay between the basket and the players they are guarding.
4. There are two ways for the ball to be moved up the court on offence - by dribbling the ball, which is by bouncing the ball with one hand only on it, or by passing it to another of your team members. Passing is a lot faster and ensures all team members enjoy the fun of the game.
5. While stationary (not passing or dribbling) the player holding the ball must always keep one of their feet on the floor, this is called the pivot foot. Players can only lift their foot if they wish to dribble, pass or shoot the ball. The pivot foot can twist but must remain in contact with the floor and in the same place. If players move their foot / feet without dribbling, passing or shooting they are penalized and the ball given to the other team, this is called travel.
6.The ball must stay within the court of play (inside sidelines and baselines); otherwise it goes to the other team.
7. No player may contact an opposition team member; this is called a foul. If a foul takes place while a player is shooting for a basket, the shooter is given free shots from the free-throw line.
• If the basket (while being fouled) is scored, 2 points are awarded and 1 free-throw is taken.
• If the basket misses. 2 free-throws are given.
• If a player receives 5 fouls during a game they must leave the court and can take no more part in the game8. Duration: generally, in junior competition a game is made up of two halves (usually 18 or 20 minutes each half). For seniors the game is made up of two halves of 20 minutes for each half.
9. Timeouts: A time-out is an interruption of the game requested by the coach or assistant coach to talk to their players; When a timeout is called players must hurry to the sideline to talk with their coach. Each time-out shall last 1 minute.
Each team may be granted:
• 2 time-outs during the first half,
• 3 time-outs during the second half with a maximum of 2 of these time-outs in the last 2 minutes of the second half,
• 1 time-out during each extra period.
Note: Unused time-outs may not be carried over to the next half or extra period.10. Rebounding: Players should assume that every basket shot will miss. Getting possession of the ball after a missed shot is called a rebound. When 2 players get possession of the ball at the same time this is called a jump ball. A jump ball starts the beginning of a game and after half time.
Fouls and violations
Fouls
1. Personal fouls: Personal fouls include any type of illegal physical contact.
• Hitting
• Pushing
• Slapping
• Holding
• Illegal pick/screen: when an offensive player is moving. When an offensive player sticks out a limb and makes physical contact with a defender in an attempt to block the path of the defender.2. Personal foul penalties: If a player is shooting while a being fouled, then he gets two free throws if his shot doesn’t go in, but only one free throw if his shot does go in.
Three free throws are awarded if the player is fouled while shooting for a three-point goal and they miss their shot. If a player is fouled while shooting a three-point shot and makes it anyway, he is awarded one free throw. Thus, he could score four points on the play.3.Inbounds: If fouled while not shooting, the ball is given to the team the foul was committed upon. They get the ball at the nearest side or baseline, out of bounds, and have 5 seconds to pass the ball onto the court.
4. One and one: If the team committing the foul has seven or more fouls in the game, then the player who was fouled is awarded one free throw. If he makes his first shot, then he is awarded another free throw.
5.Ten or more fouls: If the team committing the foul has ten or more fouls, then the fouled player receives two free throws.
6.Charging: An offensive foul that is committed when a player pushes or runs over a defensive player. The ball is given to the team that the foul was committed upon.7.Blocking: Blocking is illegal personal contact resulting from a defender not establishing position in time to prevent an opponent’s drive to the basket.
8.Flagrant foul: Violent contact with an opponent. This includes hitting, kicking, and punching. This type of foul results in free throws plus the offense retaining possession of the ball after the free throws.
9.Intentional foul: When a player makes physical contact with another player with no reasonable effort to steal the ball. It is a judgment call for the officials.
10.Technical foul: A player or a coach can commit this type of foul. It does not involve player contact or the ball but is instead about the manners of the game. Foul language, obscenity, obscene gestures, and even arguing can be considered a technical foul, as can technical details regarding filling in the scorebook improperly or dunking during warm-ups.
Violations
1. Walking/Traveling: Taking more than a step and a half without dribbling the ball is traveling. Moving your pivot foot once you’ve stopped dribbling is traveling.2. Carrying/palming: When a player dribbles the ball with his hand too far to the side of or, sometimes, even under the ball.
3. Double Dribble: Dribbling the ball with both hands on the ball at the same time or picking up the dribble and then dribbling again is a double dribble.
4. Held ball: Occasionally, two or more opposing players will gain possession of the ball at the same time. In order to avoid a prolonged and/or violent tussle, the referee stops the action and awards the ball to one team or the other on a rotating basis.
5. Goaltending: If a defensive player interferes with a shot while it is on the way down toward the basket, while it is on the way up toward the basket after having touched the backboard, or while it’s in the cylinder above the rim, it is goaltending and the shot counts. If committed by an offensive player, it is a violation and the ball is awarded to the opposing team for a throw-in.
6. Backcourt violation: Once the offense has brought the ball across the mid-court line, they cannot go back across the line during possession. If they do, the ball is awarded to the other team to pass inbounds.
Time restrictions: A player passing the ball inbounds has five seconds to pass the ball. If he does not, then the ball is awarded to the other team. Other time restrictions include the rule that a player cannot have the ball for more than five seconds when being closely guarded and, in some states and levels, shot-clock restrictions requiring a team to attempt a shot within a given time frame.
Basic basketball players positions and their roles
1.Centre
The centre is generally the tallest player who is positioned near the basket as he/she must be able to get up as high as possible for rebounds. He is also required to be more physically domineering with more physical strength and overall athleticism.Offensive: The centre’s goal is to get open for a pass and to shoot. They are required to block defenders, and to open other players up for driving to the basket for a goal. Centres are expected to get some offensive rebounds and put-backs.
The centre should be good at making quick jump shots, hook shots, and using the backboard on his shots.
Defensive: On defense, the centre’s main responsibility is to keep opponents from shooting by blocking shots and passes in the key area. They also are expected to get more rebounds because they’re taller.2.Power forward
The power forwards are usually the next tallest players in the team, who are closest to the centre in physical attributes and playing style, but with more speed. A forward may play under the hoop or are expected to operate in the wings and corner areas.They must be strong and comfortable with a lot of physical play and must be an effective rebounder and effective inside shooter like the centre. The power forward is also expected to shoot from further distances than the centre.
3. Small forward
The small forward is usually the shorter of the two forwards on the team. However, the small forward must have enough height and ability to play inside, and on top of that, play like the centres and power forwards, but also be able to guard.
Small forwards are also the second or third best shooters from distance of the five positions as they also play defensive roles.4.Shooting guard
The shooting guard is potentially the shortest player in the team. However, he has to be good at dribbling fast, passing and having court vision by seeing the court. He is responsible for bringing the ball down the court and setting up offensive plays.
The shooting guard is also the player who takes the most shots. He needs to be an accurate shooter from three-point range.
In terms of height, shooting guards are taller than point guards.
5. Point guard
The point guard needs to be the best ball handler, dribbler and passer as he handles the ball the most out of all the players on the team. He needs to bring the ball down the court and initiate offensive plays.
Point guards can also be the shortest player on the team as they use their intelligence and court vision to coordinate all his teammates on offense.
Point guards need to have a good long distance shooting, though it’s not quite as crucial as for shooting guards. However, some point guards take as many shots as shooting guards.e.Assessment (R-C-A discussions).
Reflection
• What is the importance of playing basketball adhering to rules?
• How long can you hold the ball without dribbling?
• What are the types of fouls in basketball?
• Can you take two steps without dribbling in basketball?
• How many seconds do you have to get the ball past half court?
• How many steps can you take for a layup in basketball?
• What is considered travelling in basketball?Connection
Recognise similarities between basketball rules and other games’ rules
Application
Apply rules of basketball in your daily sports activities.
5.5. End unit assessment
Set exercises passing, dribbling and shooting (including lay-up).
Set exercises of defending using man to man defensive tactics.
Organize a basketball match and observe these techniques in a game situation and the ability to adhere to basketball basic rules during game situation.
Observe:
• Learners’ ability to referee the match applying basic rules.
• The use of correct basketball techniques: pass, dribbling, shooting, lay-up
• Movement of learners in man to man defensive situation.
5.6. Additional information
Basketball play court and equipment
a. The play court
b. Equipment
The following equipment will be required:
• Backstop units, consisting of: 1) Backboards 2) Baskets comprising rings and nets 3) Backboard support structures including padding.
• Basketballs balls,
• Game clock,
• Scoreboard,
• Shot clock,
• Stopwatch or suitable (visible) device (not the game clock) for timing time-outs,
• Two separate, distinctly different and loud signals, one of each for the 1) shot clock operator, 2) scorer/timer.
• Score sheet,
• Player foul markers,
• Team foul markers,
• Alternating possession arrow,
• Playing floor,
• Playing court,
• Adequate lighting.5.7. Additional activities
As additional activities to give to your learners you need to:
• Encourage learners to actively participate in basketball training sessions organized by different coaches and private individuals in training centers.
• Encourage also learners to participate in basketball community competitions if there are any (e.g.: Kagame cup competitions, right to play, Imbuto foundation….)
• Encourage learners to participate actively in school organized competitions as well as in Sector, District and national competitions (e.g.: Inter-school’s competition organized by FRSS)
• Encourage learners to participate in all youth competitions available (e.g.: Competitions organized by FERWABA).
• Encourage learners to create local basketball competitions in their villages.UNIT 6: HANDBALL
6.1. Key unit competence
After completion of this unit, learners will be able to improve the use of techniques and tactics of handball in game situations.
6.2. Prerequisites knowledge and skills
Learners will learn better this unit if they are able to perform basic technical skills of handball in game situations such as exercises of passing the ball, exercises shooting, exercises of throwing, dribbling and bouncing.
6.3. Cross-cutting issues to be addressed
1. Inclusive education: In teaching-learning process of handball the teacher together with the learners must set instructions that include all learners. Learners with physical impairment will be referees. Simplify the rules of the game to include all learners (impaired as well as slow learners). E.g.: Not allowing more than three steps while dribbling the ball.
2. Standardization culture: In handball lesson, the size of handball balls must meet the required standards of the ball according to the learners’ age and sex.6.4. List of lessons

Lesson 1: Techniques and tactics of handball
a. Prerequisites
Learners will learn better this lesson if they are able to perform exercises of throwing, dribbling, bouncing, and goalkeeping. Practice throwing in place, back throw, vertical jump throws, stride throw, throw while falling, free bouncing, bouncing with an opponent, using hands to catch or deviate the ball (upper ball), using legs to stop or deviate the ball (lower ball), using trunk to stop or deviate the ball.
b. Teaching resources
Playground, stopwatch, whistles, cones, handball balls, chasubles/pennies,
c. Introduction
Opening discussions (in a semicircle formation)
• After checking learner’s readiness, give instructions and rules of the game
• Forms groups basing on the quantity of resources available as well as on the class size.
• Discuss with learners how to maximize the use of all the available resources.
d. Lesson development
Warm-up activities
For warm-up activities and stretching use exercises in units 1, lesson 1.
a. Teaching of catching and passing
1. Passing
Types of Passing include:
• Passing while standing,
• Passing while running,
• Passing with jump (preliminary stride),
• Passing with vertical jump
While teaching how to pass, remember to emphasize the following:
• To pass with the right and left hand,
• Passing the ball with the left hand: the right leg must be forward,
• The ball is placed in the inner surface of the hand (palm) and the hand is relaxed
• The hand is put back on the ball and the pressure on the ball is uniformly distributed on the ball,
• Passing should be as simple as possible, without additional moves,
• The ball must be passed in front of a player, taking into account the player’s speed,
• The pass should be performed while running,• To practise short and long passing, taking into account the particular situation on the playing field.

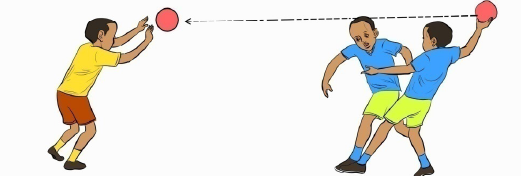
2. Receiving/catching the ball in handball
• Reception of the ball in handball must be done with two hands;
• The technique of reception must be adapted to the flying height of the ball to receive
When receiving/catching a ball of the flying height which is above the chest level, the fingers are held up higher and pointed forward and the thumbs are nearly touching each other.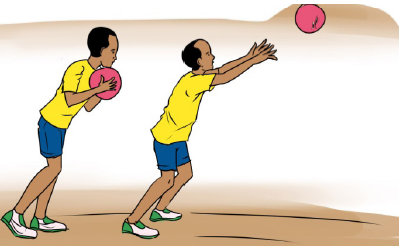
When receiving a lower ball/ close to the ground in handball; the fingers are held in lower position and pointed forward and the small fingers are nearly touching each other.
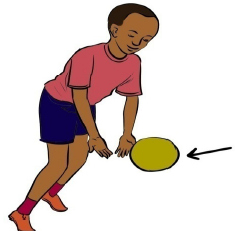
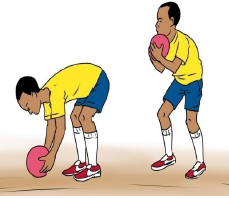
Teaching points
Receiving the ball with suppleness and flexibility; i.e. smooth flexion of the arms movement while catching the ball in reception.
After reception apply good handling techniquesb.Shoting in handbal1.
1.Shot in place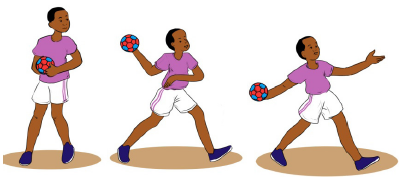
2. Leaning back shot
3. Vertical Jump Shot
4. Stride Jump Shot

5. Shots while falling
6.Shot while falling backward position
Description of the technique
• The ball is placed in the inner surface of the hand (palm) and the hand is relaxed
• The hand is put back on the ball and avoid to put much force in fingers while gripping the ball.
• Uniformly distribute the pressure of the hand on the ball, this will help to avoid uncontrolled throw.
• After receiving the ball, bring the ball in back position with two hands, then place it in the throwing hand, continue to bring back the throwing hand for preparation of the throw.
• Take the support of the entire body on the left leg (blockage of the body on the left leg) and then throw the ball.
Teaching exercises of shooting, throwing and catching in Handball
1. Throwing with precision
Each learner has to throw the ball from the distance of 6m at a fixed object (e.g. a fixed piece of tree, a ball, or another chosen target).
Variations:
• Throwing from different distances,
• Throwing with the right and left hand alternatively,
• Throwing after making 1,2 or 3 steps2. Shooting at the goal
Make to teams and place them in front of the goal, learners will throw the balls at the goal, and pursue the balls to recuperate them.
Variations:
• Throwing in place
• Throwing after 3 steps
3. Exercises with a partner (2 learners with one ball)
• Aim at the outstretched arms of the partner, who in return will pass back the ball (right hand and left hand),
• Make a pass at different height (front pass, chest level, hips level, knees level),
• Pass at the right and left sides,
• Pass from different distances,
• Pass with 2 balls (the two learners throw simultaneously the balls)
Distance of 10m between partners:
3 Steps, pass and move back (start moving back by walking first, after move back by running);
• Pass in place, left, right, left
• Pass with the right hand and move back after passing the ball;
• Pass in place; right, left, right
• Pass with the left hand and move back after making his/her pass
4. Exercises in a group of 4 learners
Pass and pursue and going standing last at the end of the line of the opposite group.
• Pass and stop,
• Pass after 3 steps
• Receiving the ball while running to meet the ball then making 3 steps and pass.
5. Throw and catch the ball
In an alley of 6 m of large, the learners exchange each other passes in zigzag.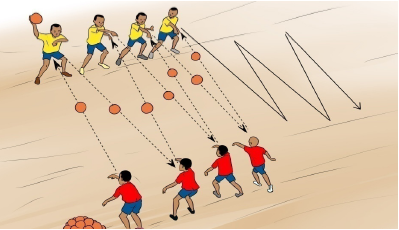
6. Throw and catch in triangle
Learners A, B and C for a triangle. Learner M stands in the middle of them. The ball will follow the following way: M-A-B-M-C-A-M-B.
7.Throw and catch the ball in triangle and in movement
6 learners form a triangle (distance of the side of a triangle)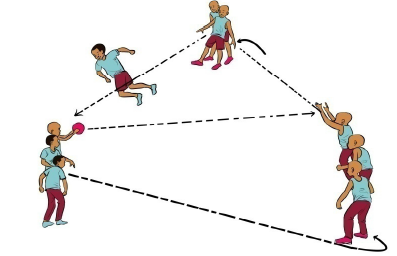
Pass and go
Each learner performs his/her. After passing, he/she joins the extremity of his/her line and waits his/her time.
Pass and pursue
• Each learner performs his/her pass. After passing, he/she joins the extremity of his/her line and waits his time pass again.
• 3 steps make a pass and pursue,
• Each learner performs his/her pass. After passing he/she joins the extremity of the line in the group which does not receive the ball.
• 3 steps pass and go to the other direction.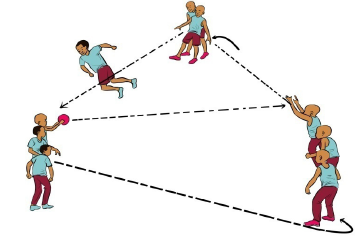
c. Jump shooting in handball
Description of the technique of jump shooting in Handball
Start with two hands on the ball in a ready position. Knees slightly bent facing the target.
Step forward with foot opposite of your shooting hand. Take non-shooting hand off the ball.
Jump in the air while raising shooting arm up and back to make an L, or a 90 degree angle. Rotate shoulders square to the goal whipping throwing arm forward.
Pike slightly at the waist and land on take-off foot. Follow through with throwing hand pointed at the target.
Teaching exercises of shooting
1. Learning the three steps rhythm
Learners jump:
• Over mark made by a chalk on the ground (ropes) or over the 9m line,
• Over a bench (or a piece of tree)
• Over an extended rope of 30cm height from the ground
• They must land on the take-off leg.2. Learning coordination of the jump and shoot
Learners jump over the bench (line, rope) and pass the ball to a partner while jumping.
3. Learning exercises for the jump shoot
After the impulse and take-off, learners pass the ball to a partner of the other group while being in their predominant phase of the jump. They jump over mark made by a chalk on the ground (or a ropes) or over the 9m line, over a bench (or a piece of tree) and over an extended rope of 30cm height from the ground.
4. Exercises of shooting at the goal using jump shoot
Form two groups; learners one by one execute the jump shoot at the goal. After performing his/her shoot, he/she recuperates the ball and goes at the end of the line of his/her group.
5. Performing a jump shoot after a pass
Form three groups (A, B, and C):
C1 passes the ball to A1 and after he/she goes at the end line of A; A1 performs the jump shoot, after shooting he/she recuperates the ball and goes to stand at the end line of the group C; C2 passes the ball to B1 and after he/she goes at the end line of B; B1 performs the jump shoot, after shooting he/she recuperates the ball and goes to stand at the end line of the group C.
6. Assessment (R-C-A discussions).
• Reflection
1. What is passing in hand ball?
2. What are the skills to develop to be a good jump shooter in handball?
3. What are the qualities of a good pass in handball?
• Connection
Compare handball pass to a basketball pass.
• Application
Applying different types of passing and shooting in different game situation.
Lesson 2 :Various technical skills and tactics of playing handball
A. Prerequisites
Learners will learn better this lesson if they are able to perform exercises of passing, shooting, blocking, marking dribbling, bouncing and goalkeeping.
B. Teaching resources
Playground, stopwatch, cones, whistles, handball balls, chasubles/ pinnies
C. Introduction
• Opening discussions (in a semicircle formation)
1. After checking learner’s readiness, give instructions and rules of the game
2. Forms groups basing on the quantity of resources available as well as on the class size.
3. Discuss with learners how to maximize the use of all the available resources.D. Lesson development
Warm-up activities
For warm-up activities and stretching use exercises in units 1, lesson 1.
1. Attacking systems
• System 3:3
• System 2:4
2. Defence systems
• System 6:0
• System 5:1
3. Attacking systems versus defending systems
• Attacking system 3:3 versus defending system of 6:0
• Attacking system 2:4 versus defending system 5:1
Teaching exercises for basic tactics in handball
a. 4 attackers versus 3 defenders
Team (B) attacks with 4 players the team (A) composed of 3 defenders and a goalkeeper on a half of the court. Defenders stay at the goal line surface, the attack is initiated from the halfway line; after a shoot at the goal, team A (defenders) leaves the court and goes standing behind team E, team C enters the court and attacks the team B; and so on.
b. Learners perform the same exercises with 5 attackers versus 4 defenders.
c. Exercises - Attackers and defenders with equal number• 3 attackers versus 3 defenders
Same organisational form as previous exercise; 3 players attack 3 defenders; the goalkeeper is neutral and remains in the goal always.
• 4 attackers versus 4 defenders (same process as the previous exercise).
• The same exercise with 5 defenders versus 5 attackers
d. Counter-attack exercises
• Two attackers versus one defender
Learners stand in two parallel lines at the end of the court; the distance between the two lines is 12 m to 15. At the other end of the court stay the goalkeeper and one defender; playing two by two, the two learners exchange passes while running towards the other end of the court and try to score; the defender comes to constrain them. They return back passing by the outside of the court. Next learners in the lines (two by two) perform the same exercise (the defender is changed).• Three attackers versus one defender
Same organisational form as in previous exercise, the pass must always go through the player in the middle.
• Three attackers versus two defenders
The same exercise as the previous but there are two defenders in defence
e. Assessment (R-C-A discussions).
Closing discussion
Reflection
1. How many handball formation systems can we use while playing as a team?
2. Outline strengths and weaknesses for each system.
Connection
Compare handball system formation to football formation.
Application
Applying different players’ formations in a game situation.
Lesson 3 : Exercises of goalkeeping and playing in teamsa. Prerequisites
Learners will learn better this lesson if they are able to perform basic exercises goalkeeping and playing in teams.
b. Teaching resources
Playground, stopwatch, cones, whistles, handball balls, chasubles/ pennies
c. Introduction
Opening discussions (in a semicircle formation)
1. After checking learner’s readiness, give instructions and rules of the games
2. Forms groups basing on the quantity of resources available as well as on the class size.
3. Discuss with learners how to maximize the use of all the available resources.
d. Lesson development
Warm-up activities
For warm-up activities and stretching use exercises in units 1, lesson 1.The goalkeeper in handball
A goalkeeper greatly influences the game and the final result. Playing as a goalkeeper requires a lot of physical and mental efforts.
The basic elements of the goalkeeper’s player are:
• Posture,
• Moving,
• Using hands (upper balls),
Using legs (lower balls),
• Using trunk,
• Putting the ball down
Posture and Moving in handball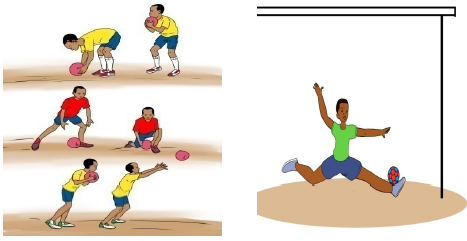
Exercises of goalkeeping in handball
Exercise No1. The shooting learners stand width front at the goal along the goal circle holding a ball in front of them. The goalkeeper runs forward and touches a ball, and the shooter, whose ball has been touched, throws the ball against the goal in a high soft curve over the goalkeeper. The goalkeeper runs backwards and tips the ball over the goal frame. The ball must be thrown at the center of the goal so that the goalkeeper does not risk running into a goal pole. Also remember that it is a goalkeeper exercise. The throw must be performed in such a way that the goalkeeper has a chance to reach the ball.
Exercise No2. The shooting learners stand 2 by 2, each with a ball and have made an agreement, who is shooting. Both runs forward and perform a shooting movement, but only one releases the ball. The distance between the shooters may be increased when the goalkeeper gets better. Start with a distance of about 2 meter and end the exercise with shots from left back and right back position.
Exercise No3. The shooting learners stand 2 by 2, each with a ball. The 1st shooter runs forward and the 2nd shooter runs behind the 1st in a distance of about 2 meter. The 1st shooter shoots at goal, high or low at the 9meter line in her starting side. The 2nd shooter also shoots from the 9meter line in her starting point side high or low. The goalkeeper must try to take both shots.
Exercise No4. The shooting learners (e.g.: 10) are numbered from 1 to 10 and are placed along the 9meter throw line from RB to LB position. The goalkeeper must not know the numbers of the shooters. The teacher now shouts one and the learner with No one shoots. Then he/she shouts two and learner No 2 shoots. There must be about 1 second between each shot. If there is a risk that the goalkeeper could step on a loose ball, the exercise is stopped. The exercise can be performed again with the same numbers, but this time the counting is backwards. Or with even and odd numbers: 2-4-6-8-10-1-3-5-7-9 and so on.
Exercises of playing in team
At this level we assume learners have acquired different techniques and tactics of playing handball.
• To conduct this step of the lesson by organising your learners in teams.
• Organise team in different attacking/defensive systems (6-0, 5-1,4-2 and 3-3 formation).
• Let learners play based on your guide and instructions.
• Alternate the system until the time is over.
• Switch the teams’ roles and systems
• Emphasis the correct techniques.e. Assessment (R-C-A discussions).
Closing discussion
• Reflection
1. What are the basic skills for a handball goalkeeper?
2. What techniques to use for a goal keeper when the ball is shot in an opposite angle?
• Connection
Compare goalkeeping in handball and goalkeeping in soccer.
• Application
Applying techniques and tactics in game situation.6.5. End unit assessment
• Set exercises passing, dribbling and shooting from various positions.
• Set exercises of defending using man to man defensive tactics.
• Organize a handball match and observe these techniques in a game situation and the ability of learners to play as a team.6.6. Additional information
Handball playing court, basic rules and players positions
1. Handball basic rules
Philosophy of the game
Handball is a team sport played by two male or female teams. The players are allowed to handle and throw the ball using their hands, but they must not touch the ball with their feet. The objective of the game is to score and avoid getting goals. The team that scores more goals in a given period of time wins the match. The game is played at a very high speed and body contact is permitted. As a result, Fair Play has a central importance. Basic handball is either played in a sports hall or outdoors on a 40x20 metres court. The other variations of the game, such as Mini-handball, Beach Handball or Wheelchair Handball, are all based on the fundamental rules of the game, although both facilities and rules shall be adapted to their needs.Who can play the game?
Handball is a team sport for two squads of 7 players (six field players and a goalkeeper). For competition handball two referees are also necessary.
What do you need to play?
The court:
Regular indoor handball court (see picture): 40x20 metres court. The court has two 6m goal areas and two goals (3x2m).
The ball:
Men play with ball size 3, women with ball size 2, but different age categories may use different sizes (size 1 and 0 balls also exist). Clothing: Players need adequate sports clothing for handball. Shorts, shirts and sports shoes are required.
Duration of the game
A handball game is played 2x30 minutes, but this duration can vary according to the needs of the diverse age categories.How to play handball in summary

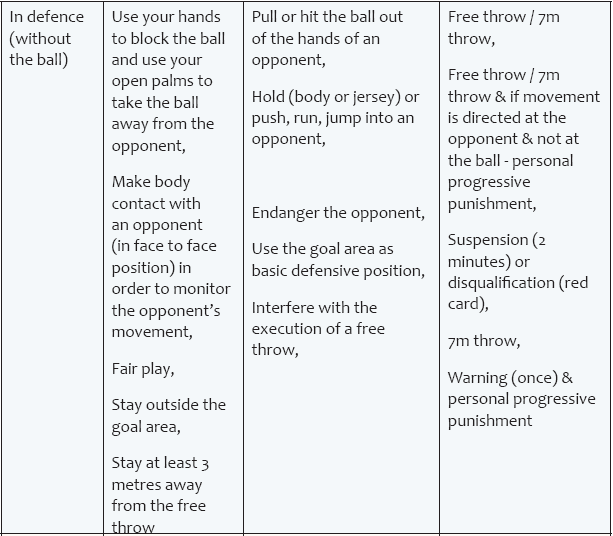

The elements of personal progressive punishment: yellow card (warning) / 2-minute suspension / red card (disqualification for the rest of the game).
2. Hanball playing court
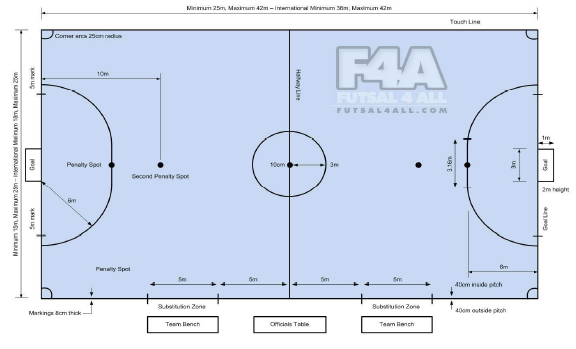
3. Players’ positions in handball court
Goalkeeper: the player who defends the goal with just about every part of the body! The goalkeeper is the only player who can touch the ball with their feet.
Centre: a creative handball player who directs play in both defense and attack. Also known as the ‘playmaker’ and sets up the tactics and the players in shooting positions.
Left and right backs: usually the largest players on the handball team. When defending, they try to block shots, and in attack they are the long-range handball shooters.
Circle runner: the creative force in attack and disruption to opponents when defending. The circle runner is quick and gets in among opposing defenders to either create openings for teammates or to get into a good scoring position themselves.
Left and right wingers: the fast players who patrol the sides of the court. They counter opposing wingers and in attack look to create openings for others, or shoot from the more difficult angles.
6.7. Additional activities
As additional activities to give to your learners you need to:
• Encourage learners to actively participate in handball training sessions organized by different coaches and private individuals in training centers.
• Encourage also learners to participate in handball community competitions if there are any (e.g.: Kagame cup competitions, right to play, Imbuto foundation….)
• Encourage learners to participate actively in school organized competitions as well as in Sector, District and national competitions (e.g.: Inter-school’s competition organized by FRSS)
• Encourage learners to participate in all youth competitions available (e.g.: Competitions organized by FERWAHAND).
• Encourage learners to create local handball competitions in their villages.REFERENCES
1. Sport-Specific: Football For Development Coaching Manual, 19/11/2007, Right To Play
2. IAAF Track and Field Facilities Manual, Edition 2008; Requirements for Planning, constructing, Equipping and Maintaining.
3. Seth Rubinroit, March 15, 2016, TRACK AND FIELD 101 Rules, retrieved from WWW.nbcolympics.com/news/track-and-field-101-rules
4. Right to Play. (2008). Le Programme de Ballon Rouge. Right to Play
5. International Football Association Board, LOIS DU JEU 2017/2018 , retrieved from WWW.theifab.com
6. REB, July 2015, Teacher Training Manual, Roll out of the Competence-Based Curriculum
7. REB, Kigali 2015, UPPER PRIMARY PHYSICAL EDUCATION AND SPORTS SYLLABUS
8. Developing the 4 X 100m Relay Loren Seagrave Director of Track and Field and Cross Country IMG Academy, Bradenton, Florida, IMG ACADEMY retrieved from https://WWW.imgacademy.com
9. John Dillon G.D.A North Kerry, Kicking Skills retrieved from http://munster.gaa.ie/wp-content/themes/munster/uploads/kicking_Skill_John_Dillon_Football.pdf
10. 7 Exercises to Improve Balance, Amy Rutherford-Close, retrieved from http://WWW.active.com/fitness/Articles/7-Exercises-to-Improve-Balance, 22, March, 2018
11. REB, Physical Education and Sports, August 2012
12. IAAF KIDS’ ATHLETICS - A Practical Guide
13. Second Edition 2006 reviewed and amended by: Charles Gozzoli (FRA); Jamel Simohamed (IAAF); Abdel Malek El-Hebil (IAAF)
14. BrianMac Sports Coach- www.brianmac.co.uk /sprints/track
15. J. Anderson, September 21, 2017, ATHLETICS TRAINING TRACKS, retrieved from https: www.sport-fitness-advisor-advisor.com
16. https:/www.wikihow.com /How to Triple Jump: 14 Steps (with Pictures)-wiki How
17. Eric D. Zemper, PhD, TRACK &FIELD STARTERS, Monograph series on track and field officiating techniques from the training subcommittee (Rex Hervey, chair) USATF National Track & Field official’s committees
18. Gavin Bowen (City Wrexham, United Kingdom) Football/Soccer: Defending zone 14(Tactical: Combination play, Mixed age), Reseller-Club: Premier Users ‘Club, retrieved from: https://www.sportsessionplanner.com
19. MACKENZIE, B (2002) Discus, https: www.brianmac.co.uk/discus/index.htm
20. http://www.volleyballxpert.com/drill/type/blocking
21. http://www.volleyballadvisors.com/volleyball-positions.html
22. Coach John Kimble, Basketball zone offense philosophy, retrieved from https://coachingtoolbox.net/basketball-zone-offense-philosophy
23. Brendan Winters, TOP 5 BASKETBALL DRILLS FOR YOUTH BASKETBALL PLAYERS, retrieved on: https://proskillsbasketball.com/5-best-drills-for-youth-basketball-players/
24. Jeff Haefner, 2008, Proper basketball shooting technique, fundamentals, and form, retrieved from: https://www.breakthroughbasketball.com/fundamentals/shooting-technique.html
25. James Gels, Basketball drills -lay-up drills from the Coach’s Clipboard Basketball Playbook , 2004, retrieved from: https://www.coachesclipboard.net/LayupDrills.html
26. Williams, A (1993). Aspects of Teaching and learning in Gymnastics. British Journal of Physical Education.
27. REPUBLIC OF UGANDA, MINISTRY OF EDUCATION, 1997, Module CE/2-Part 2 Physical Education