Topic outline
General
- P5:Physical Education and Sports TG File Uploaded 1/08/22, 09:00
INTRODUCTION
Labels: 3UNIT 3: GYMNASTICS
Content map

Key unit competence: By the end of this unit, students will be able to perform exercises of rolling safely and refining techniques.
Learning objectives:
Knowledge and understanding
State types of rolling and its importance to the body.
Explain the importance of physical exercises for circulatory and respiratory systems.
Identify the basic techniques in gymnastics.Skills to develop:
Perform different aerobic exercises.
Develop basic techniques in gymnastic.
Use gymnastics equipment appropriately Take account of their own safety and that of others during gymnastics
Coordination.Attitudes and values:
Endurance
Perception
Precision
Creativity
Fair play
Self confidenceNumber of lessons: 2
By the end of this unit, learners should be able to demonstrate basic exercises.LESSON 1: ROLLING EXERCISES
Lesson objective
By the end of the lesson,learners should be able to perform the forward roll perfectly.Teaching methods:
Demonstration
Guided discovery
Instruction
CommandTeaching materials:
Mat
Playground
StopwatchLesson Development:
Asking one learner to lead others in warm-up exercises. This may include jogging, stretching.
Instructing learners to perform forward roll and backward roll following the steps below;
– Lowering the body towards ground with straight legs by hands following body down.
– Keeping chin on chest and making back round.
– Placing hands fl at on ground with thumbs close to ears. Legs locked straight.
– Using strong arm movement pushing body to upright position.
– Keeping legs in pike and putting feed down first and using momentum to move to standing
position.
Assessment
Set the learners to perform various rolling exercises.
Relaxation
Command learners to sit down in circle and swing hands left and right, up and down.
Final discussion
What steps did you go through while performing the forward and backroll.
How are rolls important in our daily life?LESSON 2: AEROBIC PROLONGED EXERCISES
Lesson objective
By the end of the lesson,learners should be able to gymnaestic exercises following sagital plane
movements.Teaching methods:
Instruction
Guided discovery
Command
ExplanationTeaching materials:
Cones
Playground
Stopwatch
DumbbellsTeaching points for rotational exercise: Briefing learners about the importance of performing rotational exercise. Tell them that in every day life, we move forward and backwards, we also move side to side. We move up and down. We rotate. This means, we move in every direction. This calls for flexibility to be able to use our bodies well in all directions of movement.
Telling learners about the planes of motion that we move in everyday life.
– Right and left (flexion and extension) here you can move forward and backward or up and down. It is also called sagittal plane movements.
– Front and backside movement. (abduction and adduction) Here one can move side to side, This is called frontal plane movement.
– Top and bottom halves movements. This is movement in the transverse which is both internal and external rotation.
– Instructing learners to perform the following sagittal plane movements.


Note: All the above exercises are done after learners have warmed-up their bodies. This can be done by engaging in around the play field jogging, leg, arm, trunk stretch. Tell learners not to rotate or stretch their bodies beyond their limit.
General assessment
Set learners various acrobic exercises to perform and evoluate their level of achievement.
Relaxation
In what sport activity can you use transverse movement.
What are the benefits of performing plane movements.
Final discussion
Guide the learners to discuss the values of gymnastics in our daliy life so that they can be able to apply them.
Ask the learners how gymnastic exercises can be useful to them in their daily life.Unit summary
In this unit, you have taught about performing different exercises of gymnastic movement done on the ground and gymnastics exercises using apparatus.
In the next unit, you are going to teach about athletics performing different techniques stressing their importance.Glossary
Rolling : Turning over
Clasping : To hold some thing very tightly in your handsUNIT 4: ATHLETICS


Key unit Competence:
By the end of this unit, students will be able to demonstrate different types of jumping, running with acceleration and throwing heavy objects.
Number of lessons: 9
Learning Objectives:Knowledge and understanding
Identify different types of techniques of athletic and tell their importance.
State the reasons of playing athletics at individual, community and national level.
Explain the rules and their importance.Skills to develop:
Learners will be able to;
Demonstrate techniques to improve his/her performance in athletics.
Use rules of athletics in the game situation.
Develop body coordination. Evaluate his/her performance level in athletics.
Describe how athletics can be done in a safe varied, effective and enjoyable way.Attitudes and values:
Show respect of rules and regulations during the game.
Appreciate the importance of cooperation in term.
Fair play.
Self confidence
Enjoyment in playing basketball using technical tactics gesturesLESSON 1: EXERCISES OF JUMPING
Lesson objective
By the end of the lesson,learners should be able to jump over various objects without getting hurt.
Teaching methods: Explanation
Demonstration
Observation
Practical
Group/pair work
Discovery
Direct instructionTeaching and learning materials:
Playground
Paper boxes
Ropes
Whistle
Sticks
BallsLesson development:
Step 1 :
Guiding the learners to carry out warm-up activities. Let one of them be the leader as you supervise.
They should begin with simple jogging to heat up the muscles. Then stretching the muscles systematically. Thus from the neck to the ankle or vice versa. Finally they should strengthen the
muscles by activities such as jumping over the ball, push up, elbow tug of war and duck fighting.

Step 2 :
Setting objects for the learners to jump over as they move forward. These can include balls, paper boxes, sticks rested on a paper boxes about 1 foot high and ropes fixed on stands or held by the learners themselves they start in a squatting position and make two feet forward hops
Procedure
From a starting line, the participants carry out a “ fog one after another. The first participant of the
team start with the toes on the starting line. He/she then squats down and jumps forward as far as
possible, landing on both feet. The assistant marks the landing point that s nearest to the starting
line(heels) if a participant fall back, the landing point of his/her hand for example is the one marked.
The landing point, in turn becomes starting line for the second jumper of the team, who caries out
his/her “ frog jump’ from there. The third team mate jumps from the landing point of the second one,and so on. The event is completed when the last member of the team has jumped and that landing point is marked. The entire procedure is repeated a second time (second trial).Activity 4.1.1
Set exercises and observe how the learners demonstrate different types of jumping in relations to the lesson. For example” Two feet forward hops from a squat position in groups of fiveScoring
Each team member completes. The total distance of all jumps is the team result. The team scoring is based on the best result of two trials. The measurement is recorded in 1 cm intervals.Assistants
One assistant per team is needed for this event . These are his/her duties
To control and regulate the procedure (starting line landing)
To measure the total distance of each trial.
To record the scores on the event card.
Step 3 :
In small groups, telling the learners squat and jump moving forward. For the safety of the young muscles of these learners, the distance should not exceed 5 metres. The intensity of the exercise should also be low. Thus it should not be repeated many times in the same lesson.Activity 4.1.2
Dividing the learners in small groups. Set them various exercise involving jumping forward and squat jumping. Let them perform competitively take records and declare the winners at the end award prize if possibleAssessment criteria
Set the learners to jump over various objects like paper boxes, sticks (as across bar) on bricks and jumping at the sport.Relaxation
Under what situation can one apply jumping techniques?
Final discussion
Let the learners discuss how jumping can help us in our daily life by gaining fitness, servival and earning a living.Additional notes
At this level, athletics is more than games. They promote physical exercise encourage healthy competition and teach the learners to be gracious regardless of the results of the game. Athletics create lasting friendship forged through:
Achieving a common goal.
Giving the chance to explore what they are through :
– Hard work
– Physical exertion
– Emotional investment
Better still athletics provide us with the opportunity to develop:
– Fairness
– Respect
– ResponsibilityLESSON 2: JUMPING SHORT OBSTACLES
Lesson objective
By the end of the lesson,learners should be able to jump over various objects successfully.Teaching Methods:
Explanation
Demonstration
Observation
Practical
Group/pair work
Discovery
Direct instructionTeaching and learning Materials:
Playground
Whistle
Paper boxes
Ropes
Sticks
BallsLesson Development:
Step 1 :
Guide the learners to perform warm up exercise.
Step 2 :
Set objects for the learners to jump over individually.
Variations:
Jumping in different directions (forward, backward, sideways).
Vary the heights of the objects according to the ability.
Letting the height be progressive according to the better performers.
Activity 4.2.1
In small groups, according to the ability, set a variety of objects to be jumped over.
– Supervise, encourage and correct the errors.Assessment
Setting exercise and observe how the learners demonstrate different types of jumping.
Relaxation
Instruct learners to sit down and perform bicycle ride in air.
Final discussion
What do you do if you find an obstacle like log in your pathway?
How would you go over it?Additional notes
Fun and sportsmanship are the guiding principles of our athletics lesson. The learners are ensured to have the opportunity to learn and develop skills in their chosen athletics events. Group activities allow the learners to exercise their bodies as well as their minds and help them develop skills and confidence.LESSON 3: LONG JUMPING EXERCISES
Lesson objective
By the end of the lesson, learners should be able to perform long jumping exercises following correct phases.Teaching Methods:
Explanation
Demonstration
Observation
Practical
Group/pair work
Discovery
Direct instructionTeaching and learning Materials:
Whistle
Sandpit
Takeoff board
Rake/hoe
Tape measureLesson Development:
Step 1 :
Guiding the learners to brainstorm on all what they know about long jump.
– Where it is performed.
– Styles /techniques used.
– Process from the beginning to the end.
– Necessary equipment.Step 2 :
Telling the learners perform warm-up exercise following the correct procedures; refer to the previous lesson. However, new stretching and strengthening exercise can be introduced. You can organise a circuit of exercise so that they perform a different one at each station.Step 3 :
Guiding the learners to have trials in the sandpit. Leave them to jump freely in order to discover
some basics on their own.
– Introducing the “ sail techniques” to the learners.
– Demonstrating it to them. Allow at least 5 learners to try it in order to consolidate the
demonstration.
– Putting it to the learners that in all jumps there are 3 phases:
1. Approach 2. Takeoff 3. Flight and landingActivity 4.3.1
Telling the learners to perform the long jump activity following the correct phases, runway (approach),takeoff and flight and landing.
Giving them some simple points to follow:
– Good speed is needed for nice takeoff.
– Height from the ground should be moderate.
– Land and bounce forward.
– After landing move forward and leave the pit.
– Measurement is done from the nearest break in the sand to the takeoff board.
– One with the longest distance is the winner.Assessment
Setting exercise and observe how the learners demonstrate different abilities of jumping. Take records and declare the best performers, award prizes if possible.
Relaxation
Instruct learners to perform leg stretch exercises as they relax.
Final discussion
How can you use long jump to escape danger?
What techniques can you use to jump over obstacles?
How helpful is jumping in our daily life?Additional notes
During competitions, if the competitors are 8 or less take 6 trials. If they are 8 or more take 3 trials for all. Then the best 8 take 3 more trials. In case of a tie, take an extra trial.LESSON 4: SPLINTING EXERCISES
Lesson objective
By the end of the lesson, learners should be able to perform different sprints.Teaching methods:
Explanation
Demonstration
Observation
Practical
Group/pair work
Discovery
Direct instructionTeaching and learning materials:
Whistle
Playground
Batons
Stopwatch
HurdlesLesson Development:
Step 1 :
Guiding the learners to perform warm up -exercise as in the previous lesson. At least two new exercise should be introduced in each new lesson. These may include sit ups, squats, burpees to mention but a few. You may organise a circuit of 8 exercises and learners attend each and every station.Step 2 :
Telling the learners brainstorm on what they know about sprint and relays.
– Sprints are short distance races run at a high speed.
– Sprints include : 100 m, 200 m and 400 m
– A crouch start is used.
– It has 3 commands” On your marks” “ set” and “ Go”
– At “ Go “ a whistle , clapper or gun may be used.
– Shuttle relays are mainly done by a group of four. They are carried out in defi ned area. It can be between 10 m, 20 m, or 30 m at this levelStep 3 :
Letting the learners concentrate on 100 m race. They should begin with shuttle relays of 30 m between.(a) Running to and from the marked distance

FIGURE 4 .10: Shuttle relay from either side.

(d) During acceleration there should be a body lean, elbows at 90 degree and a high knee lift. Run on the balls of the foot for better speed.

(e) Finish with the torso.
Activity 4.4.1
Dividing the class in four teams and let them compete in 100 m race. Take records and at the end declare the winners. Award prizes if available in order to motivate them for further exercise.Assessment
Setting exercises involving sprinting and observe how the learners demonstrate the proper biomechanics of running.
Relaxation
Instruct and direct learners how to perform leg stretch as relaxation.
Final discussion
In which sports activity can one apply 100 metres sprint?
How is sprinting important in our daily life?Additional notes
The athletics programme
Athletics is an integral and required part of the educational experience. It includes individual sports at inter school, intramural and recreational levels. Allow the learners to have tryouts at all events before they specialise in one or some few of their interest. Coaches, teachers and administrators should find out how best they can help support them.LESSON 5: FORMULA ONE
Lesson objective
By the end of the lesson the learners should be able to run tactically through obstacles.
Teaching methods: Explanation
Demonstration
Observation
Practical
Group/pair work
Discovery
Direct instructionTeaching and learning materials:
Tumble mat
Poles
Whistle
Soft ring/baton
HurdlesLesson development:
Step 1 :
Guiding the learners to carry out warm up activities. One of them should be the leader. They should
begin with simple jogging to heat up the muscles. Then stretching the muscles should be systematic
from the neck to the ankle. Finally, let them perform strengthening exercises. These may include; push ups, plyometrics and duck fi ghting.Step 2 :
Asking the learners to mention what they know about “Formula one” as a sports activity.
Giving a brief explanation or description.
Brief description: It is a relay with a combination of fl at race, hurdles and sprinting around slalom poles. One runs in and out of obstacles on a winding course. It is designed to test tactical skills.
Step 3 :
Explaining the procedure of the relay
– The distance is about 60 m or 80 m or 100 m long and is divided into one area each for lat race sprinting, for sprinting over hurdles and for sprinting around slalom poles.
– A soft ring or baton is used. Each participant has to start with a forward roll on the tumble mat.
– The “ Formula one” is a team event in which each team member has to complete the full course. Four to six teams can complete at the same time on one course.Step 4 :
Activity
Dividing the class in groups of four.
Each group is a team
Determining the number of teams to go at a time
Take them to the starting point of your designed formula one course.
Telling them start competing as records are taken.Scoring
The ranking is evaluated according to the time: the winning team being the one with the best time.
The next teams are ranked according to their fi nishing time.
Assistants
For each of the area (hurdles, slalom) at least two assistant are needed to set up the equipment properly.
A part from the team attendants , two additional assistants are needed to serve as exchange zone judges.
One person also needs to be the starter.
Finally, there is need to have as many timekeepers as the number of teams. Timekeepers are also responsible for recording the scores on the event cards.Relaxation
Stand with arms spread sideways and breath in deeply and out.
Final Discussion
How do you feel after performing the exercise?
How do you overcome obstacles in life?
Why is problem solving skill important in our life?
Assessment
Set obstacles to observe how fast learners run through obstacles.LESSON 6: LADDER RUNNING (SPEED LADDER)
Lesson objective
By the end of the lesson, the learners should be able to improve their running speed.Lesson competence:
By the end of the lesson the learners should be able to sprint.
Teaching methods:
Explanation
Demonstration
Observation
Practical
Group/pair work
DiscoveryTeaching and learning Materials:
Whistle
Cones
Ladder
StopwatchLesson development:
Step 1 :
Guiding the learners to perform their warm-up exercise. This will include jogging around the demarcated area. Then stretching the muscles from the neck to ankle or ankle to neck. Finally, strengthening their muscles by jumping over short objects.Step 2 :
Letting the learners brainstorm on what they know about ladder running. After that guide them to identify and tell them what is involved in ladder running. These include:
– Quick reaction on signals.
– Stepping in all the gaps of the ladder to and from the cone.
– Applying high speed to use the least time possible.
– Ladder running is about speed training especially for sprinters.Step 3 :
Leting the ladder and cones as required.
You may have various stations if you have enough equipment. This will allow maximum participation.
Procedure
Between two marker cones at a distance of 19 m apart, a coordination ladder is placed on the floor/ ground at equal distance between the cones. At the start, the learner stands in a standing position (standing start) He/she stands with the tips of his/her toe at the starting line level with the first cone.
After a starting signal/command, the learner runs to the ladder. He/she steps /runs through the ladder as quickly as possible and runs to the second cone. After having touched the cone with his/ her hand, the learner turns quickly and runs back through the ladder to the first cone. The distance between the wedges of the ladder is 100 cm (1m).If the learner leaves out an area of the ladder or jumps over it, the distance is extended by 2 m. This
is done by the assistant at the appropriate next cone. One assistant is positioned at each cone. In
this way the learner is penalised by having to run a longer distance if the task is not done properly.
If two mistakes are made, the distance is extended by 4m and so on.Scoring
The best trial is scored out of four.
Assistant
For the efficient organisation of this event, two assistants are required. They have the following duties:
To start the event
To control and regulate the event
To keep time.
To record the scores on the event card.Step 4 :
Telling the learner perform ladder running as explained in the procedure.
If the class is big, try to get enough equipment.
This will help the learner to perform in small groups allowing maximum participation.Activity 4.6.1
Setting up a speed ladder and observe how the learners demonstrate a relatively increased speed in sprinting than before.Relaxation
Instruct learners to raise up their knees slowly and lower down.
Final discussion
What challenges do you face while running through speed ladder?
State any other challenge in your life that requires you to solve with a lot of concentration, planning and speed.
Assessment
Observe how fast the learners run to from through the ladder to the first cone.LESSON 7 “8” ENDURANCE RACE EXERCISE
Lesson objective
By the end of the lesson, the learners should be able to run middle and long distance without getting exhausted.Teaching methods:
Explanation
Demonstration
Observation
Practical
Group/pair work
Discovery
Direct instructionTeaching and learning materials:
Whistle
Flag poles/cones
Lesson Development:
Step 1 :
Guiding the learners to perform warm up exercises. Let them to and from the marked distance.
Then stretching the muscles systematically and finally perform the strengthening exercise such as push ups squats and sit ups.Step 2 :
Leting the learners to brainstorm on what they know about “8” endurance race: secondly, guide
them to have the brief description of “8” endurance.Brief description
“8” Endurance race is an eight minute race using a demarcated-course. The course at this level can be 300 m.
Step 3 :
Set the course with flag poles /cones as required.
Step 4 :
Taking the learners to the course you have already marked prior to the lesson.Procedure
Each team has to run a round a course 300 m from a given starting point. Each team member tries to run around the course as often as possible in 8 minutes. The start signal is set for all teams at the same time(by blowing a whistle) each member of the team starts with one card ball, piece of paper, cork or similar). He/she has to take it back to his/her team after each completion of a round on the course. Before starting again , he/she takes a new card or similar and so on. After 7 minutes , the last minute is announced by the completion of the run is indicated by a final signal.Scoring
After having finished the course, all participants hand in the collected cards to the assistant. The assistant counts them for scoring. Only completed rounds are counted. Those which are not completed are ignored.Assistant
For efficient organisation of the event at least two assistants per team are required. They are responsible for:
Designating the starting line.
Collecting and counting the cards.
Recording the scores on the event card.In addition, a starter is required for timekeeping and giving other signal 9 last minute and final signal).
Step 4 :
Letting the learners perform the “8” Endurance” race as explained in the procedure.Activity 4.7.1
Using the demarcated area of 300 m, set the learners to perform the “8” endurance” Race. Observe how the learners demonstrate a relatively increased endurance in the middle and long distanceRelaxation
Instruct learners to perform leg and abdominal stretch.Assessment
Observe how long it would take a learners while perfoming an endurance race.Final discussion
What difficulty do you experience while performing “8” endurance race?
How do you manage your time in your everyday life?
Why is time management important in our daily life?LESSON 8: EXERCISES OF THROWING
Lesson objective
By the end of the lesson the learners should be able to throw heavy objects in a short distance using one armTeaching Methods:
Explanation
Demonstration
Observation
Practical
Group/pair work
Discovery
Direct instructionTeaching and learning Materials:
Medicine balls
Physio balls
Whistle
First aid box
Fibre ball
Stopwatch
Resource person
Tennis ballsLesson Development: Step 1 :
Guiding the learners to perform warm up exercise. Let one of them be the leader. They should
stretch systematically. Thus from neck to ankle or vice versa. They should end up with strengthening
exercises such as press-ups.Step 2 :
Letting the learners define the term throwing.
Secondly, they brainstorm on what they know about throwing.
Telling the part of the body used for throwing.
Suggesting the aims of throwing.
Giving the advantages and disadvantages of throwing.Step 3 :
Guiding the learners to perform rotational throw. Brief description; The learners throw at various targets with a rotational motion.
Procedure:
Dividing the whole area between two stands ( or between soccer goal posts) into 3 equal zones.
The left zone, centre zone and right zone.
Being in a lateral standing position 5 m in front of the centre zone.
Throwing a ball (or similar object) side arm, with arm fully extended.
Throwing at the net or soccer goal.
Throwing in a way resembling a discus throw or the side way swing of a tennis racket.
Each participant gets two trials.
Try to throw the object through the zone that best matches with your throwing arm.
For example left handed thrower tries to get the object through the left zone.Scoring
If a right handed participant throws the object through the right zone, 3 points are scored.
Throwing through the centre zone, 2 points are scored.
Throwing through the left zone, 1 point is scored.
If the edge of an area is hit, the higher score is gained.
For the left handed throwers, points are scored in the reverse sequence.
If a thrower misses the target area (besides above, below) or has overstepped the foul lie he/ she has one extra throw to try to score points.
The better of the two trials of each team member contributes to the team total.Assistants
Two assistants per team are required for this event. They have the following duties :
To control and regulate the procedure.
To carry back the throwing equipment to the final line.
To score and to record the sources on the event card.Step 4 :
Dividing the class into various teams
Letting the learners perform the throwing activity as explained in the procedure
Letting the assistants do their work and finally declare the winnersRelaxation
Swing arms up and down, left and right as away of relaxing.
Assessment
Setting individual learners to perform the rotational throw.
Observe how the learner demonstrates his/her throwing ability.Final Discussion
Guiding the learners to hold a discussion about throwing to serve as a feedback for the lesson.
What techniques can you use to throw heavy objects using one arm?LESSON 9 EXERCISES OF USING BASIC ATHLETIC EQUIPMENT
Lesson objective:
By the end of the lesson the learners should be able to use various basic athletics equipment while
running, jumping and throwing.Teaching methods:
Explanation
Demonstration
Observation
Practical
Group/pair work
Discovery
Direct instructionTeaching and learning materials:
Whistle
Javelin
Sandpit
mats
Stop watches
Huddle
Discus
High jump
Crossbar
Measuring tapeLesson development:
In this lesson, learners are going to carry out various athletics exercises using simple athletics equipments .
Step 1 :
Guiding the learners to perform warm up exercise. One learner should lead them. Let them start by jogging around the demarcated area. Followed by stretching muscles systematically thus from neck to ankle or the other way round. Finally, strengthening the muscles with exercises such as push ups, jumping over the ball, squats and so on.
Step 2 :
Guiding the learners to mention the basic equipment used in athletics they know. These may
include Batons, Hurdles, shot put, Discus, javelin, crossbar , high jump stands and so on.Step 3 :
Guiding the learners to identify and name some of the exercise they can perform with basic athletics equipment.
– Hurdles race
– Sprint relay “ Bend Formula”
– Short Run Up Triple Jump
– Short run up long jump
– Beginner high jump
– Junior Javelin throw
– Junior Discus throw(a) “Bend formula” sprint relay
Brief description: This is a relay sprinting event with curved corners.
Procedure
Two lanes are necessary for each team, one with change over zone and the other without.
All the team members are gathered before the 10 m change over area.
The first participant starts running the distance towards the first pole.
Then turns around it before running in a straight line.
Then turns around the second flag pole to run back towards the team.
When he/she enters the change over area, he/she hands over the relay baton to the team mate.
He/she runs the same distance until he/she hands over the baton to the third team member and so on.
The receiving runner starts running the distance in the change over area.
The stop watch for each team is active when the first participant parts the starting line.
It is stopped when the last member crosses the finishing line (entry of change area over) once he/she complete the distance.Scoring
The ranking is evaluated according to the finishing time of the winning team. The next teams are ranked according to their time order.Assistants
For efficient organisation, one assistant per team is required. This person has the following duties:
To control the regular course of the event.
To keep the time.
To score and to record the scores on the event card.(b) Hurdles Race
Brief Description: This is the sprinting over hurdles at regular intervals
Procedure :
This is a tam event in which each participant runs individually.
He/she stands ready before the four lines to start when the starting signal is given.
He/she completes the distance to cross the finishing line as fast as possible and is given as an individual result.
Two participants run are the same time over two parallel distance on the one starting signal.
The distances marked out with 4 hurdles at 6.5 m interval.
The four line and the first hurdle are at 10 m apart.
Last hurdle and the finishing line are at 10.5 apart.Scoring
The ranking is based on the sum of the results achieved by the whole team.
The winning team is the one with the best time.
The next teams are ranked according to their finishing time.(c) Junior Javelin Throw
Brief description: one armed throws for distance/precision with an appropriate javelin.
Procedure
The throw is carried out from a 5 m run - up area.
The participant throws the javelin as far as possible at least 30 m in line with markers.
The performance will be directly recorded from the marking on the ground or from a measuring tape unrolled on the ground.
Each individual result for each of the three trials is recorded.Scoring
Each team member’s best result is recorded and added to the other result of the team.
The total performance of the team is then scored.
Assistants
One assistant is required for the event and he/she is in charge of :
Controlling the regular course of the event
Scoring and recording the scores on the event card.(d) Junior Discus Throw
Brief description; Rotating throw for distance and precision using an appropriate discus.Procedure
From a 3 m run up area, the participant throw with a rotating movement a flat object which is easy to handle.
The throwing object has to land inside a demarcated area at most 10 m wide.
The participant achieves a throw at furthest distance possible.
This is as far as 30 m on a line defined with markers.
If the junior discus lands beyond 30 m distance, inside a 5 m wide target area a 10 m bonus is given.
The measurement is made from the nearest mark by the fall of the discus at a right angle to the measuring tape along the line of the landing area.
Each participant gets two trial both being measured and recorded.
Note Safety
Safety is critical in the discus throwing event. Therefore, only assistants are allowed to be in the throwing (landing)area.
It is strictly forbidden to throw the discus before the starting signal is given.Scoring
Each throw is measured at 90o (right angle to the throwing line.
The better of the two trials of each team members contributes to the team total.
That total is compared to other for the ranking of the event.Assistants
The event requires two assistants per team. They have the following duties :
– To control and regulate the procedure.
– To assess the distance where the discus lands (90o measurement from the throwing line)
– To carry the discus back to the throwing line.
– To score and record the scores on the event card.(e) Short run-up long Jump
Brief description : Jumping for distance.
For the older learners, a regular measuring tape can be unrolled along the sand pit to get
more precise results.Procedure
Every participant starts from the very end of the run up area.
Take a 10 m run -up (marked with a cone or cross bar)
He/she carries himself /herself with a forward impulse in a 50 cm wide area.
He/she completes a jump and lands in a designated area marked before hand in the and with hoops or cones.
Area 1 give 1 point , area 2 gives 2 points and so on.Scoring
Each team member takes part in the event.
All the results for each participate are recorded.
The best of his/her three trials is scored for the total of the team.
The sum of the individual results contributes to the team total.Assistant
For efficient organisation, one assistant per team is required. He/she has to :
Control and regulate the procedure.
Score and record the scores on the event card.(f) Short Run-up Triple jump
Brief description : Triple jumping after taking a very short line.Procedure
Each team member gets three trials.
After a run up limited to 5 m the participant completes a triple jump.
This includes : (a hop, a step, a jump and a two footed landing)
The measurements are taken from landing point (heel) that is nearest to the takeoff area.
A measuring tape is unrolled along the landing area.
Scoring
The best result of each participant is scored and recorded for the total of the team.Assistant
The best result of each participant is scored and recorded for the total of the team.
To control and regulate the procedure (hop step, jump, landing on both feet)
To take the result down.
To record the scores on the event card.General Assessment
Give the different types of jumps and observe how they perform.
Why is it important to warm up before performing an activity like running.
How is junior javelin throw different from junior discus throw?Relaxation
Make squat -up slowly.Final discussion
Describe the steps taken while performing short run- up triple jump.
What do we gain by performing short run-up triple jump?
When do you jump in your daily life?Unit summary
In the previous unit, learners have learnt about;
Jumping short obstacles
Long jump
Hurdles and shuttle relays
Formula one
Ladder running
“8” Endurance race
Exercise of throwing
Exercises of using basicsFor the next unit; tell learners to research about; athletics techniques.
UNIT 5: FOOTBALL


Key unit Competence:
By the end of this unit, students will be able to use technical skills of playing football.
Number of lessons: 4
Learning Objectives:Knowledge and understanding
Explain different basic techniques of football.
Identify the importance of playing football.
Differentiate types of football techniques and tactics.
Explain the reasons and importance of playing football in society.Skills to develop:
Learners will be able to;
Apply techniques and tactics to improve his/her performance in football.
Create individual technical tactics gestures.
Evaluate his/her performance in football.
Develop body coordination.
Describe how football can be done in a safe varied, effective and enjoyable way.Attitudes and values:
Show respect to rules and regulations during the game.
Appreciate the importance of cooperation in the team.
Fair play.
Self confidence
Enjoy playing football using techniques and tactics gestures.
Increase leadership during the game.Content
Different techniques and tactics of football.Lesson objective
By the end of the lesson, the learners should be able to kick and receive the ball using the insde
of the foot.Teaching Methods:
Introduction
Explanation
Demonstration
Observation
Practical Brainstorming
Group work
PlayingTeaching and learning Materials:
Knowledgeable persons
Relevant books
Whistles
Football
Stopwatches Cones
First aid kit
PlaygroundLesson Development:
Step 1 :
Kicking the ball is the basic shot that learners (players) must learn to be successful when striking the ball on goal. Instruct learners to first warm-up their bodies, then stretch before practising how to kick the ball.
Inviting learners to sit down quietly in a circle and greet them.
Giving learners a chance to brainstorm kicking the ball.
In about 60 seconds, explain any safety rules. For example; Never kick a one another
Explaining that we kick the ball not at other people.Activity 5.1.1
Having learners form pairs or groups of three.
Telling each group get a ball.
Instructing them to kick the ball to each other.
Make observations and provide feed back.Step 2 :
Demonstrating and explain kicking the ball.
Mentioning that there are so many ways of kicking the ball but today we shall focus on the internal pass.
Explaining that to make a good internal pass;
– You have to start one step behind the ball.
– Step forward with the non - kicking foot and put it besides the ball.
– Swing kicking leg towards the ball and hit it in the middle using the inside of the foot.
– Tell them that the inside of the foot is that part of the foot where they see an arc.
Having learners touch the inside of the foot.
Finally, kick through the ball.Activity 5.1.2
Marking the play area with cones.
Having learners stand in their own space around playing area.
Explaining and demonstrate that on signal;
– They will hold an imaginary ball.
– Put it down and move one step behind it.
– Step forward with non kicking foot, putting it besides the ball.
– Swing the kicking leg and hit the ball in the middle.
– Remind them to use the inside of the foot.
– Move around playing area to make observations and emphasize kicking basics.
Step 3:
Having learners practice receiving the ball with their internal foot.
Demonstrating how to do it.
– Put yourself in the path of the ball.
– Turn your foot side ways like a “ hockey stick”
– Relax kicking leg and gently cushion touch the ball as it arrives.
Mentioning that the ball should land one step in front of you so that it is ready to kick again.Activity 5.1.3
Letting learners make pairs.
Giving each pair an actual ball.
Instructing partners to kick and receive one ball back and forth to each other.
Encouraging continuous practice and provide feedback.Safety
Make sure that all pairs are kicking in the same direction.Variations
Have pairs pass to each other in a Zig Zag way.
Let learners work in group of 3.
Tell them to stand in a triangular way.
Challenge them to kick and receive the ball using a foot internal pass.
Note: The ball should be moving in a triangular way.
Step 4 :
Telling learners to cool down in about 3 minutes.
Asking them to help you collect all the equipment
Having them review this lesson;
– Who can tell me one thing to do to make an internal pass.
– Who can show me the arc of the foot.
– Telling them what they, did well in this lesson.
– supplement on what they have said.
Telling them change into uniforms and go back to class.Assessment criteria
Set the learners exercise the kicking of the ball by making various passes to one another.Relaxation
Let the learners jog around and then stretch their muscles.Final discussion
Guide the learners to give a feedback aout what they have learnt.LESSON 2: EXERCISES OF TRAPPING THE BALL
Lesson objective
By the end of the lesson, the learners should be able to trap the ball using the foot, chest and thighTeaching methods:
Introduction
Explanation
Self-discovery
Practical
Demonstration
Observation
Class discussionTeaching and learning materials:
Knowledgeable persons
Relevant books
Whistles
Football
Stopwatches Cones
First aid kit
PlaygroundLesson Development:
The ability to effectively trap the ball is one of the most important skill in playing football. It is an integral part of controlling the pace and fl ow of the game. It is also a key component of many other skills like dribbling, passing and shooting.
Step 1:
Having all learners warm up and stretch.
Having all learners sit down quietly in a circle and you greet them.Activity 5.2.1
Give them a chance to look at the pictures below.
Asking them questions about the pictures. For example;
– Telling me what they see in the pictures above.
Encouraging them to put up their hands if they have something to say.Step 2:
Introducing the term” trapping the ball”
Explaining that it means stopping the ball from moving to a certain place.
Mentioning that we can trap the ball using:
– The foot
– The chest
– The thighActivity 5.2.2
Telling learners pair up and give each pair a ball.
They should stand facing each other.
Explaining and demonstrating how one will throw the ball to the other to trap (stop)
The other will also do the same.
Encouraging them to try trapping the ball using the foot, the chest and the high.
Move around the play area and make observation.Safety
Ensuring that all pairs stand in the same way.
Telling learners to throw the ball gently to a void injuries.Step 3:
Explaining and demonstrate trapping of the foot.
Mentioning that there are 4 types of traps in football. They include;Foot trap
The players simply steps on top of the ball or uses any other part on the foot to stop it.
Explaining that the foot trap is mainly used to stop balls that are moving on the ground.
Ask who can tell any other parts of the foot which can be used to trap the ball.Chest trap
The player puts his/her chest in the path of the ball to stop it.
Asking who can tell me any other parts of the foot which can be used to trap the ball.
Explaining that the foot trap is mainly used to stop high balls.Thigh trap
The player uses his/her thigh to stop the ball.
It is used to stop know - to - waist high ball.
Emphasize that to make a trap correctly, one should;
– Accurate judge where the ball is likely to go.
– Put him/her self in the path of the ball.
– Decide to either use the foot, chest or thigh to stop the ball.
– Finally, relax the part that was being used to make the ball stop and drop down.Suggested answers
Inside of the foot
Outside of the foot
The instep.Step 4:
Having learners practise trapping.Activity 5.2.3
Let learners pair up and stand facing each other.
Explain and demonstrate that one will roll the ball down towards the other to foot trap.
The other will also do the same.
Remind them not to throw the ball but rather roll it down.
Encourage continuous practice.
Move around the playing area to make observation and provide feed back.Safety
All pairs should be playing in the same direction.Activity 5.2.4
Marking a starting line next to a partner and put cones on it.
Having learners line up in pairs of five behind a cone.
Explaining and demonstrate the on signal;
– The 1st player will throw the ball to the partner.
– As it bounces back, they should decide to either chest trap or thigh trap it.
– The partner traps the ball with the chest, then throws it back to the partner.
– The partner does the same.
Making observation and provide feedback emphasizing trapping basics.
Encouraging continuous practice.
Step 5:
Giving learners some free play to cool down.
Making it clear that they will only play tapping the ball in their own way.
Encouraging them to make a variety of football traps.
Observing and make corrections where need be.Step 6:
Calling learners to stand in a circle
To review this lesson ask them questions.
1. Who can explain the foot trap? Chest trap? Thigh trap?
2. What should be done to trap the ball correctly?
Asking them to help you collect all the equipment you were using in the field.
They may change and go back to class.
Assessment criteria
Teacher throws/rolls/kicks the ball to learner and the learner traps it with the appropriate part of the
body according to the height of the ball.Relaxation
Let the learners walk around the demarked area and then stretch their muscles.Final discussion
Guide the learners to discuss about the importance of trapping the ball during the game situation.
What body parts can be used to trap the ball?
How does trapping the ball help the player?LESSON 3: EXERCISES OF DRIBBLING AND HEADING THE BALL
Lesson objective
By the end of the lesson, the learners should be able to dribble and head the ball perfectly.Teaching methods:
Introduction
Explanation
Demonstration
Self-discovery
Observation
Group workTeaching and learning Materials:
Knowledgeable persons
Relevant books
Whistles
Football
Stopwatches Cones
First aid kit
PlaygroundLesson Development:
Step 1 :
Inviting learners to sit down in circle and greet them.
Introduce the day’s topic of how to dribble and head the ball.
Telling them to brainstorm the day’s topics as they answer these questions.
– What does it mean to dribble the ball?
– What does it mean to head the ball?Activity 5.3.1
As a warm up session,
Giving learners balls to explore dribbling and heading according to their own understanding
Guide them to stretch their muscles systematically from neck to ankle..Step 2 :
Calling learners to come back and sit down in a circle.
Explaining and demonstrate to them that dribbling means to run with the ball at your feet in a certain direction.
It is usually done by one person to move the ball past defenders.
Mentioning that there are 4 key points to dribbling the ball properly;
– Keep the ball close to your feet.
– Keep the head looking up to see where you are going.
– Slightly bend the knees to get more balance.
– Keep arms out to the side to protect the ball.
Telling the learners that we can dribble the ball using;
– Inside of the foot where they simply tap the ball using that part along the arc on your foot.
You may have them touch it. Mention that the aim here is to keep the ball between the feet.
– Outside of the foot where we tap the ball using the opposite side of arc on the foot. Mention
that the aim is to change direction of the ball.
Step 3:
Telling learners to practice dribbling the ball.Activity 5.3.2
Have learners explore dribbling through following their leader following their....
Picking a leader
Telling him/her to dribble any where on the field.
Encouraging him/her to make lots of turns, changing speed, using both inside and outside of the foot.
Mentioning that all other players have to follow and do what ever the leader does.
Switching leaders often
You may start off as the leader and learners follow
You may group them if balls are not enough
Activity 5.3.3
Having learners form groups of 5.
Marking a start line and end line.
Letting each group stand in one line behind a cone on starting line.
Explaining and demonstrate that on signal.
The first players on line will dribble the ball in front of their body (inside of the foot) while running up to the end line.
As soon as teammate reaches the end line, the next player does the same.
The first group to have all players at the end line wins.
Making observations and providing feedback emphasizing dribbling basic.Step 5:
Calling learners back to the circle.
Introducing heading the ball.
Mentioning that it simply means knocking the ball using the forehead.Activity 5.3.4
Giving learners a chance to try heading according to their own understanding.Safety
Telling them to keep their eyes open and below the ball as they knock it.Step 6:
Explaining and demonstrating basics to heading the ball.
Explaining that these are the main basics to heading.
1. Heading the ball using the forehead.
2. Keeping eyes looking at the ball.
3. Closing the mouth when heading.
Activity 5.3.6
Instructing learners to make pairs or groups of 3.
Giving a ball to each pair or group.
Demonstrating that one will throw the ball for the other to head.
The other will also do the same.Step 7:
Giving learners time to;
Freely head the ball at their own pace.
Moving around playing area to make observation and provide feed back.
Signal and ask learners to help you collect all equipment you were using.
Calling them back into the circle
To review this lesson.Assessment criteria
Set the learners a simple game situation in which they refl ect their dribbling and heading techniquesRelaxation
Let the learners jog and stretch their muscles.Final discussion
Who can tell me at least one thing to do when heading the ball?
Which part of the body is used to head the ball?
What does it mean to head the ball?
Give three purposes of heading the ball?LESSON 4: PLAYING IN TEAMS
Lesson objective
By the end of the lesson, the learners should be able to play football using technical skills.Teaching methods:
Introduction
Explanation
Demonstration
Self discovery
Practical Observation
Group workTeaching and learning Materials:
Knowledgeable persons
Relevant books
Whistles
Football
Stopwatches Cones
First aid kit
PlaygroundLesson Development:
Introduction
Guide the learners to perform warm up exercises. Let them stretch and stretchen their muscles systematically.
Guide the learners to discuss the importance of one involving in team games,Lesson body
Step 1:
Divide the class into teams of 11 players each. Let two tems play at the same for about 10 minutes.Step 2:
Officiate the games as you encourage the learners to apply the technical skills. The teams that are not playing at that particular time should be cheering those playing.Additional notes
Explaining to learners the following technical terms.
Goal
This is where the ball crosses the goal line into the net.
Note that it is not a goal if the ball stops on the line or bounces off the goalpost.Throw in ; If you kick the ball and it crosses the side line, then the other team gets to throw
the ball back in the field.Corner kick
If you kick the ball and it crosses the side line then the other team gets to throw the ball back in the field.
Goal kick
If the other team’s member kicks the ball and it crosses your team’s goal line, your team gets a goal kick (Goal keeper kicks the ball into play)General Assessment
Give the ways of kicking the ball.
Identify the different parts of the body that can be used to trap the ball.
How would you prepare your self before heading the ball?
Mention the basic rules following while playing football.
Let the learners have a game situation to put in practice what they have discussed.Relaxation
Guide the learners to walk around and then stretch their muscles.Final discussion
Give the importance of playing football in your community.
Why is it important to follow rules why playing football
Give the importance of observing (abiding) with school rules and regulations.Unit summary
In this unit you have taught about kicking , trapping, dribbling and heading the ball in different ways.
You have also covered the rules that apply in a football game and the importance of playing the game.
In the text unit you will teach about; Individual techniques and tactics to attack in volley ball game.Glossary
Internal foot : Inside of the foot
Non kicking : Not kicking
Pass : To kick the ball towards some one
Cushion : To gently receive the ball
Trap : To stop
Dribble : To move the ball by making several short kicks
Head : To hit the ball with the headUNIT 6: VOLLEYBALL


Key unit competence:
By the end of this unit, learners will be able to execute technical skills in game situations emphasizing
rules and the regulations of playing volleyball.Learning Objectives:
Knowledge and understanding
Interpret regulations of volleyball.
Discuss the importance of playing volleyball.
Recognise the different techniques and tactics of volleyball
Recall importance of volleyball for his/her body and daily life.
State reasons for playing volleyball in the society.
Demonstrate the rules of volleyballSkills to develop:
Learners will be able to;
Apply techniques and tactics to improve his performance in volleyball.
Create individual, techniques tactics and gestures in game situation.
Evaluate his/her performance in volleyball.
Develop body coordination.
Describe how volleyball can be done in a safe, varied, effective and enjoyable way.Attitudes and values:
Show respect of rules and regulations during the game.
Appreciate the importance of co operation in team.
Fair play
Self confidence
Enjoy in playing volleyball using technique tactics and gesturesContent
Techniques and tactics in volleyball.
Rules and technical gestures in volleyballLESSON 1: BASIC TECHNIQUES OF SERVING IN VOLLEYBALL
Lesson objective
By the end of the lesson, the learners should be able to perform serving technique in volleyball.Teaching methods:
Demonstration
Role play
Explanation
Discussion
Guided discoveryTeaching and learning materials:
Playground
Whistle
Room
Stopwatch
Balls
Sticks
Cones
Narrowband
Chasuble
Net postLesson development:
Instructing learners to warm-up their muscles, then stretch.
Guiding learners that the server steps behind the line and has freedom to serve from wherever he or she pleases as long as the foot does not touch or cross the end line.
Following the under hand serve, instruct the serve to hold the ball in the hand opposite from the hitting hand.
Holding the ball below the waist and above the knee.
The server getting in good position by bending the knees.
The server hitting the ball with force using his or her hand so that it cross to the opponents side of the court over the net.
Final discussion
In which hand side should the right handed player hold the ball?
Let the learners serve the ball at least fi ve times in small groups of 10.Assessment
Mention any four basic techniques of playing volleyballRelaxation
Let them walk around and then stretch their muscles.LESSON 2 EXERCISES OF INDIVIDUAL TECHNIQUES AND TACTICS IN ATTACK
Lesson objective
By the end of the lesson, the learners should be able to use various individual techniques and tactics during a game of volleyball.Teaching Methods:
Explanation
Guided discovery
Demonstration
Instruction
PracticeTeaching and learning Materials:
Playground
Nets
Stopwatch
ChasubLesson development:
Step 1 :
Instructing learners to warm-up their muscles and stretch.
Telling the learners about the individual techniques and tactics in attack.
Individual technique and tactics are skills that are performed to improve on the quality of the game by an individual (one player).
The smash (spike) is an individual attacking weapon in the volleyball game.
Emphasize to the learners during spiking performance, a player is expected to do the following.
– Jump as high as possible into the air near the net.
– Hit the ball strongly down into the opponent’s court.
Tell the learners that for that matter, the player is required to be;
– A fast runner (athleticism)
– Have good timing
– Have good thinking
– Do a lot of practiceStep 2 :
Teaching points for spiking
Demonstrating to the learners on the following;
Stand 3-5 steps away from the net.
Move towards the net.
Accelerate to the take off position.
Put both feet shoulder width apart.
Flex the knees.
Swing the arms behind.
Take off from both feet with vigor.
Rock over heels.
Swing the arms forwards and upwards as strongly as possible.
Extend the hip, knee and ankle joint vigorously.
Flex the hitting arm at the elbow with the elbow pointing forwards.
Arch the back.
Move the trunk towards the ball.
Keep the arm at ear and move it upwards and forwards.
Keep the fingers together and wrist loose.
Contact the ball with an open hand but sharp. Rotate the elbow outwards.
Land on the ball of the feet.
Avoid touching the net.
Activity 6.1
Players stand in a file facing the net. One by one makes a s-step approach and jump to spike an imaginary ball at position 2-3 and 4.This is done repeatedly to the count of 15 repetitions.Step 3 :
Explain to the learners that setting is a volleyball pass played near and above the net.
Emphasize to the learners that setting is performed to make it easy for the spiker to hit the ball.
Let learners be reminded that setting is an attacking technique.
Describe to the learners the type of set that is best for a P.5 learner.High set as the most used type of set in volleyball
The ball is played to the wing position.
The height of the ball is between 3-4.5 m above the net.
High set is good for beginners as it gives enough time for oneOverhead set
This set could be high, short or parallel. The difference in this set is that the setter sends the ball to the front and the areas behind him.
This makes it harder to foretell (predict) the attacker’s action and as a result it is difficult t block the ball.Jump set
The setter must have jumped in air as high as possible before going beyond the net.Final Discussion
Ask the learners to describe the individual techniques in attack during the volleyball game.
What is the importance of good techniques in playing volleyball?
How are tactics important during the volleyball match?Assessment
Mention two individual techniques needed in playing volleyball.
Let the learners have volleyball matches of 5 minutes each to apply the individual techniques.Relaxation
Let the learners makes star jumps and then stretch their muscles.Final discussion
Identify the types of set used in volleyball.
According to your level, identify the best set to use while playing.
Why is selfishness not good in lifeLESSON 3: EXERCISES OF TECHNIQUES IN DEFENSE
Lesson objective
By the end of the lesson, the learners should be able to apply various techniques in defence during
a game situation.Teaching methods:
Explanation
Guided discovery
Demonstration
InstructionTeaching and learning materials:
Volleyball
Volleyball court
Whistle
StopwatchLesson development:
Step 1 :
Ask learners to perform some warm up exercises. These could be jogging, stretching,jumping, boxing in the air, running around the court, etc.
Step 2 :
Explain to the learners that blocking is a technique performed in volleyball to prevent an attack.
Emphasize to the learners that defensive tactics are to block an attack by the opponents.Teaching points on block
Stand close to the net
Watch the ball as it leaves the setter’s hands.
Predict where the ball will be attached from.
Identify the opponent attacker
Observe the opponent’s approach.
Determine his point of attack and angle through which he will most likely attack.
Places arms at shoulder level.Jump from the spot
Jump after the attacker has done so.
Thrust the arm into the air.
Place the arms opposite the attacking arms of the opponent.
Let hand lead over the net and in over the opponent’s court.
Contact the ball over the opponent’s court.
Make the contact at the peak of the jump.
Withdraw the hands from the opponent’s court.
Avoid touching the net.
Final discussion
What defence mechanism do you use in your life to overcome trouble?
Why is blocking necessary during a volleyball match?
How is blocking done in he game of volleyball?General assessment
Mention the steps and tactics to defend a team against an attack in a volleyball game.
Let the learners have volleyball matches of fi ve minutes each to apply the techniques in defence.Relaxation
Let the learners walk around and then stretch their muscles.LESSON 4: BASIC RULES IN VOLLEYBALL
Lesson objective
By the end of the lesson, the learners should be able to apply the rules of volleyball in a game
situation.Teaching methods:
Discription
Explanation
Discussion
Guided discoveryTeaching and learning materials:
Volleyball
Volleyball court
Whistle
StopwatchLesson Development:
Describe to the learners the following voleyball rules and train them on how to apply them in game
situation.
Serve
The server must serve from behind the end line until after contact.
Ball may be served underhand or overhand.
Serve must be returned by a pass or set only. Serve cannot be blocked or attacked.
Scoring
Rally scoring, there will be a point awarded on every won rally.
Offence will score on a defensive miss, out of bounds hit, or blocker touches the top of the net.
Defence will score on an offensive mis,out of bounds hit, serve into the net or hitter touches top of the net.
Rotation
Team rotates after each sideout. A sideout is when the team on serve receives a win the point
to earn the right to serve.
Players rotate in a clockwise direction.
There should be six(6) players on each side.Playing the game
The ball is hit maximum of three times per side.
Player must not hit the ball twice in succession.
Ball may be played off the net during a volley and on serve.
Ball touching any part of the boundary line is considered in.Final discussion
Ask the learners to brainstorm the rules of playing volleyball they have learnt.General assessment
1. Describing the individual techniques and tactics of attack in volleyball.
2. Mentioning the technique of volleyball that is taken to be the final touch of the team.
3. Explaining four steps that you as a volleyball player may require during exercise.
4. Giving the characteristics of attacker for a volleyball player.
5. Suggesting the four requirements to the smash player in volleyball.
6. Let the learners have volleyball matches of five minutes each in order to apply the volleyball rulesAdditional Notes
Guiding learners on how to guard against common fault in blocking during the volleyball game is very important.
i Touching the net during a takeoff and below are the reasons.
– Player taking off while too close to the net.
– Player swing arms instead of extending vertically.ii. Touching the net due to the following reasons;
– Player pushed arms across the net before enough height was reached.
– Player failed to raise his/her arms after blocking.
– Player overused his/her arms during the capping actions.iiii. Touching the net on landing
– Player took off in unbalanced position
– He/she did not control his/her landing
– He/she forgot to bring his/her hands back.Unit summary
In the previous unit, learners have learnt about;
Individual techniquesGeneral Assessment
Set the learners to perform various techniques and tactics in small teams.UNIT 7:BASKETBALL
Content map


Key unit Competence:
By the end of this unit,learners will be able to apply technical skills in games situations with increasing awareness of rules.
Learning Objectives:
Knowledge and understanding
Interpreting regulations of Basketball.
Discussing the importance of playing basketball.
Recognising different technique and tactics of basketball.
Recalling the importance of basketball for his/her body and daily life.
Stating the reasons for playing basketball in the society.
Identifying the rules of basketball.Skills to develop:
Learners will be able to;
Apply the techniques and tactics to improve his/her performance in basketball.
Create individual technical tactics and gestures in game situations.
Evaluate his/her performance in basketball.
Develop body coordination.
Describe how basketball can be done in a safe varied and effective or enjoyable way.Attitudes and values:
Show respect of rules and regulations during the game.
Appreciate the importance of cooperation in the team.
Fair play.
Self confidence
Enjoyment in play basketball using technical tactics gestures.Content
Techniques and tactics in Basketball.
Rules and technical gestures in basketball.LESSON 1: EXERCISES OF BASIC TECHNIQUES IN ATTACK
Lesson objective
By the end of the lesson, the learners should able to perform the skill of dribbling in basket ball..Teaching methods:
Demonstration
Explanation
Guided discoveryTeaching and learning materials:
Basketball court
Basketball
Cones
Whistle
Stopwatch
HoopLesson Development:
Step 1
Guide the learners to brainstom on what they know about the techniques of dribbling in basketball.
Guide them to list down those they haven’t mentioned
Guide them to perform a successful warmup. Let them jog a round and then stretch their muscles systematically.Step 2
Describe to the learners how to perform the basic simple tactics and technique of dribbling below;
Extending the dribbling hand and arm down as much as possible. This shortens the distance the ball has to move.
Keeping the elbow of the dribbling hand close in at your side.
Dribbling the ball on the side of the body away from the defender.
Keeping the palm of dribbling hand over the ball.
Step 3
Let the learners have a game situation in small groups in order to have practice of the basic
techniques of dribbling basketball.Assessment criteria
Setting learners to execute any basketball technique instructed to him/her when call upon.Relaxation
Let the learners make slow and simple movements on the court finally, let them stretch the muscles.Final discussion
How did you manage to perform dribbling technique?
What challenges did you face while performing driibbling technique?LESSON 2: EXERCISES OF USING TECHNIQUES IN ATTACK
Lesson objective
By the end of the lesson, the learners should be to apply the techniques of attack in a game
situation.Teaching methods:
Demonstration
Explanation
Observation
Practical
Group/pair work
Self discoveryTeaching and learning materials:
Relevant books
Basketball
Whistles
Stopwatches
First aid kit
Cones Sign language
Knowledgeable persons
BibsLesson Development:
Step 1
Guide the learners to brainstorm on the techniques used when attacking opponents in basketball.
They include dribbling, passing and shooting.
Guide them to perform a successful warm up. This has to systematic from simple jogging to stretching and strengthening the muscles.Step 2
Review dribbling in basketball. Guide the learners to perform basketball passes. These include
Step 3
Guide the learners to perform shooting in basketball. The technques involves;
Using shoulders as a hinge.
Extending shooting arm forward toward the hoop.
Extending (straightening) the elbow.
Releasing the ball with a snap of the wist, with the ball rolling off the fingertips.
Step 4 : Game situation
Divide the class into teams of 5.
Let two teams use half court so that four teams are playing at a go.
Let other teams cheer up
Supervise , correct and encourage the learners.
Switch after 5 minutes for the other team to play.
Continue switching until the lesson’s over.Activity 7.2.1
Having learners make one line in front of the basket.
Telling them shoot at the basket one by one.
After each trial, one should go behind the line and wait for his/her turn.
Emphasising shooting basics .
Making continuous practice.Assessment criteria
Setting the learners exercises of dribbling,passing and shooting in small groups.Relaxation
Let the learners walk to and from across the basketball court.Then they stretch the muscles.Final discussion
What basics do you follow while shooting the ball in a hoop.
Under what situation would you use bouncing pass, overhead pass, chest pass and underarm pass.
How are passes useful during the basketball match?LESSON 3: TECHNIQUES OF DEFENCE
Lesson objective
By the end of the lesson, the learners should be to apply the techniques of defence in a game situation.Teaching methods:
Introduction
Explanation
Self discovery
Brainstorming
Demonstration
Observation
Peer assessmentTeaching and learning materials:
Ball (size 5)
Knowledgeable persons
Relevant books
First aid kits
Whistles
StopwatchesLesson Development:
Step 1: Warm-up exercises
Guide the learners to the warm-up exercises.
Let them stretch and strengthen their muscles systematically.
Inviting learners to sit down quietly in a circle and greet them.
Reminding them to always stop and pay attention on every signal intruder to get clear instruction.
Briefly talk about what you are going to perform today.(Today we shall be working on tactics in defence)
In a brainstorming session, ask;
– What is the meaning of defence (The team without the ball)
– Who can tell us any tactics used in basketball defence (Man - to man, zone defence).
– Asking them to put up their hands to mention their ideas.
– Listening carefully to their responses and write them down.Activity 7.3.1
Asking learners to divide them into 2 teams.
Giving them each a basketball .
Explaining and demonstrate that on signal they will play a normal basketball game using the defensive tactics they mentioned above.
Leting them have enough time to experience defensive tactics according to their understanding.
Moving around the play area and noting down your observations.
Providing feed back, tell them what they did right.Step 2 :
Explaining and demonstrating the tactics used in defence
Mentioning that the team that is not having the ball is called defence.
They have to know where the ball is and work together to stop it.
Explaining that we are going to focus on only 2 tactics;
– Man - to - man
– Zone defence.
– Mentioning that man to man means that each player on the team is given a specific opponent to defend.
– Explaining that he/she has to follow the movement of that player and try to steal the ball away.
– Telling them that zone defensive is where a player guards a specific area at the floor. He/
she follow the movement of any offensive player who enters that area (zone)
– Offensive players mean the players in the team having the ball.Step 3 :
Demonstrating the defending techniques in slow motion and later increase speed.
Stand facing the opponent on the ball of your feet.
Position yourself between the ball and the basket(goal) Spread feet beyond shoulders- width apart.
Bend knees at 90o so that your thighs are parallel to the ground to get balance.
Stretch hands as wide as you can on both sides to block opponents’ moves.
You may also put one hand high and another low to block the opponent.
If you want to block a shot, put both hands up and try to steal the ball.Activity 7.3.2
Asking learners to stand facing you.
Telling them to mirror the actions of the leader to defend an imaginary ball.
Starting off as the leader
Performing defending techniques in steps as mentioned above in slow motion.
Ensuring learners mirror your every actionSafety
Standing in a place where all learners can clearly see you and you can see them.Progression
Gradually increase speed in performing the correct defending techniques.
Asking learners to pair up and mirror the actions of the other in each pair.
Switch learners and blow the whistles to signal the learners to make another step.
– Move around the play area and note down observation..Step 4:
Dividing learners into teams of three.
Making sure that each team has at least one person who does defending correctly.
Telling the ones who know to help the others in their groups to learn the correct technique.
Giving enough time to experience peer teaching.
Moving around visiting every group to give them guidance .
Step 5:
Have learners practise with an actual ball.Step 6:
Giving learners free play to try defending on their own without teaching pressure for about 5 minutes.
Signalling and tell them to help you collect the equipment you were using in this lesson.
Having them review the lesson by asking questions.Activity 7.3.3
Learners pair up standing behind a cone on the start line.
Explaining and demonstrating that on signal
One will play offensive (Have the ball) and the other defensive (without the ball).
Mentioning that the offensive player will try to dribble down the court and try to shoot.
The defensive player will try to guard and steal the ball or block the shot.
If the defender steals the ball, then go back to start line and switch roles.
Emphasise defending basics as you move around the play area.Safety
All pairs should be moving in the same direction.
Remembering to use size 5 ball and adjusting the goalposts (base) which learners can easily reach.
Progression
Having learners work in groups of 3, two offensive players with one defensive player.
They can pass to each other using varier passes.
Asking offensive try to rebound when the ball fails to go through the loop.
Having them make at least ten consecutive passes without the defender stealing the ball.Assessment
Let the learners have basketball matches of fi ve minutes each in order to apply the basic techniques
used in playing basketball.Relaxion
Guide the learners to perform the cool down exercises. Let them breath in and out 5 times then
stretch their muscles.Final discussion
(a) What is man to man defence?
(b) What is zonal defence?
(c) How are the above tactics useful when playing basketball?LESSON 4: BASIC RULES AND TECHNICAL GESTURES IN PLAYING BASKETBALL
By the end of the lesson, the learners should be to apply basic basketball rules in game situation.
Teaching methods:
Demonstration
Guided discovery
ExplanationTeaching and learning materials:
Basketball court
Basketball
Whistle
StopwatchLesson Development:
Step 1: Warm-up exercises
Guide the learners to brainstorm on what they know about basic rules and technical gestures followed when playing basketball.
– Add to their contribution what they have not mentioned.
– Guide them to perform a successful warm up. This may include jogging around and stretching their muscles.
Let them stretch and strengthen their muscles systematically.Step 2
Brief learners about the rules and regulations followed while playing volleyball.
Describe and demonstrate for learners the following basic rules.
– The dribbler must not touch the ball with both hands at the same time.
– An offensive player should not remain in the free throw lane for longer than three (3) seconds while his or her team is in control of the ball in the front -court.
– No moving the feet in any direction without properly dribbling.
– A team has back court past the half - court line to the front court.Final discussion
What advantages do you achieve by following rules of basketball while playing?
Why is it important to follow the rules during the basketball match?Relaxation
Let learners perform star jumps and then stretch their muscles.General Assessment
Describe the basic dribbling technique in basketball.
Identify the different types of passes in basketball.
How do you prepare yourself for shooting in basketball
Why is it important to stand facing the opponent as defence technique?Unit summary
In this unit you have taught about individual techniques and tactics in both attack and defence in a
basketball game.Glossary
Dribble : To bounce the ball
Shoot : To throw the ball through the goal
Offense : With the ball
Defence : Without the ballUNIT 8: HANDBALL
Content map


Key unit competency:
The learners will be able to perform technical skills of handball in game situations..
Learning objectives:
Knowledge and understanding
Recognise different techniques of handball.
Express the importance of playing handball.
Identify different types of handball techniques.
Label importance of handball for his/ her body in daily life.
State the reasons to improve his performance in handball.Skills
Apply techniques to improve his performance in handball.
Create their individual technique gestures while playing handball.
Evaluate his/ her performance level in handball.
Explain his/ her performance level in handball.
Explain technical and tactical gestures to use in playing handball.
Develop body coordination.Attitudes and values:
Show respect of instructions during the game.
Appreciate the importance of cooperation and communication in term.
Leadership.
Self confidence.
Enjoy in playing handball using technique gestures.LESSON 1 :BASIC TECHNIQUES OF SERVING IN VOLLEYBALL
Lesson objective
By the end of the lessons the learners should be able to perform different techniques of handball
in attack.Teaching methods:
Demonstration
Instruction
Explanation
Question and answer
PractiseLearning materials:
Playground
Ball
Whistle
Cones
Equipment
Trees
GoalpostLesson development:
Step 1 :
Let the learners brainstorm on the different techniques of handball.
Later ask one of the learners to lead other in warm up exercises lasting for 5 minutes. Exercising
in jogging jumping rolling boxing in the air.Step 2 :
Explaining to the learners that passing is one of the techniques in handball.
Telling learners that passing the ball is done by throwing.
Further guide learners to realize that through this method a ball is given out to the teammate.Activity 8.1.1
– Asks learners that of which of the two skill of playing handball is passing?
– Throwing
– ReceivingStep 3:
Tell learners that the skill of passing (throwing) is usually practised together with catching (receiving)
Demonstrate to the learners that in threes they can use the triangle formation as shown below.

Tell learners that the opponent, where A thrower B the receiver and C the opponent/ defender. Let the learners change roles so as to give chance for every player to practice the skills.
Another drill on passing
Let learners make five teams of ten. And also instruct them to make straight lines of 10 players.
Side number A│starts the drill by throwing to No.1, then Number 1 receives and throws to B.
Remind the learners that after throwing (passing) a player is free to go.
And finally the last player starts afresh after receiving it.Assessment criteria
Setting the learner to make passes in various formations.
Let the learners have handball matches of fi ve minutes each in order to apply the learnt techniques
of handball.Relaxation
Let the learners jog around the handball court and then stretch their muscles.Final discussion
Guide the learners to discuss techniques of passing the ball during the game of handball.LESSON 2: EXERCISES OF SHOOTING AND THROWING
Lesson objective
By the end of the lessons the learners should be able to throw the ball accurately and perform the
shooting techniqueTeaching methods:
Demonstration
Practice
Explanation
Guided discoveryLearning materials:
Playground
Whistle
Goalposts
balls
Cones
StopwatchLesson development:
Step 1 :
Guide the learners to brainstorm on what they know about shooting and throwing.
Explain to them that shooting and throwing.
Explain to them that shooting is another basic attacking skill in the game of handball and its major aim is to score so as to win the game.
Guide them to perform warm up exercises . This can be by jogging to and from a demarcated area and then stretching and strengthening the muscles.Step 2 :
Through guided discovery, let learners mention the different handball techniques; dribbling straight,
shoulder pass, underarm pass, bounce pass, overhead pass among others.
Further ask learners what is passing as a technique in handball.
Let learners describe passing as a technique and as passing is an act of throwing the ball to the teammate or partner.
Remind learners that passing is a skill of attacking in handball playing.
It is for that reason that a number of drills should be practised individually, in pairs and as a team.
Explaining to learners that while passing one has to be fast at making relevant decisions depending
on the situation.
Emphasizing to the learners to think about the following question.
What kind of opponent is he/she is facing.
Is it better to pass or to move into free space round him/her. Movement should be made to the right or to the left.Step 3
Demonstrate and encourage learners to practise the drills below so as to gain mastery of the passing technique in playing handball.
Emphasise to the learners that it is a good idea to practise catching (passing) skills.
The learners are given chance to build confidence as a result master the skill independently.
With individual practice, instruct the learners to have a lot of space. This approach will enable learners to avoid knocking or stepping on one another.
Note
Be sure you watch every learner and give proper feedback.
Ensure that you have enough balls for the learners
Let the learners throw a relatively low ball up and catch it from a stationary position.
Later increase the height of the ball but throwing it straight up.
After mastering stationary catch, introduce jumping. Let the learners jump high to receive the ball thrown up.
Later the learners should throw the ball ahead and move forward to catch it.Final discussion
Learners will be instructed to practise the individual pair and group on passing as a technical skill
in handball.Assessment activities
Learners will demonstrate the individual pair and group (fi le formation) passing, technical skill.Relaxation
Let the learners chase one another in pairs in a controlled area. Then they stretch their muscles.LESSON 3 :EXERCISES OF DRIBBLING AND BOUNCING
Lesson objective
By the end of the lessons the learners should be able to perform dribbling and bouncing skills in handball perfectly.Teaching methods:
Explanation
Practical
Discussion
Demonstration
Guided discoveryLearning materials:
Playground
Whistle
Stopwatch
Ball
ConesLesson Development:
Step 1 :
Guide the learners to brainstorm on what they know about dribbling and bouncing the ball in the
game of handball.
Add what they have not mentioned to their list.
Guide them to perform warm up exercise perfectly. These may include walking around, jumping
up and down and finally stretching and strengthening their muscles.Step 2 : Dribbling and bouncing
Explaining to the learners that dribbling involves a player bouncing the ball repeatedly.
Emphasising to the learners that dribbling is a skill of attack performed under the following circumstances;
– When there is one to pass the ball to.
– When the teammate is closely guarded
– When the player wants to draw the opponent(s) to himself/herself and later pass the ball to a free teammate.The teaching points:
Demonstrating to the learners the steps to follow while performing Dribbling skill.
Keep the ball to the side of the body.
Keep it slightly in front of the body.
Flex (bend) the knee to the body weight low.
Keep the head up and eyes looking straight ahead
The dribbling hand should be on top of the ball.
Step 3 : Dribbling drills
Divide the class in teams of 5
Let them have variations as they dribble in their groups.
1. Dribble and stay
Step 4: Game situation
Conduct a handball game in groups 5 Vs 5.
Switch every after 5 minutes.
Those who are not on court, cheer up.Assessment Criteria
Set exercises to the learners to perform the dribbling one at a time.Relaxation
Let learners walk around the court and fi nally stretch their muscles.Final discussion
Guide learners to discuss about dribbling and bouncing in handball.
How is dribbling helpful to the player of handball?Shooting
Explaining to learners that shooting is another basic attacking skill in the game of handball. Its major aim is scoring so as to win the game.
Emphasising to the learners that a player of handball requires the following:
Good ball handling
Be able to concentrate and accuracy.
Being in position to dodge the goalkeeper.Guiding learners that shooting has different types. And the main types include:
Jump shot
Dive shotHowever there are other minor types of shooting. They include :
Reverse shot( circle shot)
Side shot
Lob shotExplaining to the learners the basic principle that applies in all hand ball shooting skills.
A clear ball throwing direction to be established before ball release.
The player must make forward movement
Deception and taking should be done before the ball is released.
The ball is generally held behind the head with bent arm.
Non shooting hand should be kept forward to prevent opponent from taking the ball.
Wrist movement should be made.Speed, force and agility are important
Accuracy and follow through are also importantJump shot
Explaining to learners that jump shot involves the shooter jumping high and using the shoulder pass to release the ball towards the goal with the body leaning forward. Teaching players courage and how to become victorious.
From a running position, a player jumps high.
Eyes and body faces direction of the goalmouth.
The ball is held high above the head using one hand.
The body leans forward slightly and shooting is done using shoulder pass.
The ball is released at the height of the jump.
The wrist is shaped during the follow through towards the goal.Activity 8.2.1
Telling learners use free time to exercise the jump shot as he/she runs up to where he/she is going to throw.The dive shot
Explaining to the learners that Dive shot involves launching the whole body in to air while shooting the ball towards the goal.
Teaching points
Demonstrating to learners the dive shot pass.
The ball is held with the bent arm.
From a running position the body leans completely towards the goal.
Dive as you release the ball using a shoulder throw.
Follow through with a quick wrist shape.
Use hand to break the body’s forward momentum and fall.Reverse shot
Explaining to learners that this shot is used when a player is unable to perform a normal shot facing a goal.Teaching points
Demonstrating the steps to follow while performing reverse shot.
The players face opposite direction from the goalmouth, takes body to strong shooting side.
Turning and quickly pivoting to the opposite (weak) side bending the knees and releasing the ball in the sidearm action.
Bends the knee and release the ball in a sidearm action.
The body weight and momentum is directed towards the goal.Activity 8.1.3
Instruct learners to perform exercise on shooting skills without a goalkeeper.
Emphasise to learners to use jump shot which is easier for the beginnersGoalkeeper
Explaining to the learners that Goalkeeper is allowed to touch the ball with any part of his/her
body when defending inside the goal area.
Leaving the goal area without the ball and participate in the game in the play area.
Moving with the ball inside the goal area without being subject to the restrictions applying to court players.
Leaving the goal area with the ball and play it again in the play area if she /he has not managed
to control it.
Learners should exercise the different skills as listed. Stride throw while failing, free bouncing,
using legs to stop the ball, using hand to catch or deviate the ball.Assessment activities
Setting exercises and observe how learners perform technical skills of handball in game situation.Final discussion
How different is a jump shot from drive shot?LESSON 4 GOAL KEEPING
Lesson objective
By the end of the lessons the learners should be able to perform goalkeeping techniques perfectly.Teaching methods:
Explanation
Discussion
Demonstration
Description
Instruction
PracticeLearning materials:
Playground
Ball
Whistles
Cones
Equipment
Chasubles
Trees
GoalpostLesson Development:
Step 1 :
Instructing learners to form 5 groups of tens.
Letting learners to perform three minutes warm up exercise.Explaining to learners that goalkeeping is an acty of preventing the opponent from scoring. This is done through intercepting shot at the goal.
Describe and demonstrate the relevant requirement a handball player is expected to know about
goalkeeping.In order to protect the goalkeeper against harm or danger, he/ she is required to wear special
equipment like heavy pads and face mask.
A goalkeeper activities are separated from the game by the goal line.
Goalkeeping requires one who can make decisions, and determine the direction of throw.
Goalkeeping needs taking full responsibility and any action.
Goalkeeping needs full concentration and doing the best to follow the trainer’s training.
Goal requires a player who is courageous, brave, self control and self confidence.
Goalkeeping is the most important position in the handball game.
Explain to the learners that goal keeping requires both vigorous and regular exercises.
Goalkeeper once makes throw at close distance may experience painful situations.
For that reason, a goal keeper is expected to perform beyond his expectation. And in a way save.
No handball player is allowed in the goal area.
A goalkeeper is allowed to touch the ball with any part of his body while in the act of defence inside the goal area.
He is allowed to leave the goal area with out the ball and participate in the game in the playing area eave the goal area.
Move with the ball inside the goal area with out being subject to the restrictions applying to court players.
Leave the goal area with the ball and play it again in the playing area if she/he has not managed to control it.Activity 8.2.4
Guide learners to use available materials from the environment and develop materials for future exhibition to show benefit of handball to the people in society.Additional notes
Promoting mobility of people and exposers by the skilled handball players. A person who is identified as a skilled player will always get a chance to travel and in the long run tours new places. This could be in our different districts or from the international community.Handball playing promotes unity and harmony, as people from different areas meet during competition they forge unity as a result.
Handball as a game is fun and also leisure to both players and spectators.
Playing Handball gives people a chance to control obesity
Engaging in different skills in form of practice gives an opportunity to burn carols.
The fats that would block the veins are opened giving way to easy fl ow of oxygenated blood.
Oxygenated blood is the blood with oxygen.
Skilled coaches and trainers as well as players are hired to play the game on competitive basis.
Emphasise to the learners that any body can be hired as long as he/she proves to be skilled.
Therefore, handball playing creates employment opportunities to many people from the society.
Let learners be told that as handball gains more popularity, business people also become happier.
This is true because business emerged on the side of selling sports equipment.Assessment activities
Explain the roles of Goalkeeper in playing handball game.Relaxation
Let the learners walk around the handball court two times then stretch their muscles.Final Discussion
Guide the learners to discuss about the technical skills required to play handball.General Assessment
Identify different types of passes in handball.
Why is it important to keep the head-up and eyes looking straight while dribbling?
Give the steps followed while performing the jump shot and dive shot.
How important is quick decision making skill to a goalkeeper?
Let the learners have handball matches of about five minutes each applying the learnt handball skills.Unit summary
In this unit you learners have performed various techniques used in the game of handball such as;
passing, shooting, dribbling and goalkeeping among others.Glossary
Technical : Skills need to perform something
Teammate : Players on the same team
Opponent : Players on the other team
Agility : Ability to make quick reaction during an activity
Tactic : Method used to do somethingUNIT 9:TRANSMITTED DISEASES
Content map
Key unit competence: By the end of this unit, learners will be able to protect themselves against infectious diseases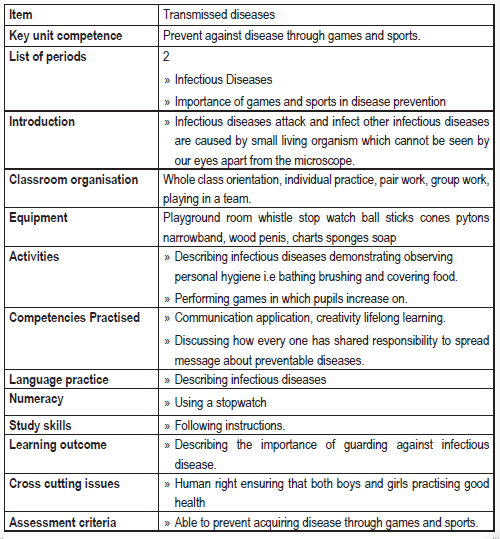
through games and sports.
Learning objectives:
Knowledge and understanding
Setting different strategies to avoid and treat the illness and diseases that can be prevented.
Recognising strategies to ensure good hygiene.
Skills to develop:
Learners will be able to;
Demonstrate the importance of looking after one another.
Demonstrate the importance of washing hands after any activity.
Explain how to be prevented against infectious diseases.
Describe the infectious diseases.
Explain the importance of game and sports in disease prevention
Attitudes and values:
Team play Creativity Self control
Fair play Inclusion Safety
Respect of game Cooperation Healthy
Instructions Self confidence
LESSON 1 INFECTIOUS DISEASE GAMES
Lesson objective
By the end of the lesson,learners should be able to protect one self against infectious disease.
Teaching methods:
Explanation
Demonstration
Observation
Group/pair work
Discovery
Direct instruction
Teaching and learning materials:
Playground Pylon Socks
Rooms Narrow band Plastic bottles
Whistles Chasuble Soap
Stopwatch Wood penes Bowl
Ball Charts Basin
Sticks Sponges
Cones Towels
Lesson development:
Step 1 :
Greeting to the learners after welcoming them to day’s lesson.
Get one of the learners and instruct her/her to lead others into warm up exercise lasting for 5
minutes.
Step 2 :
Explaining to the learners that infectious diseases are caused by germs. These germs can not
be seen by our eyes.
Emphasizing to the learners that when germs enter the body they attack its cells and tissues.
Infectious diseases grow, produce others and then spread to other healthy people.
Step 3 :
Through brainstorming guide learners to name the diseases which usually spread to children
especially whenever they come to participate in sports. Ringworm, flue, tuberculosis, measles,
chickenpox, mumps,malaria, whooping cough, leprosy, gonorrhea, pneumonia.
Using different cones written on different diseases. Telling learners to kick balls aiming at hitting the
cones. This will be an attempt to kick out diseases in the community through creating awareness.
The learners should explain the causes of the diseases and their prevention.
The learners should continuously do the same in their groups one by one changing the position.
Step 4 :
Explaining to learners that infectious disease are caused by small living organs called germs.
Let learners know that germs being too small and can only be seen by a microscope.
Asking learners why they cannot see germs with their own eyes?
Demonstrating to learners that germs which bring infectious disease are different. Through guided discovery assist learner brainstorming to mention the different germs which enter human bodies.
Step 5 :
Telling learners suggest their responsibilities towards preventable diseases participating diarrhea
diseases games; covering food to be taken later
Peeling and later washing food
Boiling water for drinking
Encouraging children to always cook food properly
Taking an active role in participating in physical activities.
Encouraging learners and others to avoid close contact with people suffering from flue and measles.
Letting learners go to the dispensary whenever they are sick in order not to spread the disease
to others. Educating people to take nutritious foods.
Washing hands with soap every after a toilet visit.
A void touching objects contaminated with the diarrhea causing germs and later touching their own nose, eyes or mouth.
Protecting themselves from sharing personal items for instance; towels and plates.
Organizing a race of awareness about preventing diseases in the community.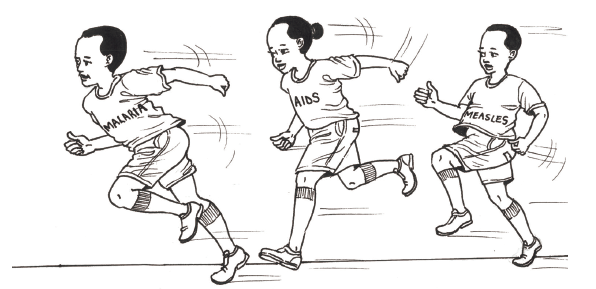
Step 6 :
Guide learners to demonstrate different ways of preventing infectious diseases.
Maintaining personal hygiene. Use proper and good hygienic practices when preparing food.
Washing and ironing clothes after sports.
Participating in communal routine cleaning like slashing the bushy area around the school.
Not mixing with people (sick people) suffering from tuberculosis.
Regular training in games to increase on body immunity.
Activity 9.1
Explaining and demonstrating sport activities that increase learner awareness on infectious
diseases and how to avoid them.
Getting throw away material like hard boxes and markers.
Cutting them into small card and like on examples of different types of germs causing disease.
Improvising by getting 6 basins. Demarcating a play area of 50 metre length and 20 metres width.
Putting cones to show play area.
Putting the equal numbers of flash cards in the basin to the opposite side of the play area (of course the width).
Then consider putting the 2 labelled basins with germ names i.e bacteria to the side of opposite width.
Select 13 learners to participate in the game at ago
Out of ten participants 5 stand behind to receive the card with names of the germs for example bacteria whooping cough.
They are expected to run to the single basing and at random pick a card with the disease name
and put it in the basin where the disease matches with the germ in the basin to the opposite side.
Ensuring that instructions are clear and blow the whistle to start them off.
As soon as the participant gets 4/3 card, let them read out the name. Point will be awarded
basing on position (ranking)1st to 5th.
Cross the standing
Explaining to the learners that they should not play in flood water. This could be after rain down pour.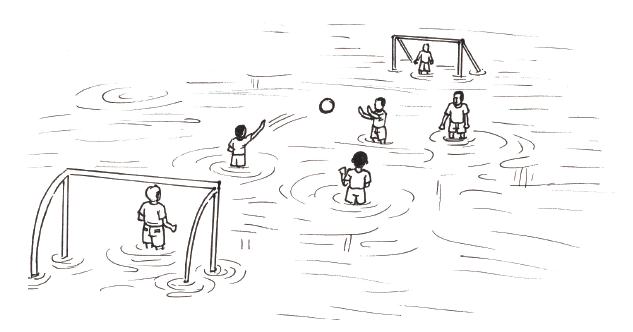
Encouraging learners to always wash their hands whenever they come in contact with flood water or touch object that has germs.
Reminding learners that is important to disinfect items that have touched flood water like clothes.
Never to expose an open wound to flood water or a used waterproof bandage at all time.
Discouraging learners not to eat food which have come into contact with flood water, even if they are packaged.
Use a towel alone, no sharing with colleagues (friend).
Assessment
Setting exercises and observing how learners describe how to prevent themselves against infectious
diseases.
Final Discussion
Guiding the learners to discuss what they have learnt about infectious diseases.
Why should we prevent ourselves from infectious diseases.
LESSON 2 IMPORTANCE OF GAMES AND SPORTS IN DISEASES PREVENTION
Lesson objective
By the end of the lesson,learners should be able to play games and sports with an aim of preventing
killer diseases.
Teaching methods:
Brainstorming Explanation
Self discovery Discussion
Teaching and learning Materials:
playground
Lesson Development:
Warm-up exercise
Guide the learners to perform warm-up exercises. They should stretch and strength them themselves systematically.
Ask learners to brainstorm the importance of games and sports in disease prevention.
Help learners to understand that participating in sports and games contribute to muscle
development, coordination, cardiovascular health and numerous (many) other benefits associated with disease prevention.
Explain to learners that games and sports can help overcome or control diseases such obesity,diabetes, cancer, hypertension, depression.
Tell learners that playing sports can help one become fit, hence achieve goal like weight loss.
Muscle development and fat reduction are benefits of playing sports.
Playing sports also contribute to mental health. It increases self esteem and prevent depression.
Sport promotes better brain health because of the fast thinking involved.
Final discussion
State the diseases suffered by people who do not participate in sports and games.
How does sports and games help you to fight diseases?
General Assessment
What are the infectious diseases?
How can you use sports and games to control diseases in your community?
Give ways of fighting infectious diseases at school and home.
Unit summary
In the previous unit, learners have learnt about;
Infectious diseases.
Selected Bibliography