Topic outline
General
- S3: Home Science SB File Uploaded 10/08/22, 16:36
- S3: Home Science TG File Uploaded 10/08/22, 16:37
UNIT1 HOME CLEANING AND HOME ARRANGEMENT
Key Unit Competence
Learners should be able to apply cleaning procedures and arrange a home.
Learning objectives• Describe types of surfaces
• Understand cleaning procedures and techniques.
• Explain the techniques for organizing a home
• Apply cleaning procedures on different surfaces.
• Practice the techniques of organizing a home
• Care for different types of surfaces
• Comply with home cleaning procedures
• Conform to the techniques of organizing a home and appreciate the result.Introductory activity
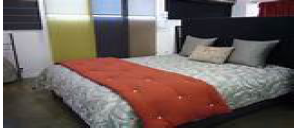
We are looking for wedding room photography. Observe the picture below:

1. Is it perfect to maintain the room for wedding event like this?
2. Why this home is kept like this?
3. Describe the situation and on your view, give some suggestions
4. What can you predict to learn in this unit?
1.1. Types of surfaces
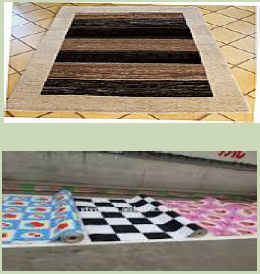
Activity 1.11. Observe the picture below:

2. Identify the type of surfaces in the picture above and describe them.
sources: https: //www.amazon in /carpet/b?ie=utf8&mode=/380463031 https://www.en.wikipedia.org/wiki/wall
https://www.ecofail.com/catedral-celiaf-insulation
The surfaces are classified into two types. These include:
Soft surfaces is a material or surface that is pleasant to touch and not rough or stiff.
Examples: A carpet, curtain, sofa, pillow, mattress, linens and clothes
Hard surfaces is a material or surface that is hard or stiff to touch.
Examples: Furniture, floor, wall and ceiling of house1.2. Home cleaning procedures
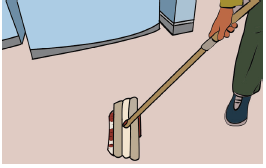
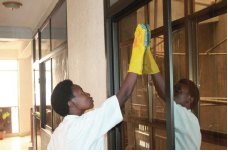
Activity 1.2: Applying cleaning procedures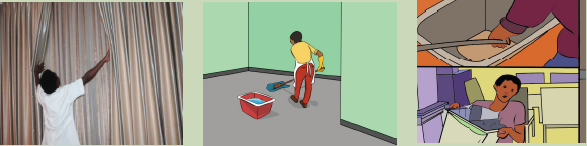
1. Discuss the ongoing activities in the picture above.
2. Explain the impartance for applying the same activities in our society.
3. Outline the guidelines to success such activity.
A home is kept attractive when furniture and fittings plus the compound are cleaned, maintained and the facilities are properly used. The home should provide a safe and healthy environment for residents and visitors. The home cleaning involves the removal of dirt (loose and fixed) from various surfaces in a home. The cleaning procedures provide both aesthetics and hygienic values.
The cleaning procedures are the processes or the ways in which cleaning is performed, to enable the effective removal of contaminants without adding unwanted substances to the home environment. These procedures include:

While home cleaning last of all you will take out the dustbin trash then wash the bag with a soap and water. Replace the bag with a new one
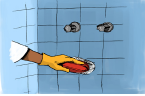
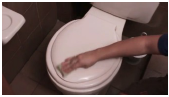
Apart for cleaning procedures above the cleaning steps of each place (bathroom, bed room, living room……) are provided in this part.a. Cleaning the bathroom
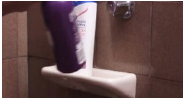
The bathroom must be kept clean for the surfaces, walls, floor, shower and toilet sparkling clean. These are steps:
Part one: Preparing to clean
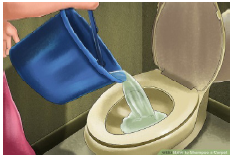
• Remove all the items that don’t belong in your bathroom • Pour some bleach or another disinfectant into
the toilet bowl
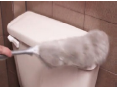
• Dust
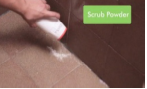
In general, when cleaning any room, start from the top down. • Apply any scrub powder to especiallydirty areas
Clean cobwebs in the corners of the bathroom, and brush other
dust and dirt directly onto the floor to sweep up later.
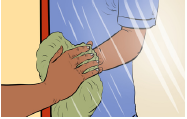
Part two: Cleaning surfaces
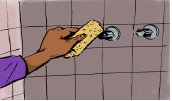
• Clean the walls, windows and/or ceiling. • Clean the shower
Spray cleaning product on the shower walls,
and the shower head and let it rest for a
couple of minutes.
• Clean the sink and counter area • Clean the mirror
Cleaning with water wipe with a towel after.
Scrub all the soap scum and toothpaste off
with a small amount of cleaner, rinsing your
sponge thoroughly as you go along
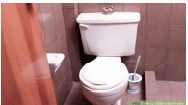
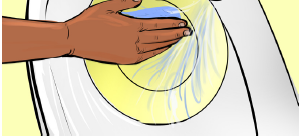
• Clean the exterior of the toilet
Wipe the outside, starting with the flush handle so as not to re-contaminate it,with a cloth soaked in disinfectant cleaner.
Thoroughly wash and rinse all exterior surfaces of the toilet bowl,
including the underside and flared base, the top and underside of the seat and lid,
and the hinges and their mounting area with a cloth and detergent or similar cleaner.
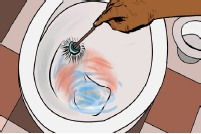
• Scrub the bowl with a toilet brush and flush
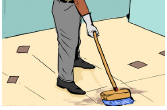 • Sweep and mop the floor
Start with the farthest point from the door. Sweep up all the dust and debris you’ve cleaned so far and let fall on the floor, then mop using hot soapy bleach waterPart three: Keeping the bathroom clean
 • Run the fan
Keeping your bathroom ventilated will discourage the growth of mildew, keeping your big cleaning sessions few and far between. Always run the fan after you get out of the shower, to dry out the bathroom and keep the moisture from clinging.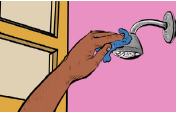
• Wipe down the shower after you use it
 • Keep it tidy
• Wash toothpaste down
Toothpaste stains and build up in the sink and even on the mirror can make a bathroom look dirtier than it needs to be.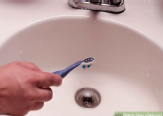
• Use the toilet brush
Even if it doesn’t look dirty, minerals in the water can stain the bowl, so it’s a good idea to brush the toilet down with a sturdy toilet brush fairly regularly.b. Cleaning of living room
As one of the most used spaces in the house, the living room can easily become cluttered and dirty. Regularly covering the basics, such as the-cluttering and vacuuming, as well as deep-cleaning every once in a while, will keep this area tidy and inviting for you and your family. There are four parts to follow while cleaning:
Part one: Airing room and drawing curtainsPart two: Cleaning
•Pick up any trash
• De-clutter your space daily
• Straighten up the sofa
• Dust surfaces
• Straighten and stack any books or magazines on the coffee table
• Reposition any floor or throw rugs that may have shifted out of place
• Clean the ceiling fan and light fixture
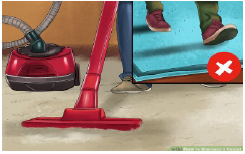
• Vacuum the drapes and blinds
• Vacuum the floor last
Part three: Deep-cleaning
• Wash the windows• Polish your furniture
• Shampoo your carpets and rugs
Part four: Organizing your space
• Consider new storage techniques
• Keep all of your remotes in place
• Invest in some “double-duty furniture
c.Cleaning the kitchen
Cleaning the kitchen may seem a daunting task. Break it up into manageable sections.
Add some great music and you’ll be coasting your way through the cleaning task. There are 7 parts to follow:
Part one: cleaning the stove top
 • Wipe the burners
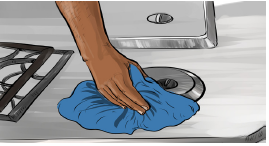 • Wipe the stove surface
Use a sponge and soap or invest in some Clorox wipes to really break down those stains.
• Remove the control knobs and wash them
Wash them in the sink using warm water and mild dish soap. Avoid using a soap that has abrasives or ammonia in it, as these components will wash away the markings on the knobs.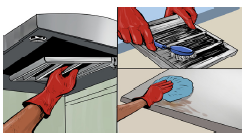
• Wipe the outside of the vent hood
Use a soapy cloth to clean the vent hood. Wash away the suds with a damp cloth, and then dry with a dry cloth. Once a month, remove the vent filters and soak them in warm, soapy water. Gently scrub to clean, then let them dry thoroughly before putting them back.
• Clean the grates of the oven
 • Remove the grates from the oven. Fill a tub or bucket with warm, soapy water and soak the grates for several hours. An effective oven cleaning mixture is ¼ cup salt, ¾ cup baking soda, and ¼ cup water. Spread the mixture all over the inside of the oven and let it remain overnight
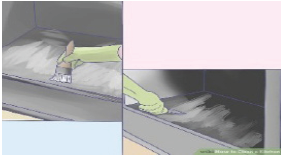 • Use a plastic spatula to remove the mixture. Wipe the oven clean with a rag. Replace the racks when they are dry.
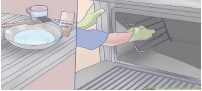
Part three: Cleaning out the fridgerator
 • Remove all food from the fridge and throw out any items that have expired or gone bad.
 • Combine two tablespoons baking soda and one-quart water. Dip a sponge in the solution, then wipe down the entire surfaces of the fridge, making sure to scrub out sticky stains. Wipe down every drawer and shelf, not just the main part of the fridge.
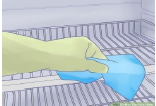
• Wipe the the solution way with a damp croth and a clean towel to dry each surface
• Leave a box baking soda in fridge
if your frigde smells bad, open a box of baking soda and leave it in the fridge. Baking soda aborsobs odors and makes your fridge smell freshCleaning the Freezer

• Clean out the freezer
First, unplug the refrigerator, remove the frozen items, throw out expired items and put the rest in a cooler while you clean. • Prepare cleaning solution , spray and wipe down the freezer
Combine 1 cup of water, 1 teaspoon dish soap, and 1 teaspoon white vinegar. Shake the solution well then spray the freezer with the mixture. Wipe down and dry freezer with paper towels. Plug the refrigerator back in and restore your frozen goods to their proper places.Part four: Cleaning cabinets and counters
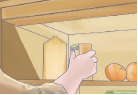
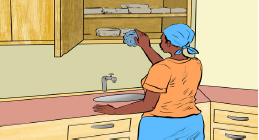 • Clean out the cabinets
Clean cabinets out, throw away expired items and wipe the cabinets with a wet, soapy rag to remove dust and crumbs.
• Clean the front of your cabinets
Grime and grease can build up on the fronts of cabinets. Wipe them down with a wet rag and dry them thoroughly to avoid any color distortion.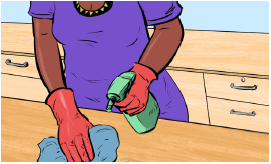 • Wipe down the counters
Use a sponge and soapy water to wipe counters down (every night after you are done cooking), wipe them and dry with a clean rag or paper towels.Importance of arranging curtains includes controlling the light, creating privacy, softening windows, providing insulation and enhancing the décor of the room. The following are steps in cleaning and organizing curtains:
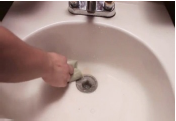
Part five: Cleaning the Sink
• Wash all yours dishes (make sure to do this before you start cleaning the sink). Either rinse dirty dishes and cups and put them in the dishwasher, or wash them in the sink.
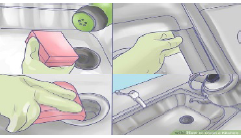
• Wipe the basin and fixtures of the sink
• To avoid mold growth or water stains, wash the basin with warm, soapy water and a sponge. Rinse along the edge of the basin, as well. Remove water stains from the fixtures.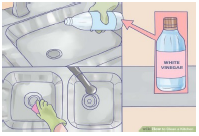
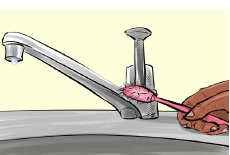 • Clean around the faucet
To clean hard to reach crannies of the faucet, use a toothbrush dipped in warm, soapy water. Buff out any water spots left behind with a dry cloth. • Keep your garbage disposal working properly
If your sink is having a hard time draining, run the garbage disposal to get rid of anything that might be lurking down there. Make frozen cubes of vinegar in an ice tray, drop them down the disposal, and then pour boiling water into it as you run the disposal. This will also sharpen your garbage disposals blades.part six: Cleaning smaller appliances
• Wipe down the microwave
Use warm, soapy water and a sponge to wipe any splatters inside your microwave. For really tough stains, use a mixture of 2 tablespoons of baking soda and 1 quart of water. Rinse with clean water, and then dry with a clean rag.

• Keep all of the appliance parts together.
Part seven: Finishing Up

• Sweep the floor with broom and dustpan
• Mop the floor when necessary
use a mop and bucket of soapy water to deep clean your floor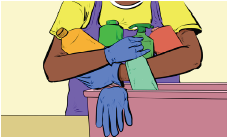 • Put everything back in its proper place
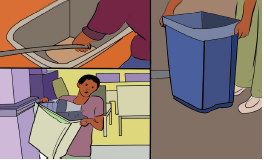
• Take out the trash
Last of all, take out the trash. You should do this last because while you are cleaning you will undoubtedly find things you will want to throw away. Wash the trash with soap and water. Replace the bag with a new one.
Cleaning home compound and surrounding
• Sweep the floor with broom and dustpan
Before you deep clean your floor, sweep any specks of dust, crumbs, and garbage that might be on the floor.1.3. Cleaning and organizing soft surfaces
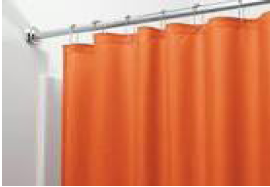
A. Curtains
Activity 1.3: Cleaning and organizing the curtains
Cleaning is one of the components of protecting the environment:a. Pick the curtains and bed then clean and organize them.b. Write down the cleaning and organizing steps of curtains.
Importance of arranging curtains includes controlling the light, creating privacy, softening windows, providing insulation and enhancing the décor of the room.
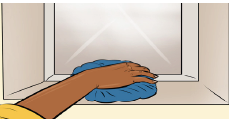
 Step 1: Thoroughly clean the window, inside and outside. The glass is known to develop a film of dirt that reduces the amount of light permitted to enter the room and can also detract from the appearance of the curtains.
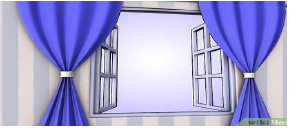
Step 2: Hang the curtains so that their level and the rod are secured. It is of the utmost importance that the rod be properly mounted, as this will ensure it can carry the weight of the drapes and avoid sagging or breaking.

Step 3: For windows in hard to reach places or in locations where privacy is not of concern, arrange the drapes in fixed position. They are often held in place using tiebacks, the rods aren’t visible, and the pleats are even

Step 4: For window that you will open and close regularly, arrange the curtains so that the rod functions well. Test the cords to make sure that the overlapping portions do not touch and that the drapery pins repositioned nicely.
 Step 5: If you need to adjust any surrounding furniture so that they aren’t touching. The curtains should break just on the floor surface, which means that the hem should touch the ground, and the fabric should bend slightly.
Step 6: Once the curtains have been installed, you can place any scarf and swag treatments. Arrange the flow of the swag to complement and hide the top of the drapes; they will often use a
Different color to add depth.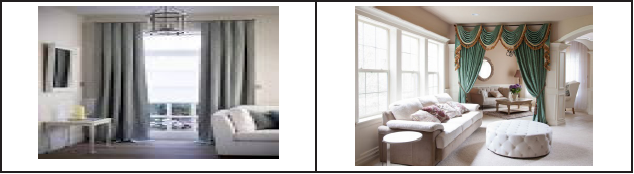
Notice: When it comes to arrange your curtains, make sure that you do so based on a list of your personal priorities for that particular window; this is because each window has different needs (a dining room will not need as much privacy as a bedroom, for example). Listing your priorities will be able to ensure that most of them are met with your arrangement.
Application Activity 1
Clean and organize the curtains of head teacher office appropriately and make up a report with the table below:

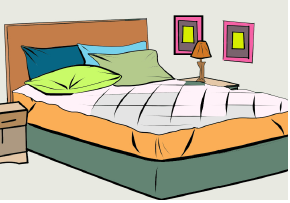
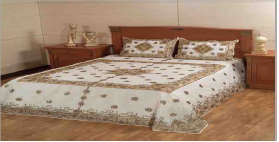
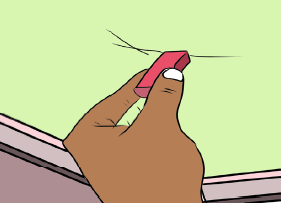
B. Making a bed
Activity 1.4
When you want to sleep peacefully, you should make your bed appropriately.Discuss and advise on bed making (What are different items that you have to put in place? Describethe procedures that should be applied?).
There are many ways to make a bed, but some are better than others. Experienced accommodation specialists have simplified the process by designing a few steps so that bed making can be simple, efficient and well done.
Different items used to make bed
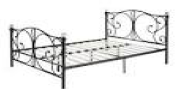

Bed base is a piece of furniture incorporating a mattress or other soft surface for sleeping or resting on.

Mattress is a fabric case filled with soft or springy material used for sleeping on.
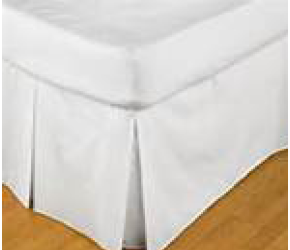
Night frill is a strip of gathered or pleated material sewn by one side only on to a garment or piece of material as a decorative edging or ornament.
Mattress protector: It is a hard linen that protects mattress to avoid soil.
 Bed sheets: It is sheet is a large rectangular piece of cotton or other fabric, used on a bed to cover the mattress or as a layer beneath blankets.
Blanket: It is a large piece of woolen material used as a covering for warmth, as a bed.
 Duvet is a soft, thick quilt used instead of an upper sheet and blankets. ``
 Bedcover: It is a bed cloth that covers or protects a read prepared bed attractively.
 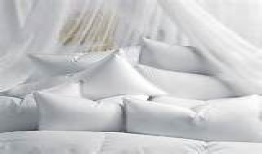 Pillows / pillow sleep is a rectangular cloth bag stuffed with feathers, wadding, or other soft materials, used to support the head when lying or sleeping
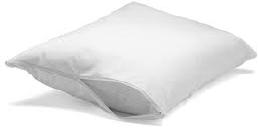
Pillow protector is a rectangular cloth bag that protects pillow.
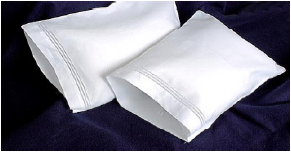
Pillow cases is a cloth cover for a pillow which can easily be removed and washed. Also, it can be defined as container designed to hold or protect pillow. The outer protective covering of a natural pillow
Decorative cautions: A care taken to avoid danger or mistakes of pillow
Bed throw
 Under sheet: a bed sheet that lies underneath something else.
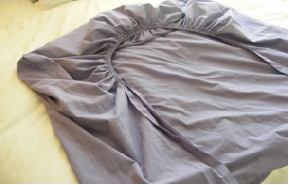
Bottom sheet: a bed sheet used to cover a mattress. E.g. sheet that one typically lies on.
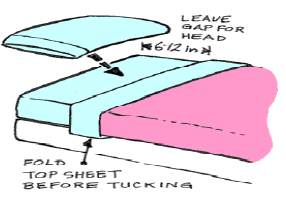
These are the steps to make a bed:
Step 1: Pull the bed away from the wall or use the pedal to lift up the bed.
Step 2: Remove all bed coverings such as the bedspread, the pillows and the blanket or duvet and place them on a chair, desk or couch nearby.
Step 3: Remove all dirty pieces of linen such as sheets and pillow cases and put them in the laundry bag.
Step 4: Also remove all towels from the bathroom and place them in the laundry bagStep 5: Stand at the foot of the bed, spread a clean bottom sheet across the mattress and tuck-in the bottom edge and make hospital corners
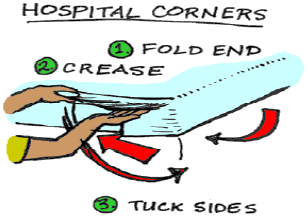
Step 6: Place the top sheet face down on the bed and tuck-in the edges in the same way as the bottom sheet.
Step 7: Leave a length of about 30 cm or one foot of extra sheet and fold the extra material over the blanket.
Step 8: Tuck both sheet and blanket under the mattress and make hospital corners
Step 9: Put clean pillow cases on the pillowsStep 10: Put the bedspread back in place and place the pillows on the bed and put the bed back in its place
Note: Don’t forget
• Make sure the under sheet is clean before you make the bed
• Make sure the sheets are clean before you make the bed
• Make sure the bedspread and blanket are clean before you make the bed
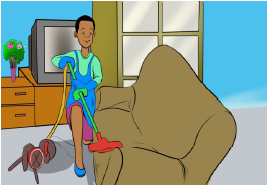
C. Sofa
Activity 1.5
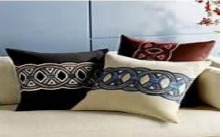
1. Observe the following pictures:
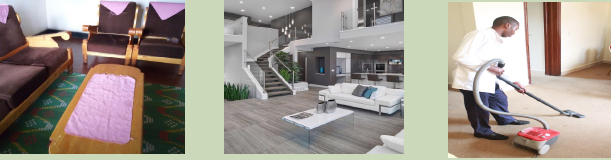
2. In a house locate where are soft surfaces used on above pictures
3. Identify soft surfaces from the picture above and make a comment on their usage.
A sofa is a long, comfortable seat with a back and usually with arms, which one or more people can sit on. It is made in a variety of materials, from cotton fabric to leather. Many of these materials are difficult to clean with normal household cleansers,
which often leave spots or marks behind.Important is to locate the fabric tag on the sofa to determine what material it is made of. Most sofa manufacturers use letter codes to indicate how to clean the furniture:
An “S” indicates that it needs to be dry cleaned or cleaned with a water-free detergent,
• “WS” means that it can be cleaned with a water-based cleaner or dry cleaned,
• “X” indicates that it should be cleaned only by vacuuming or hiring a professional to dry clean it,
• “O” indicates that it is organic material made from natural fibers and should be washed in cold water.The following is image showing a kind of sofas:

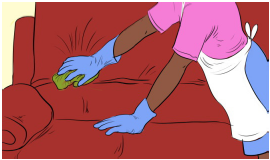
Sofa cleaning procedures
There are 7steps to follow as indicated below:
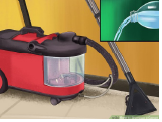
Step 1: Pre-vacuum
All sofa surfaces are vacuumed with a wet & dry vacuum cleaner using a crack tool and sofa nozzle as appropriate. Working deep into creases, crevices and folds all loose dirt dust and fluff are removed.
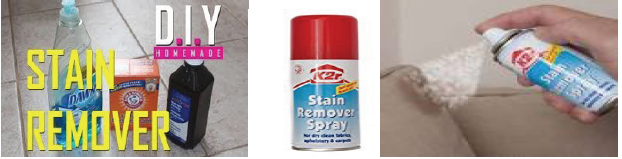
Step 2: Stain removal
All marks on the sofa are tested with spot cleaner to see if spillages are spots or Stains. Stains are pre-treated with a colloid stain removing agent; to minimize the amount of moisture available for absorption by the filling. For several minutes to work on loosening the stains prior to being absorbed with clean white cloths. The remaining Total Elim is vacuumed out to ensure complete stain removal. Room windows are opened to aid air movement, which speeds drying times.
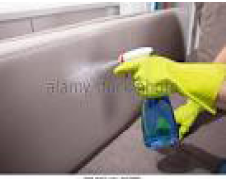
Step 3: Cleaning solution
A broad-based ionized cleaning solution is applied with a Tri-jet fogger. Fogging ensures that cleaning solutions are applied in correct concentrations to the fabric surface without wetting.
The padding or stuffing in the sofa. The container chair and the sofa bed are clouded separately. 2-5 minutes is allowed for the cleaning action to occur.

Step 4: Extractions cleaning
A sofa mitten is immersed for 2 minutes in an opposite polarity hot solution milked as dry as possible and then the fabric is wiped with a vigorous action to remove the dirt from the fibers. Magnetic attraction attracts the dirt onto the pad leaving the sofa clean. Appendages are rinsed, and the cleaning action repeated as necessary. A separate bucket of plain water is used when cleaning dirty or nicotine fabrics.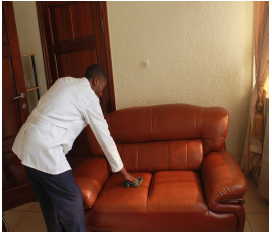

 Step 5: Secondary extractions
All sofas are then vacuumed with the wet & dry vacuum cleaner, with as many passes as necessary to remove the moisture absorbed by the cover material and filling during cleaning.
 Step 6: CleaningAppropriate fibers are prepared with the sofa cleaning tools.
Step 7: Deodorize and sanitize
 A dual sanitizer and deodorizer are fogged for approx. 5 seconds across the cleaned sofa to kill any residual bacteria that might breed in the damp sofa. It also imparts a pleasant slow release smell.
A dual sanitizer and deodorizer are fogged for approx. 5 seconds across the cleaned sofa to kill any residual bacteria that might breed in the damp sofa. It also imparts a pleasant slow release smell.
Carpet cleaning
Activity 1.6
1. Observe the pictures below

2. Describe the surfaces shown in pictures above.
3. Are these surfaces made up of our local material?
A carpet is a textile floor covering typically consisting of an upper layer of pile attached to a backing. The pile was traditionally made from wool, but since the 20th century, synthetic fibers such as polypropylene, nylon or polyester were often used, as these fibers are less expensive than wool.
These are carpet cleaning steps:
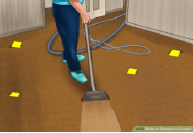
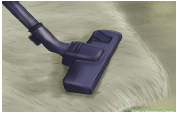
Vacuuming Process
Step 1: Pre-Inspection
Visit the carpet to identify carpet history and construction, soiling conditions and potential permanent stains.Step 2: Furniture Moving
Breakable items should be removed from all furniture before moving. Sofas, chairs and tables will be carefully moved. Furniture legs will be protected with disposable blocks and tabs. Larger pieces, such as beds and dressers are left in place. Heavy dressers can be moved if drawers are empty or removed.Step 3: Pre-vacuum
Dry soil is removed by a thorough vacuuming. Removing dry soil is one of the most important steps in the cleaning process.Step 4: Pre-spray
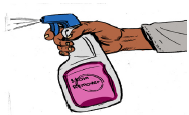
A preconditioning agent is applied to break down traffic area soil and other spots for a more thorough cleaning.Step 5: Pre-Spot
Difficult spots are pre-treated with special cleaning solutions to increase the chance of removal.Step 6: Pre-Groom
The carpet should be pre-groomed with a carpet groomer or rotary cleaning machine (depending on soil level) to further loosen traffic area soil.Step 7: Extract and Rinse
once the soil has been loosened, the state-of-the-art truck-mounted hot water extraction cleaning process will thoroughly flush the carpet pile. Pressure and heat are regulated to prevent the carpet from being over-wet.Step 8: Neutralizer
Every carpet that cleaned is pH balanced so that there is no sticky residue left behind. According to the carpet manufacturers, this is one of the most important steps to ensure that your carpet is left soft and fresh.
Step 9: Post Spot TreatmentIf any spots are not removed during the cleaning process, specialty spotting techniques are employed.
Step 10: Post Groom
the carpet is groomed with a professional groomer so that the pile of a carpet is standing tall after living it. Post grooming helps the carpet pile dry faster and in the right position.Step 11: Speed Dry
High velocity air movers are placed on the carpet immediately after cleaning to promote faster drying.Step 12: Post Cleaning Inspection
finishing the task check the carpet to point out the cleaning results and make sure that you are completely thrilled with the job.Shampooing process
There are four Parts to follow while shampooing a carpet.
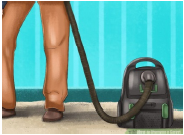
Part 1. Cleaning the home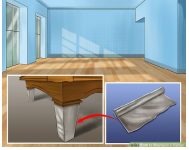 1. Move all the furniture
 Anytime you shampoo your carpets, move all the furniture completely out of the room.
 2. Vacuum the room thoroughly.
Vacuuming the room will remove larger dirt, hair, and dust balls, leaving the carpet ready for shampoo. Go in straight lines up and down the room and then do an-other set that crisscrosses the first set. Note: As you vacuum, look for stains that need pre-treatment before shampooing
 3. Treat specific stains
 With a basic carpet stain remover, spray any stains and let the cleaner work as directed. Note: Some stains may require something besides stain remover.
Part 2: Filling the Shampooer
 1. Make sure you know how the machine works
Read the instructions for machine use.
 2. Fill the machine with the directed amount of water
 Pay attention to the max fill line and do not add more water than it says.
 3. Add the carpet soap.
 Choose a soap that is designed to work with the shampooer that you have because not every soap will work with every machine. Pour only the amount of soap that is directed.
Part 3: Running the Shampooer
 1. Start in a corner and make strips
 Choose a corner of the room to start in, getting the shampooer as close to the walls as possible.

2. Pull the machine slowly
Shampooers must shoot soapy water down into the carpet and immediately suck it back up. Be patient and pull the shampooer at a rate of one step per second, give or take. It may feel like you are going too slow and that it is taking too long, but the slower you go, the deeper the machine can clean your carpet.
 3. Pay attention to the motor sound.
 Most shampooers have a float valve in the dirty water tank to warn you once the tank is full. The motor will distinctly change sounds when the float valve engages. Stop immediately when the tank is full, or you could damage the machine. Empty the dirty water and refill the clean water multiple times before you are finished shampooing the room.
 4. Empty dirty water into the toilet or outside
Part 4: Finishing the Job
 1. Run the shampooer a second time withcold water and no soap
The emphasis is on cold water because hot water will activate the soap that remains which could cause it to suds up again.
 2. Allow the carpet to dry completely before putting furniture back in the room
It can take six or more hours for the carpet to fully dry.
 3. Rinse and empty both tanks of the machine after each use
Rinse the dirty water tank out thoroughly so that no grime remains in it. Emptying the tanks all the way keeps mildew from growing and keeps the machine in top working order. Note: If the tank has a cap of any kind, leave it off for a day or two to allow the excess water to completely evaporate.
Application activity 2
At your school, there is a meeting about enhancement of environmental protection, the visitors are coming from Kenya and they know that Rwanda is a clean country, you are invited to prepare the living room where those visitors will stay, prepare that room in order to attract those visitors especially by cleaning and organizing sofa and carpet accordingly.
1.4. Cleaning hard surfaces
A. CeilingActivity 1.7
1. observing the picture below
2. Find out the activity that is being done and its importance.
3. List the types of ceiling that you have seen in different buildings? Come up in the table below

The ceiling is an overhead interior surface that covers the upper limits of a room and the inside surface of room which you can see when you look above you.
• Common types of ceiling
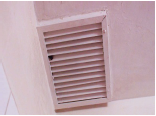
1. Dropped ceiling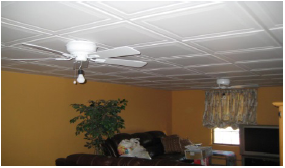


source:https://www google.com/search/q= dropped+ceiling&source=
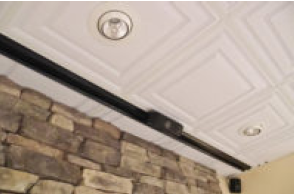
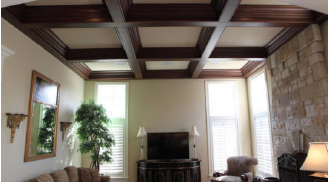
2. Coffered ceiling
Is ceiling divided into a grid of recessed square or octagonal panels, also called “lacunar ceiling”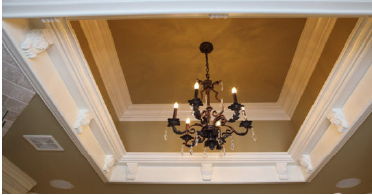


source:https//www.google.com/search?q=coffered+ceiling&source=
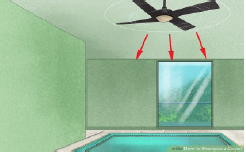
3. Cathedral ceiling
Cathedral ceiling is defined by symmetry with equal steeply sloping sides, meeting at ridge in the middle of a room and normally mirroring the pitch of the roof structure. It is any tall ceiling area like those in a church.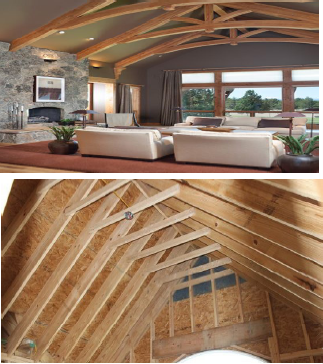

source:https//www.ecofoil.com/cathedral-ceiling-insulation
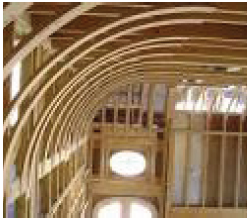
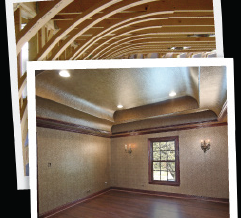
4. Cove ceiling
It is a ceiling that has the visual appearance of the point where the ceiling meets the wall improved by the addition of coving. It can also refer to an arched-dome ceiling, like in a mosque. A cove ceiling uses a curved plaster transition between wall and ceiling; it is named for cove molding, a molding with a concave curve.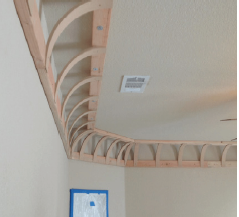
source:https://www google.com/search/q= cover+ceiling&source
Role of ceiling
It is important that ceilings are resistant to heat since it is subject to frequent heat from long period of sunlight during the day. Ceilings that acts as a floor at the same time needs to be stable, tough and can hold heavy loads that can damage or cause accident at /in the house. In all types of the multi houses, ceiling/floors can be anti-fire or with sound isolation.
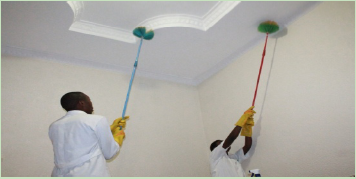
Cleaning procedures for ceiling
Ceilings are one of the parts of your home that you always see but rarely clean. The nature of ceilings makes them somewhat difficult to clean. Unfortunately, ceilings do get dirty and are rather unappealing when they are covered with dust or other stains.
There are three main steps to follow while cleaning a ceiling namely removing debris, wiping down your ceiling, and knowing how to clean your ceilings by cleaning specific stains.
• Ceiling cleaning procedures by removing debris

1. Vacuum the ceiling
Simply take the vacuum and gently run it along the surface of the ceiling.
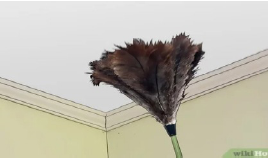
4. Use a duster
Take your duster and dust back-and-forth across the entire surface of the ceiling. Make sure to get as much dust and debris off the ceiling as you can.
 5. Wipe dirty areas with a dry microfiber cloth
When certain parts of the ceiling are exceptional dirty, use a dry microfiber cloth to wipe them. Take the cloth and gently pat or wipe the area.
Note: Avoid applying too much pressure so as not rub dirt or dust into the ceiling. Get a new cloth once the one you are using is dirty.
Ceiling cleaning procedures by wiping down the ceiling
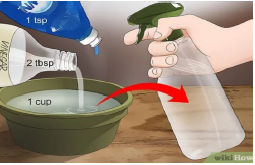 1. Create a cleaning mixture
 While a variety of cleaning solutions will help clean the ceiling, create a specific solution that won’t damage paint, tiles, trim, and other surfaces:
source:https://www google.com/search/q= crete+ceiling+mixture&source
• Mix 1 cup of warm water, 1 teaspoon of non-abrasive dish liquid (like Dawn). And 2 tablespoons of white vinegar.
• Pour the mixture into a spray bottle and shake the spray bottle vigorously.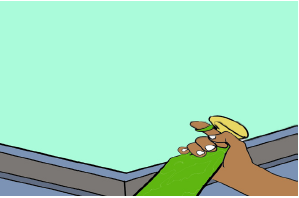 2. Spray the ceiling
Take the spray bottle and spritz down the ceiling.Note: Make sure to get somewhat complete coverage as you’ll be able to notice splotch marks on the ceiling. Avoid soaking the surface of the ceiling; if the solution starts to drip down, you’ve probably sprayed too much.
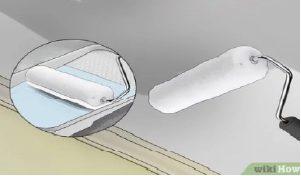 3. Use a paint roller to roll over your ceiling
Find a large paint roller, dampen it with water, and roll all over the ceiling. Do so in a systematic way so that you get complete coverage of the ceiling.
• For a textured ceiling, try a dabbing motion instead of a wiping motion.
• Make sure you remove all the vinegar and detergent solution that you sprayed on the ceiling.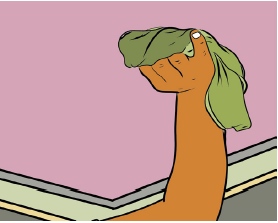 4. Pat the ceiling dry
After use of roller on the ceiling, take a clean cloth and gently pat the ceiling dry.
5. Use an eraser to remove pencil marks
Note: Use a large eraser so you can more easily remove large stains.
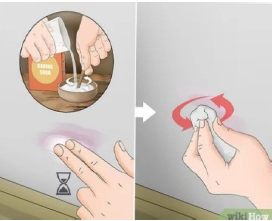 6. Try soda to remove stains Create a paste as follow: Combine 2 tablespoons of baking soda with 2 tablespoons of water and mix thoroughly. Spread it over stains on the ceiling, after few minutes wipe that paste in a circular motion.Files: 2