How to Video-record a Lesson with a Tablet Device or Smartphone
What to prepare?
- Tablet or Smartphone x 2 or 3 (one device can be used if multiple devices are not available)
- Tripod x 2
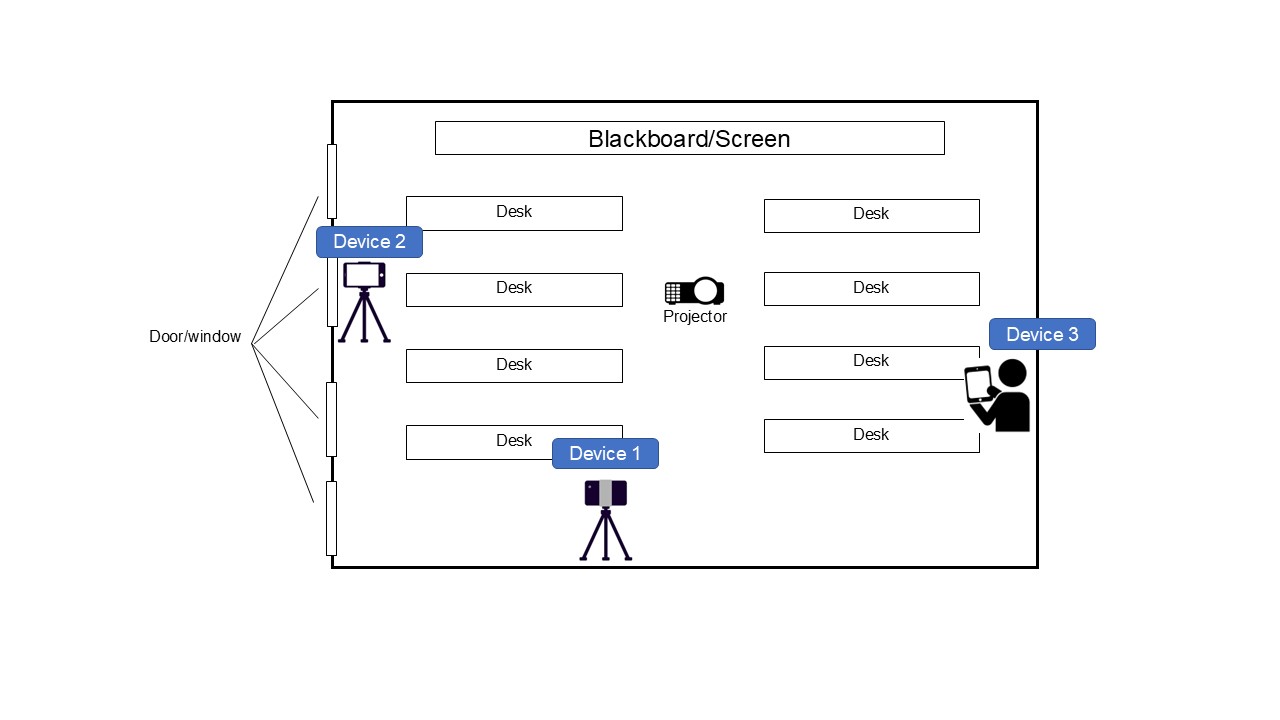
Where to put devices on tripods?
- Smooth and stable footage will make it easier to review and analyze the lesson later.

Device 1
- Set up the device on a tripod at the centre of the rear of the classroom, slightly closer to the windows, and raise the tripod to the highest possible position.
- Adjust the angle of view to capture the entire classroom. Ensure that the top edge of the video overlaps the top edge of the blackboard.
- Optimize lighting conditions to ensure the video is well-lit and visually clear. Avoid backlighting or harsh shadows that may obscure facial expressions or important details.
- Set up the tablet on a tripod at a location slightly forward from the middle of the window side, facing backwards to capture the whole scene of the students.
- Use the device as a hand-held device to record the scene of group activities, etc.
Points to Consider During Recording
- As it is difficult to record the activities of all students, focus on a student who the teacher wants to carefully look at or on a particular group.
- Avoid unnecessary movements or zooming during recording. Although you may feel like recording multiple students or groups, it is important to keep the device stationary for a certain amount of time and carefully record the activities of a particular students or group.
- Start recording two to three minutes before the lesson starts.
Last modified: Tuesday, 20 August 2024, 12:07 PM
