General
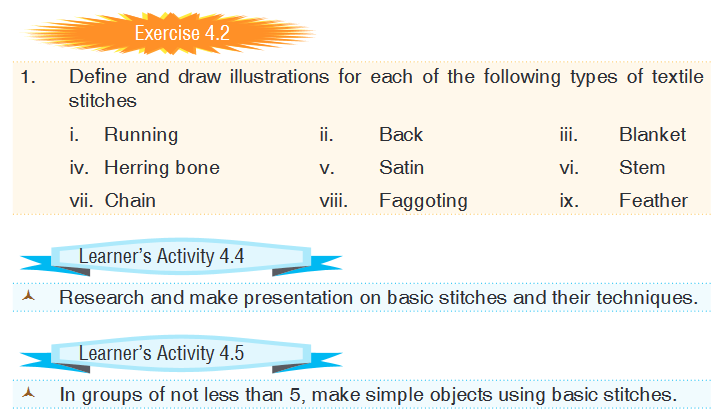
- Home Science S1 File Uploaded 24/01/22, 11:54
Unit 4: SEWING MATERIAL, TOOLS AND EQUIPMENT FOR BASIC STITCHES
Key Unit Competency:
Learners should be able to identify basic sewing materials, tools, equipment and sew basic stitches
INTRODUCTION
A good knowledge of sewing materials, tools and equipment will help in using well appropriated tools for quality products on top of rendering the garment making process simpler. The type of sewing equipment, best tools usage in construction of various parts of the garment, uses of each sewing item and distinguishing between various sewing items is importantly vital.
SEWING MATERIAL, TOOLS AND EQUIPMENT


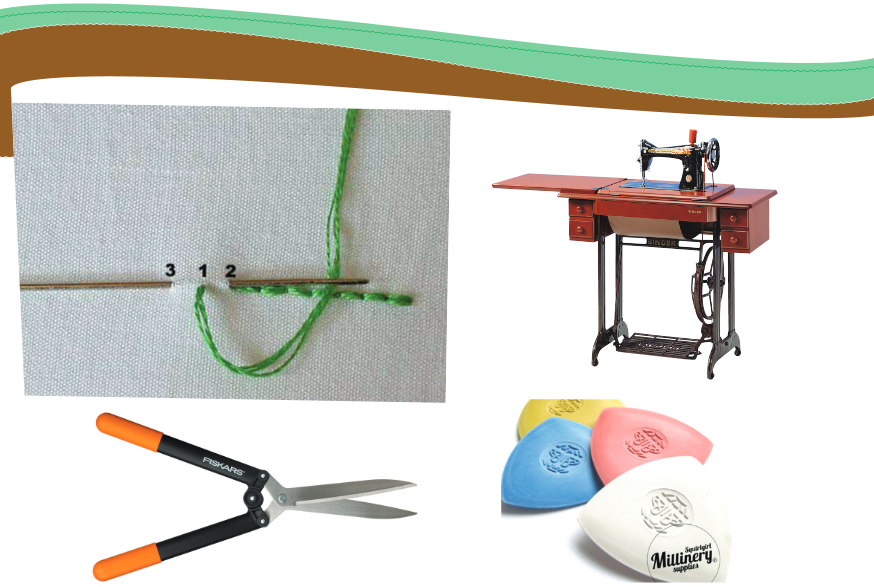
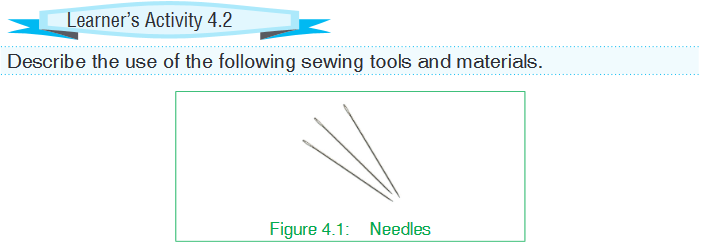
Needle
There are a variety of needles. Needles come in various lengths and the shafts have different diameters and the points are different as well as the eye sizes. Some needles have double eyes / self-threading needles.Others have very large eyes used to put together sweaters, some are curved used to sew cushions some are slender and long used to sew beads and so on.Needles go hand in hand with a needle threader, which helps in threading needles since needle eyes are very small.
Scissors and shears
Scissors are for cutting fabric. They come in different sizes what is important to note is their sharpness or have good sharp points because it is those points that are used to cut. When using such tools you have to choose those that make you feel comfortable because they are used a lot.
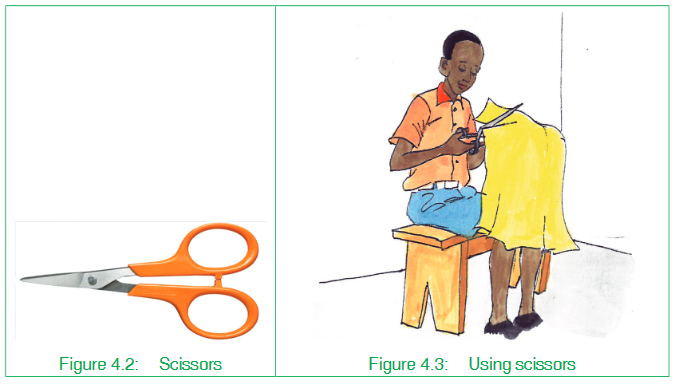

Most work carried out by such tools is on straight edges but in case of lessening the fraying a fabric is going to do, pinking shears are used. They have a bent handle and a blade that cuts zigzag.
Tape measure
A tape measure or measuring tape is a ribbon of cloth, plastic or metal with linear measure makings. Very important tool. It comes in 150 cm and 300 cm length. It’s better to shop for one that is marked at opposite ends. Tapes come in a variety of colours, fibre glass is good but it’s better to get a material that is not going to stretch. To use a tape measure, hold it and place it on the dimension of the measurement you wish to take.

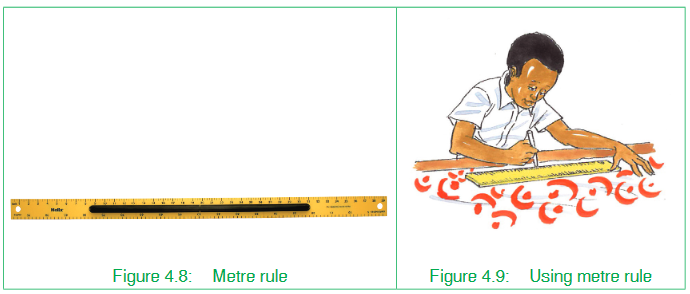
Metre rule
Is a tool to measure distance up to three feet.
A sewing gauge, 6 inches long and divided into different measuring formats, inches and metric with a slider for holding per-measured in formats at a particular measurement and keep repeating it without focusing at a measurement. It can be used to measure a long distance makings along edges,
Tracing wheel
Tracing wheels: These come in two styles, one with a serrated edge for use on most fabrics and a smooth edge for delicate fabrics. Tracing wheels are used with dressmaker’s tracing paper to transfer construction markings from the pattern to the garment pieces.

Sewing machine used when stitching fabric and other materials together with threads. A sewing machine is designed for one person to sew individual items while using a single stitch type.

Thimble- made of either plastic or metal material which is used to protect the finger from being pricked by the needle when sewing. A fitted thimble will help you sew comfortably especially when you are not used in sewing with a thimble on your finger.

Sewing Box- serves as a utility box. Sewing tools like pins, thread, thimbles, and others can be kept in this box. Sewing boxes vary in style, such as the compartmentalized and non-compartmentalized box. A compartmentalized sewing box is practical because your tools can always be orderly arranged.
 L-square - It is useful in constructing perpendicular lines with divisional parts located in longer and shorter arms. L-square is used for altering patterns, squaring off fabric straiht edges and for locating grains on fabrics.
The Hip Curve is used in connecting or shaping slightly curved points. It has a measure of inches at the front and centimeters at the back part.

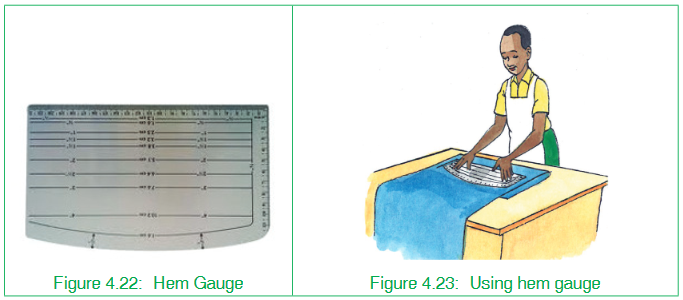
Hem Gauge- a measuring device marked with various depths and hemline folds. It is practical when hemming straight on grain edges.
Sewing gauge- a 6 inch gauge with a movable indicator convenient for measuring short lengths.


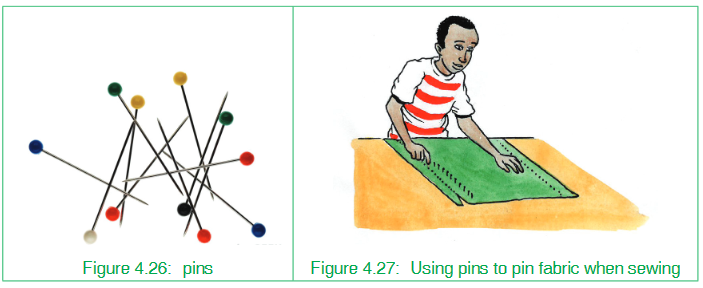
Pins
When using shears to cut the fabrics you will be pinning the fabric to the pattern paper and the pins will hold that. Pins are placed every 10 to 15 cm pins are very important so they should be chosen with care.

A thread is a highly twisted and smooth strand of fibre. It is used for sewing, embroidery and so on.
Pin Cushion- a cotton-stuffed cloth cut and sewn in many different shapes to keep the pins in place. It will help you work conveniently when placed on your waist.

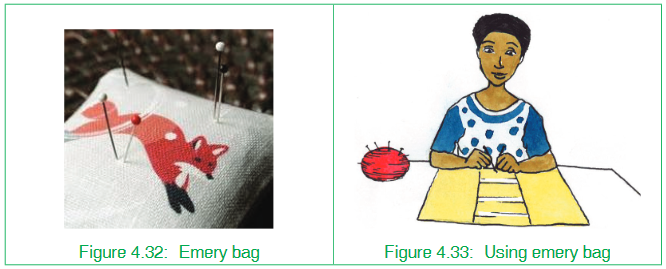
Emery Bag- used for thrusting needles and pins. It aids in sharpening the needles and removing rust
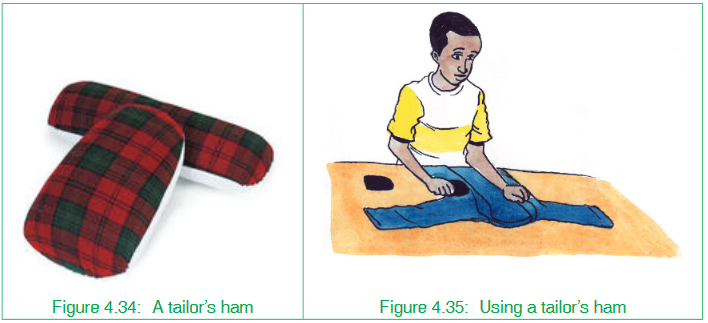
A tailor’s ham or dressmaker’s ham is a tightly stuffed pillow in the shape of a ham used as a mold when pressing curves such as sleeves or collars.

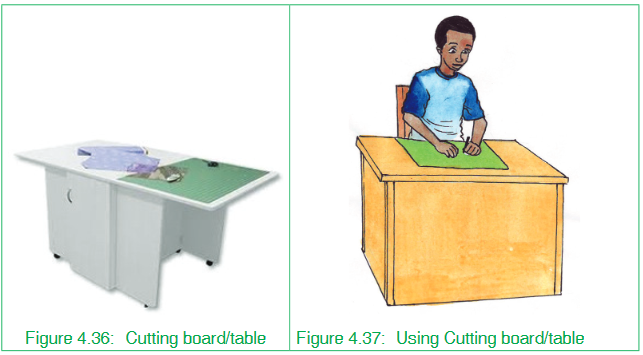
Cutting board/table- a flat board placed on a table where the fabric is laid out and cut. The fabric can be pinned securely to the cutting board/table to prevent it from slipping.
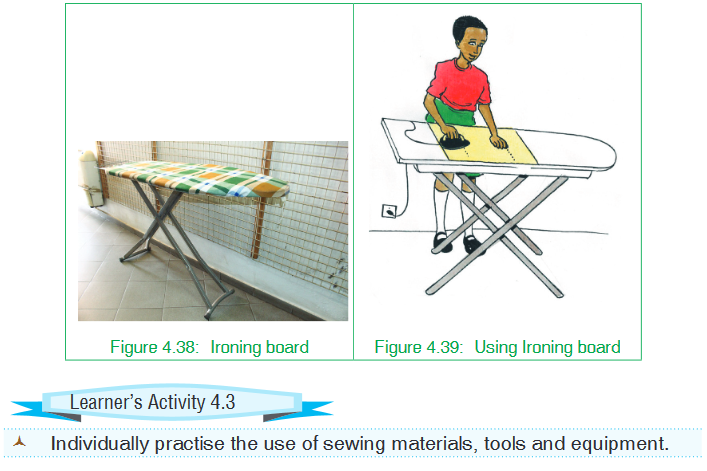
An ironing board - is a small, portable, foldable table with a heat resistant surface.
Pressing equipment:
Iron

Household iron:
This is used to iron clothes in the home. Locally household iron is designed to use charcoal as a source of heat and it is commonly used in rural areas where there is no electricity. However, there are irons which use electricity and are commonly found in urban areas where there is electricity.

A stitch is a single turn or loop of thread or yarn. Stitches are the fundamental elements of sewing, knitting, embroidery, crochet and needle lace-making, whether by hand or machine.
A variety of stitches, each with one or more names, are used for specific purposes.
Identification of basic stitches and their technique


Running Stitch
A running stitch is the go-to stitch for beginners: It is easy neat, and it gets the job done. The job, of course, is sewing two pieces of fabric to one another. You can use it to repair hems and holes as well.
To do a running stitch:
- Simply thread your needle and knot the thread,
- Run the needle through the fabric in an over-under-over-under pattern until you reach the end.
NB: Smaller, tighter stitches take longer, but are much more secure, and a large running stitch can be used to “baste” two fabrics together temporarily. It will look like a dotted line when it is complete.

The back stitch
The back stitch is another very basic stitch that can be utilitarian or decorative, and its one of the simpler types of stitches, too.
To do it, simply:
- Bring your needle up through the back of your fabric.
- Take one running stitch.
- Instead of pulling your needle up after a small space though, pull it up right before the place where your last stitch ended. This will give you a nice, consistent look.
 Blanket stitchBlanket stitches are usually found on–you guessed it–the edges of blankets. The stitch can be used to finish a raw hem by hand, or as a decorative element. It is actually one of the most popular types of embroidery stitches, where it is sometimes called a buttonhole stitch and is done with much more intricacy.To do this one:
- You knot the thread and pull your needle from the back to the front of the fabric, anchoring it.
- Push your needle through your first stitch’s entry point, making a vertical stitch and leaving a loop of thread loose.
- Bring the needle through the loop, and make a new vertical stitch, leaving a new loop of thread, but pulling the first loop of thread tight (but not too tight!). When you’re done, you should have a uniform line of threads running along the raw edge, and evenly spaced vertical stitches perpendicular to that
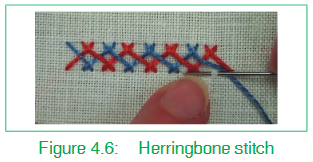
 Herringbone stitchHerringbone Stitch is also called plaited stitch or catch stitch, and is often used to work decorative borders and to accent the patchwork in quilting.Techniques involved in the herringbone stitch.
- Bring your thread to the front on the bottom line.
- With your thread below the needle, take the needle from right to left on the upper line picking up approximately 1/16 inch of fabric. You can space this stitch tightly or loosely and vary the depth as well, depending on the look you want.
- Pull the needle through. With the thread above the needle, take your needle from right to left on the bottom line, picking up 1/16 inch of fabric and spacing it the same distance away as your first stitch.
- Pull the thread through. With the thread below the needle, pick up 1/16 inch of fabric on the upper line, the same distance away as before.
- Continue working evenly-spaced stitches, alternating between the upper and lower lines.
- Now, if you want to get a little fancier, do another row of herringbone stitch in a contrasting colour in between your first row. Interlace your threads by weaving them under and over the first row. This is called double herringbone or Indian herringbone
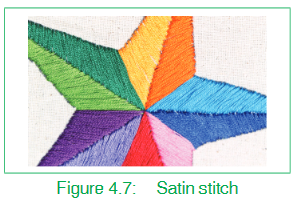
 Satin stitchIn sewing and embroidery, a satin stitch or damask stitch is a series of flat stitches that are used to completely cover a section of the background fabric. Narrow rows of satin stitch can be executed on a standard sewing machine using a zigzag stitch or a special satin stitch foot. Satin stitch has a very easy procedure.Satin stitching by hand takes precision. Practice on spare fabric first so you get a sense for how tight to stitch, and how to keep the stitches as close as possible.Satin stitch Techniques step by step
- Start with a simple square or circle before trying intricate satin stitch patterns
- Place the fabric in an embroidery hoop. Always keep the area you’re embroidering in a fabric hoop. This will keep the fabric tight and flat while you work.
- Choose a narrow area. Only include satin stitches in narrow spaces, no more than 12 inch (1.25 cm) wide. Long satin stitches will float loose and look messy.
- Stitch as close together as possible. You do not want any gaps between two stitches. Stitch as close as you can without tangling the threads, in tight parallel row
- Achieve even tension. Practice the satin stitch until you can pull the threads tight enough to lie flat, but loose enough that they don’t distort the shape of the cloth. Stitching too tightly is a common mistake. Try to use a consistent tension for each stitch, or you’ll have loose threads.
 Stem stitchStem stitch is crewel stitch. It is one of the easiest to be done .many times, people often refer to embroidery work itself as crewel work.Procedures of making a stem stitch.1. Draw a temporary stitch line with a pencil. A stitch line is through which all stitches will be running. Now, note that all the stitch points ABCD in stem stitch will fall on the stitch line figure 4.7 work this stitch from left to right. This instruction is for right handed learners
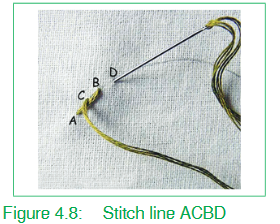 2. Bring out the thread through A and take it in through B. Take the needle backwards and bring the thread out through C figure 4.7. Make sure the point C lies over the stitch A-B in figure 4.7
 3. Take the needle in through D. Try to mark D in such a way that the point B will lie half way through C-D. Bring the needle out through B figure 4.8.You need to note that the point C lies about half way through A and B. Also note that C lies on top of the stitch A-B. So, all the subsequent stitch points will lie on top their previous stitch figure 4.9.
 So, the pattern of two stitches of the stem stitch will be as shown above figure 4.10.
 Chain stitchThis is the basic and simplest of the chain stitch family. It gives a chain like appearance or, like petals lined up one after the other.Chain stitch techniques;1. Do this stitch from top to bottom. Generally, it follows a left to right path
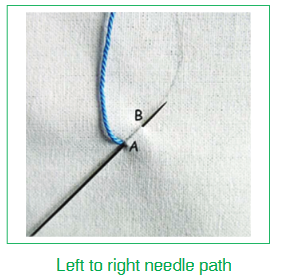 2. Bring the thread out through A. Put the needle back in A and bring it out through the point B, but don’t pull the needle out completely
 3. Now, take the thread around the needle from left to right to form a loop. Figure 4.12 and 4.13
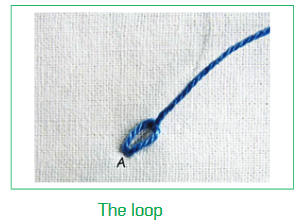 4. Pull out the needle now to tighten the loop and you will get the first part of the chain. Figure 4.4
 5. Now, put the needle in through B (now inside the loop) and bring it out on C (outside of the loop).
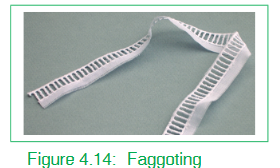
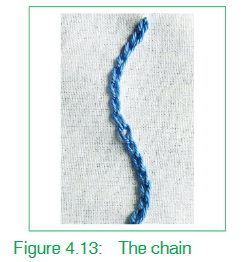 6.Continue the action by taking the thread around the back of the needle from left to right to form a loop and pull out the needle to get the next loop of the chain. Keep on with this procedure to finish the design. Figure 4.13FaggotingFaggoting is a variation of lace knitting, in which every stitch is a yarn over or a decrease. There are several types of faggoting, but all are an extremely open lace similar to netting.Like most lace fabrics, faggoting has little structural strength and deforms easily, so it has little tendency to curl despite being asymmetrical. Faggoting is stretchy and open, and most faggoting stitches look the same on both sides, making them ideal for garments like lacy scarves or stockings.To work:
- Turn under the raw edges as if for an ordinary hem and tack place hemmed or slip stitched these edges. If a narrow hem, they can be left just tacked, as the faggot stitch will keep the edges together. All stitches should be made as invisible as possible.
- The edges of the material are then tacked on to firm paper, parallel to one another and about 18 inch apart. The tacking through to the paper holds the material in place while the Faggot stitching is being worked. The distance between the hems can vary, depending on the material used or the use to which the faggoting is put. No matter what the spacing is, it must be kept regular and at the same tension throughout the work piece
 Feather stitchFeather stitch is a decorative stitch, usually, used to accompany it with embellishments or other forms of stitches like the French knot. This stitch can be used liberally to make beautiful borders, horizontal or vertical fillings, or even designs with curves. It looks like a series of interconnected ‘V’s.It is always advised to make stitch lines to avoid any asymmetry. I have made four parallel stitch lines, A, B, C, D figure 4.17. The stitches will fall between these lines and the needle will pass through these lines.
 1. Begin by bringing up the needle from B. Now, put the needle in through Dand bring it out from C.Note that the points on B and D falls on a straight line, and C lies diagonally to both B and D.Pull the needle out with the thread under it, as shown. We would form our first ‘V’ figure 4.18
 2. We now move to make our next ‘V’.Continue to put the needle in through A and bring it out through B. Pull the needle out with the thread under it as shown, to make the next ‘V’ figure 4.19.
 Now, continue the procedure by putting the needle in through the outer stitch line and bringing it out from the inner stitch line.We keep alternating between the left and right side to make the ‘V’s- putting in the needle through A and bringing it out from B; putting the needle in through Dand bringing it out from C.