Topic outline
General
- P5: Science and Elementary Technology File Uploaded 31/07/22, 12:19
- P5: Science and Elementary Technology TG File Uploaded 1/08/22, 18:25
- P5 SET TG ( Adapted ) File Uploaded 2/11/22, 08:33
- P5: Science and Elementary Technology File Uploaded 31/07/22, 12:19
- P5: Science and Elementary Technology TG File Uploaded 1/08/22, 18:25
- P5 SET TG ( Adapted ) File Uploaded 2/11/22, 08:33
UNIT 1 :Carpentry Tools
Introduction
Carpentry is the art of making wooden products. Carpenters use carpentry tools to make wooden products. Carpentry is an important art that provides employment.
Look at the following pictures.

Describe them briefly.
Predict what you are going to learn.1.1: Identification of carpentry tools
Activity 1.1: Identifying carpentry tools
(i) Name the tools that the teacher has displayed in class.
(ii) Study the following tools (page 2 and 3).
(iii) Draw all the tools in your notebook.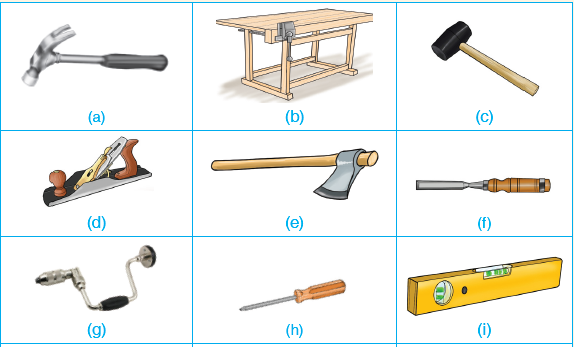
(iv) Using Internet and other carpentry books in the school library give the correct names of the tools.
A tool is a hand held device used to carry out a particular function.
1.2: U sage and maintenance of some carpentry tools
Activity 1.2: Using and maintaining carpentry tools
(i) Visit a timber workshop.
(ii) Observe the various tools and write down their names.
(iii) Ask the carpenter to demonstrate how various tools are used.
(iv) Practice how to use and maintain various carpentry tools.
Note: Be careful when using tools to avoid injuries or damaging the tools.
• When you get back to school, discuss:
(i) Use of carpentry tools.
(ii) Dangers of various tools found in the timber workshop.
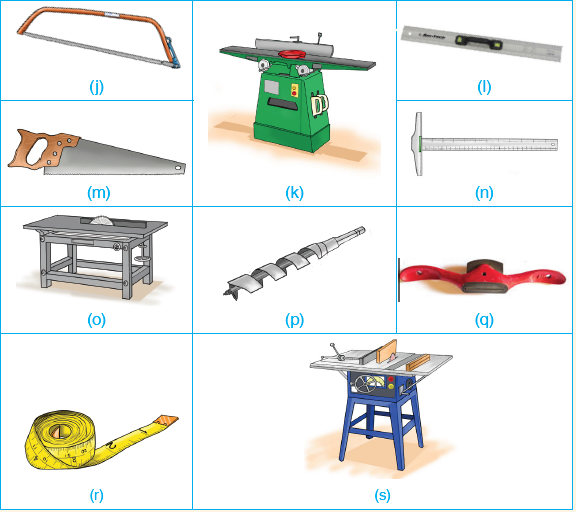
(iii) Safety precautions when in the workshop.1. Work bench
Activity 1.3: Use and maintenance of a work bench
(i) Remove all the tools that are not in use from the work bench. Wipe the bench and check if that is firm and stable.
(ii) Place a piece of wood on the work bench and cut it into two using a saw.
(iii) Smoothen one part of the wood on the work bench.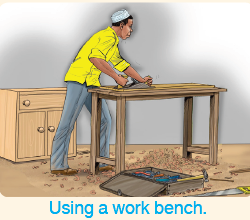
It is a surface on which a carpenter does her or his work.
Work that can be done on it include smoothing wood, cutting, measuring and making joints on wood.
Carpentry tools are important. They are used to make items like tables, chairs and desksCarpentry tools should be used appropriately. They should be maintained well.
2. Saw
Activity 1.4: Use and maintenance of a saw
(i) Check if the hand saw blade is sharp, if it is not sharpen it using a file. Check if the handle is in good condition.
(ii) Hold a piece of timber and cut it using a hand saw.
(iii) Cut another piece of wood using a bow saw.
(iv) Observe the carpenter using a table saw.
(v) After using the saws remove pieces of wood shaving stuck on the blade using a stick.
There are various types of saws. Examples are:
• Table saw, bow saw and wood saw
(a) Bow saw
• Is also known as a frame saw or buck saw.
• It is used to make straight and curved cuts on wood.
(b) Table saw
• It is made up of a circular blade that is moved by an electric motor. The blade is held in place by a table or bend.
• It is used to cut a block of wood into small pieces.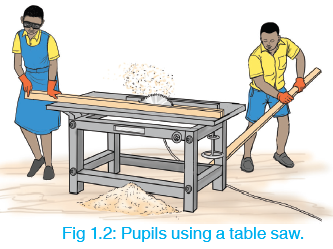
(c) Wood saw
• It is commonly called the handsaw.
• It is used to cut pieces of wood into different shapes and sizes.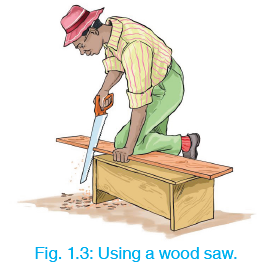
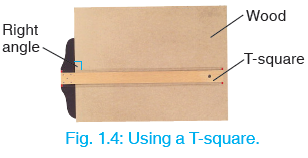
3. T-square
Activity 1.5: Use and maintenance of a T-square
(i) Place a T-square on a block of wood.
(ii) Draw a straight line on the wood along the length and width of the T-square.
(iii) Measure the angle formed and write down your answer.
(iv) Clean the parts to remove dust and saw dust. Store the T-square safely after use.
(v) Apply oil on the metallic parts of the T-square to prevent rusting.It is used for drawing and measuring right angled objects.
4. Claw hammer
Activity 1.6: Use and maintenance of a claw hammer
To driving the nail into wood
(i) Ensure that the handle is firmly attached to the head of the hammer.
Replace worn out or broken parts.
(ii) Hold a nail onto a piece of wood as shown in the picture.
(iii) Hold the hammer firmly and hit the nail several times until it enters.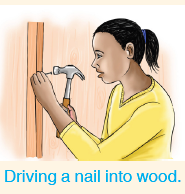
To remove the nail from the wood
(i) Slide the claw hammer under the nail head.
(ii) Pull the handle towards you to remove the nail.
(iii) Store the hammer in a dry and safe place after use.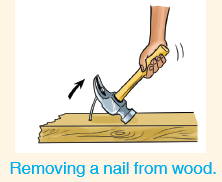
It is used for driving nails in wood and also for pulling them out.
5. Plane
Activity 1.7: Use and maitenance of a plane
(i) Look around the workshop and identify the different types of planes.
(ii) Choose the right place for the task.
(iii) Sharpen the blade and fix it on the plane.
(iv) Adjust the blade to the desired angle. Oil the plane.
(v) Place a piece of wood on the work bench and smoothen it using a plane.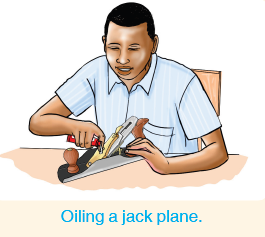
It is used for smoothing wood so as to give smooth and shinny surfaces.
Examples of planes are shown below.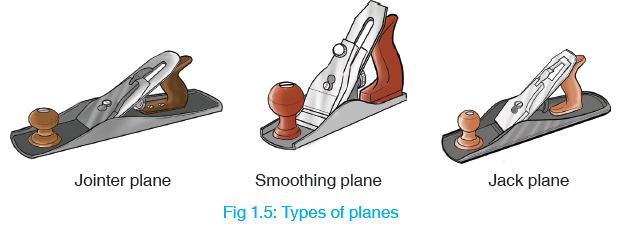
6. Axe
Activity 1.8: Use and maintenance of an axe
Identify an axe in the workshop.
(i) Look at the blade of the axe. Is it sharp?
• Sharpen blunt cutting edges of the axe.
• Replace the worn out blades with new ones.
• Ensure the axe is firmly fixed to the handle.
(ii) Hold the handle of the axe tightly and cut or split pieces of wood.
(iii) Clean the blade and store the axe in a clean dry place.• An axe is used for splitting and cutting wood.
• It is also used for cutting down trees and uprooting stumps.
7. Screw driver
Activity 1.9: Use and maintenance of a screwdriver
(i) Pick the screws to be fixed into the piece of wood.
(ii) Select a screw driver with a tip that matches the head of the screw.
(iii) Ensure the tip of the screw driver is not damaged. Replace broken or worn out handles.
(iv) Grasp the handle of the screw driver and use it to drive the screw in the piece of wood as shown in the picture.
It is used to drive screws in wood. It is also used to remove screws out of wood.
8. Brace
Activity 1.10: Use and maintenance of a brace
(i) Ensure that the handle and the head of the brace are well fixed.
(ii) Ensure that the cutting tip of the brace is sharp.
(iii) Lay a piece of wood on the work bench and mark the hole to be drilled on the wood using a
pencil.
(iv) Place the brace on the piece of wood. Make a hole in the wood by rotating the handle.
(v) Clean and store the brace in a clean and dry place.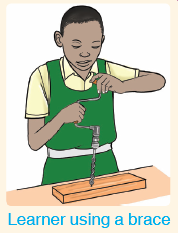
The brace is used for boring holes in wood. Force is applied on top and the handle rotated with one hand.
9. Clamp/Jointer
Activity 1.11: Use and maintenance of a clamp / Jointer
(i) Ensure you have the glue and the pieces of wood to be attached together ready.
(ii) Check and ensure the screw and other moving parts of the clamp are oiled and functioning well.
(iii) Apply glue on the pieces of wood and allow it to dry.
(iv) Attach the glued parts of wood and fix them to the clamp.
(v) Tighten the screw of the clamp and leave it for a while till the parts are firmly joined.
(vi) Blow out dirt from the joints of the clamp and wipe it with a moist piece of cloth.
A clamp is used to hold together pieces of wood to be glued.
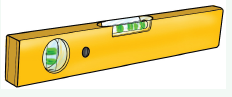
It also holds together the glued parts until the glue is dry and the pieces of wood are firmly jointed.11. Spirit level
Activity 1.12: Use and maintenance of a Spirit Level
(i) Wipe the surface of the spirit level to remove dust and dirt from it.
(ii) Hold the spirit level firmly and place it on the wooden surface that you want to check.
(iii) View and note the position of the bubble in the spirit level.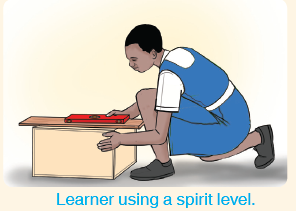
It is used to check if the wood surface is horizontal or vertical.
The spirit level is placed on a wooden surface, then the position of the bubble in the viewing point is noted.
Hold the spirit level firmly when using it. Do not let it drop on a hard surface because it can easily break.Practice Activity 1.1
1. Fill in the gaps to complete the statements below.
(a) A _______ is used to drive screws into wood.
(b) Straight and curved cuts are made on wood using a _________.
(c) A wood saw is also known as ________.
2. Name the tools below. Give their uses as well.
3. Write down 2 things you do to maintain an axe.
4. What is the main reason for applying oil on the metallic parts of a plane?
5. A _________ is used for drawing and measuring right angled objects.The general maintenance practices of carpentry tools are as follows:
(i) The tools need to be used for the right purpose. This is called proper use.
(ii) Sharpening cutting tools. Tools with cutting edges such as chisel, saw, axe and plane need to be regularly sharpened when they become blunt.
(iii) Cleaning tools after use.
(iv) Repair all broken parts. Repairing broken parts makes the tools efficient and safe to work with. Broken handles and blades need to be replaced.
(v) Oiling metallic parts helps to prevent rusting. Oiling moving parts reduces friction.
(vi) Proper storage. The tools need to be stored properly to avoid damage. They are also secured from thieves. Properly stored tools cannot cause injuries to people.1.3: D angers of carpentry tools and health and safety measures
Activity 1.13: Identifying dangers of carpentry tools
(i) Write down names of dangerous carpentry tools.
(ii) What are the dangers of the tools that you have named?
(iii) List down health and safety measures to take when using these tools.
(iv) What would you do if your friend hurt his finger or her finger while you were using a chisel?Many carpentry tools can be dangerous if not handled properly.
Most dangerous carpentry tools
1. Table saw
Dangers
• It rotates at high speed and has a sharp blade.
• If not well handled, the blade might slice off the users fingers or arm.• The table saw might throw back pieces of wood, which might hit the user. This is known as kickback.
Health and safety measures
• Do not bring your fingers or arm close to a rotating blade.
• Always wear a helmet and goggles. These will protect your head and eyes.
• When the saw is in use, stand at a safe distance from each side of the saw’s blade.
Fig 1.7: Using a table saw carefully.
How can kickbacks in a table saw be minimised?
2. Chisel
Dangers
• The chisel has a sharp cutting edge. This edge can injure you if carelessly handled.
• A chisel is driven into wood by a mallet. There is a danger of hitting your arm while hitting the chisel head.Health and safety measures
• Always keep the cutting edge of the chisel sharp. What will happen if you use a blunt chisel?
• Always clamp the work securely on the work bench.
• Wear gloves to protect hands.
Name two other health and safety measures that you need to take while using a chisel.
3. Clamp/jointer
Dangers
• During clamping, you can accidentally trap your fingers or hands.
• If the parts being clamped are loosely held, they may break and fall/drop on your hands or legs injuring them.Health and safety measures
• Hold the pieces of wood being glued together firmly. Close the jaws of the clamp until the clamp is tight before using it.
• Wear goggles or a face shield to protect your head.
4. Shaper
Dangers
A shaper has several blades that cut wood to give it different shapes. These blades can injure the user.Health and safety measures
• Shape only one piece at a time to avoid confusion and loss of concentration.
• Do not leave a shaper running without someone around.
• Do not place your hands near the part of wood that is being cut.
• Avoid clearing the working table when the shaper is rotating. Remove piled sawdust using a piece of wood or a long brush. Do not use bare hands.Revision Activity 1
1. ______ is the general name given to the cutting edge of a tool.
(Blade, Handle)
2. (i) Name any 3 carpentry tools used for cutting wood.
(ii) Draw the following carpentry tools:
(a) T - square (b) Spirit level
(c) Auger bit (d) Wood chisel
3. Match the tools named in A with their possible uses in B
4. Demonstrate how to use the following carpentry tools whilst avoiding their possible dangers.
(a) Hammer (b) Wood saw (c) Axe
5. The following pictures show use and maintenance of a hand saw.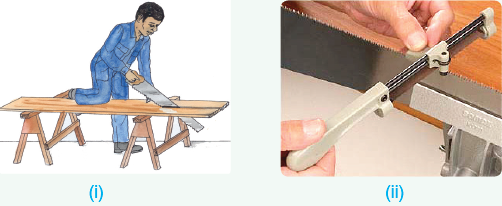
(a) Which picture shows maintenance of a hand saw.?
(b) Which picture shows use of a hand saw?
(c) Outline two other maintenance practices carried out on a hand saw.6. (a) What is the name of the following tool?
(b) In what ways is the tool useful in carpentry?
(c) Explain how it is maintained
7. A jack plane a is very important tool in carpentry.
(a) Outline the uses of this tool.
(b) In case you do not have a jack plane, what other tool can be used to do a similar job?
(c) How is the jack plane maintained?
8. (a) What is a work bench?
(b) Name two carpentry activities that are done on a work bench.
(c) How can you ensure your personal safety while working on a work bench?
9. A table saw is found in many workshops.
(a) Name any two parts of a table saw.
(b) List two dangers of a table saw.
(c) What health and safety measures can be taken to prevent injuries from a table saw?10. Outline the difference between the following saws in terms of appearance and uses.
(a) Table saw and hand sow
(b) Bow saw and wood saw
11. (a) Identify five carpentry tools that are not found in your school or home. Write down their uses.
(b) Explain the maintenance practices carried out on these tools.
(c) Write in your book 5 general health and safety measures to observe when using carpentry tools.Word list
1. Read the following words in pairs.
• Work bench • Carpentry • Mallet
• Brace • Clamp • Spokes shave
• Auger bit • Jack plane • Spirit level
2. Spell 3 words while your friend writes them in his or her notebook. Let your friend also spell 3 other words as you write them in your notebook.
3. Discuss with your friend the meaning of any 3 words in the word list. Refer to notes in your textbook.Forums: 2Files: 6Labels: 26URLs: 44UNIT 2:Masonry Tools
Introduction
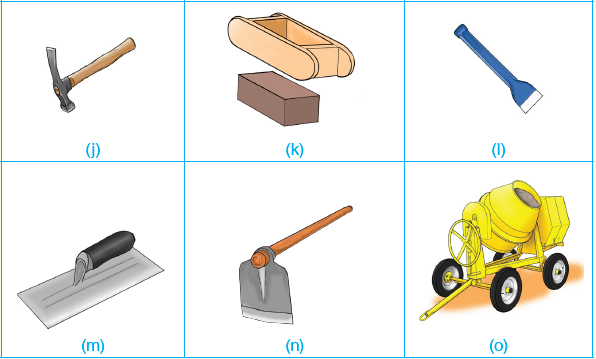
Masonry is the art of making structures from stones, bricks or tiles. Masons
use masonry tools to make structures such as buildings and animal shelters.Look at the following pictures.

Describe each picture.
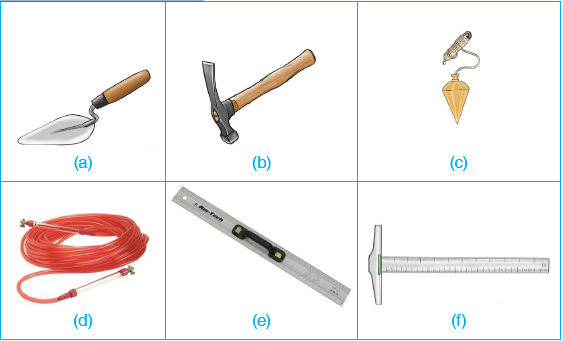
Predict what you are going to learn.2.1: Examples of masonry tools
Masonry tools are tools used in the construction of farm structures and buildings.
Activity 2.1: Identifying masonry tools
(i) Identify the tools displayed by the teacher in class.
(ii) Draw all the tools in your notebooks.(iii) Draw and write the names of the following tools in your notebook.

(iv) Which of these tools have you ever seen? Where did you see them?
2.2: U sage and maintenance of some masonry tools
Activity 2.2: Using and maintaining of masonry tools
(i) Visit a construction site.
(ii) Observe the various tools and write down their names.
(iii) Ask a mason to demonstrate how various tools are used.
(iv) Practice how to use and maintain various masonry tools.
Note: Be careful when using tools to avoid injuries or damaging the tools.Masonry refers to building structures using stones or bricks. During masonry work, masonry tools are used.
1. Trowel
Activity 2.3: Use and maintenance of trowel
(i) Ensure the handle of the trowel is in good condition.
(ii) Using a trowel mix the mortar.
(iii) Scoop and apply the mortar using the trowel as shown.
(iv) Clean and keep it dry after use.
It is used for mixing, scooping and applying mortar. What is mortar?
2. Plumb line
Activity 2.5: Use and maintenance of a plumb line
(i) Hammer a nail into surface you want to check.
(ii) Tie the string of the plumb line to the nail.
(iii) Measure the distance from the vertical surface of the wall to the top of the string.
(iv) Mark the points you want to find with chalk.
(v) Clean the plumb line, oil it and store in safely in a dry box.
It is also known as a plumb bob.
It is used to determine whether walls of building under construction are vertical.3. Water level
Activity 2.4: Use and maintenance of a water level
(i) With your partner stand at the location you want to level.
(ii) Hold the water level against the surface you are levelling.
(iii) Use chalk to mark the spot on the wall where the water line inside the tube falls.
(iv) Clean the water level and store it when dry. Write down the use of a water level.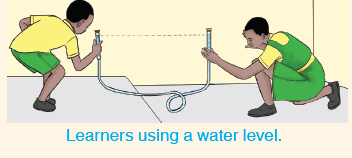
It is used to measure the heights of locations that are far apart on a surface.
Examples of such surfaces include floors and walls.4. Float
Activity 2.6: Use and maintenance of float
(i) Ensure the handle of the float is firm.
(ii) Spread concrete over the floor and wall as shown.
(iii) Clean it and oil the metallic parts of the float.
(iv) Store the float on a rack.
There are two types of floats. These are:
(a) Steel float
It is used for plastering walls and floors.
(b) Wooden float
It is used for spreading concrete over floors and walls.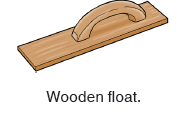
Fig. 2.1: Floats.
5. Metre ruler
Activity 2.7: Use and maintenance of metre ruler
(i) Place a metre ruler on the wall.
(ii) Measure the length of the wall in meters.
(iii) Avoid knocking the edges of the ruler against objects.
(iv) Clean it after use.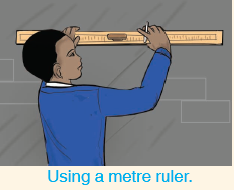
Used in accurate measurement of lengths. It has a measurement of one metre (100 centimetres).
6. Tape measure
Activity 2.8: Use and maintenance of a tape measure
(i) Hold the tape measure vertically on a wall.
(ii) Keep the edges straight.
(iii) Measure the distance and mark with a pencil as shown.
(iv) Avoid rubbing or scratching the tape measure.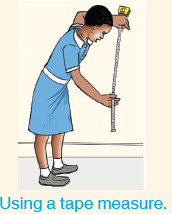
It is used for measuring distances, both vertically and horizontally.
7. J ointer
Activity 2.9: Use and maintenance of jointer
(i) Ensure the nuts of a jointer are tight.
(ii) Run a jointer along a mortar joint and compact it.
(iii) Scrap excess mortar from the joint.
(iv) Clean, dry and store it in a dry place.
Name two uses of a jointer.
It is run along a mortar joint to compact it. It also scraps excess mortar from the joint.
8. Brick frame
Activity 2.10: Use and maintenance of a brick frame
(i) Place a brick frame carefully on a flat surface to avoid breaking it.
(ii) Pack wet concrete or soil into it to produce rectangular shaped bricks.
(iii) Clean and store brick frames in a dry rack.
(iv) Oil metallic frames to prevent rusting.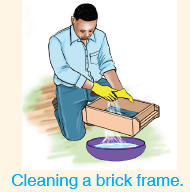
It produces rectangular shaped bricks. These bricks are used in construction.
9. Wheelbarrow
Activity 2.11: Use and maintenance of a wheelbarrow
(i) Ensure the handles are firm and the moving parts are greased.
(ii) Load sand, gravel or stones into the wheelbarrow.
(iii) Push the wheelbarrow to where they are needed.
(iv) Clean it well and oil after use.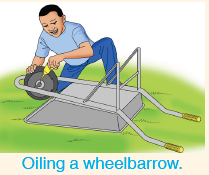
10. T-square
It is used for carrying sand, gravel and stones for constructions.
Activity 2.12: Use and maintenance of a tape T-square
(i) Place a T-square on the floor with the head resting at a 90° angle.
(ii) Measure the right angle.
(iii) Avoid rubbing the T-square against hard surface to avoid removing marking.
(iv) Avoid bending the T-square to prevent breakage.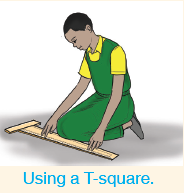
Masonry tools need to be stored properly in a tool rack as shown below.
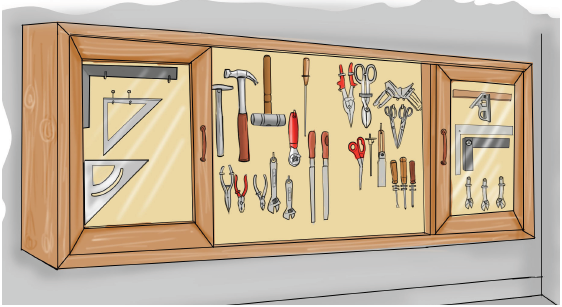
Fig. 2.2: Masonry tools stored properly.
Name two other dangers of masonry tools.
2.3: D angers of masonry tools
Activity 2.13: Dangers of masonry tools
(i) In your working groups search for dangers of masonry tools on your XO browser.
(ii) List them down in your notebooks.
(iii) Research on the safety precautions to be taken when using masonry tools.1. Some tools can bruise you when you rub against them or when they fall on you.
2. Some masonry tools can cut you if handled carelessly.
3. When these tools are not stored properly, one can trip on them and fall.
4. Some tools can also pierce the skin if stepped on.
Revision Activity 2
1. Name the following tools:
2. What is the work of a:
(a) Trowel
(b) (i) Steel float (ii) Wooden float
(c) Water level
(d) Plumb line
3. Sand and stones need to be delivered to a construction site.
(a) Select a suitable masonry tool that you are going to use.(b) Carry the sand and stones to the construction site.
(c) Maintain the tool after use.
4. Describe briefly the maintenance of
(a) a steel float (b) a wooden float.
5. Use and maintain a metre ruler.
6. Outline 3 dangers of masonry tools.
7. What is the general importance of masonry tools? Justify your answer using suitable examples.
8. (a) Outline uses of a mortar mixer.
(b) (i) If you do not have a mortar mixer, what other tools can you use?
(ii) Describe briefly how the tools will be used.
(c) How do you ensure that a mortar mixer remains in good working condition.
9. The following picture shows a construction site.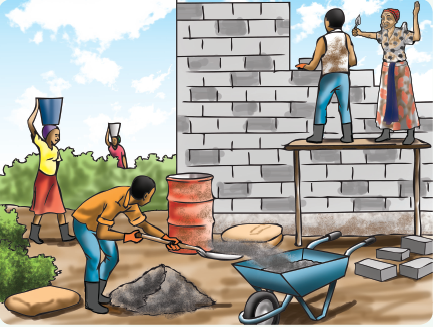
(a) Identify the masonry tools being used.
(b) What tool does the mason mixing sand and cement need?
10. (a) Describe maintenance practices carried out on a brick hammer.
(b) What can happen if a wooden brick frame is put in a damp place?
11. (a) What is the use of a plumb line?
(b) A water level functions like a certain carpentry tool. What carpentry tool is it?
(c) How is a water level used?Word list
1. Read the following words in pairs.
• Trowel • Mortar • Plumb line • Cement
• Tape measure • Gravel • Shovel • Rusting
• Wheelbarrow • Repairing
2. Spell 3 words while your friend writes them in his or her notebook. Let your friend also spell 3 other words as you write them in your notebook.
3. Discuss with your friend the meaning of any 3 words in the word list. Refer to notes in your textbook.UNI T 3:OBJECTS PRODUCTION
Introduction
Toys, utility objects and learning materials are important in our daily lives.
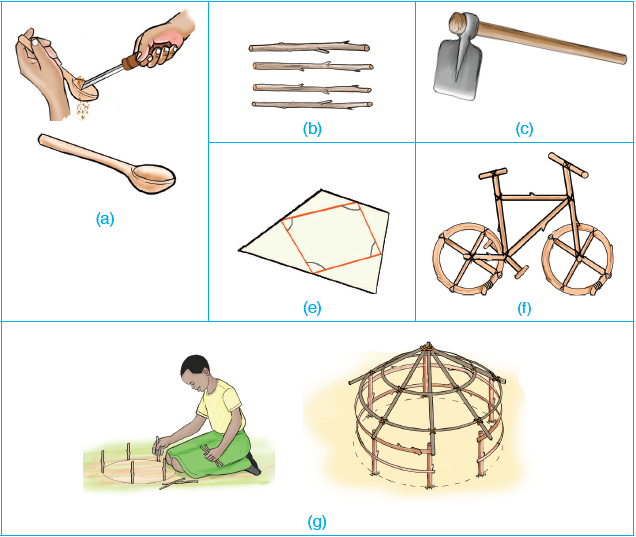
These objects can be bought and used. However, we can make our own toys, utility objects and learning materials easily using locally available materials.Look at the following pictures.
Describe each of the pictures.
Use the pictures to predict what you are going to learn.3.1: Making toys using sorghum straws and sticks
Activity 3.1: Making toys using straws and sticks
(i) Go into the nearby field. Collect dry straws and sticks.
(ii) Also collect pictures of bicycles and huts.
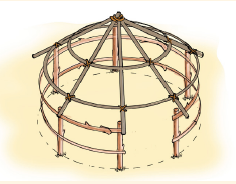
(iii) Choose the best materials to make toys from the ones you have collected.a) Making a toy house using sticks and sorghum straws
Materials required:
Small flexible sticks, A big stick with a sharpened end, Sorghum straws, Strings or wires
What to do:
1. Clear a small area in the school
field using a hoe or a spade.2. Drive the stick with a sharpened
end into the ground.3. Draw a circle around the stick as shown below.

4. Place some small sticks around the circle.

5. Tie the flexible sticks around
the other sticks to make thewall.

6. Make the roof using sticks as shown below.
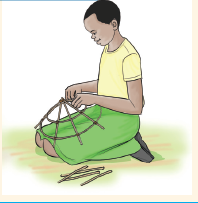
7. Fix the roof to the house as follows.
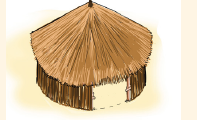
8. Using sorghum straws thatch the roof. Use some of the
straws to fill spaces in the walls. Leave spaces for thedoor and windows.
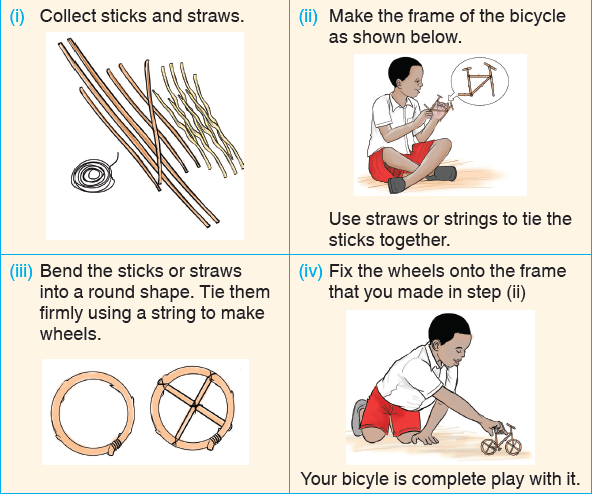
b) Making a toy bicycle
Materials needed:
• Sticks, Straws, threads / stringsWhat to do:
3.2: Making utility objects in wood
Activity 3.2: Making utility objects in wood
(i) Collect these tools from the school workshop or from a nearby workshop: Chisel, spokes shave and saw.
(ii) Collect sisal fibres and pieces of wood.
(iii) Bring the following utility items to school; spoons and hoe handle.
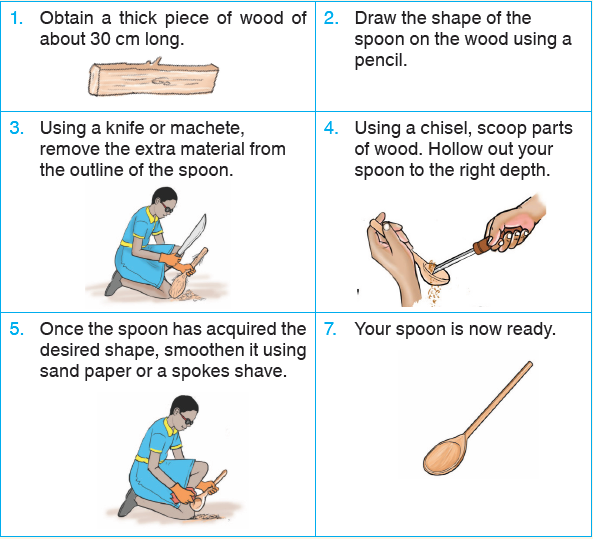
Name 3 other utility items used in your home.a) Making a spoon in wood
Materials needed:
• A soft piece of wood • Knife or machete • Pencil or pen
• Spoke shave or sand paper • A chiselWhat to do:
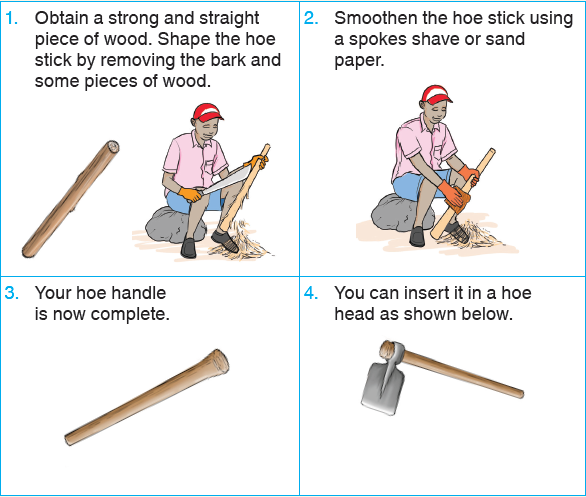
b) Making a hoe handle
Materials needed:
• Hand saw
• A long thick piece of wood (about 1 m long)
• A machete or strong knife
• A spokes shave or sandpaperWhat to do:
Utility items are used in daily activities. Some of these items include spoons, baskets, chairs and hoe handles.
3.3: Making learning materials in paper and manila paper
Learning materials are used in class to make learning easier and enjoyable. In P5, we will make shapes such as rhombuses, parallelograms and trapeziums.
Activity 3.3: Making learning materials in paper
A rhombus is a figure that has four equal slanted sides.
Materials needed:
• Scissors • Pencil • Pen or marker
• Ruler • Manila paper • Protractora) Making a rhombus
What to do: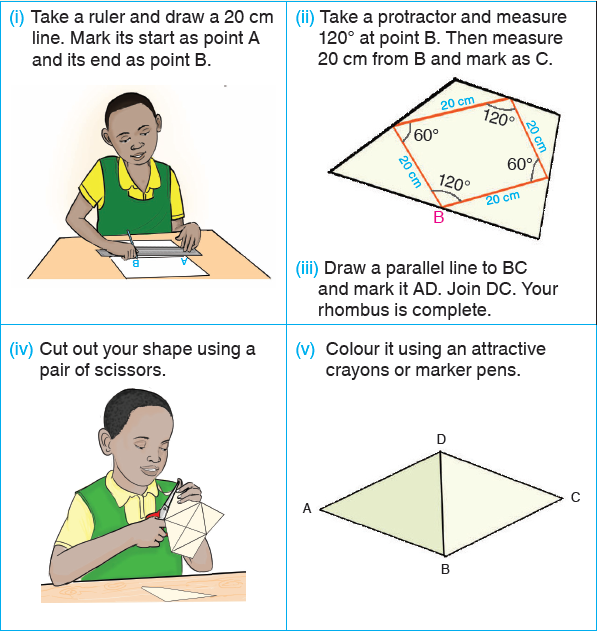
b) Making a parallelogram
What to do:


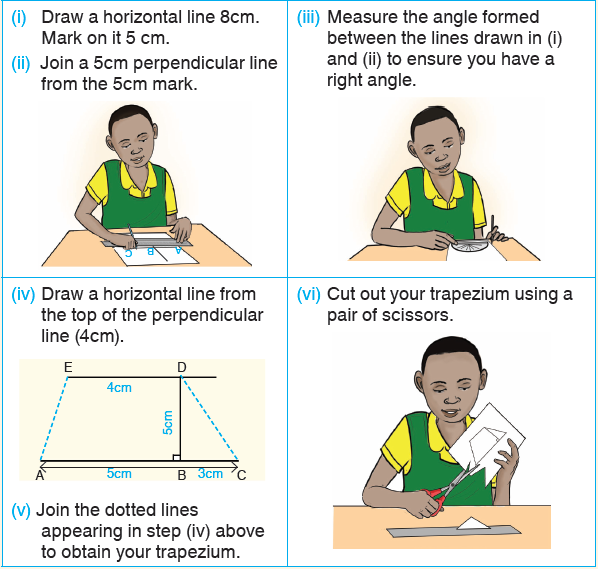
c) Making a trapezium
What to do:
3.4: Maintenance of utility and learning objects
Activity 3.4: Maintenance of utility and learning objects
(i) Collect boxes sacks and bags.
(ii) Put some wooden spoons and hoe handles in one dry corner of the class.
(iii) Hang the remaining wooden spoons on a rack.
(iv) Store your rhombus, parallelograms and trapeziums on a shelf or in a dry bag.
(v) Mount your shapes on a soft board and hang on the class wall.How will you keep the things that you have made?
• Wooden spoon and hoe handle can easily rot if placed in a moist place.
• A hoe handle should be kept in a tool store. Wooden spoons should be hung on a rack.
• Learning materials should be mounted on a soft board and displayed in class.
• They can also be put in class cabinets, shelves, cupboards and boxes.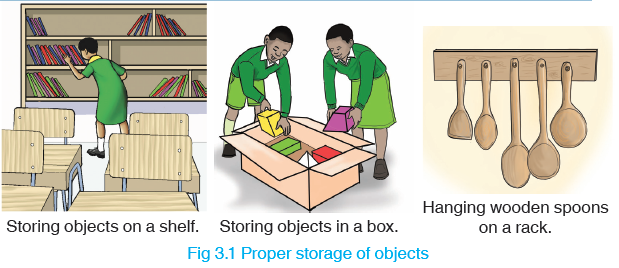
• Store your toy bicycle in a cool, dry and safe place.
• Protect your stick house by covering it with paper or leaves.Revision Activity 3
1. Make a toy bicycle using straws and sticks.
2. Make a wooden hoe handle.
3. (a) Identify three tools that should be used when making a hoe handle.
(b) Make a trapezium from waste pieces of paper.
(i) Colour the trapezium using crayons.
(ii) Store your trapezium safely.
4. Identify ways of maintaining utility and learning objects.
5. Draw a rhombus, trapezium and a parallelogram.
A pupil made a toy house as shown below.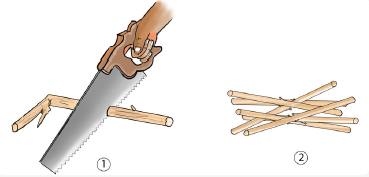

6. (a) Identify the tools that she used.
(b) How did she use the tools?
7. (a) Name the local materials that she used.
(b) Where did she get the materials?
8. What precautions did she take while using the tools and materials?
9. How will the girl maintain the toy house?
10. Give the uses of the following utility items.
Word list
1. Read the following words in pairs.
• Hoe • Utility objects • Straws • Peg
• Wall plate • Scissors • Drill
• Spoke shave • Chisel • Gouge
• Sand paper • Diagonal • Bisect
• Protractor • Compass • Sisal
2. Spell 3 words while your friend writes them in his or her notebook. Let your friend also spell 3 other words as you write them in your notebook.
3. Discuss with your friend the meaning of any 3 words in the word list. Refer to notes in your textbook.UNIT 4:COMPUTER MY FRIEND
Introduction
Introduction
A computer is an important device. It can store data in its internal memory.
Since a computer can store information it is a very important friend that you need in your life.Look at the following pictures.

Describe each picture above.
Predict what you are going to learn.4.1: Data and memory
Activity 4.1: Finding out what data is
Explain the meaning of data.
Meaning of data
Data are facts and figures that need to be processed by a computer.
Processed figures and facts are called information.
Example of data include:
• Letters of the alphabet, for example A, B,
C, D etc.
• Numeric numbers such as 0, 1, 2, 3 etc
• Symbols like *, $, %, –, = etc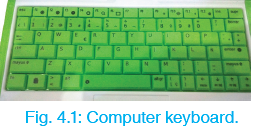
The data is entered into the computer using computer input devices like the keyboard and mouse.
Meaning of memory
Activity 4.2: using memory
(i) Write down the name of your school.
(ii) Write down the name of the teacher who taught you in P1.
How were you able to remember your P1 teacher?Memory refers to parts of the computer that are used to store data or information.
Roles of memory
Activity 4.3: Typing in the Write Activity
(i) Start the Write Activity from the Home View.
(ii) Type the following in turns:
• Name of your district • Your name
• Name of your school • Name of your class teacher
(iii) Where is the information that you have typed stored?
(iv) Now save the information that has been stored on a flash disk.For a computer to store information effectively, it should have memory. Memory holds instructions and data needed to complete tasks.
4.2: Examples of data and memories
Internal storages
Activity 4.4: Storing data in memory
(i) Start Write Activity.
(ii) Type the following:
• Name of your school
• Name of your class
• Your name
(iii) Close the document and check if the file is available in the journal.The Journal is the internal storage of the XO laptop. These are the storage/ memory found inside the computer.
There are two types of memories in the computer.
These are:
(a) The computer memory (RAM/ ROM). (b) Hard disk.Hard disk
Activity 4.5: Accessing a saved document in the journal
(i) Click on the Journal icon at the bottom of your XO laptop.

(ii) Open the document that you typed in Activity 4.3 by clicking on it.
• The hard disk is a storage device found inside all computers.
• A hard disk is mostly used to store computer programs.
• The hard disk has a large memory space.
The Write Activity automatically saves your work to the Journal. The Journal space is in the hard
disk.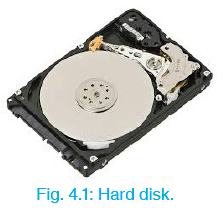
Activity 4.6: Saving documents
(i) After creating a document, click on the Keep button. What do you observe?
(ii) Find the new Journal entry created.
(iii) Go to the list that shows items in the Journal. Give the activity you have saved a different name.
Documents are normally saved in the ODT file format. ODT is Open Document Format.
There are times when you may prefer to save your document in another format, other than the ODT format. To do this, use the Keep button.
The Keep button lets you save a copy of your document in rich text (RTF), hypertext (HTML) or plain text (TXT) formats in the Journal.ROM and RAM
ROM
Activity 4.7: Boot-up process
(i) Switch on the laptop by pressing the power button. Observe what happens from the time the laptop is switched on until the Sugar Home View is displayed.
(ii) Write down your observations in your notebooks. Share your findings with the rest of the class.ROM stands for Read Only Memory. It only allows reading of its content. The user cannot change content on it.
This type of memory is a permanent storage. When power goes off, data written on it is not lost.
This memory is therefore called non-volatile.
ROM contains data that is used when starting computer, checking the RAM and when loading other computer programs.
RAM
RAM stands for Random Access Memory. It is a temporary memory.
Most computers do not store what you have worked on automatically. When power goes off suddenly, what you have been working on disappears.
This happens because data is stored on this memory temporarily and when power is on.
This memory is said to be volatile.
Role of temporary memory
Activity 4.8: Drawing a picture and writing a story
(a) Drawing a picture in Paint Activity
(i) Open the Paint Activity.
(ii) Click on the brush tool then colour-picker tool to set the drawing colour you wish to use.
(iii) Draw a shape of your own choice.
(iv) Fill your picture with your favourite colour.
(v) Use the secondary toolbar to insert below your picture a comment reading: I love drawing.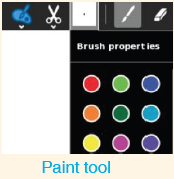
(b) Writing a short story in the Write Activity
(i) Switch from the Paint Activity to the Write Activity. [The frame key lets you switch between activities.]
(ii) Type the following story exactly as it appears.
My Best Friend
My best friend is Marie. Marie is a beautiful girl. She is very hard working as well.
Marie lives with her grandparents in Mayange Village. Her parents own a shop in Kigali City. They sell groceries.
This holiday, Marie will visit my home together with her parents. I will prepare them my favourite dish.(iii) Click on the frame key then switch back to the paint Activity.
(iv) Bold the comment you made. Also apply a different font type and font size.
(v) Complete this story by writing more about Marie e.g. the school she goes to, her favourite dish, her best subjects, her hobbies among other things.
(vi) Check how the Write Activity and the Paint Activity have been saved in the Journal.
Why did the Paint Activity remain when you switched to the Write Activity?The RAM stores instructions and data needed to complete a task or tasks being worked on fast.
The temporary memory also enables computer users to switch between several activities.External storage
Activity 4.9: Copying a file to the memory card
(i) Start the write Activity and access the Journal. Locate the story that you wrote in Activity 4.8.
(ii) Insert a memory card in the USB slot on your computer.
(iii) Select the journal entry of the story by clicking on it.
(iv) Move your entry to where your storage device icon appears (right side of the journal).
(v) Check to see if your file appears on your storage device.External storage refers to devices that are not permanently fixed on or in a computer. These devices are used to store information permanently.
These devices include, Memory cards, Flash disks, CDs, DVDs and external hard drives.

(a) Memory card
A memory card is also known as an SD card or flash card. It is an electronic device used for storing digital information.(b) Flash disk
Activity 4.10: Copying a file/document to the flash disk
(i) Access the Write Activity in the journal.
(ii) Insert your flash disk in the USB slot. Ensure that your computer shows the icon representing the presence of an external storage.
(iii) Drag the Journal entry story that you wrote in Activity 4.8 into the USB icon.
(iv) Outline the importance of saving information on a flash disk.A flash disk is also known as USB flash drive.
It is connected to the XO laptop through a USB port. Data can be easily saved on it and easily deleted from it.
Activity 4.11: Opening a document stored on external storages
(i) Access the Journal from the Home view.
(ii) Insert in the USB slot a flash disk or Memory card on which you saved the story in Activity 4.8.
(iii) Click on the USB icon that shows on your computer. Open the story in Activity 4.8 by clicking its icon.
(iv) Edit the document by Bolding and Underlining the heading. Format text in your story by changing the font colour, font size and font type.
(v) Close external storage and quit the Journal.(c) CD, DVD
CD in full means Compact Disk.
DVD in full means Digital Video Disk.
CD and DVDs are inserted in a CD Reader in order to access stored information.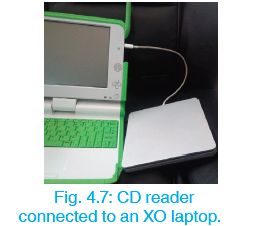

The information on the CD-R is read only. This means that you cannot add more data on a CD or DVD that already has data on it.
Information on CD-RW is read and write.(d) External Hard disk
It is also known as external hard drive. It is a portable storage device. It has a very large storage space that is similar to that found on the hard disks of computers.
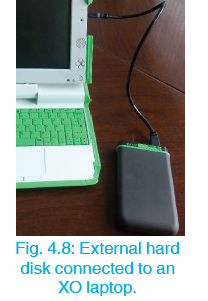
This storage device is connected onto the computer by a cable.
4.3: Sharing a document
The XO laptop allows for connectivity between it and neighbouring XO laptops. This is called collaboration.
Collaboration allows you to share what you are doing with others. You can also see what friends in your neighbourhood are doing.You can collaborate with others by sending an invitation or by sharing with the Neighbourhood.
(a) Send an invitation
Activity 4.12: Sending an invitation
(i) Create the following story about the environment.

(ii) Go to the Neighborhood View to share your story. Click a friend’s XO icon on your computer to send an invitation request.

(iii) Once you have invited your friend, tell him or her to click the Write icon in the Frame of his or her XO laptop. Let him or her select the Join option from the dropdown menu that appears.
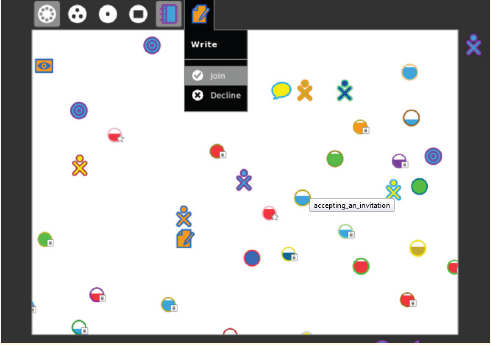
The Write icon has the colour of your Sugar XO icon. Once she or he clicks on the Join Option, he or she can view your story and contribute to it accordingly.
You send invitations to a specific person. When you invite your friends, you allow them to collaborate with you in the Activity that you are doing.
What happens when your friends make changes to the document that you stored?(b) Share with the neighbourhood
The neighbourhood view in all XO laptops shows all the connected laptops around you. It also shows all the shared Activities.
Activity 4.13: Sharing Activities with the neighbourhood
(i) Access the Neighbourhood view by clicking the Neighbourhood icon on the frame of your computer. You can also use the Neighbourhood icon on your XO screen.
(ii) Find your friends and activities you are interested in by searching for them in the search menu.
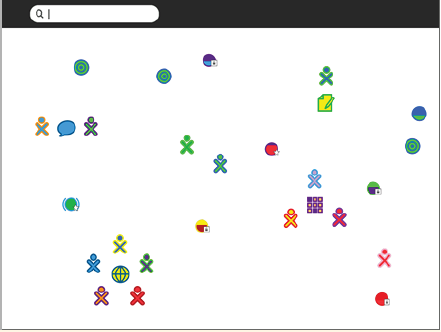
(iii) You can join in an Activity you are interested in by clicking on the Shared Activity’s icon.
(iv) Add other users in your Neighborhood to your Friend/ Group by clicking on their XO icons. You can also invite them to share in your Activity.Additional Activity
(i) Send an invitation to two of your friends to collaborate and continue the story you typed in Activity 4.8 (b) (ii).
(ii) Locate a group in your Neighbourhood. View how they are working on the story you wrote in Activity 4.12. Join them in this Activity.Revision Activity 4
1. (a) Name the following types of memories.

(b) Identify internal and external memories from the examples above.
(c) Compare RAM and ROM.
2. The following statements refer to RAM. Which one does not?
A. Kind of memory where your computer holds copies of programs and data.
B. Computer uses RAM to store software programs currently in use.
C. Programs are loaded into memory and removed from memory when files are closed.
D. RAM is the same as hard disc.
3. What happens when you first turn on your computer?
A. The Hard Disc takes control
B. The ROM loads the operating system
C. The Gnome desktop appears immediately
D. RAM takes control4. To send an invitation, you will do the following except one. Which one is it?
A. Open a document
B. Go to Neighborhood View
C. Click a friend’s XO icon to send an invite request
D. Navigate to the tool bar5. Give three examples of data.
6. Explain what happens when the computer is turned on.
7. Give a reason why the hard disc is an important storage device.
8. List three tasks performed by ROM.
9. Give 2 reasons why RAM is called temporary storage.10. You have been given a flash disk by the teacher to transfer some pictures from your computer to the flash disk.
(a) Insert the flash disk in the XO USB port.
(b) Access the flash disk and save one file from your XO in it.
(c) Close the flash disk and eject it from your laptop.
11 (a) Write 3 sentences about your school.
(b) Share your activity with two friends in your neighbourhood to make a nine sentence document.Word list
1. Read the following words in pairs.
• Retrieved • Data • Volatile
• Temporary Memory • Bits • Bytes
• Storage Devices • RAM • ROM
• Neighbourhood • Invitation • Collaborate
• Non-Volatile
2. Spell 3 words while your friend writes them in his or her notebook. Let your friend also spell 3 other words as you write them in your notebook.
3. Discuss with your friend the meaning of any 3 words in the word list. Refer to notes in your textbook.UNIT 5:WRITING SKILLS
Introduction
A computer is used to store data. The data should be entered in the computer by typing them. Data can be entered in tables as well.
Look at the following screenshots.
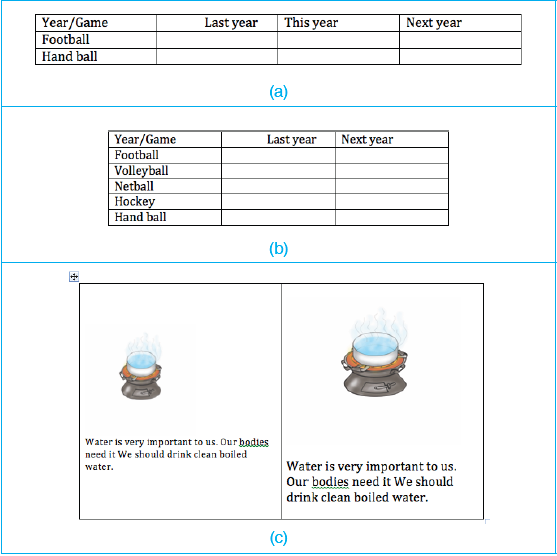
Describe each screenshot above.
Predict what you are going to learn.5.1: Insert tables
Activity 5.1: Meaning of table
(i) What is a table? Research and write short notes.
(ii) Identify rows and columns from the following figure.
Tables
A table is made up of columns and rows.
(a) Create a table (columns and rows)Activity 5.2: To create a table
(i) Open the Write Activity from the Home View.
(ii) Place the pointer where you want the table to appear.
(iii) On the Write Activity toolbar, click the Table tool.
(iv) Choose from the drop-down menu: Create table.
(v) Select the number of rows and columns.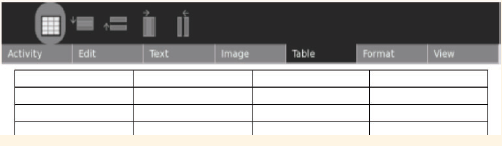
You create a table by choosing the table tool
 from the Write Activity toolbar.
To Insert a Column
Activity 5.3: Inserting a column in a table
How do we insert a new column in a table?
Click where you want the column to appear.
From the table tools choose the command for inserting a column.
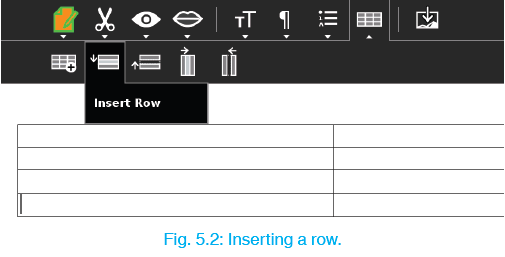
Fig. 5.1: Inserting a column.
To Insert a Row:
Activity 5.4: Inserting a row in a table
How do we insert a new row in a table?
Click where you want the row to appear.
From the table tools choose the command insert row.
Activity 5.5: To delete rows, columns, and tables
To delete a column
(i) Using the left button, click on the column you wish to delete.
(ii) From the command bar choose delete column.
To delete a row
(i) Left click on the row you wish to delete
(ii) From the command bar in table tools choose delete row
To delete a table
(i) Use the cursor to highlight the whole table
(ii) On the keyboard press Delete key to delete.
Enter text in a table
(i) Left click in one cell of the table you have created.
(ii) Enter text in the cell by typing on your Keyboard.
(iii) Create the following table and insert in text as shown.
Resizing rows and columns
Activity 5.6: Resizing rows and columns
How do you resize rows and columns.
(a) Resizing rows
(i) Place the pointer on the horizontal line of the row that you want to resize.
(ii) A double edged arrow appears(iii) Drag this arrow which changes into a hand shape. Then drag to the inside or outside of the row that you have.
(b) Resizing columns
(i) Place the pointer on the vertical line of a column you want to resize.
(ii) A double edged arrow appears.
(iii) Drag this arrow which changes into a hand shape. Drag towards the inside of the column you want to resize.Practice Activity 5.1 Deleting, adding and resizing rows and columns
(i) Create a table that looks like the one shown below, using the Write Activity.

(ii) Insert a new row between the 2nd and 3rd rows as shown below.

(iii) Type in the new row, text shown below.
(iv) Delete the last row.

(iv) Resize column one in (i) by making it smaller.
(v) Resize row four in (iii) by making it bigger.5.2 Insert pictures and images
Activity 5.7: To insert a picture
(i) Click where you want the picture to be.
(ii) Hover your pointer on insert image tool bar.
(iii) Click on Insert image. The Journal will then open up, showing you a list of all of the pictures saved on your computer.
(iv) Choose the picture you want to add to your document by clicking on its icon.

(v) Your picture will be added to your document
The Write Activity is mainly used for creating documents. It also has features that allow you to quickly insert pictures and images in a document.
If you have pictures saved in your Journal or storage device, you can insert them into your document.Resize and position an image or picture
Activity 5.8: Resizing and positioning an image
Practise how to position and resize an image.(a) Position an image
(i) Click the position where you want the image to be.
(ii) Click on it then drag it to a new location.
(b) Resize an image
(i) Click on the image. Resize marks appear.
(ii) Place your pointer on one resizing mark then drag the image.Provide text relating to imported image
Activity 5.9: Providing text to an image
Add text to your picture as shown in the picture.
You can add a comment to your picture.
To do this, move your pointer closer to the image. Type the text that you want.Practice Activity 5.2 Creating and editing a school newspaper
(i) Collect information on 5 major challenges faced by people in your local community.
(ii) Using your XO Write Activity, create a table that looks like the one shown below.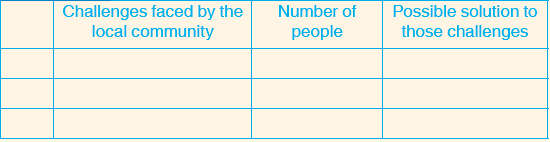
(iii) Share your findings with your classmates.
(iv) Collaborate with your friends in the Write Activity so as to produce a complete 5 paged newsletter.Revision Activity 5
1. A table is made up of the following except one. Which one is it?
A. Sheets B. Columns C. Rows D. Cells2. (a) What is the name given to this icon
 ?
?A. Table icon B. Table tool C. Row tool D. Column tool
(b) Look at the following pictures.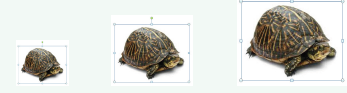
Compare the pictures. Write down your findings.
3. Which other term means the same as highlight?
A. Replace B. Select C. Insert D. Duplicate4. When you click on insert table tool which tool is likely to be active?
A. Create table B. Insert Row C. Insert Image D. Insert Column5. a) Start Paint Activity and draw a star shape.
b) Close the Paint Activity then Start the Write activity.
c) Insert the Star shape from the journal into the Write Activity.
d) Resize the star to
(i) Make it bigger (ii) Make it smaller6. In Write Activity you can undo and redo any action done by clicking on the tools shown below.
(a) Type the name of your school in Write Activity.
(b) What happens when you click on undo command?
(c) What happens when you click on redo command?

7. If you want to work with tables, which tool will you open?
8. Before you start typing text in a cell, why is it important to click inside the cell?
9. Start Write Activity and format a table as follows:
a) Insert a table containing 4 columns and 4 rows.
b) Type table header as follows: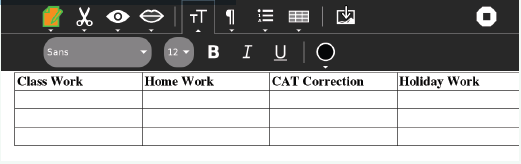
c) Bold the headers as shown above.
10. (a) Write four sentences about your home.
(b) Insert an image in your text.
(c) Provide text concerning the image that you have inserted.
11. (a) What is a table made of?
(b) Draw a table with 2 columns and 4 rows.
(c) (i) Type your first name in the first column and row.
(ii) Type your class name in the second column of the first row.
(d) Delete the third row.
(e) Resize column 1.Word list
1. Read the following words in pairs.
• Write Activity • Insert • Table
• Row • Column • Images
• Highlight • Delete • Import
• Resize • Cursor2. Spell 3 words while your friend writes them in his or her notebook. Let your friend also spell 3 other words as you write them in your notebook.
3. Discuss with your friend the meaning of any 3 words in the word list.
Refer to notes in your textbook.UNIT 6:COMPUTER RESEARCH
Introduction
Since you are living in a technological world, you can easily find out information that you need from the Internet by browsing. You can also exchange information that you have obtained through emails.
Look at the following pictures.
Describe each picture above.
Predict what you are going to learn in this unit.6.1: Browse and the use of e-mails
E-mail account
Activity 6.1: Investigating what an e-mail account is
(i) What is an e-mail account?
(ii) Research from the Internet or dictionary and write in your notebook its definition.E-mail is a message that is sent electronically using e-mail applications such as Yahoo, Gmail, or Hotmail.
A real e-mail application enables you to create, send, receive as well as organize e-mail messages.
You can send and receive e-mails from users across several e-mail service providers.
For you to start using e-mail services, you need to sign up for an e-mail account.Create an e-mail account
Activity 6.2: To create your new e-mail account
(i) Open a browser window by clicking on the browse icon.

(ii) On the address bar, type a web mail address, for example www.yahoo. com
(iii) On yahoo home page, click on sign up link.

A sign up form will open up for you to start filling in your personal details.
(iv) Click “submit” when you finish entering your correct details.Login and logout
Activity 6.3: Loging in and loging out
Practise to sign in (logging in) and to sign out (logging out).
To login:
1. Click on Sign In.2. Fill in your Username and Password.
3. Click on Sign In again.
4. Click on Sign out.

To write and send e-mail
Activity 6.4: To write and send an e-mail
(i) Access Browse activity.
(ii) Sign in/login your e-mail account. Then click “compose”. This provides a small window from where you can start typing your message.
(iii) Type the recipient address for example, hannah@gmail.fr, adianhabimana@yahoo.com in the recipient text box. Ensure you send the e-mail to one of your classmates.
(iv) Type the subject for your e-mail for example; happy birthday in the subject text box.
(v) Go a head and write the birthday message in the text window.
(vi) Click send.
(vii) Ask your classmate if she or he has received your e-mail.Read inbox e-mails
Activity 6.5: Reading inbox e-mails
(i) Click on Inbox folder to display your e-mail. This will display all the available e-mails in your account.
(ii) The new unread e-mails have purple bullets on them.
Inbox is a folder where your newly delivered e-mail messages appear. The Inbox is normally opened automatically when you login to read your e-mails.
6.2: Browse Activity
Activity 6.6: Browse Activity
(i) Start Browse Activity from the Home View.
(ii) What do you see when the browse activity opens up?
(iii) Name any 2 Internet browsers that you know.Navigating and Using the Browse Activity
When you click on a web page and view its contents, we say you are navigating the web.
To navigate the web, you will need to type the address you want to go to in the Address Bar. For example www.yahoo.com.
• The most common website used for finding information is http://www.google.com.
• Information can also be searched on Wikipedia or yahoo.
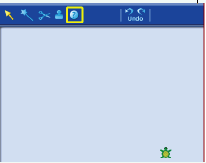
Activity 6.7: Taking a screenshot
(i) Identify the image or information that you want.
(ii) Hold down the Alt key and then press 1 (Alt + 1).
(iii) View your screenshot in your XO Journal.Activity 6.8: Navigating using the Browse Activity
(i) Start Browse Activity.
(ii) Type http://wiki.laptop.org in the address bar.
(iii) Read the content on the website.
(iv) Take a screenshot of information and pictures that you like.
Accessing the Worldmap, Dictionary, Textbooks and Storybooks
Activity 6.9: Accessing the Dictionary, Textbooks and Storybooks
(a) Accessing the dictionary
(i) Browse the Google website by typing http://www.google.com in the address bar.
(ii) In the Google search box type the word ‘Dictionary.’
(iii) Click the search button
 to view results.
(b) Accessing the Textbooks and storybooks
(i) To access Textbooks and storybooks, use the Google search box.
(ii) You can search for a specific book or a broad category of books.(c) Accessing the World Map
(i) Start the Browse Activity. Then Google search box
(ii) Type in the address bar “world map” as your search term.
(iii) Click on images icon to view images only.(iv) Click on various maps to view them. Zoom the maps to see them more clearly. Click on the icon that looks like this
 to zoom.
To zoom in, click on To zoom out click on
(v) Take two screenshots of the map that you can see clearly.
(vi) View your maps in the Journal.You can use the browser to access important learning materials. Examples of learning materials that you can access include: The world map, Dictionary, Textbooks and storybooks among others.
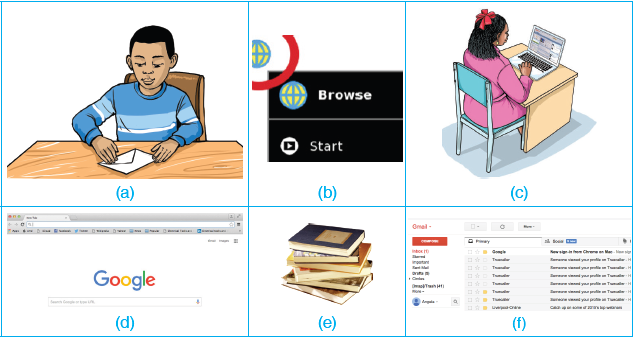
A world map shows all the continents and oceans of the world.Practice Activity 6.1
John's XO laptop is showing the following screen.
1. What website did he type in the address bar?
2. What did he search for?
3. Write down some responses that he got from his search.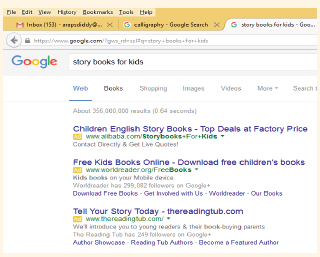
Share the content from Browse Activity
Activity 6.10: Sharing Bookmarks
(i) Create a book mark by clicking on the book mark icon which appears like a star on the top of the browser window.
(ii) Hover your pointer over the Private icon.
(iii) Click the My Neighbourhood icon. By doing this, you will be allowing friends to view and share your bookmarks.
(iv) Ask your friends to see the shared bookmarks. To do this, they will just need to open their Neighbourhood View on their XOs laptops.If you wish to show other people what you have been doing in Browse, you can share your bookmarks with them.
A bookmark is a record of websites that you have visited. You will need to have at least one bookmark already saved.
Revision Activity 6
1. Study the following screenshot:
(a) What is the page above used for?
(b) (i) Name the parts labelled K and J.
(ii) Explain briefly how you can share content in the parts labelled J.
(c) Apart from Google, what other web application can we use to search for information?
2. (a) Start Browse Activity. In the Google Search box that appears type
“Map of Africa” as your search term to access the map of Africa.
(b) Click on images link to view images only. Click on one image you have chosen to have a larger clearer view.
(c) Zoom-in so that you can locate the East African countries.
(d) Take a screenshot and share it with friends.
3. What is an e-mail?
A. Sending text messages electronically
B. Sending invites electronically
C. A message that is sent electronically
D. A message that is flagged electronically
4. What is the name given to the process of creating an e-mail account?
A. Login B. Make
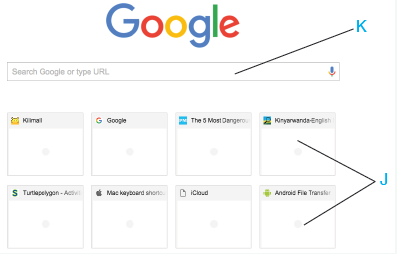
C. Design D. Sign up5. The following picture shows an e-mail that Jane wants to send to her mother. She wants to inform her about her school accommodation balance.
(a) What is the importance of the parts labelled:
(i) A (ii) B (iii) C (iv) D(b) Using your XO laptop, compose the e-mail that Jane needs to send. Include the subject in your e-mail.
6. The following features are found in a gmail account except
A. Sent mail
B. Drafts
C. Trash
D. School
7. Using Write Activity, outline the steps you will follow to create an e-mail account.
8. You need to send an e-mail to your friend to invite her to your community
cleanup exercise. Create an e-mail with a relevant subject and content.
9. Write a step-by-step procedure you will follow to compose an e-mail message.10. (a) Who is the recipient with reference to e-mails?
(b) Create an email to your friend.
(c) In the body of the e-mail, add content explaining why you like using XO laptops in your school.
(d) Give a relevant subject to your email.
11. (a) Can you send an e-mail with the same message to several recipients?
(b) Juliane has told Thomas that her e-mail has an attachment.
(i) Explain what a file attachment is?
(ii) Give examples of files that can be attached using e-mail?Word list
1. Read the following words in pairs.
• Empowerment • Browse • Login
• Login • Address Bar • Home Page
• Sign up • Navigating • Website
• Internet • Bookmark • Downloading
2. Spell 3 words while your friend writes them in his or her notebook. Let your friend also spell 3 other words as you write them in your notebook.
3. Discuss with your friend the meaning of any 3 words in the word list.
Refer to notes in your textbook.UNIT 7:PROGRAMMING FOR CHILDREN
Introduction
You are growing up in a digital world where everything involves use of electronic devices. These devices operate using stored programmes.
Look at the following screenshots.

Describe each screenshot above.
Predict what you are going to learn.Turtle Art Activity
7.1 Drawing geometric shapes
Activity 7.1: Identifying geometric shapes
(i) Draw the following pictures in your notebook.
(a) Parallelogram (b) Rectangle
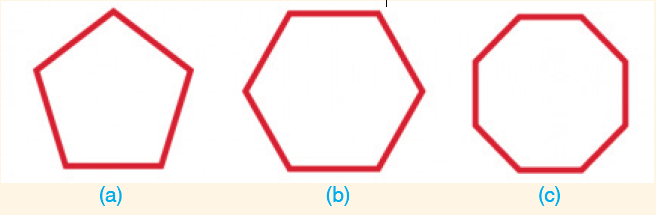
(c) Trapeziums (d) Rhombuses(ii) Identify the following regular polygons.
(iii) Study the following table correctly.
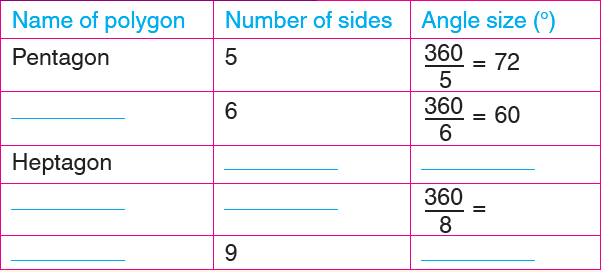
Copy the table in your notebook and fill in appropriately. Use the Browse Activity on your XO laptop to find out more information.
Drawing a 6 sided polygon in Turtle Art
Activity 7.2: Drawing hexagon in Turtle Art
Use the Forward Command and Left/Right command. Using the Forward and Right/Left commands to draw a 6 sided polygon you can also use the Repeat command.
(i) Select the instruction block written on Forward. Enter the number of pixels that you want your Turtle to move e.g. 200.
(ii) Select the Left or Right command. Enter the angle as 60°.
(iii) Enter the two steps above 6 times.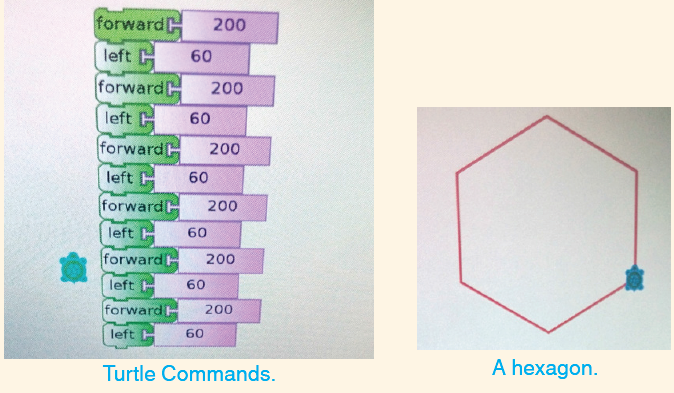
(iv) Run your stack slowly to see how your Turtle draws the polygon.
Using the Repeat command
The repeat command helps you to avoid writing the same commands several times.
When you use the Repeat command you should also use the command written on Start.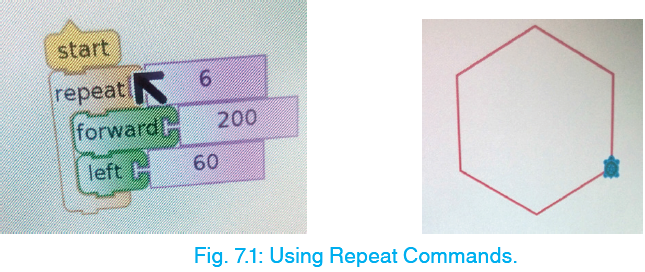
Parallelogram
Activity 7.3: Drawing a parallelogram in Turtle Art
Draw a parallelogram using Turtle Art instructions.
(i) Select the Left or Right command block. Enter the angle as 105°.(ii) Select Forward command block. Enter the number of pixels that you want your Turtle to move e.g. 200.
(iv) Select the Left or Right command block. Enter the angle as 75° (180– 105).
(v) Select the Forward command block and enter the pixels as 100.
(vi) Repeat the above instructions one more time.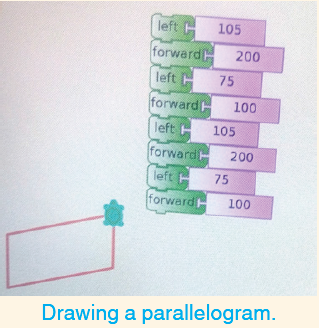
A parallelogram is a slanted rectangle. Two of its opposite sides are parallel to each other. Opposite angles are also equal.
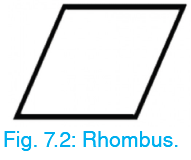
Rhombus
Activity 7.4: Drawing a rhombus in Turtle Art
(i) Access the Turtle Art Activity. Using the instructions you used in drawing a parallelogram, draw a rhombus.
Hint: Use the same pixel values for all your Forward commands.
(ii) Draw rhombuses of various sizes using Turtle Art Commands. Practice using the Repeat command to draw your rhombus.
(iii) Calculate the perimeter and area of the figures in your Notebooks.
(iv) Give your book to the teacher for marking.A rhombus is a slanted square. It has 4 equal sides. The opposite angles in a rhombus are equal.
Trapezium
Activity 7.5: Drawing a trapezium in Turtle Art
(i) Draw a trapezium in Turtle Activity.
(ii) Draw the trapezium that the Turtle draws in your book.
(ii) Practise drawing another trapezium that has a different shape.What to do:
1. Drop the stack of command blocks shown in the screenshot opposite.
2. Run the stack of commands to obtain your Trapezium.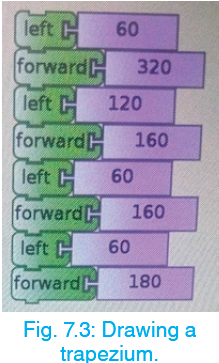
7.2: Arithmetic Operations
Practice Activity 7.1
(i) Work out the following in your notebook
(a) 3 + 2 (b) 7 × 3 (c) 36 ÷ 9 (d) 60 – 7
(ii) Comment about the activities in (i) above.Arithmetic deals with counting and calculations of numerical data.
Turtle Art has a Number palette that contains operators that are useful in carrying out mathematical calculations. The Number palette appears on fig. 7.7: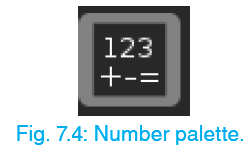
When you click on this palette, several operations are displayed as shown below.
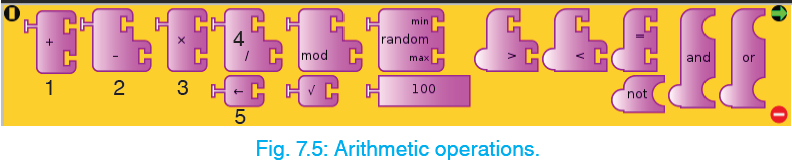
The icons labelled 1, 2, 3 and 4 are, addition, subtraction, multiplication and division blocks respectively. Icon 5 is the number block.
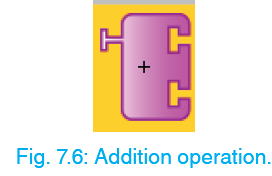
Addition
You use the Addition operation and the Number block to add two numbers. The Addition operation is represented by the symbol +.
Example:
Gilian had 100 bulls, she bought 300 hundred cows.
How many cattle did she have all together?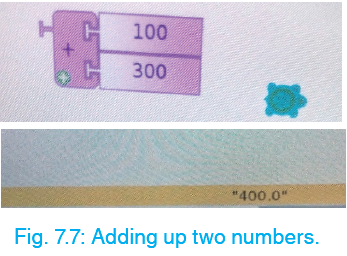
Subtraction
Use the Subtraction operation and the Number block to add two numbers.
The Subtraction operation is represented by the symbol –.
Example:
Peter had 10 pencils. He gave 3 pencils to his sister. How many pencils was he left with?
Multiplication
Use the Multiplication operation and the Number block to multiply two numbers.
The Multiplication operation is represented by the cross symbol X.
Fig. 7.10: Multiplication operation.
Example:
A plot has 5 rows of tomatoes. Each row has 10 tomato plants. How many tomato plants are in the plot?

Fig. 7.11: Multiplying two numbers.
Division
Use the Division operation and the Number block to divide two numbers.
The Division operation is represented by the symbol /.
Fig. 7.12: Division operation.
Example:
Mrs Gatere has 30 books. She wants to share the books equally among her 5
children. How many books will each child get?

Fig. 7.13: Dividing two numbers.
Practice Activity 7.2 Performing Calculations
Use the Arithmetic Operations in your XO’s Turtle Art Activity to solve the following problems:
1. Use the following picture to answer questions that follow (distance between Kigali and Muhanga = 50 km, Kigali and Ngororero = 88 km.
(a) Anne has cycled from Kigali to Muhanga. How many kilometres does she need to cover in order to reach Ngororero? Show your calculations using the Turtle Art Activity.
(b) Moses cycled from Kigali to Muhanga in 10 days. How many kilometres did he cover each day? Use the Turtle Art Activity to do your calculations.
2. Find the area of a parallelogram with a length of 10 cm and a width of 6 cm.3. (a) Use the Turtle Art Activity to draw the figure that the command blocks below will give.

(b) Calculate the area of the figure.
4. James had 27 mangoes. He shared the mangoes equally between his three friends. Use the Turtle Art activity to calculate the number of mangoes that each of James’ friends got.Scratch Activity
7.3 Create dialogue and cartoons
Activity 7.7: Changing the appearance of a Sprite
(i) Click on the Costumes icon in the script pane.
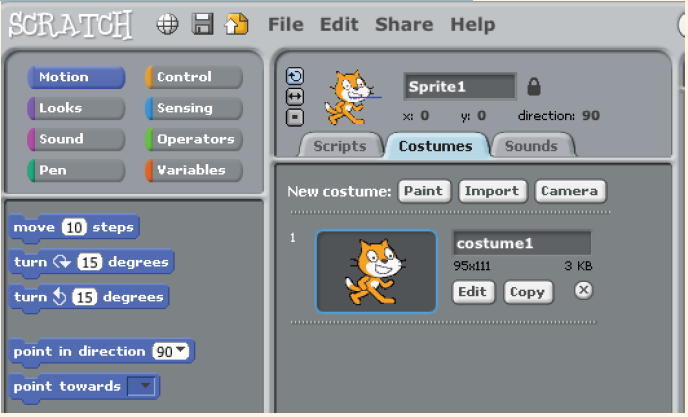
(ii) You will get three options; Paint, Import and Camera. These three are the ones used to change the sprite's appearance.
(iii) What happens when you click on the Edit or copy icons?Dialogue and cartoons can be created as Scratch projects in the Scratch Activity.
These projects can then be shared among Scratch Activity users.
Spriting
Sprites are the objects that perform actions in dialogues and cartoons (actors).
Sprites are important because they are the ones that move and act.
Spriting is the act of creating or modifying objects that act for use in dialogues and Cartoons.Paint Option
The Paint Option gives you a background with tools that allow you to draw and paint sprites of your own choice.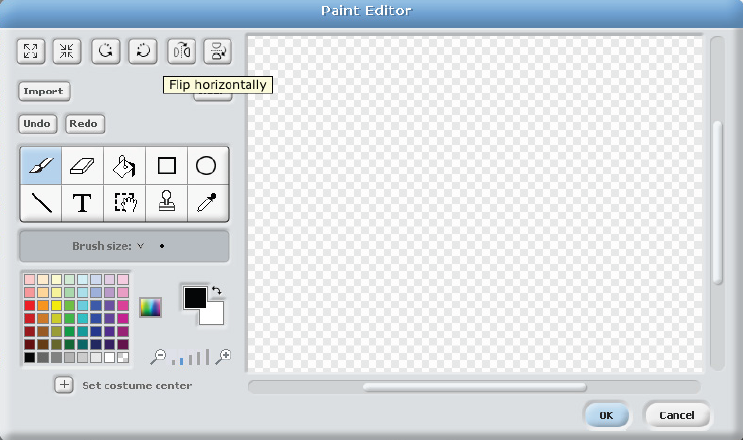
Fig. 7.14: Paint Option.
Import option
This option allows you to choose a different sprite from the existing one.
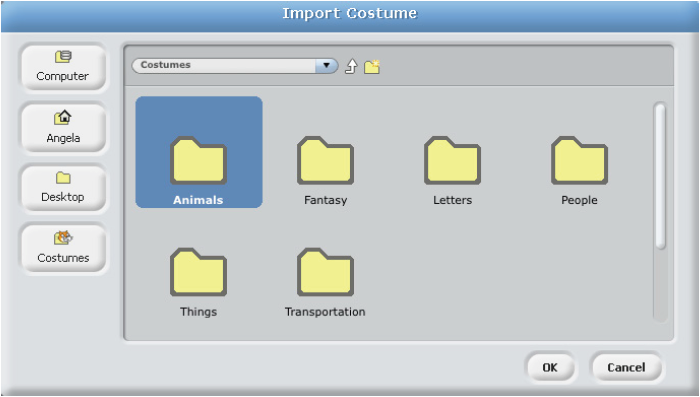
Fig. 7.15: Import Option.
The sprites are grouped in different categories. Each category contains a number of sprites that you can choose from.
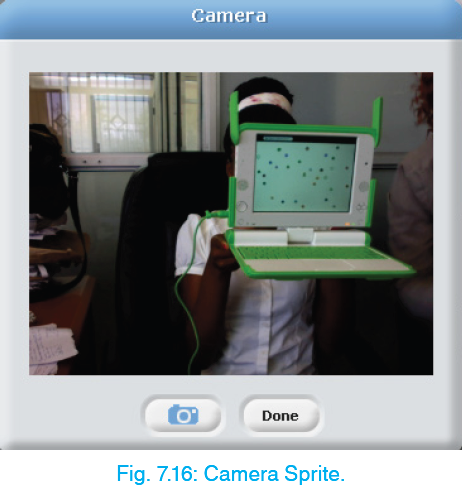
Camera
The camera lets you take photographs of objects that you want to use in your project.
When you click on the Camera icon the camera on your XO is activated. You can then take a photograph by clicking on the camera icon, followed by Done.
Commands and speeches
Activity 7.7: Scratch commands
(i) Name the eight command blocks found in the Scratch command palette.
(ii) What are the functions of the pen, sensing, operator and variables command blocks? Give answer basing on your exploration on the XO laptop.To create dialogues and speeches, you have to create a good script for your sprites to act.
As learnt earlier in P4, there are eight command blocks.
The following blocks will help you to assemble a working script. Such a script will enable you create a dialogue or cartoon.
Motion blocks
• They are blue coloured blocks.
• These blocks make your sprite move, point in a certain direction and change direction.Looks blocks
• These are purple coloured blocks.
• They help you to change the costume of your sprite, create dialogues using speech balloons, let your sprite think
and also change the size of your sprite.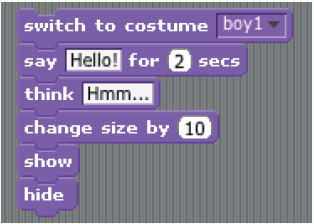
Sound blocks
• These blocks allow you to put sound in your dialogue. The sound can be heard when the project runs.
• It can also be used to stop playing sounds, increase or decrease the volume of sound.
Control blocks
• Instructions in this command block enable your scripts to run.
• These instructions help you to run scripts for each sprite, repeat instructions, wait or give directions to sprites.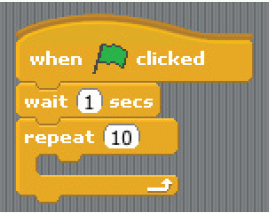
7.4 OrganizationActivity 7.8: Organizing a script
(i) Research the following topics: corruption, child abuse, drugs, health, sports and environment.
(ii) Following the example create dialogues about these topics.
(iii) Create the scripts of one dialogue.
(iv) Organise the commands to create a functional script in the script pane.
(v) Show your work to your friends.A script is created by grouping commands that convey certain information together.
When the command blocks are stacked and the green flag in the stage pane clicked, your cartoon or dialogue will be acted.
The following script gives a game dialogue between Irene and Jane.
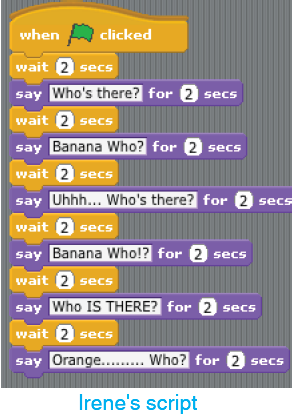
Fig 7.18: Examples of organized scripts
After creating your script above. Click the green flag in the stage pane to see what happens.
Background setting
Activity 7.9: Using background settings
(i) Click on the Stage icon in the thumbnails pane.
(ii) Practise using paint, import and camera options.When you click on the Stage icon, Pop up menus appear in the script pane.
These are backgrounds and sounds.
When you click on Backgrounds, the following menu comes up.
Paint option
The paint option gives a paint palette similar to that used in creating new sprites.
(Refer to Fig. 7.14 on page 74)
Import option
This option gives you lots of backgrounds that you can choose from. You can also select images that are stored on your computer.
Camera option
The camera option lets you take photographs of objects that you want to use for the background of your Scratch stage.
Practice Activity 7.3 Changing backgrounds choosing sprites and inserting sound in project work
1. Look at the following figure. What photograph has been used as the stage’s background?

2. Practise taking photographs of various backgrounds using your XO Laptop.
3. Change the sprite shown in the above figure to that of a bee.
4. Sounds is an Icon that appears both in Sprinting and Background setting. Find out practically how sound setting is done using Set and Import options.
5. In your notebook describe briefly how you added sounds to your project.
6. (a) Press the icon written on outdoors. Write down the outdoor backgrounds there.
(b) Click on the Nature icon. Choose flower-bed background and click okay.
(c) Show your work to your desk mate.Revision Activity 7
1. When you drag and drop the forward block to start drawing your shape, the turtle will .
A. move one step back wards
B. move one step right
C. move one step left
D. move one step forward2. (a) What is the name given to the image shown here?
A. Tool bar
B. PaletteC. Main Area
D. Stage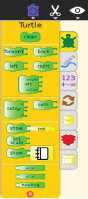
b) The space marked p below is known as

A. Tool bar B. Palette C. Stage D. Main Area
3. (a) Which activity is represented by the image below?
(b) List the mathematical operations that can be done using the number palette.
4. Use Turtle Art to draw the following Shapes.
A. Parallelogram
B. Rhombus
C. Trapezium
D. Regular Polygons
5. (a) When scratch activity opens up it will show your sprite. The place where the sprite appears is called .
A. the stage B. the Window
C. command tab D. dialogue box(b) What is the name given to images shown below?

A. Files B. Folders
C. Documents D. Tables6. What is the name given to the process of sending files from an external source to your program?
A. Sourcing
B. Exporting
C. Importing
D. Extracting7. (a) What is a script?
(b) Create a simple script on your XO laptop.
8. (a) What is a background as used in Scratch Activity?
(b) The following sprites were created by Loice. How did she create them?
(c) Create the sprites shown above.
9. (a) Choose the sprite of a girl from existing sprites.
(b) Change your existing background into background of a bedroom.
(c) Change your background to that of a kitchen10. You are required to use your own image saved in an external storage device as your new sprite. Perform this activity step by step.
11. Explain the following words as used in sound settings.(a) Sound Editor (b) Edit tab
(c) Effects tab (d) Play Sound• Stop All Sounds
Word list
1. Read the following words in pairs.
• Turtle Art • Window • Button
• Instruction Blocks • Sequencing • Command Blocks
• Number Palette • Operators • Explore
• Parallel • Scratch Activity • Sprite
• Script Pane • Costume Icon • Background
• Cartoon • Camera Icon • Convey
• Dialogue • Paint Option • Import
• Stage Pane • Stage Icon • Menu• Costume
2. Spell 3 words while your friend writes them in his or her notebook. Let your friend also spell 3 other words as you write them in your notebook.
3. Discuss with your friend the meaning of any 3 words in the word list.
Refer to notes in your textbook.UNIT 8:WATER
Introduction
Water is important in our daily life, we cannot do without it. It is used for domestic, industrial, hygiene and other purposes. It is necessary for all of us to ensure that water sources are not polluted.
Look at the following pictures.
Describe each picture above.
Predict what you are going to learn.8.1: Importance of water
Activity 8.1: Identifying the Importance of water
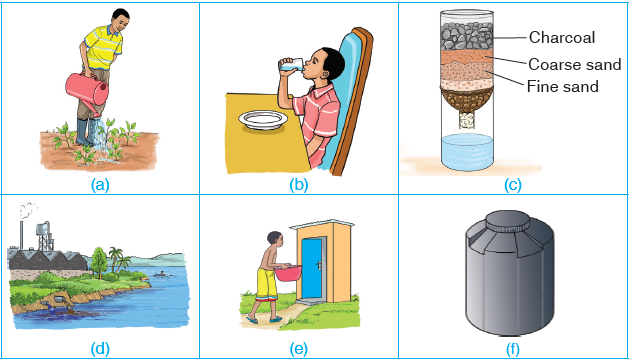
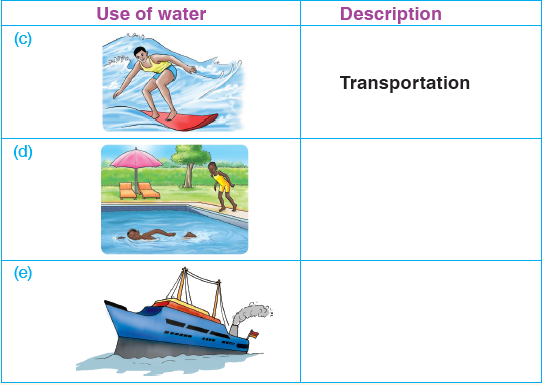
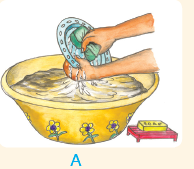
(i) Identify the uses of water shown in the pictures below.

(ii) Discuss how water is important in the uses identified above.
(iii) Identify other uses of water not shown in the pictures above.We use water for different purposes.
1. As human food
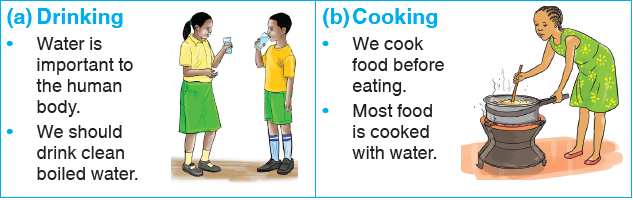
Fig. 8.1: Water as human food.
2. I n sanitation
Sanitation refers to the cleanliness of our body, clothes and our surrounding.
The uses of water for sanitation include: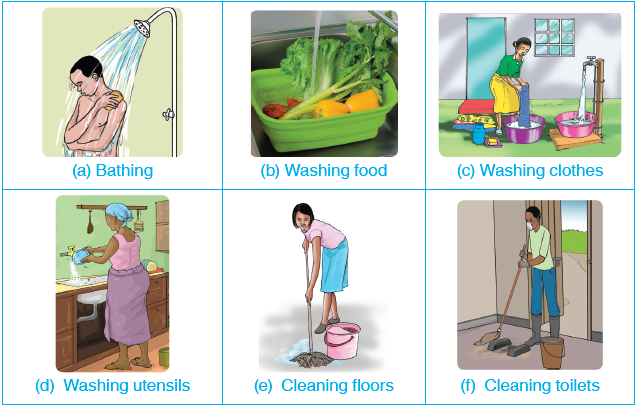
Fig. 8.2: Using water for sanitation.
3. In farming
The uses of water in farming are as follows:(a) Watering plants
• Plants obtain most of their water from rain.
During which weather is watering of plants done?
• Plants on a small piece of land can be watered using a watering can.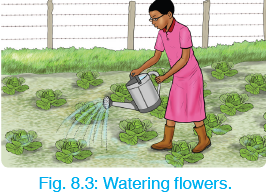
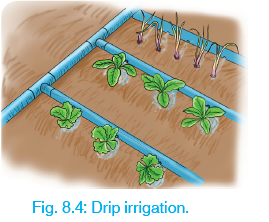
Huge plantations on many acres of land are watered using sprinklers or by drip irrigation.

(b) Water for animals
• Animals should be provided with plenty of water to drink after they feed.
• All animals should be given clean water.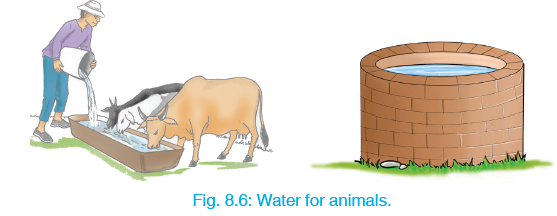
Name 3 places where animals are watered.
(c) Cleaning tools and farm structures
We use water for cleaning animal houses, stores, farm tools and animal feeding equipment.
(i) Name two animal houses that can be cleaned using water.
(ii) Name two feeding tools that can be cleaned using water.
(d) Mixing farm chemicals
• Farm chemicals are mixed with water and sprayed on the animals to kill the parasites.
• Some chemicals can also be sprayed on plants to kill plant pests.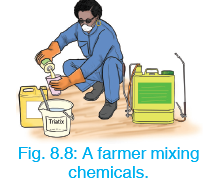
4. In industry
Most of the things that we use are made in factories.
Things that are made in the factories are called products.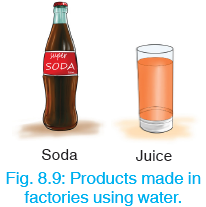
Practice Activity 8.1
1. Match the uses of water shown below with their correct use.

2. Look at the following pictures.
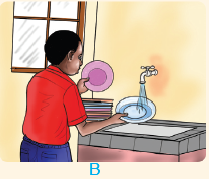
(a) Which picture shows the most economical way of using water?
(b) Explain your choice.8.2: Sources of water
What to do:
(i) Your teacher will take you for a field visit to observe sources of water around your school.
Note: Do not go near rivers, dams or lakes (water sources) without the help of your teacher or parent. You can drown in water.(ii) When back at school write down the common sources of water in your District.
(iii) Using Browse Activity on your XO laptop or books in the school library find out about other sources of water that are not found in your District.
(iv) Present your findings to other members of your class.Where do you get water for use at home?
Where does your desk mate's family get their water from?
A place where we get water from is called a source of water.
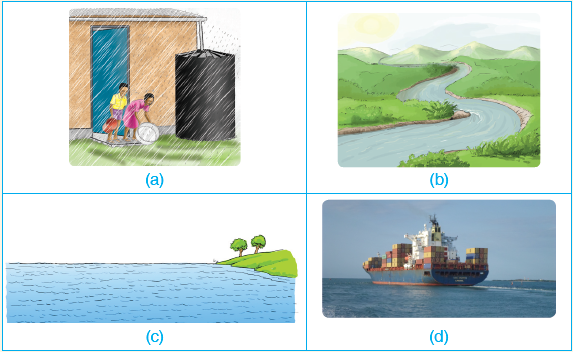
We can get water from many sources. Water is obtained from:
1. Natural sources of water.
2. Man-made sources of water.1. Natural sources of water
Activity 8.3: Identifying natural water sources
(i) Look at the following pictures.
(ii) Name the water sources labelled a, b, c and d.
(iii) Name other water sources.Human beings do not make these water sources.
Examples include rain rivers, streams, lakes, oceans, seas, and springs.2. Man-made sources
Activity 8.4: Identifying man-made water sources
Identify the following man made sources of water.

These are sources of water that are made by human beings.
They include dams, wells and canals.Point-check!
• Rain is the main source of water.
• We should not throw dirty things into water sources. They make the water dirty.
• Dirty water can cause diseases.8.3: Properties of water
Properties are also called characteristics. Only properties of pure water are considered in this unit.
Activity 8.5: Investigating properties of water
Materials Needed:
• Water in a container • A transparent glass
• Lids • Salt
What to do:
(i) Put clean boiled water in a transparent glass.
(ii) Hold the glass in your hands and do the following:
• Look at the water. What colour is it?
• Pour some water in a lid and smell it. Does it have a smell?
• Drink some of the water. How does it taste?
• Put a little salt in the water and stir it for some time. What happens?
(iii) Write down the properties you have investigated above.Pure water is water that does not contain contaminants such as mud and dissolved salts. Pure water is obtained by distillation.
1. Pure water is colourless.
2. Pure water is odourless (has no smell).
3. Water is tasteless.
4. Water is a good solvent.
5. Pure water has a melting point of 0 °C.
6. Pure water has a boiling point of 100 °C.8.4: Rain Water
What happens to water sources like rivers and streams when there is no rain?
Rain is the main source of water. Rain water fills oceans, lakes and rivers.Activity 8.6: Investigation to discover a simple water cycle
Materials Needed:
• Source of heat e.g. stove or burner • Sauce pan
• Pan containing cold water • WaterWhat to do:
(i) Turn on your source of heat.
(ii) Pour some water in the Sauce pan. Place the source pan on the source
of heat.
(iii) Heat the pan until the water boils.
(iv) Wait for the water to boil. How do you know that the water has boiled?
(v) Hold a pan containing water above the source pan.
What do you observe at the bottom of the pan containing cold water?
Why does it happen that way?
(vi) From your discussion, explain how rain forms as shown in the cycle below.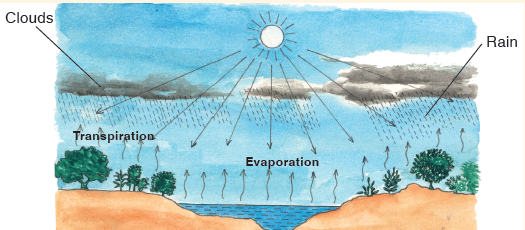
(vii) Discuss the processes: condensation, evaporation and precipitation in your investigation.
(viii) Using your XO Browse Activity research of how the processes; evaporation, transpiration, condensation help in formation of rain. Your can also use books in the school.A water cycle
• This is continuous process by which water moves from the land to the atmosphere and back to the land again.
• The cycle involves processes such as evaporation, transpiration, condensation and precipitation.Evaporation
It is change of liquid (water) to vapour (gas).
Transpiration
It is loss of water from plant leaves in form of vapour.
Condensation
It is change of water vapour to liquid water.
Precipitation
Are all forms of water vapour condensed in the sky. They fall down on earth as
rainfall, snow, hail etc.Effects of rain water
Activity 8.7: Effects of rain water
(i) Look at the following pictures.
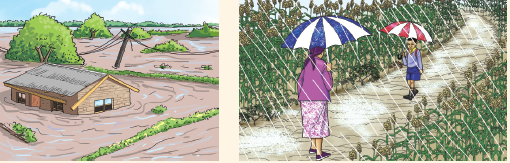
From the pictures above, identify:
(a) the beneficial effects of rain water.(b) the destructive effects of rain water.
(ii) Give 5 activities that cannot be done when there is too much rain.Positive effects of rain water
• Rain water is used at home for drinking, cooking and cleaning.
• Rain water helps plants to grow.
• Rain water cools the earth.
• When it is dusty, rain water helps to settle the dust.Negative effects of rain water
• Too much rain water causes floods and land slides.
• Too much rain water causes soil erosion.
• When there is too much rain water, waterborne diseases tend to emerge and spread. Some of these diseases can cause deaths.
Name 3 examples of waterborne diseases.
• Too much rain can destroy infrastructure. Infrastructure includes buildings, roads, railway lines and telephone lines.
• Too much rain disrupts people’s activities.Practice Activity 8.2
Read the following story.
Jean and Francine are cousins. They are P5 pupils at Bicumbi BoardingSchool.Jean lives in Rwamagana while Francine lives in Gicumbi.
When school closed last holiday, their aunt and uncle came to pick them up from school. They were going to spend their holiday in their grandfather’s home at Karongi.
That same day, it rained heavily. This made it difficult for the two cousins to collect their belongings
and pack them in their auntie’s car.
After leaving the school compound they got into a traffic jam. They could not move fast because rainwater had flooded the roads. Traffic policemen were helping the motorists to move.
The traffic jam delayed their journey. It got late so they could not travel to Karongi. Their aunt rented a room in Kigali town for them to spend the night there.
The following day, the weather was warm and they were able to travel comfortably to Karongi. On their way there, they saw healthy plants growing in farms. There were cattle grazing on the green grass that grew by the roadside. They also saw farmers working on their farms. They did not see children going to fetch water from River Nyabarongo as they usually did during sunny weather.
1. (i) Name two positive effects of rain mentioned in the story.
(ii) Name two negative effects of rain outlined in the story.
2. (i) From the story above, does the writer shows that rain is good or bad? Justify your answer.
(ii) Do you agree with the writer’s observations concerning rain?
(iii) If yes give your reasons. If no, give your reasons.
3. Using the Browse Activity on your XO laptop:
(i) Search the map of Rwanda.
(ii) Locate Rwamagana, Gicumbi and Karongi from your map.Methods of protecting the environment from the rainwater
Activity 8.8: Identify ways of protecting the environment from rain water
What you need:
• Sweet potato vines • Tree seedlings • Hoes
• Machetes • Tape measureWhat to do:
(i) Get into three working groups.
(ii) Assign yourselves plots.
(iii) Let one group make terraces, let another group plant sweet potato vines, the last group to plant tree seedlings.(iv) Plant trees in areas where they will be allowed to grow.
(v) Take care of your plots in turns. Ensure you water your seedlings and vines. Protect them from animals like goats and cows.
(vi) Using browse Activity on your XO laptop or books in the library find out other ways of protecting the environment from rain water.
(vii) Present your findings to the other members of your class.
We should protect the environment from rain water.
Some ways of protecting the environment from rain water include planting trees, making terraces, making ditches cultivating anti-erosive plants.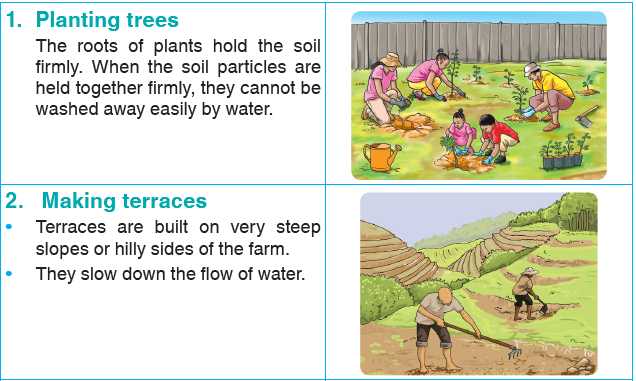
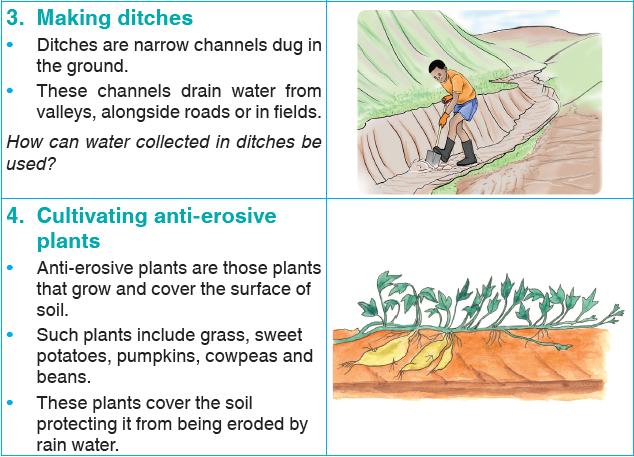
Table 8.1: Examples of methods of protecting the environment from rainwater.
8.5: Water pollutants
Activity 8.9: Observing water pollution
(i) Look at the following pictures.
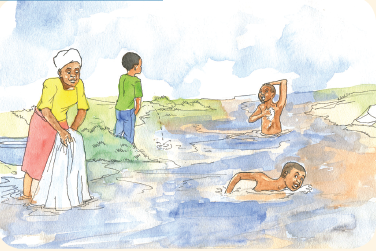
(ii) Identify and name the water pollutants in the picture above.
(iii) Visit some of the water sources which are affected by pollution.
(iv) Observe the activities taking place around the water sources.
(v) Identify dangers of the polluted water and ways of maintaining the water sources unpolluted.
(vi) Research on ways in which other water sources are polluted. Present your findings to the rest of the class.Activity Questions
2. (a) What is water pollution?
(b) Give 3 examples of water pollutants.
3. When a lot of fertiliser finds its way into water bodies, it pollutes water. What are the dangers of such polluted water?The following are major ways in which water is polluted.
1. Human and animal wastes
Human and animal wastes such as faeces and urine pollute water.
These wastes contain germs. When passed in water, they make the water unsafe for drinking and for domestic use.
2. Floods/run-off water
When it rains, rain water flows over the soil. This water becomes muddy. It also carries along solid particles such as pieces of paper and dry grass.
When such water flows into a water source, the water becomes polluted.3. Waste from factories
3. Waste from factories
Factories make products and produce waste as well.Most of the waste is dangerous. If the waste is dumped into water they pollute it.
Water polluted by wastes from factories is unsafe for drinking, domestic use and farm use.
4. Oil spillage
Crude oil is transported across seas and oceans in special ships known as oil tankers.
These tankers may accidentally overturn and spill oil into the ocean or sea.
5. Farm chemicals
Examples of farm chemicals include pesticides, herbicides and fertilisers.
Some of these chemicals may dissolve in rain water and be carried to water sources.8.6: D angers of water pollution
Activity 8.10: Identifying the dangers of water pollution
Materials needed:
• Photographs and cut-outs showing water pollution and its effects.
• Pens and books.
What to do:
(i) Collect cut-outs from newspapers and magazines.(ii) Look at the following pictures.
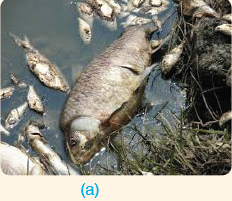
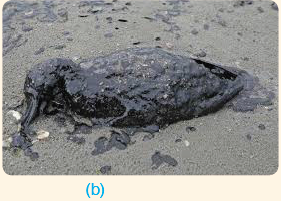
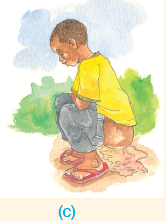

(iii) Identify the dangers of water pollution shown in the pictures above.
(iv) Outline other dangers of water pollution from the photographs and cutouts that you have.Water pollution is dangerous for human beings, plants, animals and soil.
1. D angers of water pollution for human beings
• Polluted water may contain germs and parasite.
• When people drink the polluted water, they take in the germs or parasites.
• These germs spread water borne diseases such as cholera and typhoid.
2. D angers of water pollution for animals
Animals also take in germs and parasites when they drink polluted water.
What are the effects of germs on animals? How can oil spilled on water affect animals?
3. D angers of water pollution for plants
Water that contains excessive fertilisers, pesticides or herbicides can make plants to dry.
What are the other dangers of water pollution to plants?4. D angers of water pollution for soil
When we use water, which is polluted to grow crops, or for domestic use, we may end up polluting the soil. Polluted soil kills small organisms that live in soil.8.7: Prevention of water pollution
Activity 8.11: Identifying ways of preventing water pollution
(i) Look at the following pictures.
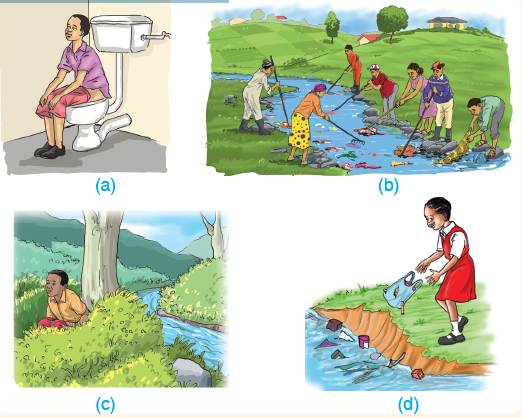
(a) Describe the activities labelled a, b, c and d.
(b) Which activities will cause water pollution?
(c) Which activities are helping to prevent water pollution?(ii) Identify different ways of preventing water pollution.
(iii) Write them in your notebooks.
(iv) Talk with your partner about what you have written.Water pollution can be prevented by stopping or controlling activities that lead to water pollution.
The following are some of the measures that can be taken to prevent water pollution.
1. Practising proper hygiene, for example use of toilets, latrines and urinals.
2. Avoid bathing, watering animals and washing clothes in water sources.
3. Practising farming methods that reduce soil erosion like contour and terrace farming.4. Avoid draining of industrial and domestic sewage into water sources.
5. Dispose of solid waste properly. Do not dump solid waste in water sources.
6. Clearing accidental oil spills as soon as they happen.
7. Use farm chemicals such as fertilisers, pesticides and herbicides in controlled amounts.8.8: Water purification methods
Activity 8.12: Experiment on purification of water
Materials needed:
• Source of heat
• Pan or pot with lid
• Sieve or white piece of cloth
• Small containers
• River water or dam water in jerry cansWhat to do:
(i) Hold a sieve over a clean pan or pot. If you do not have a sieve, tie a clean piece of cloth around the pan.
(ii) Pour water from a jerry can over the sieve or piece of cloth into a clean pan or pot to filter it. Cover the pan or pot with a lid.
(iii) Light a fire to get heat. Place the pan with filtered water over the heat.
(iv) W(v) Add some water-treating chemical into water in another container.
(vi) Taste the boiled water and the chemical treated water.hen the water has boiled, remove it from the source of heat. Let the water cool.(a) (i) Do chemical treated water and boiled water taste the same?
(ii) Name 3 examples of chemicals that can be added to water in your homes to purify it.
(b) Which water would you prefer to drink? Give the reasons for choice of your answer.
(c) Do people in your village purify their drinking water using chemicals or do they boil it?
(d) Why do you think they use the method you have talked about in (c) above?Water from its sources is not safe for home use. Purified water is safe for drinking and other domestic uses.
Purification of water involves removal of suspended wastes by filtration and germs by boiling or chemical treatment.1. Boiling water
Boiling is the best method of making water safe for drinking.
The high temperature kills harmful micro-organisms in the water.2. Filtration of water
Filtration refers to removal of solid wastes from water.
During filtration, dirty water is poured through a filter or sieve into a separate container.Note: Filtered water is not safe for drinking.

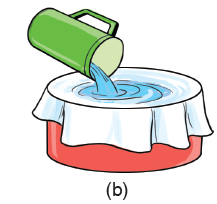
3. Chemical treatment of water (chlorination)
Chemicals treatment of water is widely used in purification of large quantities of water.
The chemicals kill harmful microorganisms in water, making the water safe for drinking and domestic use.
Chemical purification of water is done by water supplying companies. It can also be done in
wells and boreholes.
Fig. 8.12: (a), (b) and (c): Water purification methods.
8.9: Making a water filter
Class Project: Making a water filter
Materials needed:
• A large plastic bottle • Clean sand
• Coarse sand • Sharp knife or razor blade
• Beaker • Charcoal
• Clean cotton wool • Paper filter
• Small gravelWhat to do:
(i) Observe the water filter shown on page 102.
(ii) Following a similar arrangement make a water filter in school.(iii) Use the filters in your groups to filter muddy water.
The following picture shows a water filter made by a pupil in P5.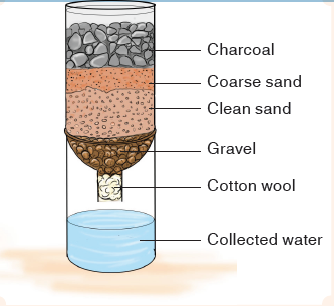
Knowing how to make a water filter is important. You can use it to make muddy water clean.
Make a water filter like the one shown above.8.10: Water storage
Activity 8.13: Role play
The following pictures show activities that you need to role play.
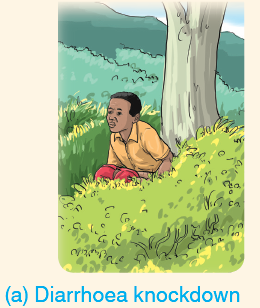
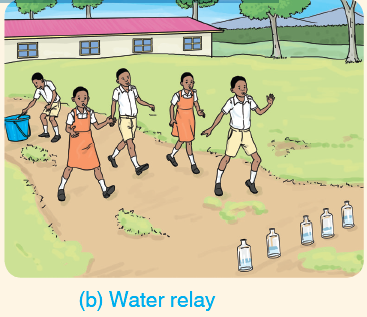
What to do:
(i) Dramatise diarrhoea knockdown as a result of drinking dirty water.
(ii) Play the water relay game as shown in picture (b).Water storage means, storing water safely for future use. What is the major use of the following containers?
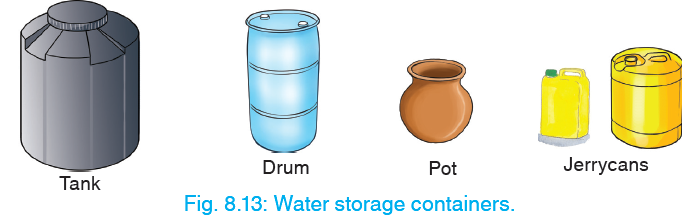
• Water from rainfall can be directed into large tanks and stored for use when there is no rain.
• The water can also be stored in drums, jerry cans, pots, buckets and bottles.
• All stored water needs to be covered to keep away dirt and insects.How can excess rain water be collected and stored?
• You should put soft drinking water in a portable container and carry it with you.
Why is this important?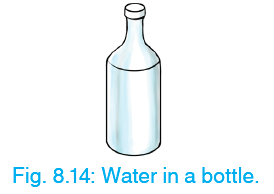
Revision Activity 8
1. What is sanitation?
2. Identify the uses of water shown below.

3. Name one chemical that is mixed with water to spray on:
(a) crops (b) animals4. What is irrigation?
5. Name 3 properties of water.
6. Write down 3 negative effects of water.
7. Look at the following picture.
(a) How is the water being polluted?
(b) How can the pollution shown above be controlled?8. Identify 5 dangers of water pollution.
9. Outline 3 measures that we can take to prevent water pollution.10. (a) Name the water purification methods shown below.
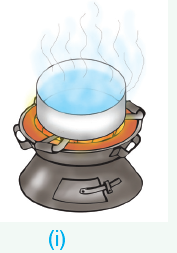
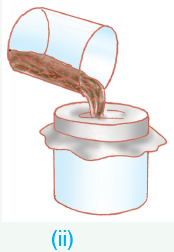
(b) Which method makes water safe for drinking? Explain.
11. You have been provided with muddy water in a container.
(a) Purify the water by removing observable wastes.
(b) Make the water safe for drinking.Word list
1. Read the following words in pairs.
• Recreation • Environment • Transportation
• Terraces • Evaporation • Pollutants
• Condensation • Tank • Precipitation
• Filtration • Atmosphere • Chlorination
2. Spell 3 words while your friend writes them in his or her notebook. Let
your friend also spell 3 other words as you write them in your notebook.
3. Discuss with your friend the meaning of any 3 words in the word list.
Refer to notes in your textbook.UNI T 9:SOIL
Introduction
Soil is essential for survival of both plants and animals. It provides a surface on which plants grow. It is also a habitat for many animals.
Look at the following pictures.
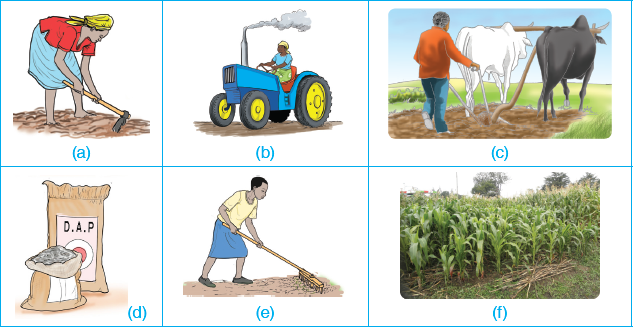
Describe each picture above.
Predict what you are going to learn.9.1: Preparation of soil for cultivation
• Preparation of soil involves activities that are carried out on land before seed are planted or seedling are transplanted.
Name all the activities that are done on land before planting seeds.Activity 9.1: Preparing plots for cultivating in vegetables
Requirements:
• Hoe • Rake
• Tape measure of strong manila string
What to do:
(i) Your teacher will assign you a piece of land. Use a tape measure to divide the piece of land into small plot.(ii) Prepare your plot for planting maize seeds. Do this by:
• Clearing the land
• Digging for the first time
• Digging a second time to make the soil fine.
• Levelling the seed bed by removing stones and other wastes.(iii) Ensure that you break the soil into small particles, remove wastes and bury organic matter deep in the soil.
(iv) 3-4 days after the above activities, add manure or fertiliser to the soil.
Turn the soil over and over to mix it with the fertiliser.
(v) Level your seedbed using a rake.
(vi) Make furrows on your seedbed using a hoe. Your seed bed is now ready for planting seeds.
(vii) What can the vegetation that this man is clearing in the picture alongside be used for?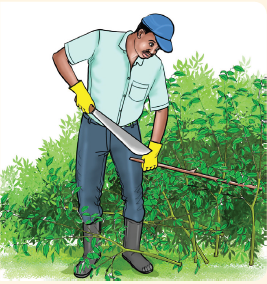
Land clearing
Land clearing done by cutting or uprooting vegetation on a piece of land.
Name 4 types of vegetation that is cleared.
To clear the land tools like machetes, axes, slashers and saws are used.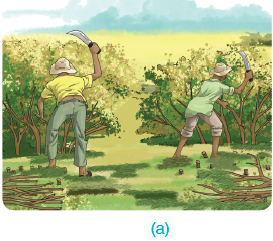
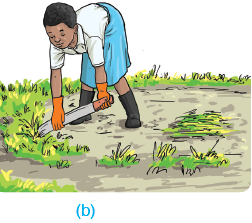
Fig. 9.1 (a) and (b): Land clearing.
Ploughing
Ploughing also referred to as primary cultivation of soil. It can be done as shown below

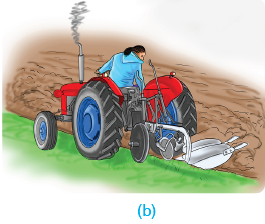
Fig. 9.2 (a) and (b): Primary cultivation.
Ploughing involves digging up the soil and turning it over. It opens up the land, loosening soil particles.
During this cultivation soil is broken into big irregular soil lumps.Secondary cultivation
Secondary cultivation is done after primary cultivation.
It is done on a dug seed bed before the seeds are planted or seedlings are transplanted. This involves furrowing.
From the picture above, explain how furrowing is done. Can furrowing be done using a hoe?
Levelling
Levelling is done when preparing a seed bed.
What is a seedbed?
Levelling of a seedbed is done using a rake.
Name three materials that are removed from soil during levelling.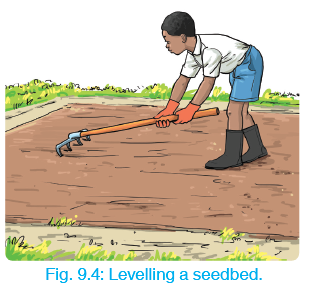
9.2: Fertilisation of soil for cultivation
Activity 9.2: Classification of fertilisers
(i) Obtain a little fertiliser that is bought from the shops and bring it to school.
(ii) Obtain drying leaves, sticks and other plants materials and bring them to school.
(iii) Obtain dried cowdung and bring it to school.
(iv) Write down all the similarities and differences between materials
obtained in steps (i), (ii) and (iii).
(v) Classify the materials into two groups based on findings in (iv) above.When crops are grown on a piece of land for a long time, nutrients in the soil are reduced.
The nutrient content of such soil can be improved by adding fertilisers to the soil.
When added to the soil, fertilisers replenish nutrients used by plants or those lost during soil erosion and leaching.Types of fertilisers
There are two types of fertilisers. These are:
(a) Natural (organic) fertilisers
(b) Artificial (inorganic) fertilisersNatural fertilisers
Natural fertilisers are also called manure.
They are grouped according to the way they are prepared.
Examples of organic fertilisers are:(a) Organic mulches, (b) Farmyard manure,
(c) Green manure, (d) Compost manure(a) Green manure
Green manure is formed from green plants.
Plants that are almost flowering are chopped and buried into the soil. When they decompose, they form green manure.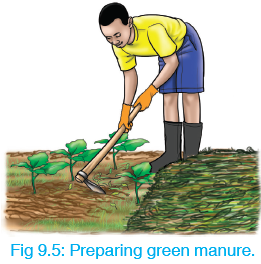
(b) Farmyard manure
Farmyard manure is also called animal manure. It is made from animal droppings,
dung, urine and their beddings.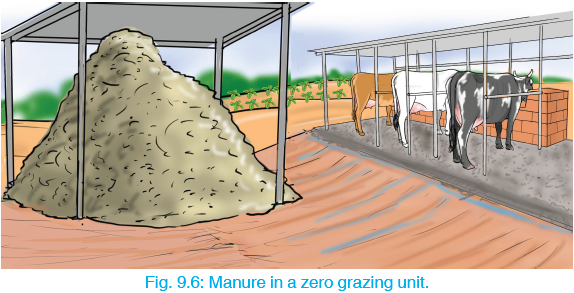
Farmyard manure should be heaped in a shed and protected from the hot sun and excess rain water.
The manure should be allowed enough time to rot before it is applied to crops.(c) Compost manure
Activity 9.3: Preparation of compost manure
Materials needed:
• Degradable waste from the class bins such as paper and fruit peelings.
• School kitchen refuse e.g. potato peelings and food remains.
• Maize stalks, grass and other dry materials.
• Farmyard manure
• Top soil
• Wood ashWhat to do:
(i) Make a trench in the ground using a hoe and a spade.
(ii) Put maize stalks and other dry materials in the trench as the first layer.
(iii) Add degradable materials from the class bin and kitchen waste (about 7 cm thick).
(iv) Add some farmyard manure (about 5 cm thick).
(v) Add some wood ash (about 7 cm thick).
(vi) Put top soil on top of the heap.
(vii) Repeat the arrangement in (ii), (iii), (iv) and (v) until the heap is 1.2 metres high.Give reasons why the following materials are needed in making compost manure
(a) Top soil
(b) Wood ash
(c) Farm yard manure
(d) Degradable waste, leaves and kitchen refuseActivity Question
1. Compost manure is made from plant remains, animal waste, wood ash, kitchen refuse and top soil.
The materials are put in a heap or pit then allowed to decay or decompose.Why are plants like beans, peas and soyabeans the best for making green manure?The following picture shows what a compost heap looks like.

Compost manure should be allowed to decompose before it is used in the farm.
Chemical fertilisers
Chemical fertilisers are also known as artificial fertilisers or inorganic fertilisers.
They are made from chemicals.
They have a high concentration of specific nutrients.
These fertilisers can be classified into two major groups straight fertilisers and compound fertilisers.(a) Straight fertilisers
Straight fertilisers are fertilisers that contain only one major type of nutrient.
Examples include urea, single super phosphate among others.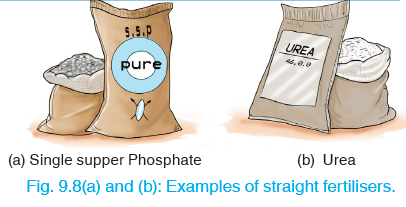
Name 3 other examples of straight fertilisers.
(b) Compound fertilisers
Compound fertiliser are also called complex fertilisers. They contain two or
more major types of nutrients.
Examples of compound fertilisers include Diammonium phosphate (DAP) and
Calcium Ammonium Nitrate (CAN).The following pictures show examples of compound fertilisers.

(a) Calcium Ammonium Nitrate (b) Diammonium Nitrate
Fig. 9.9 (a) and (b): Examples of compound fertilisers.
9.3: I mportance of fertilisers
Activity 9.4: Investigating importance of fertilisers
Two farmers planted maize seeds on the same day. Their maize plants grew as shown below
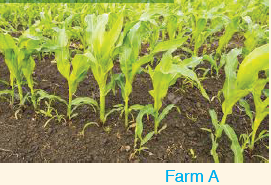
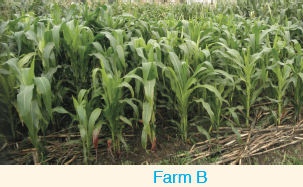
(i) Which farm had fertile soil? Explain.
(ii) How does a farmer benefit from having healthy plants?
(iii) What can the farmer of Farm A do to make her maize plants healthy?
(iv) Describe how you can take care of your maize farm.
(v) What will happen if farmyard manure is exposed to direct sun and rain?
(vi) A certain farmer always applies decomposed farmyard manure on his crops. What might happen if he applies manure that has not decomposed on his crops?Fertilisers are important in the following ways:
(a) They replace the nutrients lost through erosion or leaching.
(b) They help to increase crop yields.(c) Inorganic fertilisers release their nutrients to crops very quickly. This makes crops grow fast.
(d) Organic fertilisers help to improve the physical properties of soil such as drainage, water retention and aeration of soil.
(e) Organic fertilisers help by introducing decomposers such as bacteria and fungi to the soil.Rules of applying fertilisers
Activity 9.4: Application of fertilizer
Refer to the gardens that you prepared and planted maize in activity 1.1.
(i) Identify the appropriate type of fertiliser to apply: organic or inorganic fertiliser.
It is recommended to use organic manure before using inorganic fertilizer.Procedure of applying nitrogenous fertiliser in the garden
(i) Choose the appropriate fertiliser for your farm.
(ii) Wear protective clothing; gumboots, gloves and an overall. This is to prevent direct contact of chemicals with the skin. They have a burning effect on the skin.(iii) Read the manufacturer's instructions for directions on the amount to apply, how to mix the chemicals and mode of application.
(iv) Apply the fertilisers on the farm through top dressing (applied on the soil
surface at the base of the maize plant).(v) Dispose of the empty containers of chemical fertilisers by burying deep into the soil or pit latrine.
(vi) Clean yourself thoroughly with soap and water.
NOTE: Organic fertiliser improves soil properties. They also release nutrients slowly; meaning the soil will retain its fertility for a longer time.

Class Project: To Investigate the effects of different fertilisers on plants
What is needed:
• Four equal plots of land.
• Coloured manila strings
• Maize seeds or sorgum seeds
• Hoes and rakesWhat to do:
(i) Prepare the big plot for planting by digging and levelling.
(ii) Use a tape measure to divide the big plot into smaller equal plots A, B,C, D and E. Mark the plots using coloured manila string.
(iii) In plot A, apply DAP fertiliser in the holes where you will plant your maize seeds. In plot E, mix farmyard manure with soil before planting your seeds.(iv) Plant maize seeds in plots B,C and D without using any fertiliser.
(v) Observe the appearance of your maize seedlings after three weeks.
(vi) When your maize plants are at knee height, apply fertilisers as outlined below.
• In plot B, use nitrogenous fertilisers such as urea.
• In plot C use phosphatic fertiliser.
• In plot D use compound fertilisers such as CAN.(vii) Compare the growth of maize plants in each plot. Record your observations in a project book.
(viii) Share the recorded information with other members of the class.
(ix) Once harvesting is done, compare the yields from each plot.Points to note
• Ensure that all your maize seeds are planted at the same time.
• Ensure that you attend to the crops in all the gardens the same way.
For example watering, weeding and pest control should be done at the same time.Activity Questions
1. Name: (a) Two fertilisers that are used during planting.
(b) Two fertilisers that are used during weeding.
2. Consider a farm where maize has been grown continuously over several years and a farm where beans have been grown continuously for several years.
How will the fertility of the two farms compare?Revision Activity 9
1. Match the characteristics of fertilisers given in (a) to the correct fertilizer in (b)
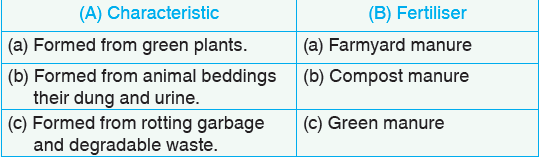
2. Identify steps of soil preparation for cultivation.
3. Why is it important to carry out secondary cultivation?
4. (a) What is the difference between organic and inorganic fertilisers?
(b) Which fertiliser improves the quality of the soil? Explain.
5. The following pictures show chemical fertilisers.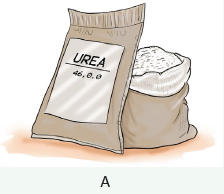
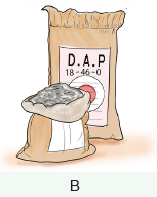
(a) A is a ________ fertiliser.
(b) B is a ________ fertilizer.6. Why is it advisable to add wood ash when preparing compost manure?
7. Outline the procedure of preparing green manure.
8. Compost manure can be made using the heap method or the pit method depending on weather conditions.
(a) Describe when the heap method is used and why.
(b) Describe when the pit method is used and why.
9. Farmer A keeps many animals while farmer B grows a lot of peas and beans.
(a) What organic fertiliser can farmer A make?
(b) What organic fertiliser can farmer B make?(c) Give one disadvantage of fertilisers made in (a) and (b) above.
10. (a) Identify the following farm tools.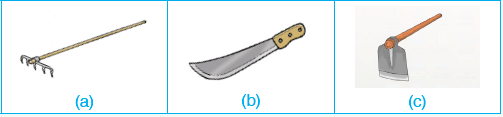
(b) From the tools given above, identify a tool suitable for:
(i) Clearing land.
(ii) Levelling the soil.
(iii) Ploughing a small piece of land.11. (a) Fill two big containers with soil. Label them as (i) and (ii).
(b) In (i) add farmyard manure and mix it with soil.
(c) In (ii) add a chemical fertiliser like DAP.
(d) Plant bean seeds in each container. Water the containers untilthe plants germinate.
(e) Observe the bean plants as they grow. Write a report on how you have managed your plants.Word list
1. Read the following words in pairs.
• Cultivation • Tilling • Harrowing
• Rake • Organic manure • Chemical fertiliser
• Ploughing • Seed bed • Compost manure
2. Spell 3 words while your friend writes them in his or her notebook. Let your friend also spell 3 other words as you write them in your notebook.
3. Discuss with your friend the meaning of any 3 words in the word list.Refer to notes in your textbook.
UNIT 10:ANIMALS
Introduction
Birds are widely kept all over the world. They are easy to rear and are a source of food for humans as well as income generating animals.
Look at the following pictures.

Describe each picture above.
Predict what you are going to learn.10.1: Keeping chickens
Chickens are kept in many parts of the world. Many people keep them for eggs, meat and feathers.Conditions of a good chicken house
Chicken should be housed properly to protect them from harsh weather conditions and predators.
Activity 10.1: Identifying conditions of a good chicken house
1. The following pictures shows chicken houses (coop).
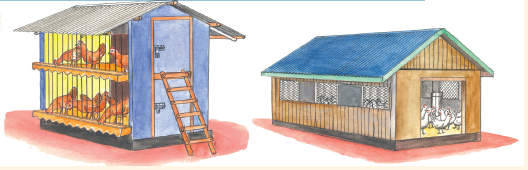
2. Outline any characteristics of a good chicken house that you can see from the pictures.
1. The chicken coop should be in a place that is easy to get to for the farmer, so that he/she can look after them well and keep them safe.
2. It should be built where there is a good drainage to prevent waterlogging. A cold and wet poultry house encourages diseases and parasites.
3. It should have adequate lighting for the birds to feed and water properly.
4. The open side of the chicken house should face away from the direction of the wind. This will prevent wind from blowing into the building.
Identify 5 other conditions of a good chicken house by researching from the Internet. Write them in your notebook.10.2: Types of breeds
Activity 10.2: Identifying types of chicken breeds
What you need:
Pictures of broilers, layers and dual purpose types of chicken.
What to do:
(i) Visit various poultry farms around your school. Identify the kind of breeds of chicken that are kept.
(ii) Collect newspaper cuttings or books showing various breeds of chicken.
Observe keenly the features of the chicken. You can also browse on your XO laptop to see the various breeds of chicken.(iii) Research the common characteristics of various chicken breeds.
(iv) Write short notes in your notebooks.
(v) Share your points with other members of your class.There are three types of breeds of chicken.
1. The egg-laying breeds.
2. The meat – type of chicken.
3. The dual purpose type of chicken.The egg-laying breeds
• They are also known as layers.
• This type of chicken is kept mainly for eggs.
Outline one physical characteristic of an egg laying chicken.
• Common breeds include White Leghorn, New Hampshire and Rhode Island Red.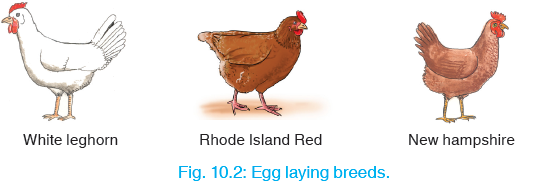
The meat-type breeds
• They are also known as broilers. Broilers are kept mainly for meat.
• Broilers grow faster than layers. They are also heavier.
• Examples include Cornish Cross, Light Sussex, Cornish Rock, Jersey Giant, among others.
Dual-purpose chickens
• They are kept for both meat and eggs.
• They are medium in weight.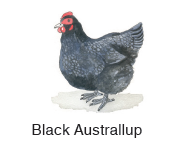

Fig. 10.4: Dual purpose breeds.
10.3: Chicken reproduction
Activity 10.3: Chicken reproduction
Read the following story.
Once upon a time in the village of Kimirongo there lived a young man called Inkoko. He kept a big cock called Igitondo. The cock was a good friend to Inkoko because it used to wake him early in the morning.One day Igitondo went out in the field to feed. He walked on until he came to a beautiful pond. There, he found a beautiful golden hen. Igitondo asked her to go with him back to Inkoko’s house.
The beautiful hen was known as Ingabire. She told Igitondo that she wanted a beautiful nest to lay eggs in.
When they got back to Inkoko, he was so happy. A few days later, Ingabire started laying eggs in a beautiful nest that Inkoko had made for her. She laid one big brown egg each day.
Inkoko cooked some of the eggs for breakfast and sold some to his neighbours. The eggs were very tasty.
eggs and refused to go out. Ingabire told Inkoko and igitondo not to worry because she was brooding the eggs for chicks to form.
After three weeks, nine tiny yellow coloured chicks came out. Only one egg had failed to hatch.

A few years later Inkoko’s home had so many chicken, that people called him “The Great Inkoko”. He was a very rich man.
He married a hardworking wife to help him take care of his many chickens.
Till now, people of Kimirongo still talk about how chicken keeping made Inkoko a rich man.Questions
1. Give a suitable heading for the story above.
2. From the story above:
(a) Who were Inkoko, Igitondo and Ingabire?
(b) What is brooding?
(c) How should a hen be cared for while it is brooding?
(d) Write short notes about the chicken reproduction.
3. (a) How do chicks form from eggs?
(b) What conditions should be present for chicks to form in the eggs?
(c) How does a broody hen behave?
4. Research using your XO laptop about artificial brooding? Write short notes about it.
5. Present your books to the teacher for marking.Reproduction in chickens involves laying eggs followed by incubation. After the incubation period is over chicks hatch from the eggs.
Laying eggs
• Hens are the ones that lay eggs.
• The eggs should be laid in nests.
• If there are a lot of chickens, the eggs should be collected at least three times a day. This way, the eggs cannot get dirty or be broken.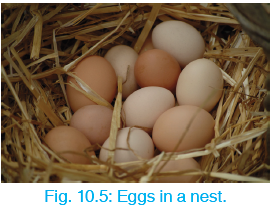
Incubation
Incubation of eggs means keeping eggs under conditions that allow them to hatch into chicks. Incubation is also known as brooding.
There are two methods of incubating eggs. These are artificial incubation and natural incubationArtificial incubation/ Brooding
In this type of brooding, the eggs are put in a special machine called an incubator for them to
hatch.Natural incubation
Natural incubation is when a broody hen sits on eggs for 21 days for them to hatch.
A broody hen is one that shows a natural tendency to sit on eggs for them to hatch.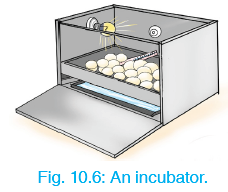
necessary to provide the following conditions:
(i) A clean dry nest, made of soft materials. The nest should be free of parasites.
(ii) A place with dim light and free from disturbance.
(iii) Clean water and feeds.
Point-check!
• All eggs for incubation should be fertilized. Select eggs from hens that interact with a cock.
• Select clean, medium-sized eggs. Do not brood very large or very small eggs because they may have defects. Incubate fresh eggs.
• Do not brood eggs, which are more than one week old. Avoid wetting the eggs when handling them.
• Let the hen sit comfortably on eggs. Do not give it too many eggs. Eggs that are not covered will not hatch.
• Brooding also means giving special care to chicks from when they are one day old to the time they are about eight weeks.
• Chicks can be reared naturally by the mother hen or artificially in a chicken house.10.4: Proper feeding of chicken
Do you keep chicken in your home?
What type of feeds do you give to your chicken?
What feeds do they get from the field by themselves?Activity 10.4: Proper feeding of chicken
What to do:
(i) Visit a chicken farm near your school.
(ii) Observe the breeds of chicken kept in the chicken house.
(iii) Ask the chicken farmer to let you:
• see how chicken feeds are prepared.
• observe the chicken as they feed.
• record the amount of feeds given to the chicken groups.
• collect various green feeds and give them to the chicken.
• clean the watering containers and feeding troughs.
(iv) When you go to school, write down short notes on practising good feeding and hygiene for chickens.
(v) Present your findings to the rest of the class.Chickens can be fed on a variety of feeds. Examples of common chicken feeds include grains like maize and millet, crushed cereals, small insects and soft vegetation.
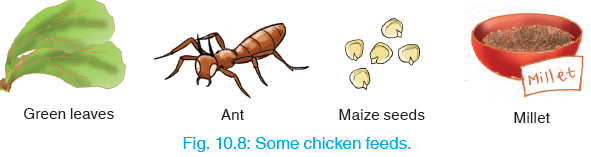
Apart from feeds that can be obtained locally, chicken can be fed on commercial feeds. Commercial feeds are also known as concentrates.
The following table shows examples of commercial chicken feeds.
Point-check!
• Ensure that all the feeds given to chickens contain proteins, carbohydrates, vitamins and essential minerals.
• Give chicken clean drinking water.
• Feeding troughs and watering containers should be kept clean at all times. This prevents the spread of diseases.
Practice Activity 9.1
1. (a) Why do some hens lay soft shelled eggs?
(b) What can be done to avoid this?
2. (a) What is cannibalism in chicken farming?
(b) How can you avoid cannibalism in chickens?10.5: Chicken diseases and parasites
Activity 10.5: Chicken diseases and ways of preventing them
What to do:
(i) Search on the Internet “ common diseases that affect chicken”
(ii) Discuss with your friend on ways to prevent chicken diseases.
(iii) Write down notes from the discussion in your notebooks.
(iv) Exchange your notes with others.Various diseases can affect chicken. Some of these diseases may be infectious diseases while some may be caused by parasites.
(a) Parasitic diseases
Parasitic diseases are caused by parasites.
What is a parasite?
A parasite is an organism, which lives in or on another organism. It benefits by getting nutrients from the host.
Infectious diseasesThese are diseases that spread from one chicken to another. Examples of infectious diseases are salmonella and infectious bronchitis.
The following table shows examples of parasitic and infectious diseases in chicken.
Disease Cause Signs and symptoms Prevention/Treatment Coccidiosis Is an intestinal
parasitic disease.Parasite called
coccidia• Diarrhoea
• Pale combs and wattles.
• Blood or mucus in the droppings.• Keep the chicken house clean and dry.
• Feed chickens with feeds containing coccidiostats.
• Keep any sick chickens warm.Ascarids
Is an intestinal parasitic
disease.Parasites
called Askaris
(round
worms• Affected chicken
becomes thin and weak.
• Slow growth and
big bellies.
• Production of thinshelled
eggs with
uneven shape.• Do not mix young and older chickens.
• Give clean feeds to the chickens.
• Treat affected chickens using dewormers.Salmonella
Is an infectious disease.Bacteria • Affected chicken look weak.
• They have purple
combs and wattles.
• They look drowsy and sluggish.• Vaccinate the chickens.
• Disinfect the chicken
coop from time to time.
• Give clean feeds and drinking water to
chickens.Infectious bronchitis
Is an infectious
disease.Bacteria • Gasping
• Sneezing
• Nasal discharge• Vaccinate the chickens.
Table 10.2: Chicken diseases signs and symptoms and ways of prevention.General measures to prevent chicken diseases
Activity 10.6: Identifying general measures to prevent chicken diseases
What to do:
(i) Visit a poultry farm around your school.
(ii) Identify the sick chickens.(iii) Observe how they are feeding, their houses and feeding containers.
(iv) Back at school discuss in groups the ways to prevent chicken diseases.
(v) Present to the rest of the class.Have you ever seen a sick chicken?
What did you do to the chicken?The following can be done to prevent chicken diseases:
1. Always keep the chicken house clean.
2. Disinfect the feeding and watering equipment.
The chicken house should be disinfected before bringing in a new flock.
3. Feed the chicken properly. Chicken should be given enough well balanced feeds for them to
be healthy and strong.
4. Add preventive drugs to chicken feeds or drinking water. Call a veterinary officer to give
vaccines to chicken.
5. Quarantine sick birds to control the spread of infections.Name 3 other ways of preventing chicken diseases.

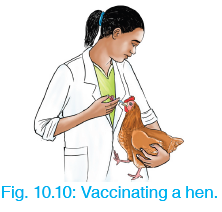
10.6: Importance of chicken farming
Activity 10.6: Identifying benefits of chicken farming
From the story of Inkoko and his chicken (Activity 10.3), name three importance of chicken farming.
Chickens are reared all over the world because of their great economic, agricultural and nutritional
importance.Nutritional importance
Chickens are a source of food. Chicken meat and eggs are a good source of proteins.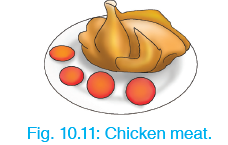
Eggs are widely eaten because they are cheap and readily available.
Source of Employment Chickens can be kept on a large scale for production of eggs or for meat production.
Many farmers get income from selling their chickens or eggs. Chicken meat and egg processing companies also employ workers who get an income from their work.
Chicken feathers can be used to create beautiful crafts that can be sold.
The feathers can also be used to fill pillows and duvets.
Agricultural importance
Chicken bones and egg shells can be ground to make feeds for other animals.
The droppings from chickens can be used as manure on farms.
Chickens feed on insects that destroy crops.
Name 3 examples of destructive insects that chickens feed on.10.7: Chicken farming process
Project: Managing a chicken farm in school
• Manage a small chicken farming project at school.
• The following is a guide on what you need to consider before starting a chicken farming project.What you need:
• Poultry house • Feeding troughs
• Waterers • Chicken feedsWhat to do:
(i) Construct a good chicken house ensure the poultry house is clean and in good condition.
(ii) Put feeding troughs, waterers and perches in the chicken house.(iii) Buy required commercial feeds and supplements.
(iv) Let the chickens in and take care of them.Care of chickens involves disease control and proper feeding. Disease control can be practised by proper hygiene and vaccination of the flock.
The following table gives a simple vaccination programme for chickens.
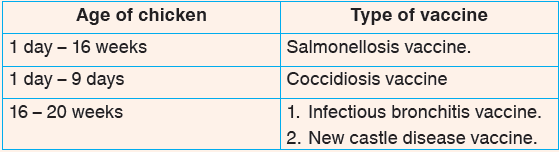
Chickens can be reared both on a large scale and a small scale.
Chickens can be reared easily because:
• Many birds can be kept in a small area.
• They grow fast. Therefore, they can be eaten or sold within a short time.
• Their feeds can be found easily.There are various methods of rearing chickens. These include:
(a) Free-range system. (c) The fold system
(b) Deep litter system (d) The battery system.(a) Free range system
In this system, chickens are left to move freely in an area and feed by themselves.
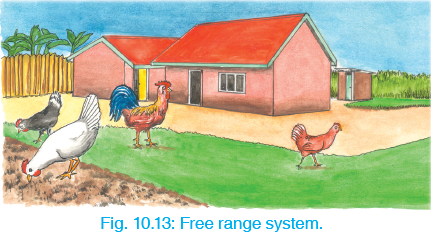
(b) D eep litter system
In this method, chickens are put in a permanent structure.
The chicken are provided with clean feeds and water in their housing.
(c) Fold system
In this method, chickens are enclosed in a movable structure. The structure is moved to a new place everyday to prevent spread of diseases and pests.
(d) Battery system
This is an expensive method of rearing chicken.
Each chicken is kept in a cage with a sloping floor for collecting eggs.
The chickens are fed and watered in their cages. It is easy to maintain individual record of each chicken.
Revision Activity 10
2. List 5 conditions of a good chicken house.
3. Name the 3 broad types of chicken breeds.
4. Define the following words:
(a) Incubation (b) Cannibalism (c) Quarantine5. Write down characteristics of a broody hen.
6. Name two examples of parasitic diseases in chicken.
7. Why do we quarantine sick chicken?
8. (a) Describe briefly the importance of chicken farming.
(b) Look at the following products.
(i) What chicken parts are they made from?
(ii) Name two other uses of the parts named in (i) above.9. Name the four methods of rearing chicken.
10. (a) Why is it easy to rear chicken?
(b) Explain any two challenges that you may face when rearing chicken.
11. (a) You have bought two very young chicks.Describe briefly how you are going to manage them until they are big enough for eating.
(b) How will you protect your chicks from predators?
Word list
1. Read the following words in pairs.
• Incubation • Quarantine • Brooding
• Vaccinate • Hatch • Predators
• Broilers • Ascarids • Casual purpose
• Coccidiosis • Cannibalism • Bronchitis
2. Spell 3 words while your friend writes them in his or her notebook.Let your friend also spell 3 other words as you write them in your notebook.
3. Discuss with your friend the meaning of any 3 words in the word list.Refer to notes in your textbook.
uniT 11 :PLANTS AND ENVIRONMENT
introduction
Plants are essential for survival of human beings and animals.
They provide food, regulate air as well as protect the environment.
look at the following pictures.
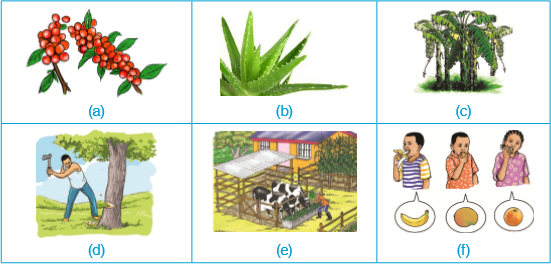
Describe each picture above.
Predict what you are going to learn.
11.1: Identification of the importance of plants
Activity 11.1: identifying the importance of plants in the locality
What to do
1. Visit the school farm or farms around the school.
2. Observe and record the types of plants grown in your local area.
3. Use a table like the one shown below to group the crops that you have identified according to their uses.

Plants that are cultivated by human beings are generally known as crops.
A crop is a plant that is grown for its usefulness.
The following are reasons why crops are important.
(a) Human food (food crop)
(b) Animal feeding
(c) Medicinal plants
(d) Cash crops
(e) Protection of environment
Human food Crops that are grown for human food are called food crops.
When eaten, these plants supply nutrients to the body.
Food crops
Activity 11.2: Grouping plants into various food groups
Fill in the following table appropriately.
• Give at least five examples in each case.
• Use your XO laptop or books in the library.

Types of Food Crops
(i) Cereals
These are crops grown for their grains.
They include rice, barley, wheat, oats, maize, sorghum, millet among others.
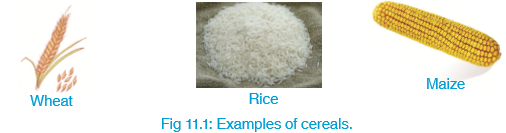
(ii) legumes These crops mainly produce their seeds in pods.
These include: peas, green grams, beans, groundnuts, black beans, french beans and groundnuts.
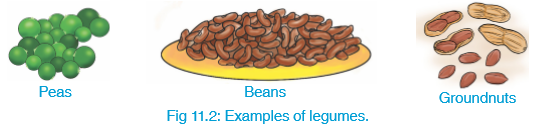
(iii) Fruits These include:
pawpaw, oranges, mangoes, bananas, pineapples, passion fruits, pears, apples, avocado and many others.

Fruits have two scars, unlike seeds which have one scar.
(iv) vegetables These include: spinach, kales, cabbages, broccoli, lettuce, cauliflower, egg plant, onions,
tomatoes and many others.
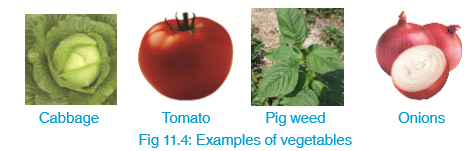
(v) Tubers
These are plants that store food in their roots (root tubers) or stem (stem tubers).
a) Root tubers include: carrots, cassava, turnips, radish, beetroot, arrow roots, sweet potatoes and others. b) Stem tubers include: yams and Irish / English potatoes.
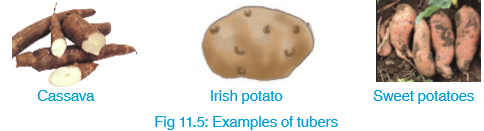
Cash crops
Activity 11.3: identifying cash crops
(i) Observe various types of plants grown in your locality.
(ii) Write down the names of the crops.
(iii) Identify crops that are sold to earn income (cash crops). (iv) Compare your findings with those of your friend.
(v) Research from books more cash crops.
These are crops grown mainly for sale. The farmer sells the crops to industries for processing.
Cash crops can be grouped as shown in table 11.1 on page 137.
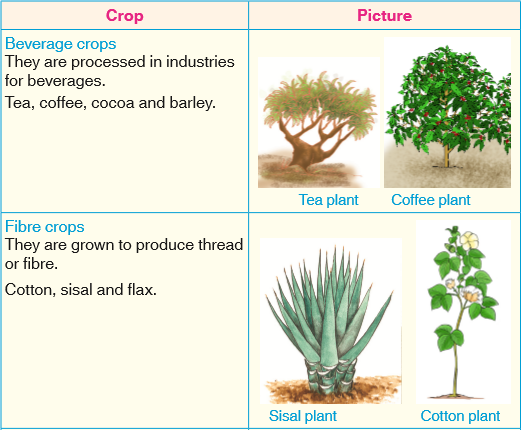
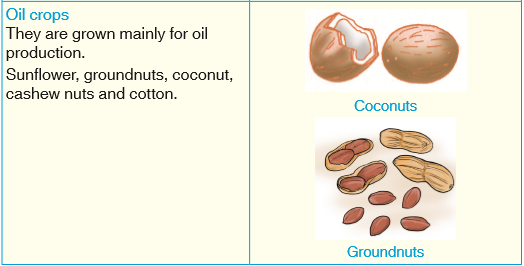
Table 11.1: Cash crops.
Practice Activity 11.1
Match the plants with their products.
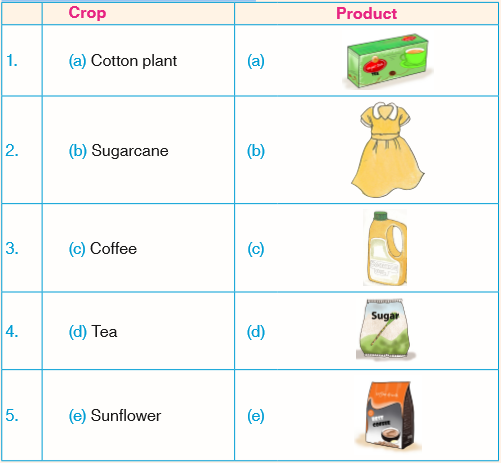
Animal feeding
Activity 11.4: identifying importance of plants
Describe what is happening in the following pictures.
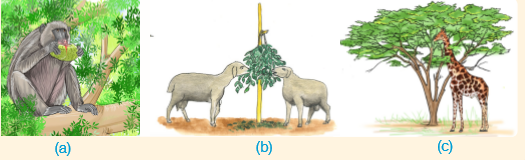
Both wild and domestic animals feed on plants. Most domestic animals feed on grass, leaves of trees and grains. Animals such as chickens and ducks feed on grains and leaves of plants.
Some animals feed on fruits and plants.
Medicinal plants Extracts from some trees, shrubs and herbs have been used traditionally to treat known diseases.
Medicines that come from plant parts are called herbal medicines. The following pictures show some medicines from plants.
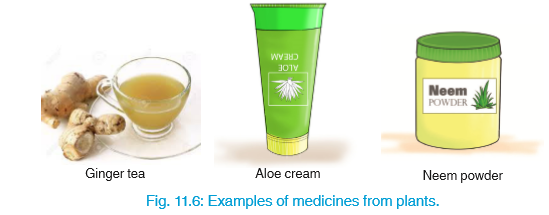
Practice Activity 11.2
1.Using the Browse Activity, research medicinal plants in Rwanda.
You can also search for information from books in the school library. 2.Copy the following table in your notebooks. From your research findings,
fill in 8 examples of medicinal plants and what they cure.

Protection of the environment
Look at the following picture
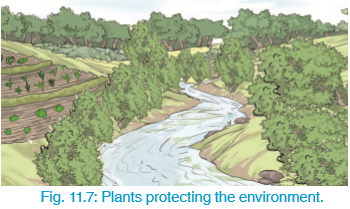
How are the plants shown in the picture protecting the environment? Plants are very important to the environment.
Plants protect the environment from drought by acting as rain attracting zones.
Roots of trees hold the soil particles together. Soil erosion is minimised.Trees act as a windbreak.
They protect the environment from the dangers of the wind.
11.2: Common importance of trees on the environment
Look at the following pictures.
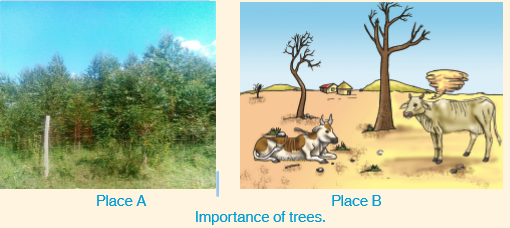
(a) Which place looks beautiful? Why?
(b) Outline the benefits of trees in Place A:
(i) to the farmer and his or her neighbours (ii) t o Rwanda.
(c) Imagine you are an agricultural officer. Write down short notes that you will give to farmer in Place B in order to encourage him to plant trees on his farm.
(i) improves weather conditions of a place Trees produce moisture during transpiration. This moisture forms rain clouds.
This explains why places that have dense forests record high rainfall.
Trees also act as windbreaker by slowing down the speed of the wind.
(ii) Control soil erosion The roots of trees hold soil particles together. This prevents top soil from being washed away by water.
The leaves of trees also form a canopy.
The canopy acts like a shade that reduce the intensity of rain drops falling on the soil.
(iii) Recycle air through photosynthesis Plants require carbon dioxide to make food through photosynthesis.
When they use carbon dioxide they release oxygen, which is then used by animals.
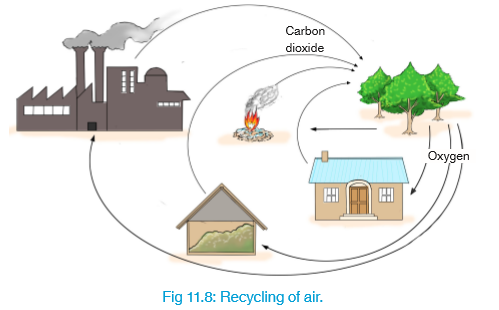
Name 3 human activities that give out carbon dioxide.
How do animals produce carbon dioxide?
(iv) Shelter for wild life and birds Many wild animals live in forests. Forests provide a safe hiding place for the animals.
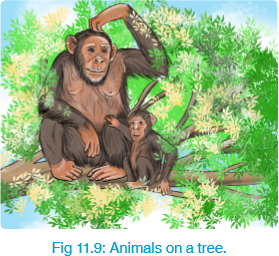
1. Name 5 animals that live in the forest.
2. Name 3 mammals that live on trees.
3. Name 3 animals that live in trees.
Other importance ways trees help the environment
Activity 11.6: importance of vegetation to the environment
(i) Using your atlas, locate the deserts in Africa. Also locate regions around Rwanda and Congo forest.
(ii) Compare the vegetation found in these two areas.
(iii) Identify the importance of trees to the environment.
Relate them to agents of weather: Wind, rainfall and temperature.
(iv) Name the general importance of trees in your locality.
(v) Write short notes on your findings.
(vi) Present your findings to the rest of the class.
The following are other important ways trees help the environment are:
• Ornamental trees. • Agroforestry.
• Fruit trees. • Timber and fuel.
Practice Activity 11.3
Match the following description of uses of trees to their pictures.

11.3: Effects of afforestation and deforestation on the environment
Activity 11.7: Identifying importance of afforestation, causes of deforestation and effects of deforestation
(i) Visit a planted forest near your school.
(ii) Observe and feel the environment around the forest.
(iii) Visit a place without tress around your school.
(iv) Observe and feel the environment around this place.
(v) When you get back to school discuss in your groups the causes of deforestation,effects of deforestation
and the importance of afforestation.
(vi) Present your findings to the rest of the class.
Importance of afforestation
1. Minimises soil erosion.
2. Beautifies the environment.
3. Promotes air circulation.
4. Provides homes for wild animals.
5. It shields homes and crops from excessive wind and sun.
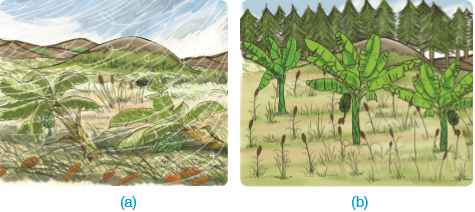
Fig. 11.10 (a) and (b): A hilly place before and after afforestation.
6. It provides timber, fruits and feeds for cattle.
Causes of deforestation
1. Construction and expansion of roads, towns and cities. 2. Commercial use of trees such as for making paper, making timber, making posts among others uses.

3. Creation of homes for settlement.
4. Creation of agricultural land.
Effects of deforestation
Activity 11.8: debate
Debate on the following topic: Conserving an existing forest is better than planting a new forest in a deforested area
Deforestation leads to:
1. destruction of the natural environment. This can result in drying of rivers and formation of deserts.
2. increased soil erosion.
3. destruction of animal habitats.
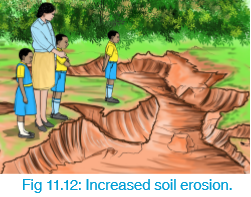

4. climate change. These changes include low rainfall and poor air circulation.
5. extinction of some plants.
Prevention of deforestation
Activity 11.9: Planting trees
Plant trees in the school surroundings to maintain the environment. You can also plant trees in your home. Materials needed:
• Piece of land • Tree seedlings • Hoes
• Manure • Spades
What to do:
1. Dig a hole to the desired depth using a hoe.
2. Mix manure and soil that you have dug up from the hole.
3.Plant your seedlings the same depth they were in the nursery seedbed. If the seedlings are in paper tubes,
remove the papers before planting.
4. Compact the soil around the seedlings using your hands.
5. Apply some mulch and then water your seedling.
6. Take care of your seedling until it grows.
When we prevent deforestation, we conserve trees.
Conservation means using a resource in a sustainable way and without wastage.
In order to conserve trees, we need to do the following :
1.Use existing trees properly. For instance we should not cut down trees in order to obtain fuel.
Instead we should prune the branches and use them.
2.The government should regulate harvesting of trees in both natural and planted forests through strict rules.
Laws that punish those who break these rules should be put in place.
3.Elders in the Districts and villages should ensure that when a tree is cut down another tree is planted to
replace it.
4. There should be recycling of waste paper to avoid cutting down many trees to make new paper.
5 Using alternative sources of fuel for example kerosene, biogas and solar energy for domestic use.
List 5 other things that can help to prevent deforestation.
Revision Activity 11
1. Name two examples of medicinal plants.
2. Identify 3 crops that produce oil. 3. Name three cash crops grown in your District. 4. Explain three ways in which trees help to conserve the environment. 5. Describe briefly how trees recycle air.
6. Explain the meaning of the following terms. (a) Afforestation (b) Deforestation (c) Ornamental plant
7. (a) What is agroforestry?
(b) What characteristics should trees used for agroforestry have? (c) What are the benefits of practising agroforestry?
8. Study the following pictures.
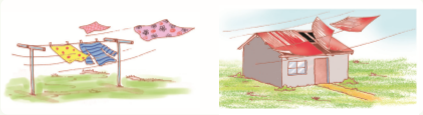
(a) How can the effects of wind shown above be prevented?
(b) Name two effects of deforestation.
9. (a) What are food crops?
(b) Name 5 types of food crops grown in your locality.
10. What is the importance of trees to:
(a) domestic animals.
(b) wild animals.
11.You have been given a tree seedling as your birthday gift. Write an essay on how you will take care of
your tree.
Word list
1. Read the following words in pairs.
• Beverage
• Fibre crops
• Tubers
• Neem tree
• Afforestation
• Deforestation
• Photosynthesis
• Ornaments
• Agroforestry
• Recycle
• Desert
2.Spell 3 words while your friend writes them in his or her notebook. Let your friend also spell 3 other words
as you write them in your notebook.
3. Discuss with your friend the meaning of any 3 words in the word list. Refer to notes in your textbook.
UNIT 12: DIGESTIVE SYSTEM
introduction
The digestive system carries out digestion. Digestion is the process where by food is broken down into nutrients that the body
can absorb.
Look at the following pictures.
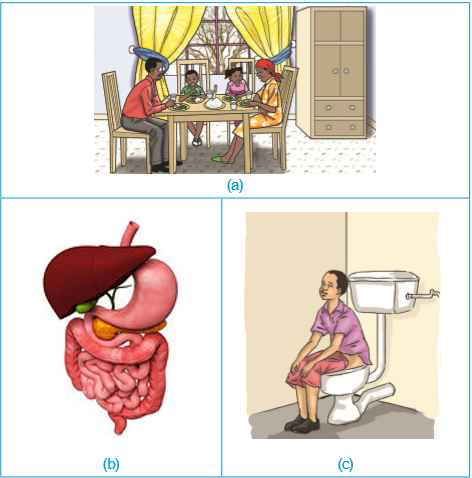
Describe each picture above briefly.
Predict what you are going to learn.
12.1: Functions of the digestive system
The major functions of the digestive system are digestion of food and absorption of digested food.
Activity 12.1: identify location of the digestive system
What to do:
(i) Touch your body to show how food moves along the digestive system.
(ii) Describe what happens to food from the time you take it in your mouth to the time it comes out as faeces.
(iii) Look at the wall chart in your class showing parts of the digestive system. Draw it in your notebook.
Digestion is the process by which food is broken down into smaller particles.
Absorption refers to the uptake of digested food into the body.
12.2: Parts and functions of the digestive system
The digestive system consists of the alimentary canal and digestive glands.
Activity 12.2: naming parts of the digestive system
(i) Draw the following picture in your notebook.
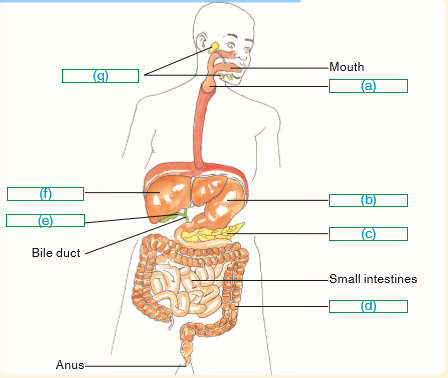
(ii) Use your XO laptop or books in the library to fill in the blanks on the diagram above.
(iii) Describe how food passes through the body to the anus.
(iv) Indicate on the picture where the salivary and gastric glands are located.
The alimentary canal
The alimentary canal is a tube-like passage, which runs from the mouth to the anus. Parts of the alimentary canal include, the mouth, oesophagus (gullet), stomach small intestine, large intestine
and the anus.
Digestive glands Digestive glands are glands that produce substances that are useful in the digestion process.
These glands include the salivary glands, gastric glands, the liver, gall bladder and the pancreas.
12.3: Stages of digestion
Activity 12.3: The digestion process
What to do:
(i) Observe the digestive system that you drew in your notebook.
(ii) Label the parts that you had not labelled.
(iii) Research the process of digestion.
(iv) Write short notes about digestion in your notebook.
Digestion takes places in stages. These are: ingestion, digestion, absorption and ejection.
Ingestion Ingestion refers to the intake of food in the mouth. We should ingest clean food and digestible food.
It is wrong to ingest non food materials like soil, metals and plastics.
Digestion
(a) digestion in the mouth
Ask your friend to open his or her mouth. What do you see?
What are the functions of all the parts that you have seen in the mouth? The ingested food is chewed using teeth and mixed with saliva from salivary glands. Saliva is a digestive
juice that moistens the food.
The tongue rolls the food into small rounded balls called boluses. Saliva also contains digestive substances (enzymes) that break down starch into a simpler form.
The food boluses are then pushed through the oesophagus.
The oesophagus is a tube that connects the mouth to the stomach.
Point-check !
• Food moves through the oesophagus in continuous waves of contraction and relaxation.
These waves are called peristalsis.
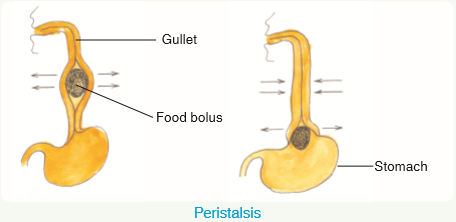
• Digestion starts in the mouth and ends in the small intestines.
(b) Digestion in the stomach
From the oesophagus the food enters the stomach.
The lining of the stomach produces digestive enzymes, which help in the digestion of proteins.The stomach lining also produces hydrochloric acid. This acid kills germs that may be present in the food.
The stomach serves as a temporary store for food. From time to time, food is released into the small
intestines.
(c) Digestion in the small intestine The small intestine is divided into two parts. The upper part is known as the duodenum. The lower part is
known as the ileum.
Most digestion in the small intestine takes place in the duodenum. In the duodenum, bile and pancreatic
juices mix with food.
Bile is produced by the liver and stored in the gall bladder. Pancreatic juices help in further digestion of food.
The ileum is involved in the absorption of digested food. After digestion in the ileum, fats, proteins and carbohydrates are ready for absorption.
Absorption
Absorption is also known as assimilation. The digested food is absorbed into the blood stream through the walls of the ileum.
Elimination The indigestible materials, unabsorbed food and water enter the large intestines. The large intestines
consists of the colon and the rectum.
In the colon, most of the water is absorbed into the blood stream.
The remaining food waste is passed down to the rectum. The rectum stores undigested food before passing through the anus as faeces.
The removal of the undigested food is known as egestion.
Point-check !
• Water and mineral salts are absorbed in the large intestines.
• Vitamins and glucose are not digested. They are absorbed directly into the blood.
12.4: Hygiene of digestion
Activity 12.4: identifying the hygiene of digestion
Match the hygiene of digestions practices shown below to their pictures.
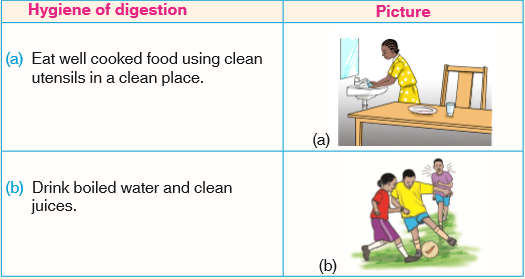
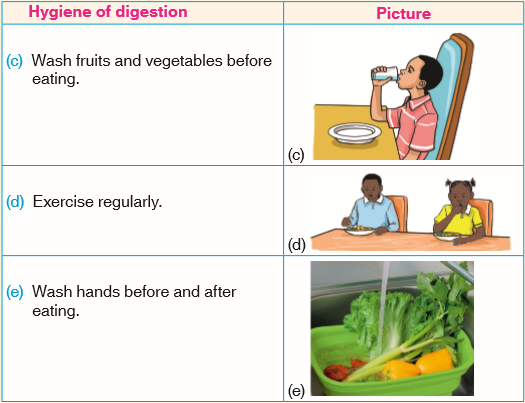
Name 3 other practices that help to maintain the hygiene of digestion.
Project 1 Maintaining the hygiene of digestion
• Use your XO browser or books in the library to research ways to maintain a healthy digestive system. • Design a poster that encourages hygiene of the digestive system. Hang it at the back of your class. • An example of a poster is shown below:
Chewing food properly = Easy swallowing + healthy body Hurried eating = Choking + Poor digestion + Poor health Make your DS happy, chew slowly !
12.5: Identification of a balanced diet
A balanced diet contains energy giving food (carbohydrates), body building food (proteins) and protective food (vitamins).
Activity 12.5: identification of food groups
(i) The following table shows a variety of foods.
(ii) Put the foods into a group of 3 to create balanced diets.


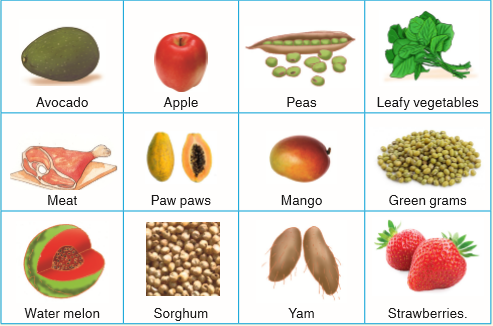
Components of a balanced diet
Activity 12.6: Collecting various groups of food to identify them
What to do:
1. Collect the groups of food over the weekend and bring them to school.
2. Place the foods into their correct food groups.

A balanced diet is a meal that contains all the nutrients needed by the body in the right quantities.
A meal is food eaten during any occasion in the day.
What food groups should a balanced diet contain?
1. Carbohydrates Carbohydrates provide the body with energy to work. These foods also keep the body strong and warm.
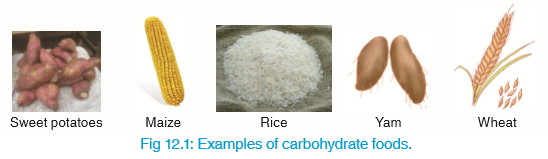
2. Proteins
Proteins are necessary for the growth and repair of body tissues.

3. vitamins These foods protect the body against diseases.
Fresh fruits and vegetables are the main sources of vitamins. There are many types of vitamins. Examples are vitamins A, B, C, D, E and K.
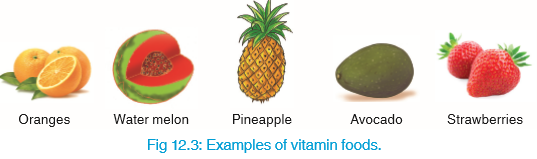
Point-check !
Cashew nuts and ground nuts are both energy giving and body building foods.
4. Minerals
Minerals are present in many foods. They are required by the body in small quantities. Examples of minerals are calcium, phosphorus, iron, iodine, potassium, sodium and zinc. The following table shows some minerals, their uses in the body and their sources.
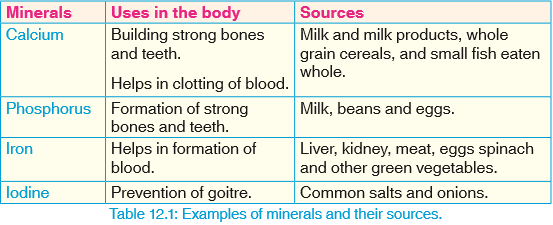
5. Lipids (fats and oils) Fats and oils provide the body with energy. They also make the skin shiny and healthy.
Fats and oils are eaten together with other foods. Fats exist in solid form while oils are in liquid form.
Oils are mainly obtained from plants such as avocado, sunflower, corn, sesame, coconut and ground nuts.
Some animals like fish produce oil (cod liver oil). Milk products like butter, ghee and cheese also contain oils.
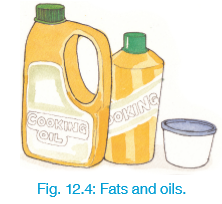
6. Water
The body needs water in order to stay healthy. Water performs the following functions in the body:
• Cools down the body when the weather is hot.
• Helps in digestion and transportation of food in the body.
Name other 2 functions of water.
Practice Activity 12.1
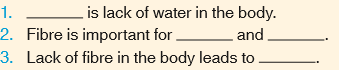
Activity 12.7: Preparing a balanced diet
Read the following story.
Paulo is a P5 pupil in Munini Primary School. On Friday last week, they held a sports day at his school.
He ran in a 400 metre race where he came first. His friends knew he would win because he is a healthy boy.
Paulo usually brings a packed lunch that contains all the three food groups.
On Monday and Thursday he brings rice, meat stew and oranges. Other days he brings posho or rice,
vegetables salad and bean stew or groundnut sauce.
Paulo’s parents work at a factory in Nyabisindu. His sister is ten months old.
Paulo’s parents come home late every Tuesday and Friday. On such days, Paulo helps their house help
to prepare dinner.
Paulo knows how to prepare posho, steamed rice, bean stew, vegetable salad and groundnut sauce.
He always prepares balanced meals for his family. He sometimes prepares fresh mango juice for the family.
But when he is tired he brings them clean boiled water.
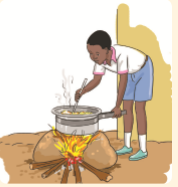
Questions
(i) Why is it important for you to know how to prepare balanced meals?
Relate your answer to Paulo’s situation. (ii) What meals does Paulo prepare? List them in your notebook.
(iii) Paulo feeds on a balanced diet. What benefits does he get?
(iv) Write down the possible food-group menu for Paulo’s family from Monday to Friday.
(v) Make a one-week dinner menu for your family. Ensure that all the meals are balanced.
Project 2: Preparing a balanced diet
(i) Offer to cook a balanced meal at home.
(ii) Use guidance from the tables that you made in Activity 12.5 and Activity 12.6.
(iii) Take caution when using fire. You can burn yourself.
(iv) Practise good food hygiene when serving and eating your food.
12.6: Nutrition deficiency diseases
Activity 12.8: observe and discuss about children suffering from deficiency diseases
What to do:
(i) Observe wall charts and pictures showing children suffering from various deficiency diseases.
(ii) Research the disease that each child is suffering from.
Give symptoms and identify the deficiency disease e.g. the child is thin and bonny; marasmus.
(iii) Write in your notebook ways to prevent each deficiency diseases identified.
(iv) Give your notes to the teacher for marking.
Nutritional deficiency diseases are diseases caused by lack of some food nutrients in the body.
Nutritional deficiency diseases include:
• Kwashiorkor
• Marasmus
• Rickets
• Goitre
• Anaemia
Kwashiorkor
Kwashiorkor is caused by lack of proteins in the diet. It mainly affects children under five years of age. It usually occurs after stopping breastfeeding.
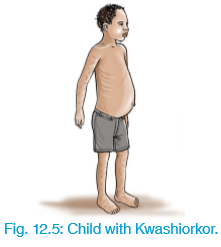
Prevention of Kwashiorkor
1. The child should be breast fed up to 2 or 3 years. 2. Weaning foods should constitute a balanced diet with lots of proteins. 3. Children should be provided with food rich in proteins.
Marasmus Marasmus is caused by lack of enough food. Marasmus mainly affects children but it can also affect adults.
It occurs during severe famine that leads to starvation. The affected person becomes thin and weak.
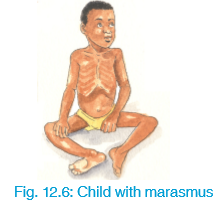
Prevention of marasmus
1. Give the child or patient enough of all the food nutrients in adequate amounts.
2. During severe drought or famine, relief food should be provided to children to prevent starvation.
Rickets
Rickets is caused by lack of vitamin D and calcium. Prevention of rickets
1. Children should be fed on foods rich in calcium, vitamin D and phosphorous.
2. Expose babies to morning and evening sunlight. Sunlight helps in formation of vitamin D by the skin.
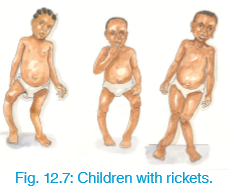
Goitre
Goitre is caused by lack of iodine in the diet. The deficiency is shown by visible swelling at the base of the neck. The affected person experiences difficulty in swallowing and breathing.

Prevention of goitre
1. It can be prevented by eating iodine-rich foods. Such foods include sea fish, crabs, prawns and lobsters. 2. People should use iodized salt in the diet.
Anaemia
Anaemia is caused by lack of adequate iron in the diet.
When one has anaemia his or her blood is unable to supply enough oxygen to the tissues.
This leads to exhaustion. Anaemia can occur in both young children and adults. It occurs commonly during pregnancy and in adolescent girls. People suffering from malaria may become anaemic.
Why do you think anaemia is common in pregnant women, adolescents and malaria patients?
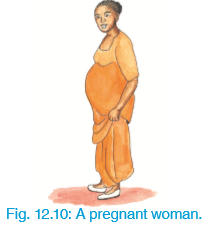
Some signs and symptoms of anaemia 1. Pale skin (jaundice). The eyes, gums, palms and fingernails appear pale. 2. Loss of appetite and general body weakness. One feels very tired even after doing a small task.
3. Shortness of breath and dizziness.
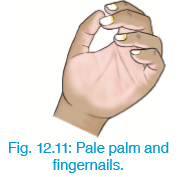
Prevention of anaemia 1. Eating food rich in iron. Such foods include liver, eggs and green leafy vegetables like spinach and kales. 2. Girls and women should take foods rich in iron to replace the iron lost during their monthly period. 3. Visit a nearby health facility for check-up if you have the signs and symptoms mentioned.
Revision Activity 12
1. Explain briefly the meaning of the following:
(a) Digestion
(b) Absorption
(c) Ingestion
(d) Egestion
(e) Egestion
2. Draw the parts of the digestive system.
3. Make correct sentences using the following words:
(a) Alimentary canal
(b) G all bladder
(c) Teeth
(d) Gullet
4. Name glands that produce the following juices:
(a) Gastric juice
(b) Saliva
5. Describe briefly five ways of maintaining hygiene of the digestive system.
6. Name the groups of food shown in the following pictures.
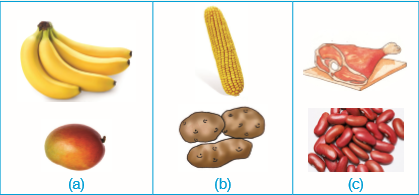
7. (a) What deficiency disease is caused by lack of proteins in the diet?
(b) Anaemia is caused by lack of adequate ................. in the diet.
8. (a) What is the following child suffering from?
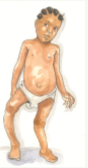
(b) How can the disease be prevented?
(c) Name 4 foods that we should feed on in order to prevent goitre.
9. Show in a table 3 meals that constitute a balanced diet.

10. Why is it important for a P5 learner to know how to prepare a simple meal?
11. You have been provided with peas, cabbages and potatoes.
(a) Prepare a balanced meal from these foods. (b) Observe necessary hygiene practices during preparation and serving of the food.
Word list
1. Read the following words in pairs.
• Digestion
• Duodenum
• Absorption
• C arbohydrates
• Ingestion
• Protein • Egestion
• Vitamin
• Alimentary canal
• Minerals
• Gall bladder
• Constipation
2. Spell 3 words while your friend writes them in his or her notebook. Let your friend also spell 3 other words
as you write them in your notebook.
3. Discuss with your friend the meaning of any 3 words in the word list. Refer to notes in your textbook.
UNIT 13: REPRODUCTIVE SYSTEM
introduction
The reproductive system plays an important role in survival of human beings.
Look at the following pictures.
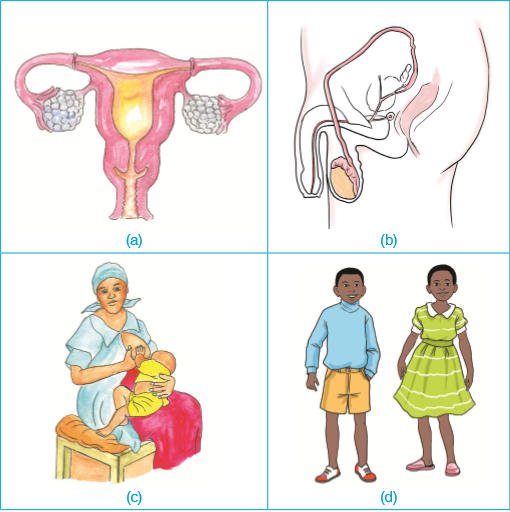
Describe each picture above.
Use the pictures to predict what you are going to learn.
13.1: Human reproductive system
Activity 13.1: Researching the functions of the reproductive system
What to do:
(i) Using your XO laptop, research on the major function of the reproductive system.
(ii) Share your findings with the rest of the class.
Human beings are either male or female. The males (boys and men) have male reproductive organs while
females (girls and women) have female reproductive organs.
Males and females have both external and internal reproductive parts. The male and female reproductive organs are used for reproduction. Through reproduction, human beings
increase in number.
The external male and female reproductive organs also assist in passing out urine.
The male reproductive external organ
These are parts that can be seen on the outside.
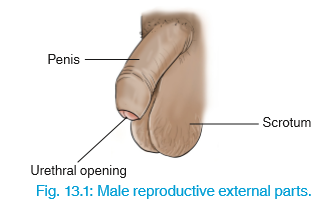
The parts that make up the human male external reproductive parts include: scrotum, penis and urethral opening.
The female reproductive external organs
These are parts that can be seen on the outside. All these parts are generally called vulva. The parts of the vulva include the mons pubis, labia minora, labia majora, urethral opening and vaginal
opening.
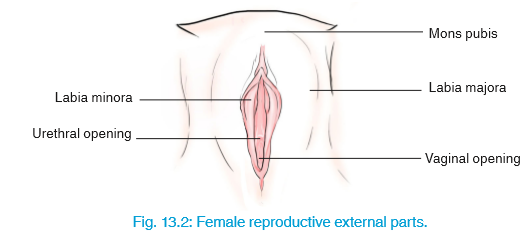
13.2: Hygiene of female and male genital organs
Activity 13.2: discussing hygiene of the genital organs
What to do:
(i) Look at the following pictures.
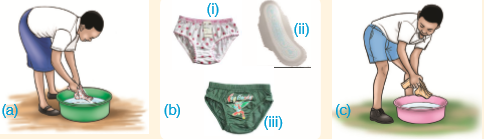
(ii) Describe the hygiene of genital organs based on the pictures above.
(iii) Write short notes in your notebook.
Hygiene of female genital organs
It is important to keep the reproductive organs clean. Generally, women and girls can maintain the hygiene
of their genitals by doing the following:
(i) Bathing regularly. Clean the vulva with clean water.
(ii) Change into clean underwear after bathing. Wear loose cotton underwear. Avoid sharing underwear.
(iii) After urinating, wipe the genitals from the front to the back using soft tissue paper.
(iv) Visit the hospital in case of abnormal discharge from the vagina or urethra. (v) Do not sit on shared toilet seats as they could spread infections. (vi) When having periods, bathe two or more times a day. Use sanitary towels to avoid soiling your clothes.
(vii) Do not insert objects into the vagina. Avoid touching your genitals with dirty hands.
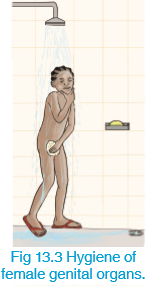
List other practices for maintaining the hygiene of female genitals.
Hygiene of male genital organs
The males should also maintain proper hygiene.
Men should: (i) Bath regularly with mild soap and plenty of clean water.
(ii) For young uncircumcised boys, clean the area under the foreskin gently.
(iii) Change into clean underwear after bathing.
(iv) Shake the penis gently after urinating to expel the remaining drops of urine.
(v) Seek immediate medical attention in case of abnormal discharge or rashes around the genitals.

List other practices for maintaining the hygiene of male genitals13.3: Sexual characteristics at puberty
Activity 13.3: identifying parts of female and male anatomy that are similar
What to do:
(i) Look at charts and pictures in books showing external reproductive organs of girls and boys.
(ii) Which parts of the female and male anatomy are the same or similar?
Identify them from pictures and charts. Write them down in your notebook.
Puberty is a period where a boy or a girl reaches sexual maturity. This period is usually marked by maturation
of genitals and development of secondary sexual characteristics.
When girls and boys enter into puberty, they are capable of reproducing sexually.
This stage occurs earlier in girls than in boys.
In girls it starts at about ages 8 years to 13 years (on average, 10 years).
In boys, it occurs at the ages of 9 years to 14 years (on average, 11 ½ years).
Secondary sexual changes in both boys and girls
1. Hair grows under the armpits and in the pubic area.
2. Pimples may appear on the face.
3. There is sudden increase in height and weight (growth spurt).
4. The male and the female genitals enlarge.
Secondary sexual changes in girls
Activity 13.4: identifying secondary sexual changes in girls
Look at the following pictures.
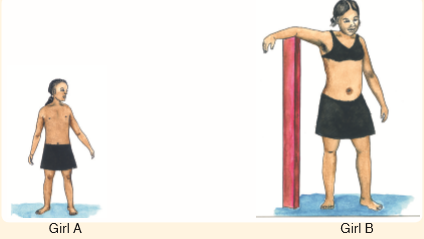
(i) List the differences you can see between Girl A and Girl B.
(ii) How does Girl A develop into Girl B?
Secondary changes in girls develop between ages 8 to 13.During this period:
1. There is enlargement of the breasts.
2. Menstrual flow begins. This is also called monthly periods.
3. The hips become broader.
Practice Activity 13.1: identifying secondary sexual changes in girls
The following story was written by P5 girl. I am Halima. I am 11 years old. Next month I will be turning 12. My best friend is called Liana.
I share the same room with my 7 year old sister. Lately, I do not feel comfortable undressing or dressing up
when she is around.
My breasts buds started itching and soon the breasts began to grow bigger. I also sweat alot and have to
wash twice a day. My hips are growing bigger. Boys in our class love teasing me.
They say I am beautiful like Miss Rwanda. I wish no one would notice these changes.
I wish I could be like Liana she is slim as a boy, although she is my age.
Many girls in our class are going through the changes that I am experiencing.
Our Science and Elementary Technology teacher told us that we are going through puberty.
That our bodies are changing to those of adults. She brought us sanitary towels and showed us how to use
them when we have periods. I am scared of periods. Some girls in our class said they usually have severe
pain during periods. I wonder how mine will be.

(i) List 5 physical changes that take place in girls during puberty.
Relate the characteristics to Halima and Liana.
(ii) Do all girls enter into puberty at the same age? Support your answer with evidence from the story above. (iii) Where can girls entering puberty find important information concerning this stage?
Justify your answer using evidence from the story above.
(iv) Draw a sketch of a young girl.
(v) Now draw a sketch of the same girl after puberty and when she is a young woman.
Exchange your drawings.Talk about the changes that have taken place from childhood to adulthood.
Secondary sexual changes in boys
Activity 13.5: identifying secondary sexual changes in boys
Look at the following pictures.
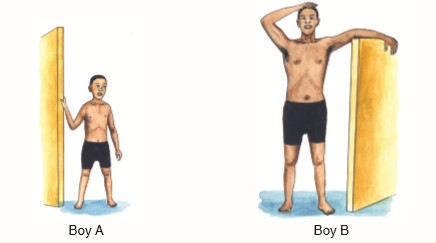
(i) List the differences you can see between Boy A and Boy B.
(ii) How does Boy A develop into Boy B?
Secondary sexual changes in boys develop between ages 9 to 14.
They include:
1. Broadening of chest and shoulders. 2. Experiencing wet dreams. This is the discharge of semen during sleep. 3. The voice breaks (it becomes deep).
Practice Activity 13.2: identifying secondary sexual changes in boys
The following story was written by P5 boy. My name is Edgar. I am 12 years old. My best friend is called Franc. We attend the same school.
I am the head boy of our school. Most boys in our class are the same age as me, but although a few boys are older by a year or two.
Among my age mates, some boys are taller and stronger than others.
My friend Franc is taller and stronger than me. When I stand next to him my head comes up to his chin.
His chest and shoulders are also broader than mine.
Franc's face is oily and has a few pimples. When we change into our games uniforms I can see hair under his
armpits and on his chest. His voice is deep these days. Girls in our class say he speaks bass.
When my father came from work last Saturday, he greeted me and said “Oh boy your voice has started to
break!” All along, I had thought I had a throat infection. He sat me down and explained to me the changes
that I would expect to go through. I now know that I am going to be like Franc. It feels good to grow up.
(i) List 5 physical changes that take place in boys during puberty.
Relate the characteristics to Edgar and Franc.
(ii) Do all boys enter into puberty at the same age? Support your answer with evidence from the story above. (iii) Is it good for boys entering puberty to find out information about puberty from their peers?
Justify your answer. (iv) Draw a sketch of a young boy.
(v) Now draw a sketch of the same boy after puberty and when he is a young man.
Exchange your drawings. Talk about the changes that have taken place from childhood to adulthood.
Puberty characteristics in girls Apart from the visible physical characteristics in girls, there are other changes that girls also experience.
These changes affect their emotions and social relationships with their peers and elders.
What brings about these changes? These changes include: • Shyness due to enlargement of body parts such as breasts and hips.
• Some may even lose confidence and become self-critical.
• Girls may be embarrassed by their menstrual flow.

Fig. 13.5: Mother talking to her daughter.
• Some girls become conscious about their weight and physical appearance. • Attraction to the opposite sex. Girls get attracted to boys. Name 3 other puberty characteristics in girls.
Puberty characteristics in boys
• Boys may be embarrassed by their rapid development. Some become clumsy. • Boys may also become shy due to deepening of their voices. • Behaviour related to identity begins to show. They begin to identify with adult role models and heroes. • They are easily angered due to sudden mood swings. • Winning becomes important. So they derive satisfaction in playing competitive games.
Name 3 other puberty characteristics in boys.
Activity 13.6: Emotional and social changes during puberty
Materials needed
• Red and blue marker pens
• Rulers
• Sheets of paper
What to do:
(i) Prepare a worksheet like the one shown below.
(ii) Fill in 10 words according to the headings given.
(iii) Use blue pen to record Feeling positive words and a red pen to record Feeling negative words.
(iv) Display the words you have written to your partner. Combine your lists to make one long list.
(v) Talk about situations where you have felt positive emotions and feeling about your appearance.
Talk about situations where you have negative emotions and feelings about your appearance.
(vi) Suggest possible causes of the behaviour change observed in some boys and girls during puberty.
(vii) Share your points with other groups in your class.
13.4: Safe responsible behaviour
Activity 13.7: identifying safe responsible behaviour
Read the following story carefully and answer questions that follow.
In 1994, during the genocide period, Grace Uwamahoro was 11 years.
She joined her grandmother and another group of people to flee Rwanda.
On the way somewhere near Gitarama she heard a baby crying from a nearby bush.
The people she was with urged her to walk faster and ignore the baby's cries she ignored their orders.
She sneaked into the bush and picked the baby. The mother to the baby was dying and she could not save her.
She took the baby with her to congo and took care of her. She named the baby Vanessa Uwase.
It was a very hard time for her and the baby since they lived in a refugee camp.
In 1996, they returned to Rwanda. Uwamahoro never went to school. However, she enrolled Vanessa into
a nearby school. She also opened a small grocery shop in Nyabugogo to support them financially.
Vanessa is now a young woman with a great character. In 2015, she was in Senior Six.
She wants to study Political Science in the University and provide a better life to Uwamahoro.
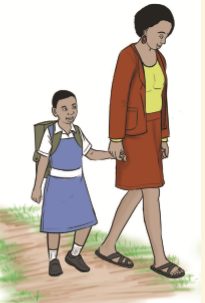
Activity Questions
(i) Outline 4 responsible behaviour shown by Uwamahoro from the story on page 175.
(ii) Outline any 2 responsible behaviour shown by Vanessa in the story. (iii) Explain briefly your answers in (i) and (ii) above using appropriate examples.
(iv) How can you develop positive behaviour like the ones you have identified above.
(v) Identify any 5 irresponsible behaviour in the society.
Safe responsible behaviour refers to knowledge and skills that you need to develop so as to make
right decisions concerning your life. Why do young people need to make responsible choices in their lives?
Safe responsible behaviour in boys and girls include:
1. Abstinence. This means not having sex before marriage.
2. Making informed choices. Learn to say no to situations that may leave you with lifetime consequences.
For example, avoiding premarital sex because it can lead to unwanted pregnancy or contracting of sexually
transmitted infections.
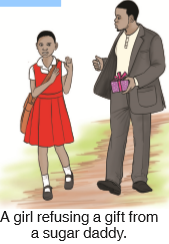
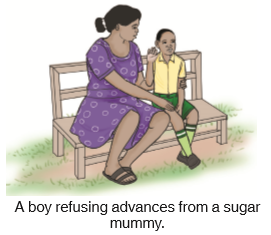
Fig. 13.6 (a) and (b: Making informed choices.
3. Choose good friends. Choose friends who encourage you to do what is right.
Also ensure that your friends make you feel good about yourself.
4. Develop positive values and behaviour based on informal awareness and knowledge.
You can do this by reading motivational books, participating in communal work, sports and other recreational
activities that help you learn.
5. Avoid risky behaviour such as drug abuse, fighting and participating in crimes such as robbery or theft
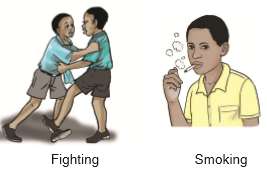
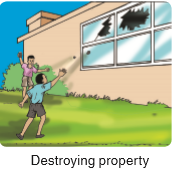
Fig. 13.7: Risky behaviour.Risky behaviour can result in:
• Death by mob justice.
• Being jailed (imprisonment).
• Rejection by family members or the community.
• Drug addiction, which can lead to death.
Practice Activity 13.3
1. Who are doing the correct thing? Explain.
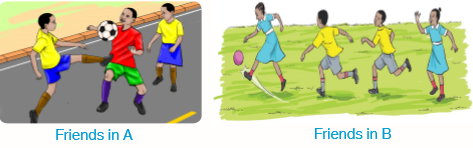
2. Name 4 other risky behaviour that pupils should avoid.
3. Name any 5 behaviour of a pupil who makes informed choices.
13.5: Love and infatuation
Activity 13.8: love or infatuation game
Read through the following statements.
(i) I feel instant desire to sit close to him/her.
(ii) He/she is my friend. We quarrel and say sorry. our friendship keeps growing day by day
(iii) He/she is patient with me. sometimes I panic when I make mistakes,
but he/she encourages me to try until I succeed.
(iv) He/she says I am pretty. sometimes he/she looks at other girls/boys in class and say they
are more beautiful.
(v) He/she says we must get married right away because he/she cannot risk losing me.
(vi) He talks about his/her future plans. He/she wants us to study hard and be successful adults.
(vii) He brags about his/her parent’s wealth and how we can have a future without working hard.
(a) Choose from the sentences above that you think indicate love and those that indicate infatuation.
(b) Check your list of statements. Are you at risk?
Revision Activity 13
1. Define the term reproduction.
2. Identify the parts marked a, b, c and d, in the following diagrams
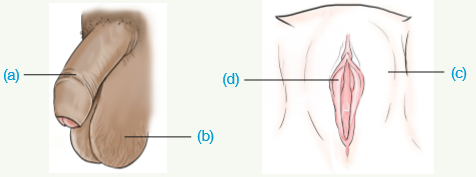
3. (a) List 3 ways of maintaining hygiene of the female genitals. (b) List 3 ways of maintaining hygiene of the male genitals. 4. Name 3 risky behaviour that you should avoid while in school. 5. Outline 4 possible effects of irresponsible sexual behaviour. 6. What brings about social and emotional changes in girls and boys?7. Diane and Josh are hungry. They see their neighbours mango tree with ripe fruits.
Diane asks Josh to help her climb up the tree, but Josh refuses.
(a) What safe responsible behaviour is Josh practising? (b) What can happen to the two friends if they steal?
(c) What kind of friend is Josh?
8. (a) Write down 3 sexual changes that take place in boys and in girls during puberty.
(b) Identify any two sexual changes that take place in both boys and girls.

9. (a) What is puberty?
(b) What is the importance of puberty?
10. Your friend is showing the following puberty changes:
• Has hair under the armpits.
• Sweats a lot and has body odour.
(a) Advise your friend on what to do about these changes.
(b) How can we choose good friends?
11. (a) What will you do if your classmate writes you a love letter? Explain your answer.
(b) Write a short story explaining how you made a responsible choice in your life
Word list 1. Read the following words in pairs.
• Genital organ
• Puberty
• Vulva
• Pregnancy
• Adolescent
• Testis
• Scrotum
• Reproduction
2. Spell 3 words while your friend writes them in his or her notebook. Let your friend also spell 3 other words
as you write them in your notebook.
3. Discuss with your friend the meaning of any 3 words in the word list. Refer to notes in your textbook.
UNIT 14: LIGTH
Introduction
Light is a form of energy, it is obtained from many sources.
These sources may be natural or artificial.
Look at the following pictures.
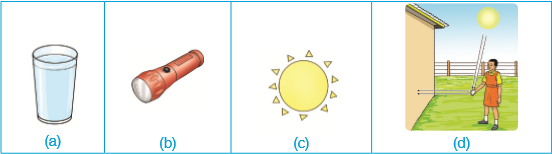
Describe each picture above.
Use the pictures to predict what you are going to learn in this unit.
14.1: LIGTH PROPAGATION
Propagation means to move, spread or travel.
Activity 14.1: To investigate how light is propagated
Materials needed:
• A torch or candle
• 3 equal pieces of cardboard
• Nail
• Pencil
What to do:
(i) Make small holes in the centre of the cardboards.
(ii) Arrange the pieces of cardboard so that all the holes at their centres are in a straight line.
(iii) Place a lit candle or torch at one end of the pieces of cardboard as shown alongside.
(iv) Observe though the other end of the cardboard. What can you see?
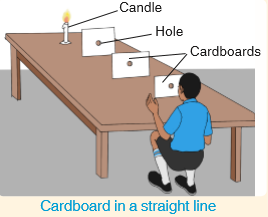
(vi) Write short notes concerning this experiment.
(vii) Explain how light from the following sources of light travels.
(a) Light from a lamp
(b) Light from the sun
(c) Light from a car’s head lamps
(viii) What is the name given to a group of rays?
Light travels in a straight line. Light also travels in all directions. Light travels in the form of a ray or rays. What is a ray?
14.2: Medium for light transmission
Activity 14.2: Comparing how light travels through different media
Materials needed:
Various materials for example:
• Oiled paper
• Clear polythene paper
• Notebooks
• Torch
• Block of wood
• Clear glass
What to do:
(i) Get into your working groups.
(ii) Let one of you shine a torch on the materials listed above one by one.
(iii) Let the rest of you stand on the opposite side of the materials being illuminated by the torch.
Observe what happens.
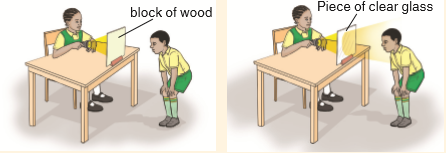
(iv) Interchange so that all of you make observations.
(v) Let your group secretary record the observations made.
(vi) Share your report with the rest of the class.
Compare your observations with the following: • Light was seen at the other end when the clear polythene and clear glass were put in the path of light. • Some light (not much light) was seen when an oiled paper was put in the path of light. • No light was seen when an notebook and block of wood were put in the path of light.
What conclusion can you make concerning transparent, translucent and opaque materials, from the above investigation?
Materials or medium that transit light can be classified as follows:
1. Transparent
2. Translucent
3. Opaque
Transparent media These are materials that allow light to pass through them. We can see through them clearly
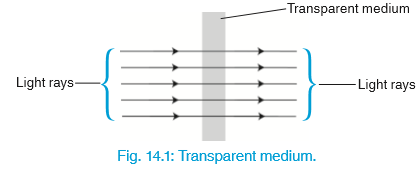
Examples of transparent materials include glass windows, colourless drinking glasses, air, clear water
and windscreens.
Name 3 other examples of transparent materials.
Translucent media
These are materials that allow some light to pass through them. We cannot see through them clearly.

Examples of translucent materials include frosted glass, waxed paper and thin pieces of cloth or paper.
Practice Activity 14.1
1. Frosted glass is used in making modern windowpanes and toilet windows.
What is the advantage of using such a glass?
2. Name 2 other examples of translucent materials.
Opaque Media
These are materials that do not allow light to pass through them.
We cannot see through opaque materials because they block the light.

Examples of opaque materials include stones, wood, metal sheets, books, timber and the human body. Name 3 other examples of opaque materials.
14.3: Laws of light propagation
Reflection of light
Activity 14:3: To demonstrate reflection of light
Materials needed:
• A plane mirror
• Source of light e.g. the sun or torch
• Wall What to do:
1. Hold a mirror in the sun as shown alongside.
2. The light is reflected to the wall by the mirror.

3. Now, change the angle of the mirror. Does the light patch change its position? When light falls on the mirror, the direction in which it will be reflected, depends on the angle at which
the light hits the mirror.
Reflection is the bouncing back of light when it falls on a surface. Smooth shiny surfaces reflect most of the light that falls on them. They are good reflectors of light.

Rays falling on the mirror are called incident rays.Rays that bounce off the surface are called reflected rays. Brightly coloured surfaces reflect light better than dull coloured surfaces.
Types of reflection
There are two types of reflection. These are: (a) Regular reflection (b) Irregular reflection
(a) Regular reflection
Regular reflection occurs when light falls on a flat shiny surface such as a mirror.
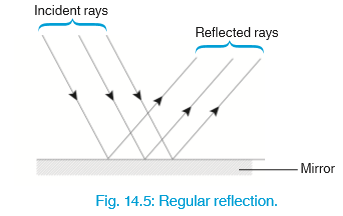
The beam of light is reflected as parallel beams
(b) Irregular reflectors (diffuse reflection)
Irregular reflection occurs when light falls on a rough surface. Reflected light spreads in different directions. Identify other incident rays and reflected rays on the picture.

Practice Activity 14.1:
1. Name 4 examples of smooth shiny surfaces.
2. Comment on the reflection of light on dull and bright surfaces.
3. In what areas is knowledge on reflection of light useful?
4. Research on your XO laptop or from books in your school library.
Refraction of light
Activity 14.4: To demonstrate refraction of light
Materials needed:
• Pencil or ruler
• Glass of water
What to do:
(i) Put a pencil into a clear glass of water.
(ii) Observe the appearance of the pencil or ruler at various positions.

Discussion
Light travelling from the air is bent at the surface of the water (meeting point of air and water).
Refraction of light makes the pencil appear bent. Refraction occurs because light travels at different speeds in different media.
Refraction is the bending of a light ray when it travels from one medium to another different medium.
The following are examples of refraction of light:
• A coin at the bottom of a container with water appears raised. • Riverbeds appear shallow. • The floor of the swimming pool appears raised
Revision Activity 14
1. A group of rays form a . ...............
2. You have been provided with a list of materials:
Frosted glass, oiled window pane, stone, wood, drinking glass, polythene paper.
Group the materials as transparent, translucent or opaque in the table like the one shown below.

3. Define:
(a) Reflection
(b) Refraction
4. Name the two types of reflections.
5. Demonstrate the refraction of a light using a ruler and a glass of water.
6. What kind of surface reflects most of the light falling on it?
7. (a) Name the type of reflection shown below.
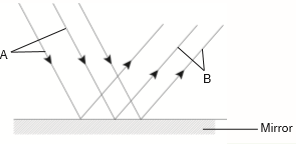
(b) Name rays: (i) A........................ (ii) B..........................
8. Describe briefly where refraction is displayed.
9. Rose and James observed lit candles through different metallic pipes as shown below
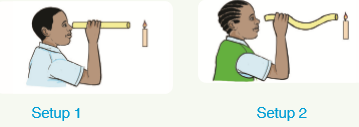
(a) What happened in each setup?
(b) What did the experiments that Rose and James did confirm?
10. The following figure shows a model of a periscope. A periscope utilises light.
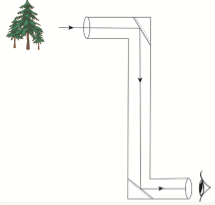
(a) What law of light propagation does it use?
(b) What is a periscope used for?
11. Describe briefly the uses of the following media in daily life.
(a) Transparent media.
(b) Translucent media.
(c) Opaque media.
Word list
1. Read the following words in pairs. • Energy
• Opaque
• Propagation
• Reflection
• Rays
• Refraction
• Beam
• Reflectors
• Transparent
• Translucent
2. Spell 3 words while your friend writes them in his or her notebook.
Let your friend also spell 3 other words as you write them in your notebook.
3. Discuss with your friend the meaning of any 3 words in the word list. Refer to notes in your textbook.
UNIT 15:ELECTRICITY
introduction
Electricity is another form of energy. It is generated from various sources. It also has a wide range of uses.
During installation and use of electricity various tools and materials are used.
Look at the following pictures.

Describe each picture above.
Use the pictures to predict what you are going to learn.
15.1: importance of electricity
Activity 15.1: identifying the importance of electricity
The following picture shows the general importance of electricity.
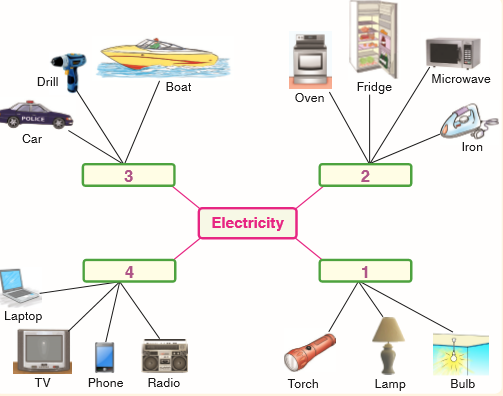
Identify the uses indicated 1, 2, 3 and 4.Electricity is important in the following ways. 1. It is used to power radios, televisions, computers and phones. 2. It is used to light homes, schools and other important places. 3. It is used to power vehicles and machines.
4. It is used for heating in ovens and microwaves.
5. It is used for air conditioning and refrigeration.
6. Used to press clothes (iron) and to dry clothes in dry cleaning shops.
7. Used to solder (press together) metals.
15.2: Production of electricity
Activity 15.2: Field trip to electricity producing plant
Visit an electricity producing plant.
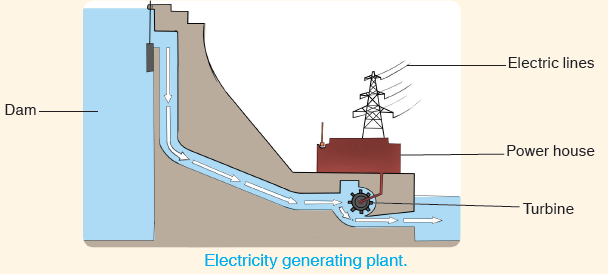
What to do:
1. Observe how electricity is generated and supplied.
2. Ask questions about generation of electricity.
3. Make short notes in your notebook.
4. Go back to school and compare the notes that you wrote with those of your friends.
Electricity can be produced from its sources in different ways. Sources of electricity include:

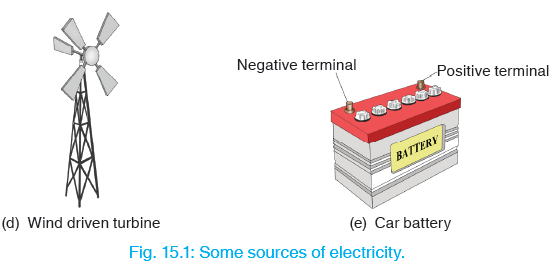
Others are generators (diesel and petrol), water and fuel.
Bicycle dynamo A bicycle dynamo is a generator, which produces electrical energy when rotated by a bicycle wheel.
Activity 15.3: Producing electricity using a simple dynamo
Materials needed:
Bicycle with dynamo and bulb.
What to do:
1. Obtain a bicycle with a dynamo and bulb installed.

2. Turn the bicycle upside down so that both wheels face up and its pedals are free.
3. Switch on the bulb when the bicycle wheels are not moving. What happens to the bulb?
4. Rotate the bicycle pedals slowly at first. Switch on the bulb and observe what happens.
5. Rotate the bicycle pedals very fast while the bulb is switched on. How does the bulb appear?
6. Allow the wheel to rotate until it stops. What happens to the bulb? What conclusion can you make from the experiment above? Compare your notes with others.
Observation
When the bicycle is at rest (wheels not moving). The bulb does not light up. When the pedals are rotated to make the wheels move, the bulb lights up.
When the wheels are rotated very fast, the bulb light gets brighter.
Conclusion
A bicycle dynamo generates electricity when the bicycle is being pedalled.
Solar panel
Solar panels come in different sizes and shapes depending on their use. The panels are usually placed where they can receive maximum sunlight.
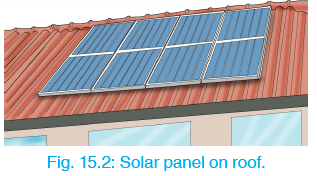
A solar panel produces electricity by changing light energy from the sun to electricity.
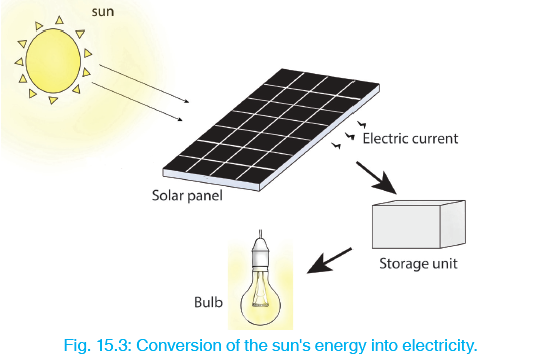
The electricity produced can be stored in a car battery.It is then used when there is no sunlight especially at night.
Activity 15.4: Producing electricity from simple solar panels
Materials needed:
Simple solar panel e.g. a solar lamp or a solar powered mobile phone.
What to do:
(i) Obtain a solar lamp or a solar powered mobile phone.
(ii) Ensure that your phone or lamp does not have power
(iii) Switch on your phone or solar lamp. What do you observe?
(iv) Place your solar lamp or phone in the sun (30 minutes to 1 hour).
Ensure that the part having the solar cells faces the sun. What happens?

Observation When the solar lamp does not have power, it cannot light up.
After exposing the solar panel to the sun for some time, the solar lamp lights up.
Conclusion
A solar panel generates electricity when exposed to the sun.
Practice Activity 15.1
1. What is hydroelectric power.
2. What are the men in the picture doing.
3. Name 3 hydroelectric power-generating projects in our country.
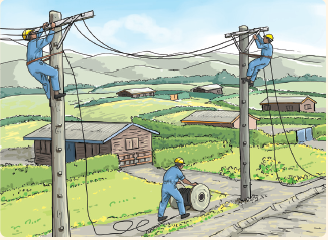
15.3: Common tools used in electricity
Activity 15.5: identifying common tools used in electricity
Name the following tools used in electricity

What are the uses of the tools shown above.
15.4: Common materials used in electricity
Materials used in electricity are either conductors or insulators.
Activity 15.6: identifying common materials used in electricity
Name the following materials used in electricity.
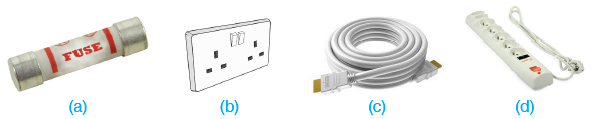
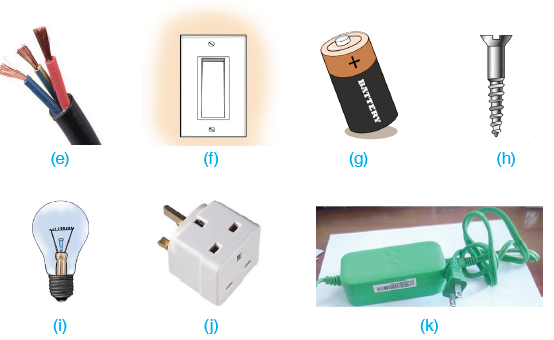
(b) What are the uses of tools shown above?
Conductors can be used to make conducting wires, contacts in switches and fuses, plugs and sockets. Insulators are used to insulate electric cables and prevent short-circuiting.
15.5: Simple electric circuit
Activity 15.7: Making a simple electric circuit
Material needed:
• Dry cells
• Wires
• Bulbs
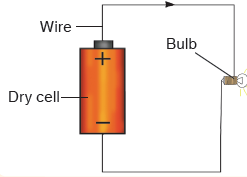
What to do:
1. Arrange the materials listed above as shown in the diagram.
2. Remove one end of the wire from the dry cell. What happens.
Additional work
(i) Make other circuits by connecting two or more dry cells.
(ii) Connect positive terminals of dry cells to negative terminals as shown in the following example.

(iii) Make your observations. Note the brightness of the bulb when one dry cell is connected and
when two dry cells are connected.
An electric circuit is a path through which electricity flows.
The major parts of a simple electric circuit are:
(a) Source of electricity (dry cell or battery)
(b) Conducting wires
(c) A bulb A switch can be included in the set up. A switch is used start and stop electric flow in the circuit.
Practice Activity 15.2
Draw the picture shown below in your notebooks

Name the parts that you know.
Controlling an electric circuit
An electric circuit can be controlled by a switch. The switch helps to control the flow of electric current by switching it on or off. When you switch on, you complete the circuit. When you switch off, you break the circuit.
Activity 15.8: Controlling an Electric circuit
What to do:
1. Name the things in your homes and at school that use switches. List them down in your notebooks.
2. Make set-ups as shown below.
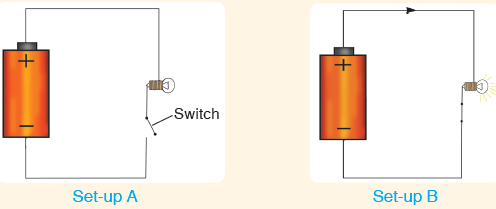
3. (a) Does the bulb light in Set-up A light? Write down reasons for your answer.
(b) Does the bulb light in Set-up B light? Write down reasons for your answer.
Explanation
Set-up A: The bulb does not light when you disconnect the switch end from the dry cell.
This is so because the circuit is incomplete.
Set-up B: The bulb lights when you connect the switch to the dry cell. The set up is said to be a complete
circuit.
15.6 dangers of electricity
Activity 15.9: investigating dangers of electricity
Materials needed:
Charts and cut-outs showing dangers of electricity What to do:
(i) Obtain charts and cut-outs that show the dangers of electricity.
(ii) Observe the charts and pictures. Write down the dangers that you have observed in your notebooks.
(iii) Browse on your XO laptop about the dangers of electricity.
(iv) Read the following poem
Electricity is wonderful,
It makes our lives colouful,
But wait, it can also be shocking,
This poem can be the unlocking.
Electricity from the mains, so powerful,
It’s not like from the dry cells, so peaceful,
It can be colourful, yes but it can kill you !
Please listen carefully, yes it can kill you !
Stop! No metals in the plugs,
Watch out! That wire is exposed,
No! don’t touch with tiny wet hands!
Don’t take the risk, always ask for help.
Questions
(a) Come up with a suitable title for the poem.
(b) Outline 4 dangers of electricity mentioned in the poem.
(c) Who do you think the poem addresses? Justify your answer.
(d) Write down ways in which one can avoid dangers caused by electricity.
(v) Make a poster to warn or teach your friends about dangers of electricity.
(vi) Electricity was installed in Mr. Ivan house last weekend.
The electrician forgot to install a switch in his bedroom. What problems will Mr. Ivan have?
Electricity is a very useful form of energy. It is important for you to be careful when using it,
because it can be very dangerous.
When mishandled, electricity can cause dangers such as:
• Burns
• Fires
• Electrocution
• Deaths
• Destruction of electrical appliances
The following practices should be avoided because they increase the dangers of electricity. • Inserting nails and other metallic objects into sockets.
• Touching electrical appliances with wet hands.
• Repairing electrical appliances while still plugged in. • Operating electrical appliances with damaged cables.
List 5 other practices that should be avoided.
Revision Activity 15
1. A bicycle dynamo produces electricity when the bicycle is at rest. TRUE/FALSE
2. Observe the following circuit diagram. Will the bulb light up? Explain.
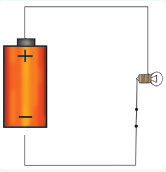
3. Name any two sources of electricity that you use in your homes. 4. Explain briefly how a solar panel produces electricity.5. (a) Construct a circuit with two dry cells and one bulb.
(b) Draw the circuit you have made
(c) Label all the parts of the circuit.
6. Name two materials that are good conductors of electricity. 7. Write down 3 ways of preventing the dangers of electricity when using electrical appliances.
Jeanette made the following circuit from locally available materials.
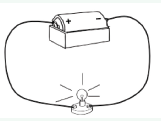
8. Name four materials that she used to make the circuit. 9. Jorum wants to improve on Jeanette's setup so as to make the bulb light more brightly.
What should he do?
10. (a) When Jeanette left the circuit on for a long time. The bulb stopped lighting.
What might have happened?
(b) How can Jeanette solve the problem in (a) above?
11. (a) Name any 3 electrical appliances that have the part shown below.
(b) What can happen if an electric appliance has the damage as shown in the picture? (c) What measures will you take if you have an electrical appliance that has the damage shown in the picture?
Word list 1.
Read the following words in pairs.
• Electricity
• Circuit
• Generator
• Dry cell
• Dynamo
• Electric shock
• Solar panel
• Switch
• Fuse
• Geothermal
• Turbines
• Plug
• Socket
• Tester
• Electric metre
2. Spell 3 words while your friend writes them in his or her notebook.
Let your friend also spell 3 other words as you write them in your notebook.
3. Discuss with your friend the meaning of any 3 words in the word list. Refer to notes in your textbook.
UNIT 16: MATERIALS
Introduction
Materials refer to things around us. These things can be solids, liquids or gases.
We use materials around us in our daily activities.
Look at the following pictures.
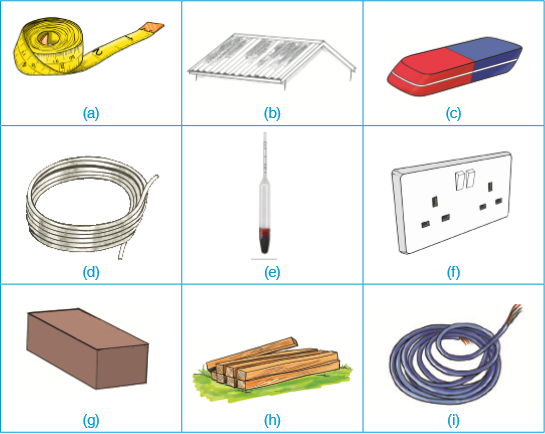
Describe each picture above.
Use the pictures to predict what you are going to learn.
16.1: Classification of materials
Natural materials can be classified broadly into two:
1. Metals
2. Non Metals
Activity 16.1: Grouping materials as metals and non-metals
What to do:
(i) Identify various materials used at home and at school:
• Bell
• Hoe
• Thread
• Glass
• A nail
• saucepan
• Spoon
• Book
• Brick
• Plastic pens
• Piece of iron sheet
(ii) Make a table like the one shown below in your notebooks.

(iii) Group the materials collected as metals or non metals.
(iv) Give reasons for grouping the materials as you did.
(v) (a) Do the following to the materials:
• Hit them with a stick.
• Feel how heavy they are.
• Observe their appearance.
• Bend and straighten them.
• Stretch them.
(b) Write down general characteristics of metals and non metals from your observation in (a) above.
(vi) Compare how you grouped the materials and the observations that you have made.
Non metals
A non metal is a material that lacks metallic characteristics. The following are major properties of non metals:
1. Most non metals are poor conductors of both heat and electricity.
2. They are soft and break easily.
3. Most have a dull appearance.
Write in your notebooks two other properties of non metals.
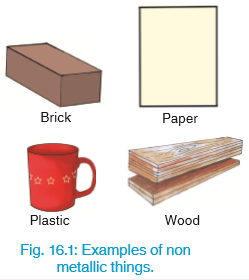
Common examples of non metals include bricks, paper, plastics, wood and glass.
Metals
A metal is a material that is typically hard and shiny.
Common metals
In nature, metals are found on or in the earth crust.
Examples of common metals include aluminum, zinc, iron, tin, lead, copper, silver and gold.
Physical properties of metals
Activity 16.2: investigating physical properties of metals
What you need:
• Heat source
• Nail
• Wooden handle or piece of cloth What to do:
(i) Light the heat source.
(ii) Heat the nail gently.
(iii) What can you feel?
Caution: Do no hold the nail until it is very hot or you will get burnt.
(iv) Use a wooden handle or piece of cloth to hold the nail. Now heat the nail.
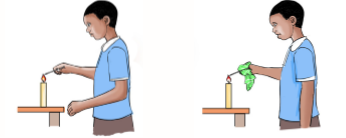
(v) What do you feel? Why?
observation
• When you hold the nail in your hand and heat it, it will get hot. You will feel the heat in your hands. • When you hold the nail with a wooden handle or a piece of cloth, you will not feel the heat.
The wooden handle or piece of cloth is not a good conductor of heat.
Conclusion
Metals conduct heat.
The following are the general physical properties of metals:
1. They are shiny.
2. They are sonorous – Most make a bell-like sound when hit. 3. They are good conductors of electricity and heat.
Name 5 other properties of metals.

16.2: uses of common metals
Activity 16.3: identifying uses of common metals
(i) Collect metallic materials such as cans, nails, coins, spoons, axe, electric wires, iron sheet pieces
and bring them to school.
(ii) Group them according to the metal they are made from.
1. Iron is used to make roofing materials hoes, shovels, screws and nails.
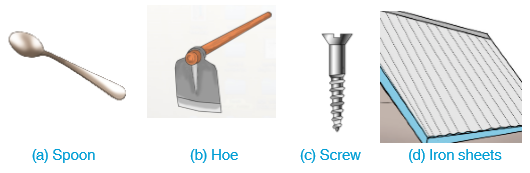
2. Copper, silver and bronze are used to make coins and medals. Copper is used to make electric wires and water pipes.

3. Gold and silver are used to make jewellery and other decorative items.
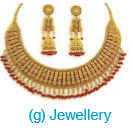
4. Tin is used to make cans and tin lamps.
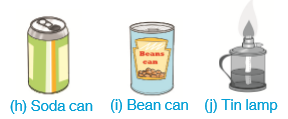
5. Aluminum is used to make saucepans.
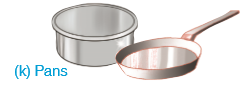
Fig. 16.3: Common objects made of metals.
Practice Activity 16.1:
Using your XO Browse Activity:
1. Search and write in your notebook other uses of metals. 2. Find out what metal a 50 Rwandan Franc coin is made of. 3. Search and write in your notebook metals that are found in Rwanda or the neighbouring counties.
16.3: Maintenance of metals
Activity 16.4: identifying maintenance of metals
(i) Go for a walk around your school.
(ii) Observe the roofs.
(iii) Comment about roofs that are painted and those not painted. (iv) Discuss why metallic tools are maintained by oiling and storing in a dry place.
1. Painting the metal
Painting metals prevents corrosion. Corrosion occurs when moisture and air react with a metal.
Painting keeps the metal surface free from air and moisture.
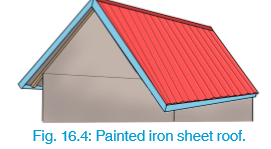
2. Galvanisation This is the process of applying a protective zinc coating to iron.
The zinc coating protects the iron surface from rusting.
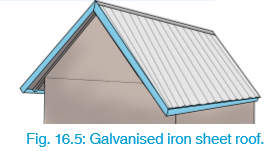
3. Store in a dry place: All metallic tools and equipment need to be stored in a dry safe place.
4. oiling: Moving or rotating metallic parts should be oiled to reduce friction.
16.4: Density
Activity 16.5: Defining density
(i) Using your XO laptop research for the definition of density.
(ii) Write down the definition in your notebook. Density is defined as the mass of a substance per unit volume.
Calculation of density Density of a substance is obtained when you divide the mass of that substance by its volume. It is expressed mathematically as;

Example: A metallic block has a mass of 500g and a volume of 50cm3. Calculate the density of the block.
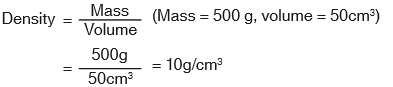
The standard unit used in measuring density is grams per cubic centimetre (g/cm3). The other unit is kilograms per cubic metre (kg/m3).
Activity 16.6: Measuring density of materials
(a) Measuring the mass of the materials
It is measured using a beam balance or weighing scale. Materials needed:
• Wood
• Water in a container
• Weighing balance
• Nails
• Stone
• Metallic hammer or knob
What to do:
(i) Use a weighing balance to measure the mass of water and nails as shown below.
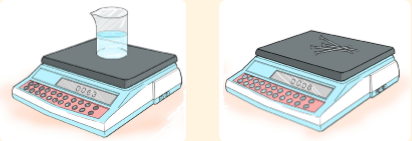
(ii)Use the same weighing balance to measure the mass of wood, nails, stones and
metallic hammer or knob.
(iii) Record their mass in a table like the one shown below.

(b) Measuring the volume of irregular materials Volume of regular objects like cubes and rectangles is calculated using formulae. Volume of irregular objects is obtained using the displacement method.
Materials needed:
• Water in a container
• Wood
• Thread
• Metallic hammer or knob
• Stone
• Nails
• Measuring cylinder or container with volume markings.
What to do:
(i) Collect water in a measuring cylinder or marked container.
(ii) Note the initial level of water in the cylinder. Record it as initial volume of water.
(iii) Tie a piece of thread around a stone.
(iv) Lower the stone gently into the measuring cylinder or container. What happens?
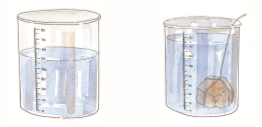
(v) Note the final level of water. Record it as final volume of water.
(vi) Find the volume of the stone as follows:
Volume of material = Final volume of water – Initial volume of water
(vii) Put the other objects one at a time into the measuring cylinder with water.
(viii) Measure the initial and final volumes of other objects and record them in a table as shown below.
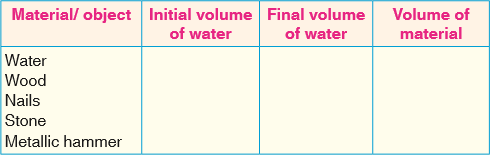
Question Calculate the volume of the stone used in this experiment.
(c) Calculating density
(i) Record the mass and density of the measurements in (a) and (b) in a table as shown below.

(ii) Compare the mass with the volume of the different materials.
(iii) Calculate the ratio between measured mass and volume of each of the objects.
Use the formula:

Relative density
This is the ratio of the density of a substance to the density of a given reference material. Normally, the reference material is the density of pure water.
The formula for calculating relative density is:

Example The density of kerosene is 0.8g/cm3. If the density of water is 1g cm3, calculate the relative density of
kerosene.
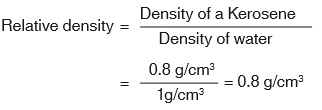
Relative density is measured using a hydrometer. The following pictures show a hydrometer and how it is used.

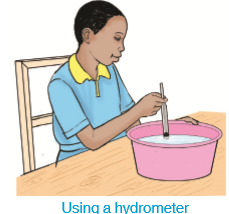
Fig.16.5: A hydrometer and how it is used.
Activity 16.7: Measuring densities of liquids using a hydrometer
What to do:
1. Using a hydrometer, measure the density of liquids such as clean water,unclean water,cooking oil, paraffin,juice, milk, salty water among others.
2. Record your finding in a table as shown below.
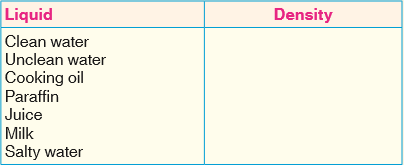
3. Compare different values of densities of measured objects with the density of water.
Application of relative density
Some objects have a lower density compared to water. While some objects have a higher density compared to water. This relative density (high or low) of objects determine their behaviour on water.
Activity 16.8: Experiment on behaviour of different objects in water and relative density
Materials needed:
• Water • Saucepan
• Basin or sink • A bottle (with lid) full of water
• Paraffin • An empty bottle with lid (full of air)
• Stone • Feather
• Cooking oil • Metallic hammer
• Metallic spoons • Plastic objectsWhat to do:
(i) Put water in a basin or sink (up to ¾).
(ii) Gently put the objects listed above in water one at a time.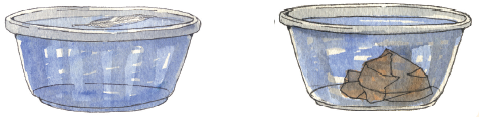
Observe how the objects behave. Compare their behaviour in water.
(iii) Which objects sink in water? Record them in your notebook.
(iv) Which objects float on water? Record them in your notebook.
(v) What conclusion can you make concerning relative density of objects and their ability to float or sink?
Conclusion
Objects that have a lower density than water float on water. Objects that have a higher density than water sink in waterRelative density is applied in our everyday lives as follows:
1. It is applied during designing of structures like ships and planes.
• A ship has to be hollow that it can float. Making the ship hollow reduces its density.
• Materials used for building the parts of aeroplanes should have a low density.A good example of such material is aluminum.
2. Relative density is used to determine the purity of some substances.For example a lactometer is used to measure density of milk to find out if it is pure or water has been added.
3. The knowledge of relative density is applied to determine the mineral content in a rock.4. Density is also considered during the design of swimming and diving equipment.
Revision Activity 16
1. Materials can be classified into two broad groups. Name them.
2. Name three properties of non metals.
3. What type of metals are the following things made of?
(a) Spoon(b) Rwandan 100 franc coin
(c) Electric wires(d) Iron sheets
(e) Diamond necklace
4. Outline 3 physical properties of metals that you can test in class.
5. Describe briefly how you can measure the volume of an irregular metallic ring.
6. (a) Give the general formula for calculating density.
(b) Calculate the density of a stone that has a mass of 1 000 kg and volume of 50 m3.
7. The density of a piece of wood is 12 g/cm3, the volume is 10 m3. Calculate the mass of the wood.
8. A metallic knob was put in a measuring cylinder containing water. The water rose from 63 cm3 to 85 cm3. Calculate the volume of the stone.
9. (a) What is the instrument shown below used for?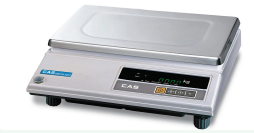
(b) What is the standard unit used in the instrument shown above?
10. (a) A feather floats on water but a pin sinks in water. Explain this behaviour of objects with referenceto their densities.
(b) Describe briefly 2 applications of density that use the behaviour explained in (a) above?
11. (a) What is galvanising.
(b) A farmer has roofed his cowshed with new iron sheets. Advise him on how he can maintain the roof.Word list
1. Read the following words in pairs.
• Conductors • Malleable • Electricity
• Galvanization • Aluminium • Density
• Mass • Measuring cylinder • Volume
• Hydrometer • Weighing balance • Relative density
2. Spell 3 words while your friend writes them in his or her notebook. Let your friend also spell 3 other words as you write them in your notebook.
3. Discuss with your friend the meaning of any 3 words in the word list.
Refer to notes in your textbookGlossary and Index
Absorption of food Uptake of digested food into the body
Afforestation Planting of trees where they did not exist
Agroforestry Practice of growing crops together with trees
Ant-erosive plants Also known as cover crops. Plants that grow and cover the soil surface e.g
pumpkins, sweet potatoes e.t.c.Abstinence Not having sex before marriage
Boluses Small portions of food rolled into balls by the tongue in the mouth
Compound fertilisers Fertilisers that contain two or more major nutrients
Cash crops Crops grown for sale
Chlorination Purifying water using chemicals (Chlorine) to kill germs
Condensation Change of gas/vapour into liquid
Data Facts and figures that are processed by the computer
Deficiency diseases Diseases caused by lack of certain food nutrients in the body
Deforestation Cutting down trees
Density Mass of a substance per unit volume
Digestion Process in which food is broken down into smaller particles
Duodenum Upper part of the ileum in the digestive system
Egestion Removal of the undigested food through the anus
Evaporation Change of liquids to gases
Food crop Crops that are grown for human food
Galvanisation Process of coating iron metal with zinc to protect it from rust
Genitals Reproductive organs
Hard disk/Hard drive Primary storage device found in computers
Herbal medicine Medicine got from plants
Incubation/Brooding Keeping eggs under conditions that allow them to hatch into chicks
Incubator Special machine that allows the eggs to hatch
Inbox Computer folder in which newly delivered e-mail messages appear
Infatuation A strong but often short-lived liking for another person
Ingestion Uptake of food into the mouth
Kickback Pieces of wood thrown back when using a saw
Leaching Process in which nutrients in soil are dissolved and drained deep in the
soil by water
Masonry tools Tools used in the construction of farm structures and buildings
Menstruation Shedding blood through the vagina in adult females after every 28 days
Opaque Materials that do not allow light to pass through them
Ornamental trees Trees that beautify a place
Parasite An organism which lives in or on another living organism (host) deriving nutrients from it
Peers Boys or girls of the similar age group
Photosynthesis Process in which green plants make their own food
Precipitation When water droplets condense to form clouds in the sky and then fall down to the earth as rain, snow, etc. Rain and snow are examples of precipitation.
Premarital Before marriage
Puberty Period where a boy or girl reaches sexual maturity
Reflection Bouncing back of light when it falls on a smooth shiny surface
Refraction Bending of light rays when they travels from one transparent medium to another
Relative density Ratio of the density of a substance to the density of a given reference material
Resizing Making an image bigger or smaller
Rhombus A figure that has four equal slanted sides
ROM Read only memory: Permanent storage memory in computers
RAM Random Access memory: Temporary storage memory in computers
Sanitation Cleanliness of the body and the surroundings
Seed bed An area of land/soil prepared for planting seeds
Sprites Objects that perform actions in scratch dialogues or cartoons
Straight fertilisers Fertilisers that contain only one major nutrient
Tool Hand held device used to carry out a particular function
Transpiration Loss of water in plants through the stomata
Translucent Materials that allow some light to pass through them
Transparent Materials that allow all the light to pass through them
Trapezium A four sided figure that has two parallel sides
Voice breaking Voice becoming deeper in boys undergoing puberty
Waterborne diseases Diseases transmitted through contaminated water
Water pollution Introduction of harmful substances in water
Wet dreams Discharge of semen by adolescent/ young males during sleep